To set up online exhibitor and booth registration, we will begin with the Exhibitors Area Definition, which defines the Exhibitors option in the Home page menu.

Figure 829: Online Example of Exhibitors Area Definition
If the Exhibitors Area Definition is already in the selection grid under the Area Definitions tab, double-click it to open the edit form.
Or, if not already present, add the Exhibitors Area Definition.
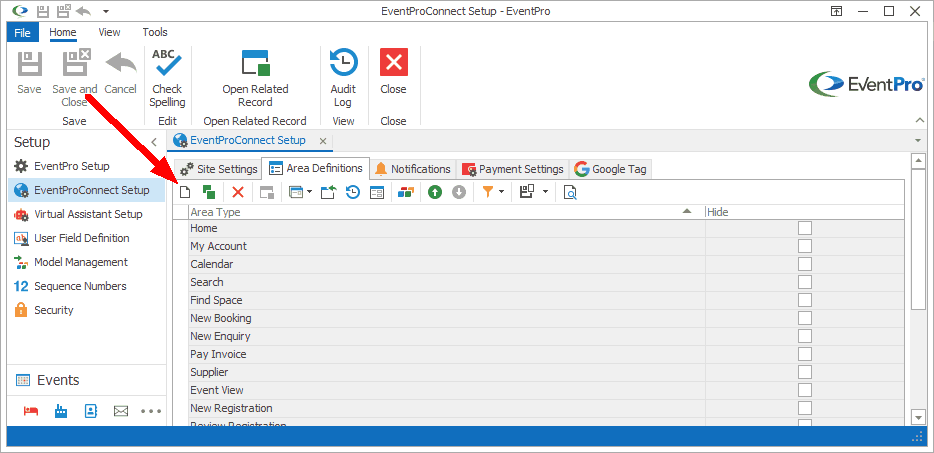
In EventProConnect Setup, click the New button at the top of the Area Definitions tab.

Figure 830: Adding Area Definition
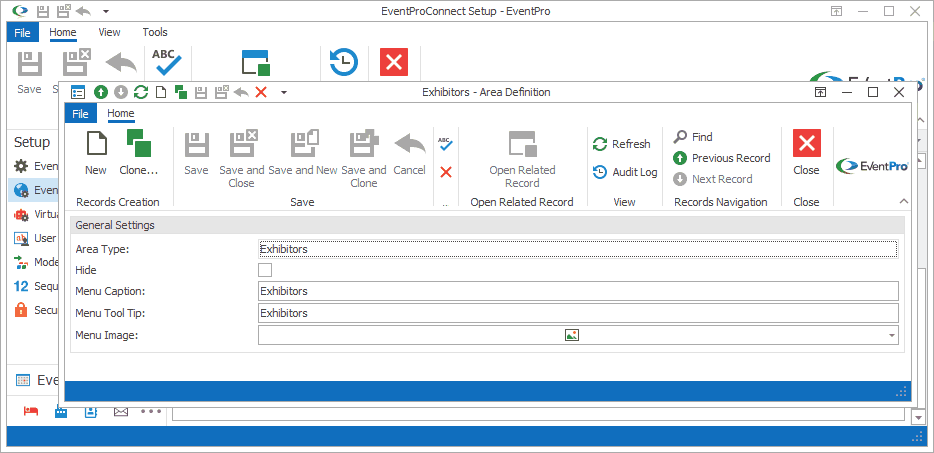
The Area Definition edit form appears.

Figure 831: Adding Exhibitors Area Definition
Area Type
Select the Area Type from the drop-down list.

Figure 832: Selecting Area Type
The Area Type determines the other settings that appear in the Area Definition edit form.
EventPro will automatically pull in the default set of Page Definitions, Form Field Groups, Form Fields, and/or Grids (if applicable) for the selected Area Type.
Once the Area Type has been selected, it cannot be changed.
Hide
The Hide setting determines whether the area is visible as an option in the website menu.

Figure 833: Hide Checkbox
If you want this area to be visible in the website menu, leave the Hide box unchecked
Select the Hide checkbox if you do not want the area to be visible in the menu.
Note that even if you select the Hide checkbox, users can still access the area if given a direct link.
Menu Caption
This is the text that appears on the area's menu button along the top of the EPConnect website.
The Menu Caption will have a default entry.
You can edit the Menu Caption, but remember that the button space is limited, and text should be brief.
Menu Tool Tip
The Menu Tool Tip is the pop-up text hint that appears when you hover the mouse pointer over the corresponding Menu button.
This field will already have a default entry, but you can enter custom text for the Menu Tool Tip.
Menu Image
The Menu Image appears in the top menu button, next to the Menu Caption you defined earlier.
The recommended size for a Menu Image is 16 x 16. It's a small icon image that fits in the command button.
To view the currently used image, click the drop-down arrow next to the Menu Image field.
To load a different image, right-click in the preview drop-down, and select Load from the speed menu.
The Open window appears. Select the image you want to use, and click Open.
Back in the image preview drop-down, click OK.
Figure 834: Selecting Menu Image
Save & Close
When you are done with the Exhibitors Area Definition edit form, click Save and Close to return to EPConnect Setup.
The next step will be to add the New Exhibitor Registration Area Definition to EPConnect Setup. Go to the topic New Exhibitor Registration Area Definition.