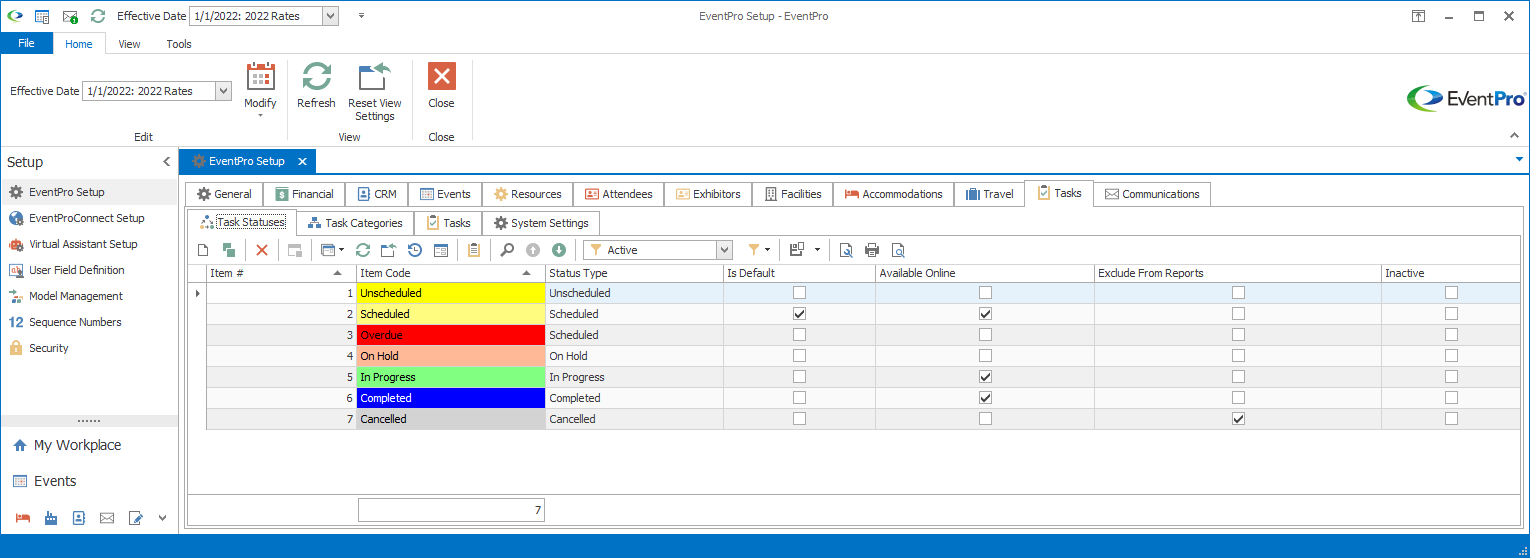
Under EventPro Setup > Tasks > Task Statuses, you will define the status levels used for Tasks.
1.Start a New record in the Task Statuses tab.
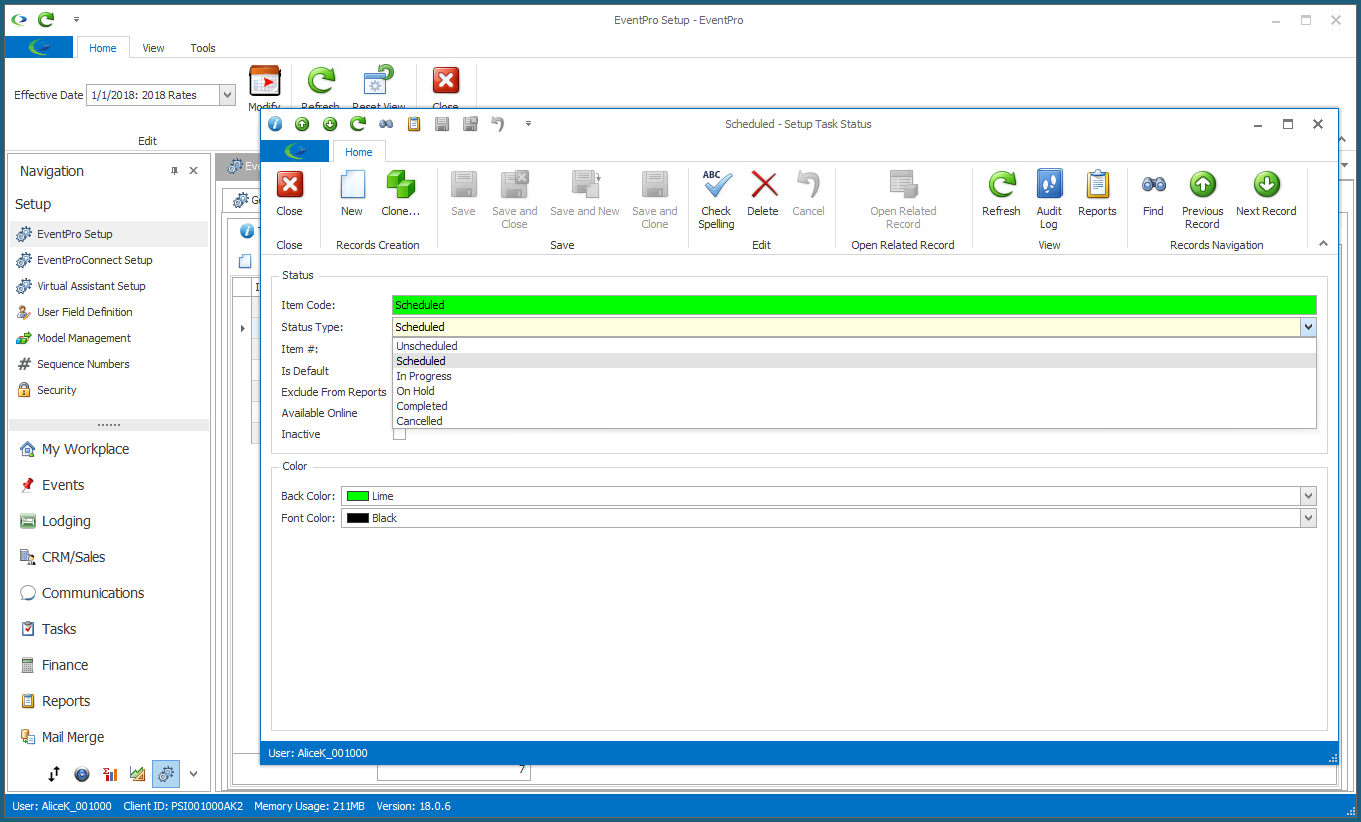
2.The Setup Task Status edit form appears.
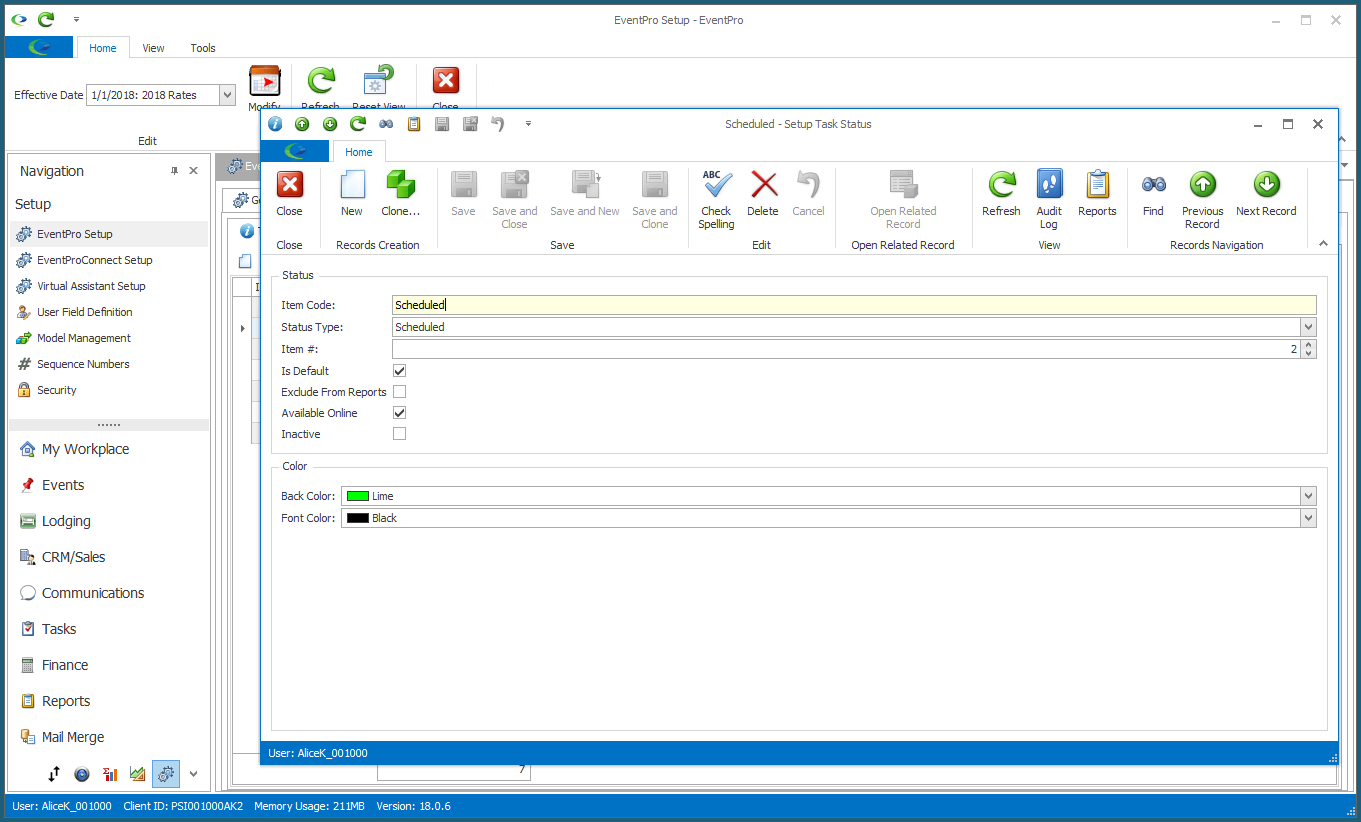
3.Item Code: Enter the name of the Task Status.
4.Status Type: From the drop-down, select a Status Type for this Task Status.
5.Item #: Enter an Item number for this Task Status. Item numbers provide a way to determine the sort order in which the Statuses appear in a list.
6.Is Default: Select this checkbox for one of your Task Statuses to set it as the default Status for new Tasks.
7.Exclude from Reports: Select this checkbox if you want Tasks of this Status excluded from reports.
8.Available Online: If you have purchased the EPConnect Suite, select this Available Online checkbox if you want Tasks of this Status to be available online. Please note that the EventPro Connect web modules are available separately or as part of the EPConnect Suite. If you have not purchased the relevant module or suite, you will not see the related tabs and screens.
9.Inactive: You can mark an existing Task Status as "Inactive" if you cannot/don't want to delete it, but want to prevent it from being used in the future.
10.Back Color & Font Color: Select the colors that will represent this Task Status elsewhere in EventPro, particularly graphical calendars. Select the background color from the Back Color drop down, and the text color from the Font Color drop down.
11.When you're done creating or editing the record, click Save | Save & New | Save & Close.