•Remember that with the Create Event > New Event option, you are creating an event with no booked locations. If you choose to link the event to an opportunity, you can use the Opportunity's Preferred Dates, but the Preferred Locations will not be relevant for an event without booked locations.
•On this Opportunities page, you determine whether you want to link the Event to an Opportunity in your CRM, and if so, which one.
•NOTE: The Opportunities page of the Event Creation Wizard will only appear if you have the EventPro Sales Management Module.
•However, if you own the Sales Management Module, but you still don't see this page in the Event Creation Wizard, note that there is a "Skip Opportunity Wizard Page" setting in Events System Settings.
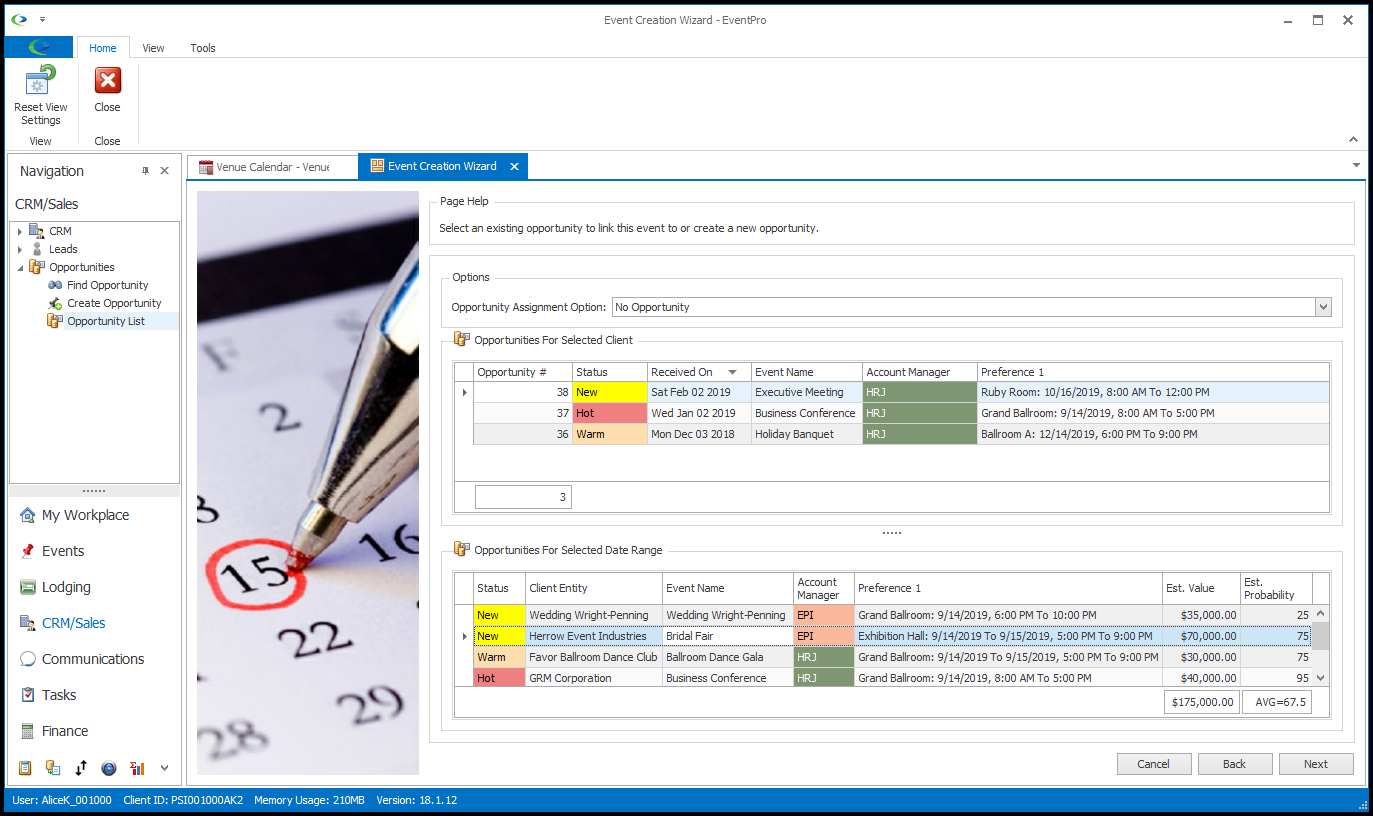
1.This wizard page contains two selection grids displaying potential Opportunities (if any):
a.Opportunities for Selected Client: Opportunities belonging to the Client, regardless of whether they fall in the date range you selected.
If you decide to use an Opportunity for this event booking, you will be able to select an Opportunity from this grid.
b.Opportunities for Selected Date Range: Opportunities that occur in the date range you selected, regardless of the Client/Lead.
This is a display-only informational grid; if you choose to use an Opportunity, you cannot select from this grid.
2.From the Opportunity Assignment Option drop-down, choose which option you want to pursue:
a.No Opportunity: If you select this option, simply click Next to continue with the new event booking that's not connected to an Opportunity.
b.Select Existing Opportunity: If you choose this option, select the existing Opportunity you want to use from the Opportunities for Selected Client grid below, and click Next.
c.Create New Opportunity: Select this option if you want to create a new opportunity at the same time as booking the event. Click Next.
- - - - -
•You will only see this Opportunity Information page if you chose to Select Existing Opportunity or Create New Opportunity on the previous Opportunity Options page of the Event Creation Wizard, or if you started the event from the Create Event > New Event from Opportunity command.
•This Opportunity Information page will look different, depending on whether you are using an existing opportunity or creating a new opportunity.
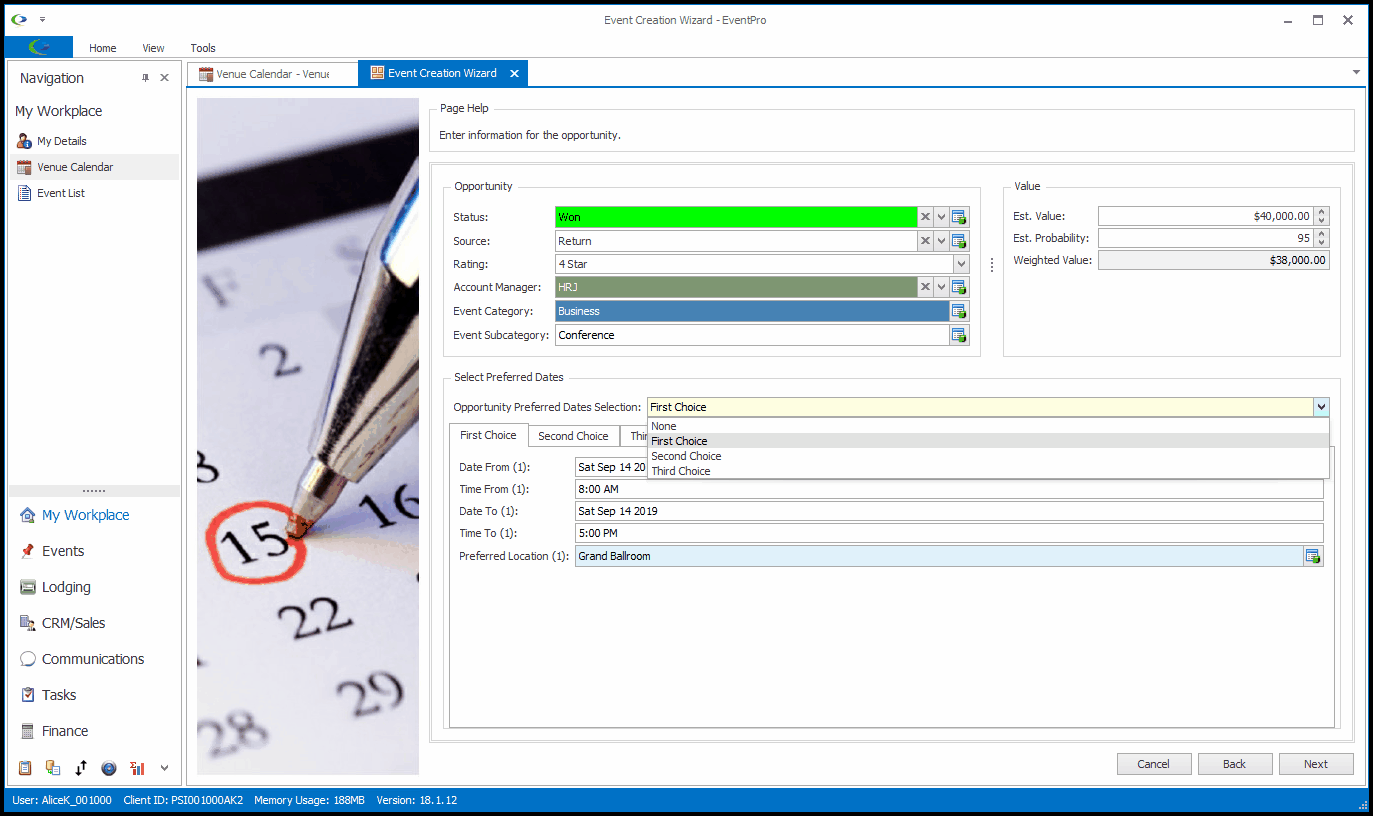
1.Opportunity Information (Existing):
a.This page will display the information previously entered for the existing Opportunity.

b.You can make any changes that you require. For example, you may want to change the Status to indicate that the Opportunity has been won.
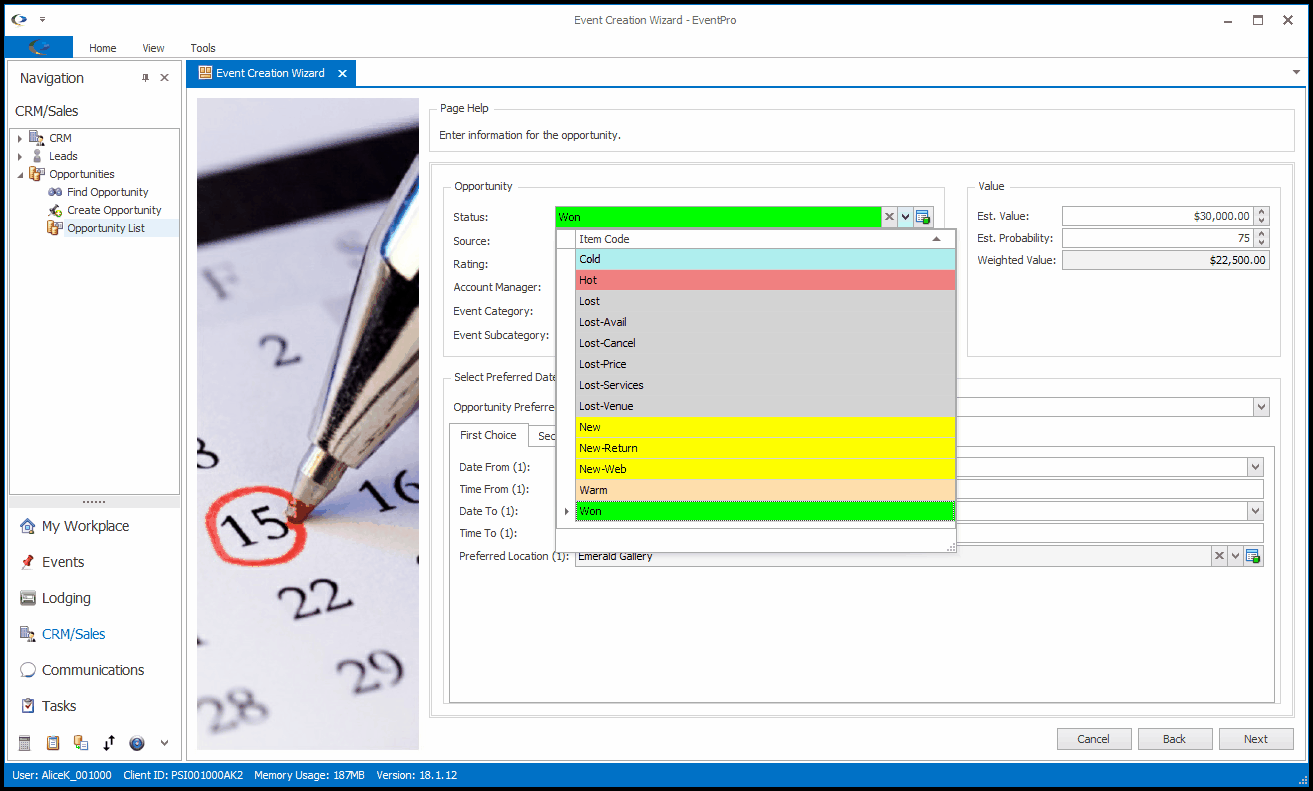
c.Under Select Preferred Dates, from the Opportunity Preferred Date Selection drop-down, choose which dates you want to use: First Choice, Second Choice, Third Choice, or None.
NOTE: You will be required to select Preferred Dates with a Preferred Location if the "Preferred Location Required for Opportunity Conversion" checkbox has been selected in Events System Settings.
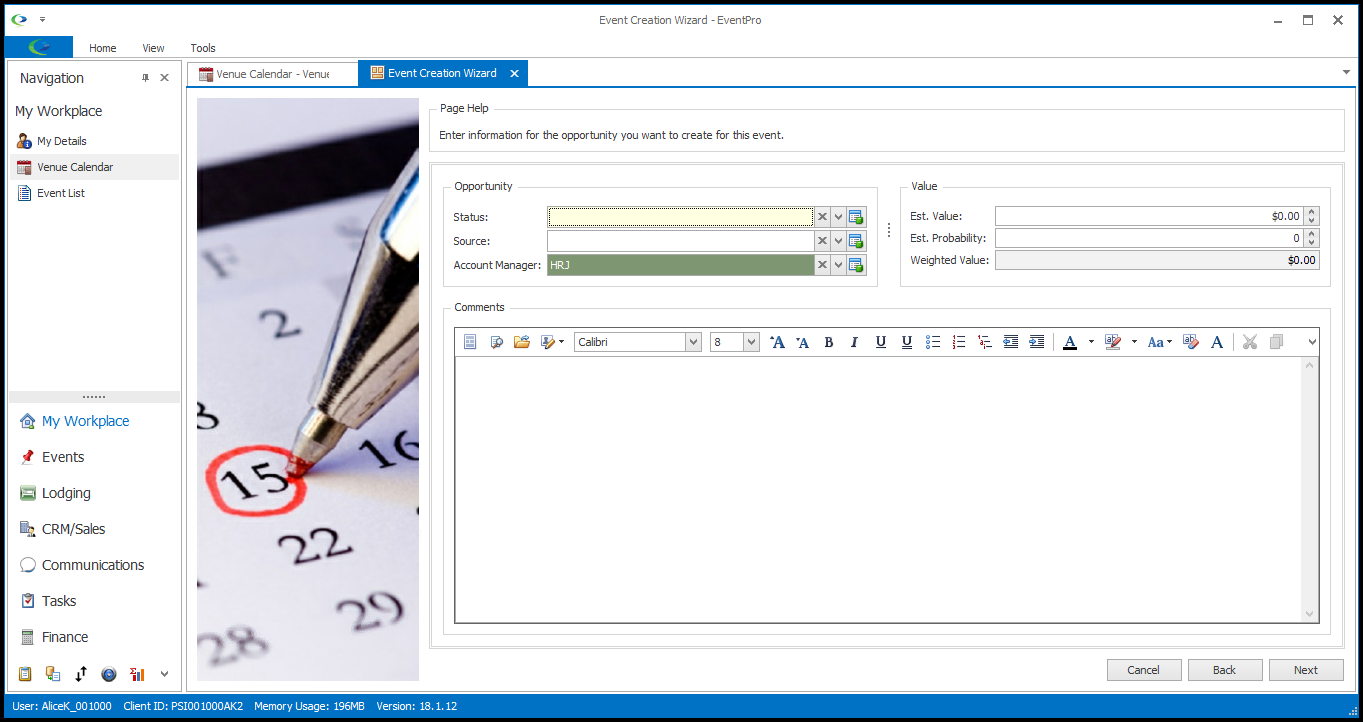
2.Opportunity Information (New): Select the Status for the new Opportunity, and enter any other information you require.
Any notes you enter in the Comments area here will later be pulled into the Event Comments tab of the wizard's Notes page.
The Opportunity will be automatically assigned an Opportunity # when you finish the Event Creation Wizard.
3.When you are done adjusting the information in the Opportunity Information page, click Next.