•In order to accept electronic signatures on a document, it must be an email attachment, and it must contain specialized DocuSign fields.
•You can create two different kinds of documents for DocuSign attachments: Reports, as described in this topic, or Letter Templates, described below.
•To create DocuSign-enabled Reports, you will Clone existing reports and edit them in the Report Designer to add DocuSign fields.
•To begin, go to the Reports area of EventPro, and Clone the report you want to use.
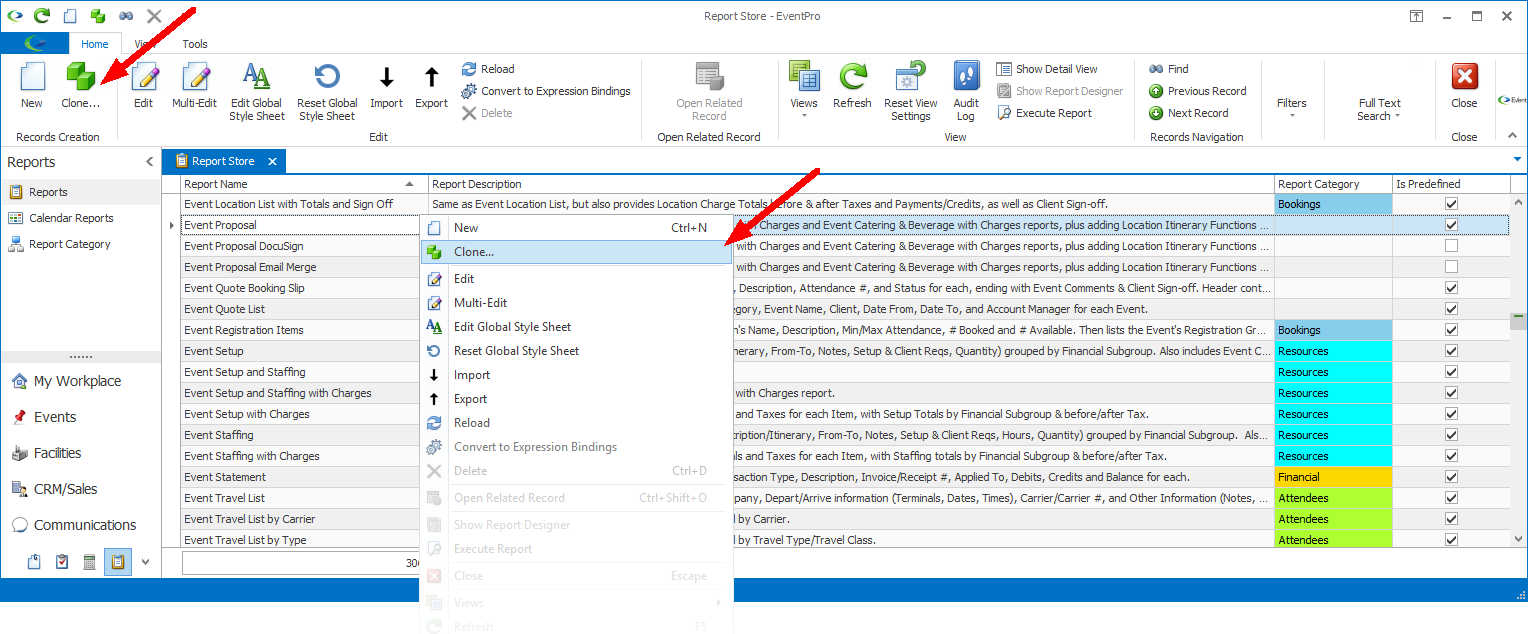
oIn the Report edit form, edit the Report Name; it can't be the same as the original Report's name.
oSelect the Is DocuSign Enabled checkbox.
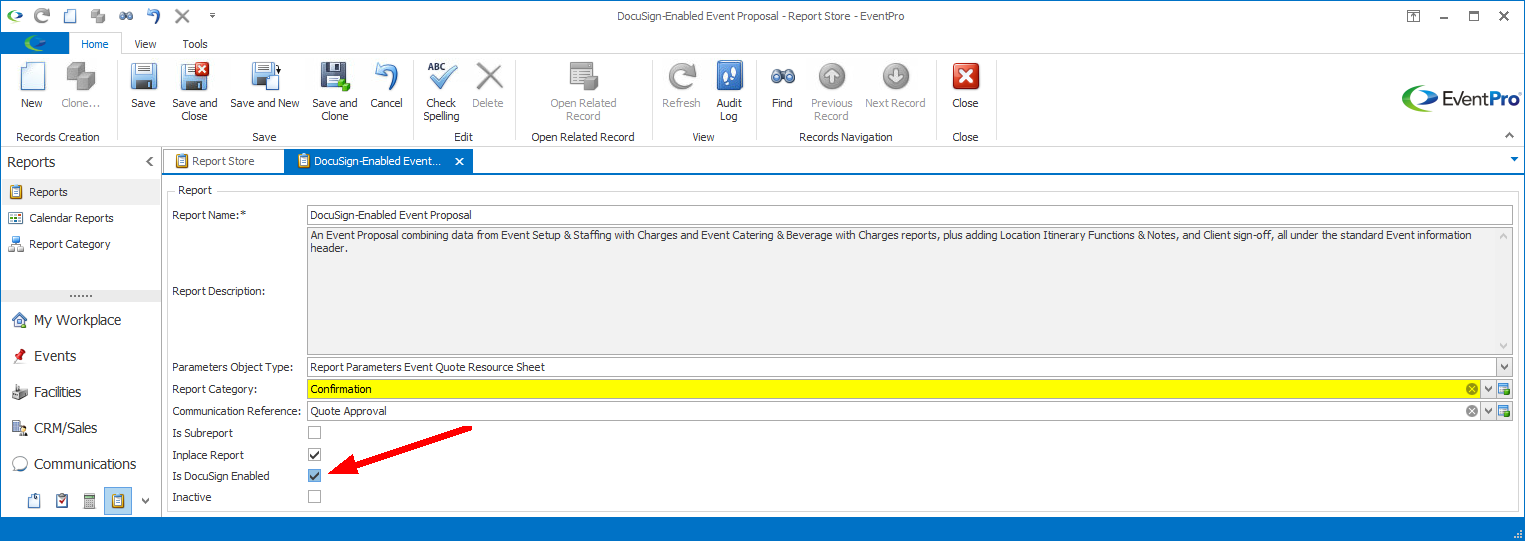
oSave and Close the edit form.
•You will return to the Report Store.
•Select the new DocuSign-enabled Report in the grid, and click the Show Report Designer button.
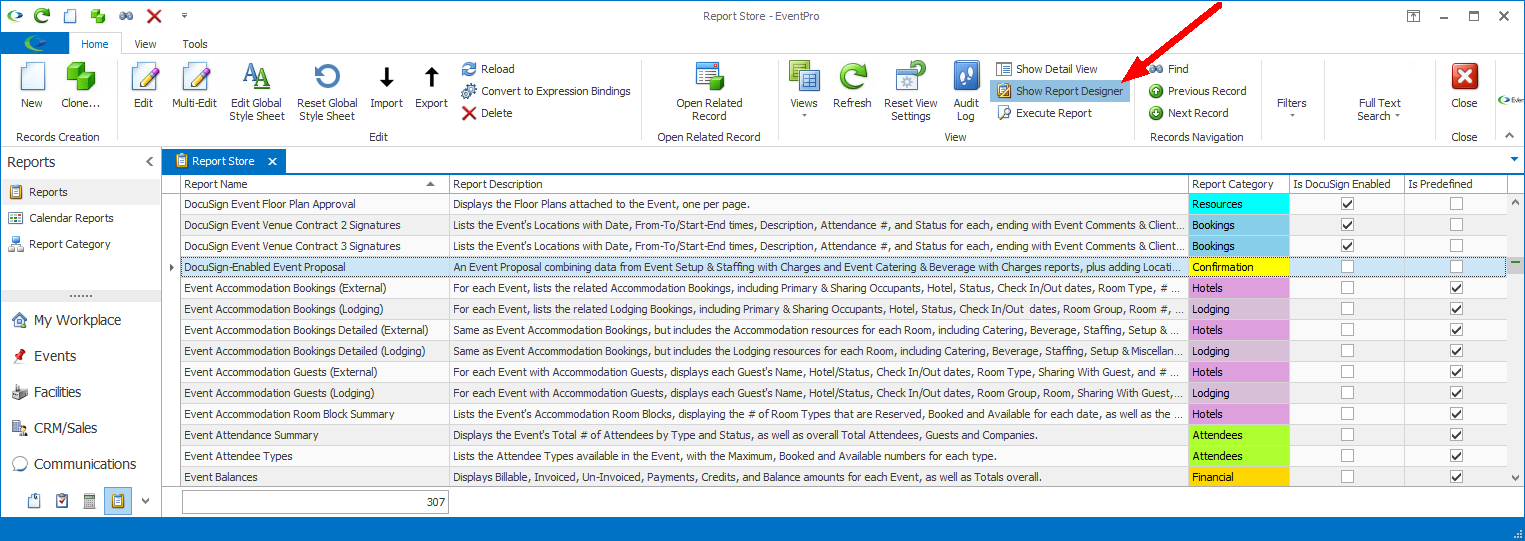
•The Report Designer opens.
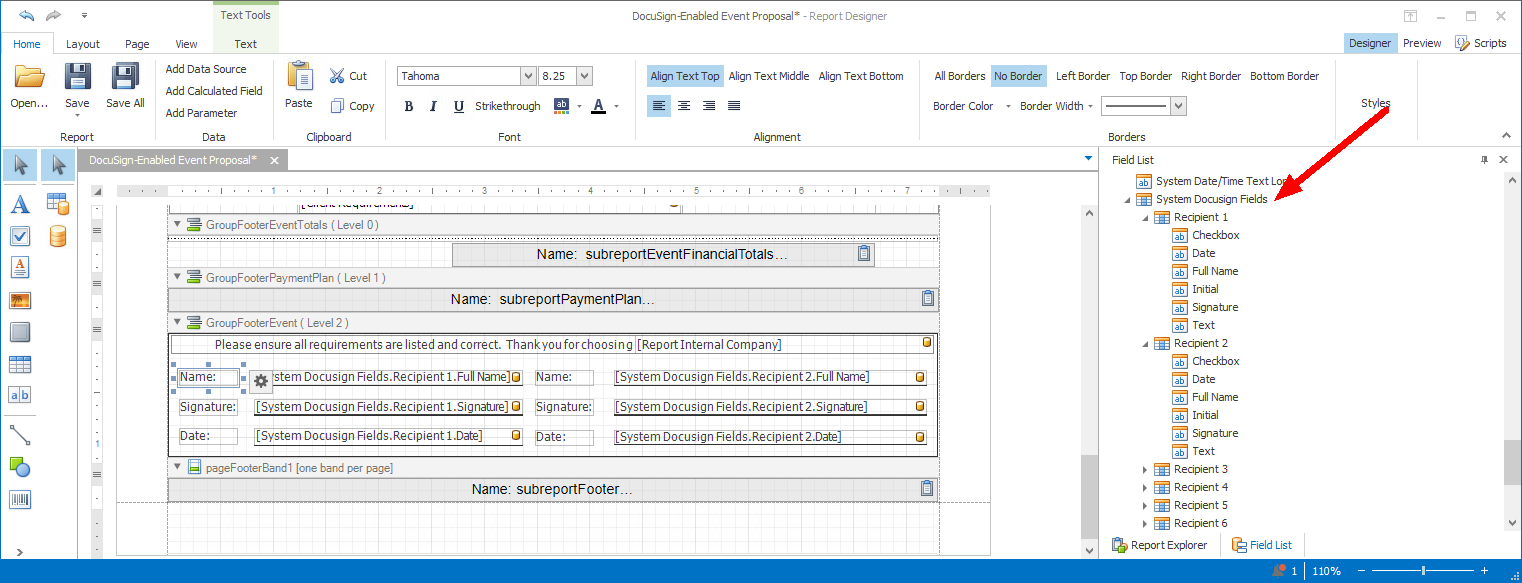
oIn the Field List, scroll down to find System DocuSign Fields.
oYou can add up to six recipients to a DocuSign document. Under System DocuSign Fields, you will see Recipient 1, Recipient 2, Recipient 3, Recipient 4, and so on.
▪NOTE: Later, when emailing the report, the recipients will be determined by the order of email addresses in the To field: the first email address will be Recipient 1, the second email address will be Recipient 2, and so on. This recipient order will be particularly important if you plan to use the "Route to Recipients in Order" setting, i.e. the tiered-approval feature.
oFor each Recipient, there are six fields: Checkbox, Date, Full Name, Initial, Signature, and Text.
oYou can add multiple Checkboxes and Text fields per recipient. A recipient's multiple Text fields can have unique values.
oAdd the System DocuSign fields to the report as you require. Editing a report in the Report Designer requires some report-building skills; you may need to contact your EventPro Trainer or Support Specialist for assistance.
oWhen you are done designing the report, click Save, and close the Report Designer window.