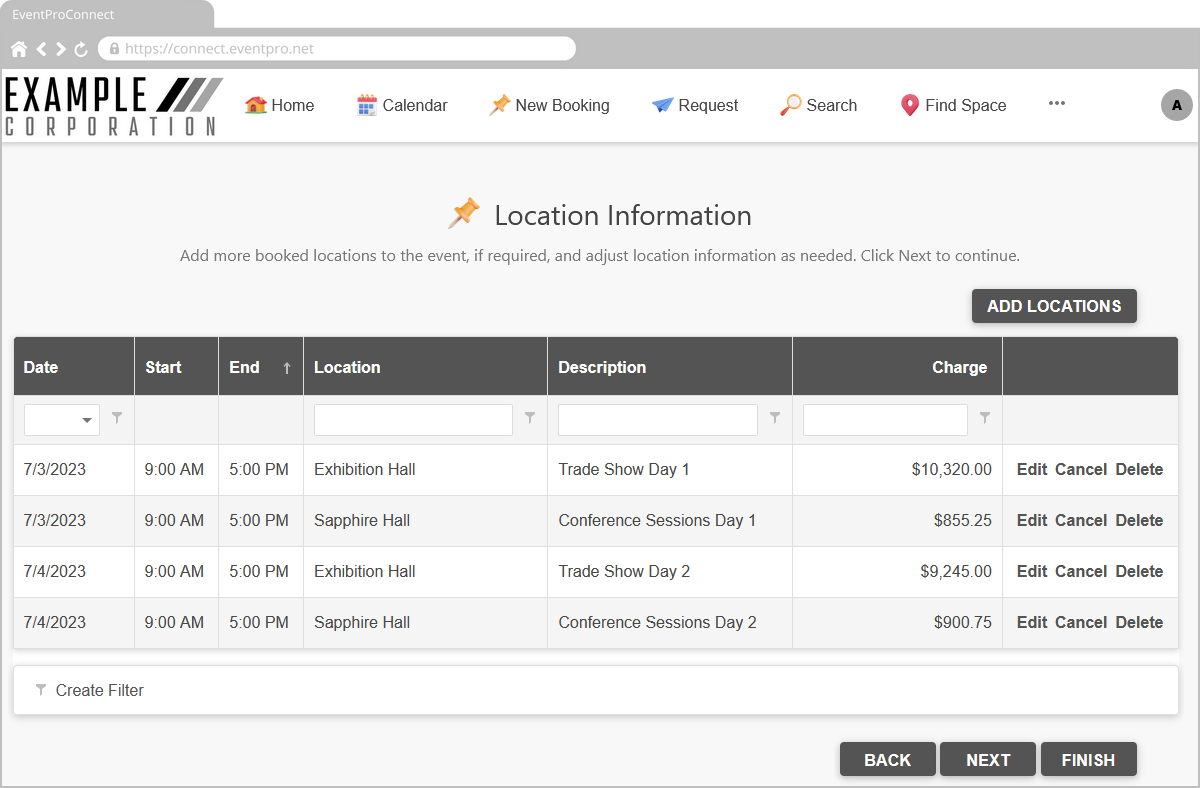
Some of your EPConnect pages will contain Grids, which display information from EventPro, organized under Columns that you select.
(Remember: These instructions will not be relevant for all Pages, as not all Pages will contain Grids.)

Figure 665: Example of Grid in EPConnect
Grids (called Form Column Grids, in full) are hard-coded for certain Page Definitions, meaning that you can't delete an existing grid or add a new grid.
However, you can add, edit, and delete the Form Columns, determining which are displayed in a Form Column Grid.
While the Form Columns available in each Page Definition are different, the processes of adding, editing, and deleting a Form Column are essentially the same for most pages.
As noted earlier, Form Columns are contained within Form Column Grids, which are nested within Page Definitions, and then Area Definitions. You first need to open the relevant Area Definition, then Page Definition, and then Form Column Grid to access its Form Columns.
Add Form Column to Grid
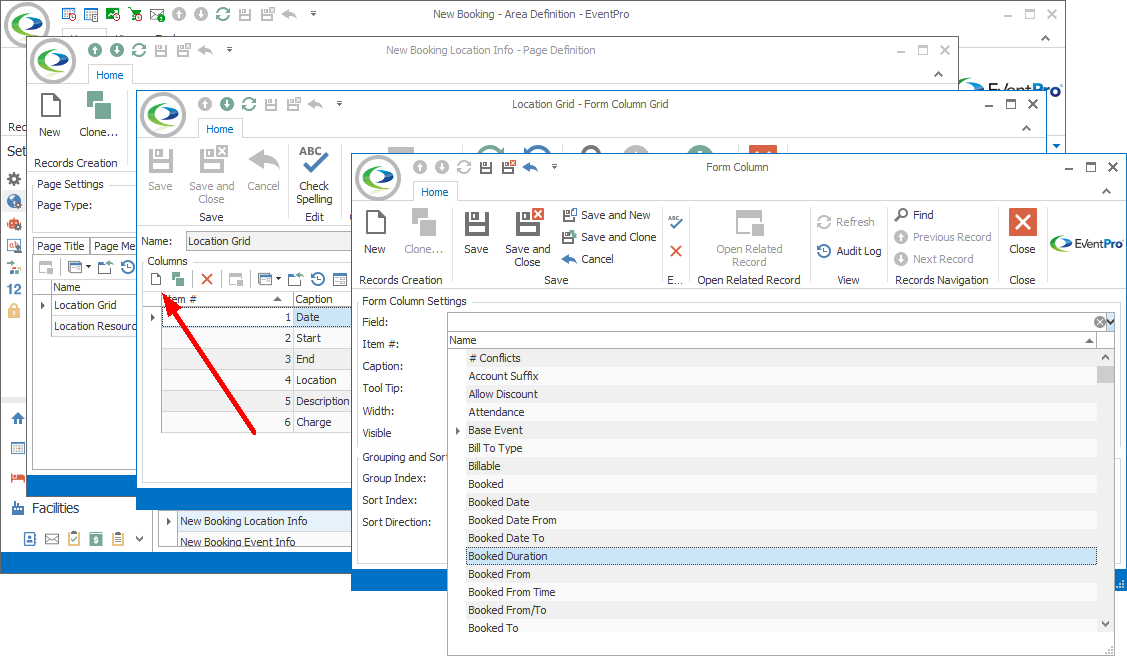
1.Open the relevant Area Definition, Page Definition, and Form Column Grid edit form. Click the New button in the Columns selection grid.
2.A new Form Column edit form appears.
3.You first need to select a Field from the drop-down list. The settings applicable to that selected Form Column Field will then be automatically pulled into the edit form. You can edit the Form Column's settings, if required.
4.Click Save and Close to return to the Form Column Grid edit form.

Figure 666: Adding Form Column
Edit Form Column
1.Open the relevant Area Definition, Page Definition, and Form Column Grid edit form. In the Columns selection grid, double-click the Form Column record you want to edit.
2.The corresponding Form Column edit form appears.
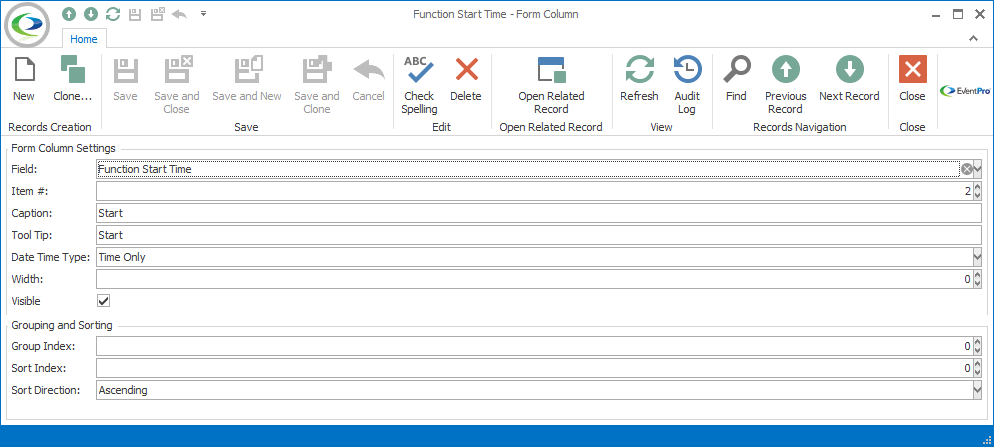
3.In the Form Column edit form, you can adjust various settings that determine the appearance the column in the online grid.
a.The settings in Form Column edit form will vary, depending on the Field you selected.
b.However, some settings will be common across all or many Form Columns. While you may choose different options for different fields, the setup process will be similar. Rather than repeating the instructions for each Form Column, the common settings are described in the topic Common Column Settings.
c.Some of the Form Columns will have unique settings, which will be described in other topics below.
4.When you are done making changes, click Save and Close.

Figure 667: Editing Form Column
Delete Form Column
1.Open the relevant Area Definition, Page Definition, and Form Column Grid edit form to locate the Form Column you want to delete.
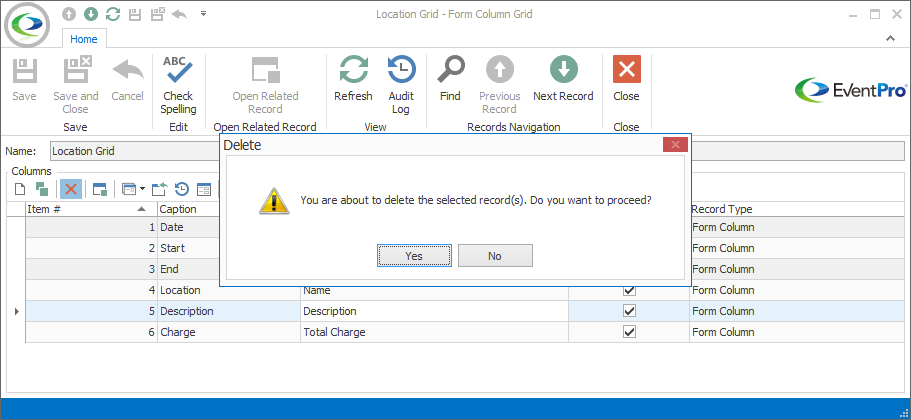
2.Under the Columns grid, select the Form Column you want to delete and click the Delete button.
3.If you are certain you want to delete the Column, click Yes in the Delete dialog.

Figure 668: Deleting Form Column