•These instructions explain how to add or edit a payment gateway with the new payment integration module.
•When a payment is made in EPConnect, the online payment form for your selected gateway will appear as a pop-up overlay, with fields for Name, Email, Credit Card Number, Expiration Date, and CVV.
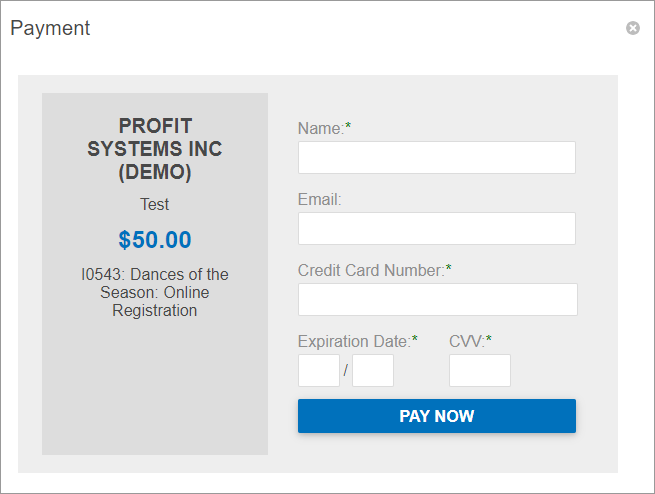
•Online payments through the new integration platform will be automatically recorded back in EventPro (assuming you have selected the Record Payment checkbox for the payment gateway).
1.To add a Payment Gateway Definition, click the New button in the Payment Gateway Definitions selection grid. If the gateway definition already exists, double-click the record in the selection grid.
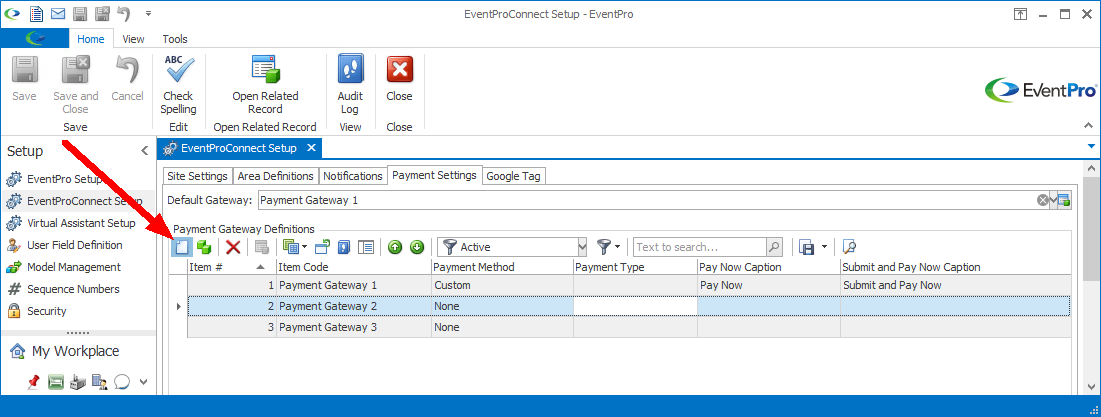
2.The Payment Gateway Definition edit form opens.
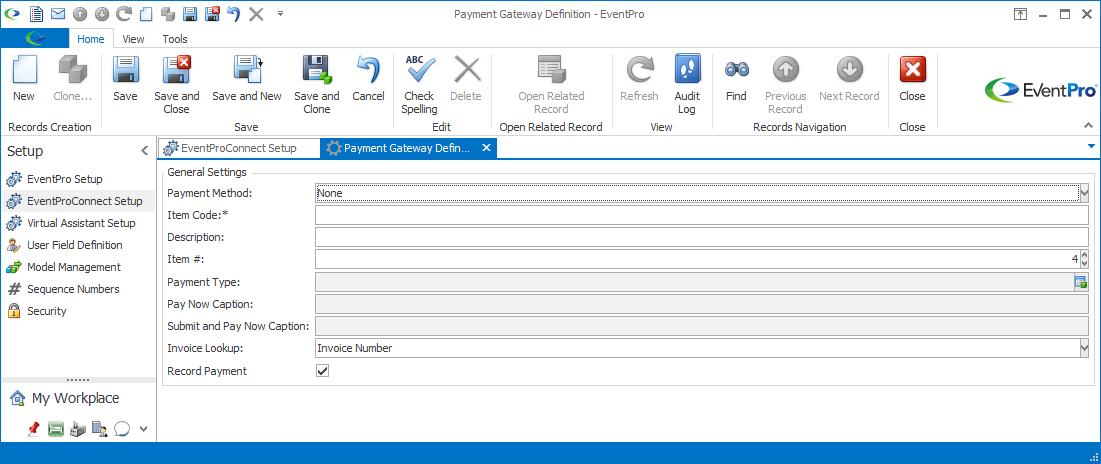
3.The Payment Gateway Definition edit form typically has two sections:
a.General Settings: The General Settings are the same regardless of which Payment Method you select.
b.Payment Settings: Some of the Payment Settings vary, depending on the Payment Method selected.
4.Payment Method: Under General Settings, select the applicable Payment Method from the drop-down.
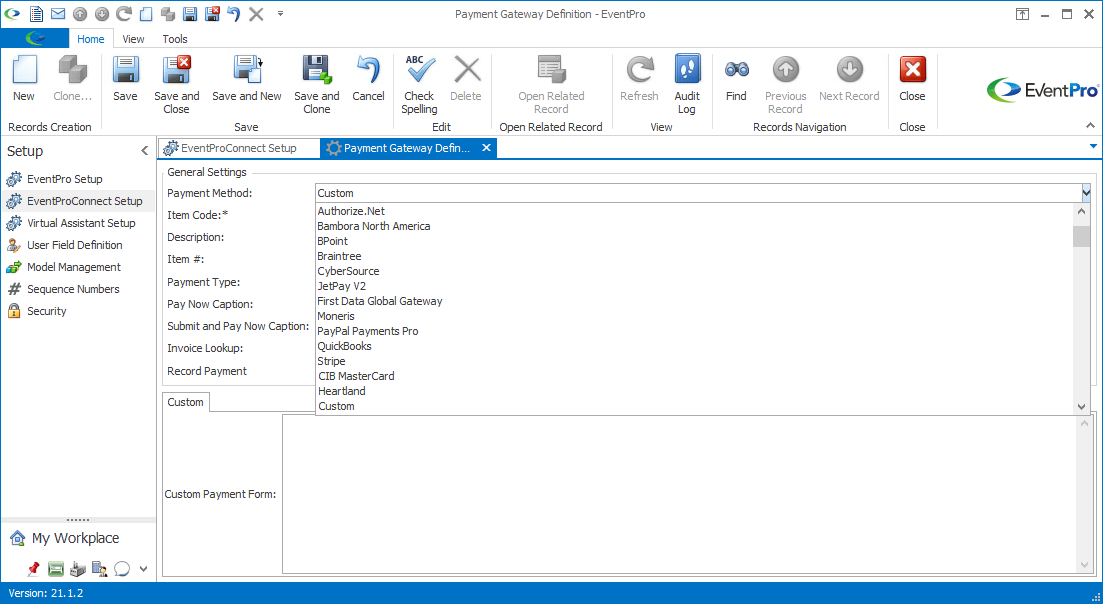
5.Item Code: Enter the Item Code for this payment gateway.
6.Description: The Description will initially default to match the Item Code, but you can edit the Description if you want.
7.Item #: You can change the Item Number if you want to change this record's place in the sort order.
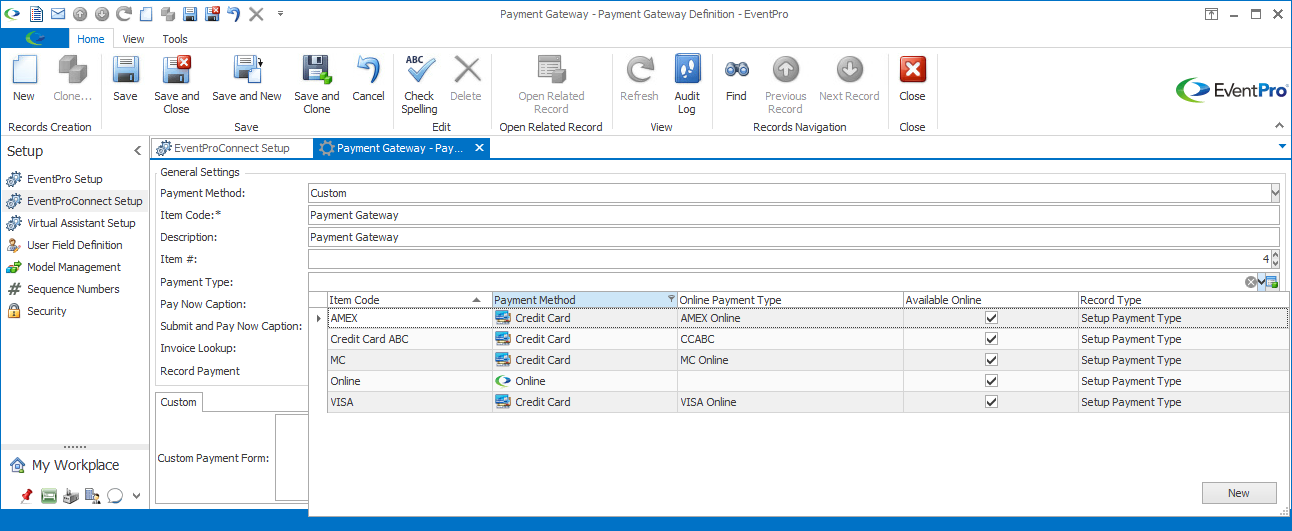
8.Payment Type:
a.Select the EventPro Payment Type that will be assigned to payments coming from this online payment gateway.
b.This drop-down is populated by your Setup Payment Types, although it will only show those payment types that have been flagged as "Available Online".
9.Pay Now Caption: Enter the text you want on the EPConnect "Pay Now" button.
10.Submit and Pay Now Caption: Enter the text you want on the EPConnect "Submit and Pay Now" button.
11.Invoice Lookup: In most cases, this will be set to Invoice Number, unless you are otherwise instructed.
12.Allow Partial Payments: Select this checkbox if you want to allow partial payments. This option will allow the online user to manually enter the amount they are paying.
a.This checkbox is selected by default, assuming that you want to automatically record EPConnect online payments made through this gateway. Normally, you will want to leave this checkbox selected in order to record online payments for your EventPro financial records.
b.However, in certain limited circumstances, it may be necessary to unselect this checkbox and prevent payments from being recorded for a specific gateway. An example would be a duplication issue with API. If this is the case, please consult with your Trainer or Support Representative.
14.Payment Settings: As noted earlier, some of the Payment Settings will vary, depending on the particular Payment Method you selected. However, there are some common Payments Settings across all or most of the Payment Methods in the new payment integration module.
a.Currency: Select the currency to be used for the incoming payments.
b.Is Sandbox: Select this checkbox if you want to test the payment gateway with your sandbox information.
c.Payment Form Company Name: Enter the name of your company as you want it to appear in the online payment form.
d.Payment Form Description: Enter a description as you want it to appear in the online payment form.
e.When a person makes an online payment in EPConnect, the payment form appears as a pop-up overlay. In the payment form overlay, the Payment Form Company Name appears in the top left corner, and the Payment Form Description appears directly below it.

16.Unique Payment Settings:
a.Follow the relevant link for the unique Payment Settings of the Payment Method you selected:
iii.BPoint
iv.Braintree
vii.JetPay V2
viii.Moneris
xi.Stripe
xii.For a list of other supported payment gateways, see the topic Supported Gateways.
b.When you have completed the payment settings, return to this step.
a.When you are done adjusting the settings, click the Authorize Gateway button.
b.You should get the message, "Gateway successfully authorized".
c.You will need to click the Authorize Gateway button any time you create or modify a gateway, before you can save the gateway settings.
d.NOTE: If you are using the QuickBooks payment gateway, remember that you need to authenticate EventPro by signing in to your QuickBooks account. Review the QuickBooks settings below.
18.When you have entered all of the information for this payment gateway definition, click Save or Save and Close in the navigation ribbon above.
19.You will return to the Payment Gateway Definitions selection grid.
20.If applicable, you can add more Payment Gateway Definitions.
21.When you are done defining Payment Gateways, you can assign a Default Gateway.