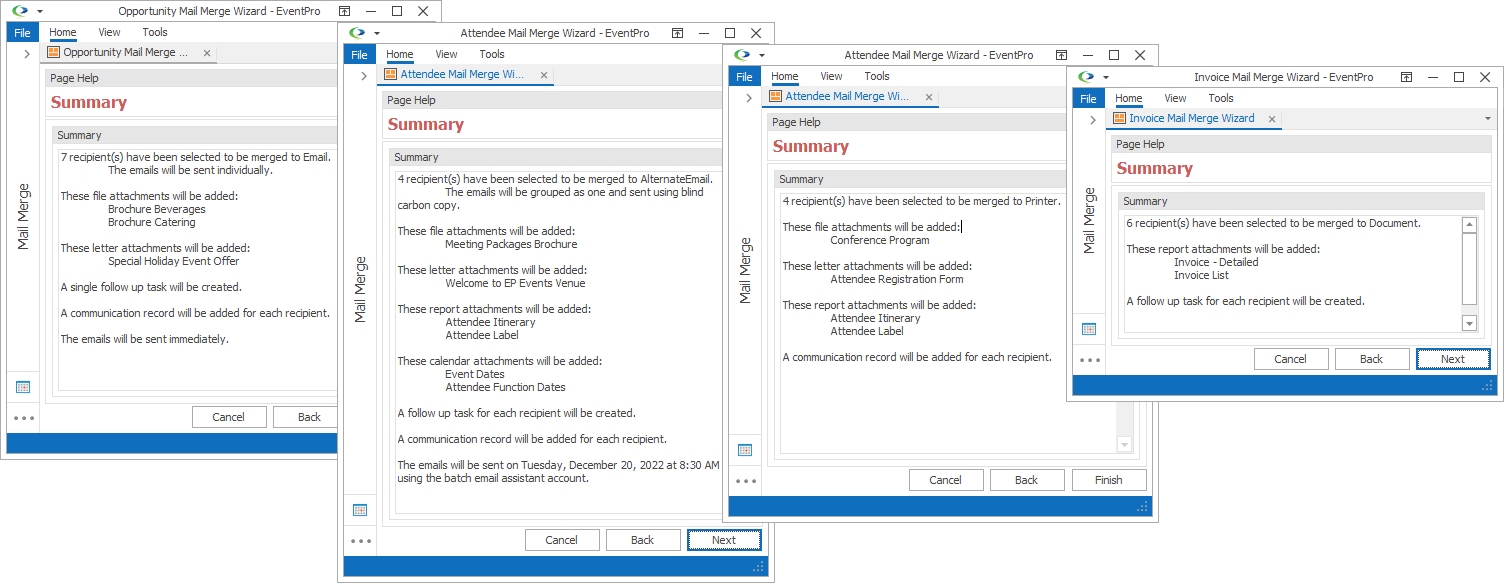
The final page of the Mail Merge Wizard - the Summary - will summarize the important elements of the merge, including (as applicable):
•Number of recipients and merge destination
•Whether the emails will be sent individually or grouped as one
•Whether Bcc is used
•Attachments added, listed under headings for File, Letter, Report, and Calendar
•Whether a task will be created
•If a task will be created, whether it is a single task or one per recipient
•Whether a communication record will be added
•When the emails will be sent (immediately or the selected future date)
•If scheduled for a future date, which account will be used to send the emails (this account or the Batch Email Assistant account)
You may not see all of these elements in the Summary, as it depends on what options you selected for the mail merge.

Figure 321: Mail Merge Summary Examples
If the information in the Summary is to your satisfaction, click Next.
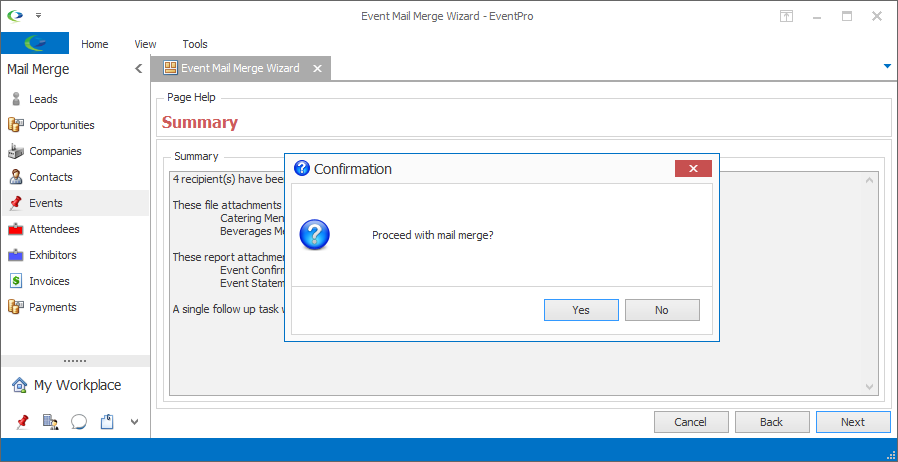
The Confirmation dialog asks if you want to proceed with the mail merge.
Click Yes to continue.

Figure 322: Confirming Mail Merge
After processing, the next wizard page will vary, depending on the Destination you selected for the Mail Merge:
•Email or Alternate Email: You will proceed to the Results page.
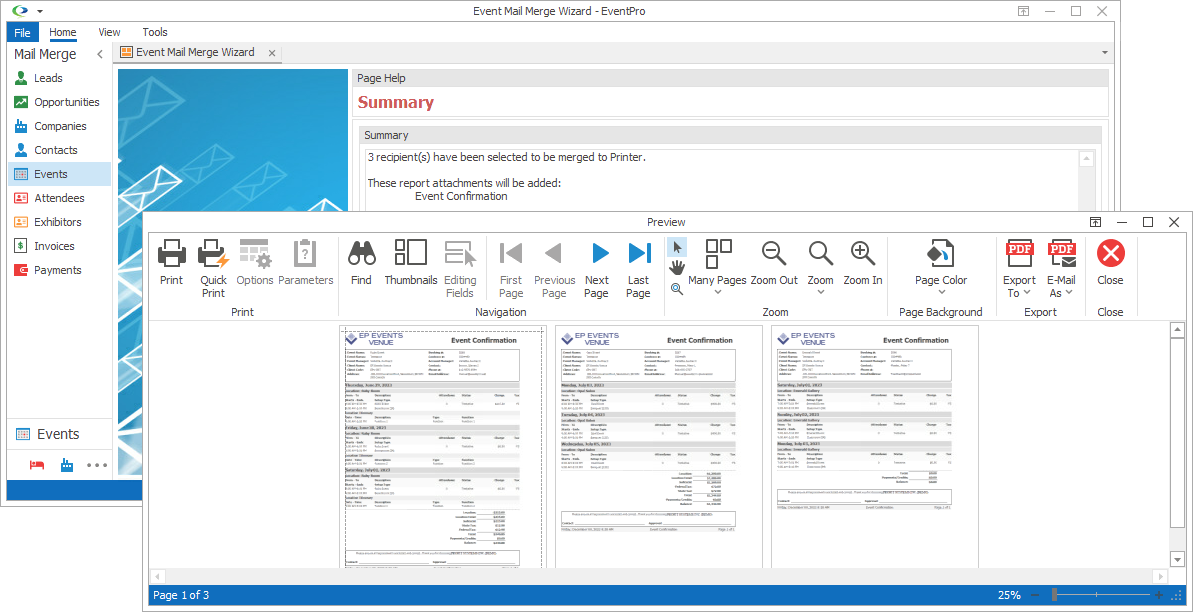
•Printer: The Preview page appears, displaying the selected Attachments merged with recipient information. From here, you can print the document.

Figure 323: Printing Merged Document
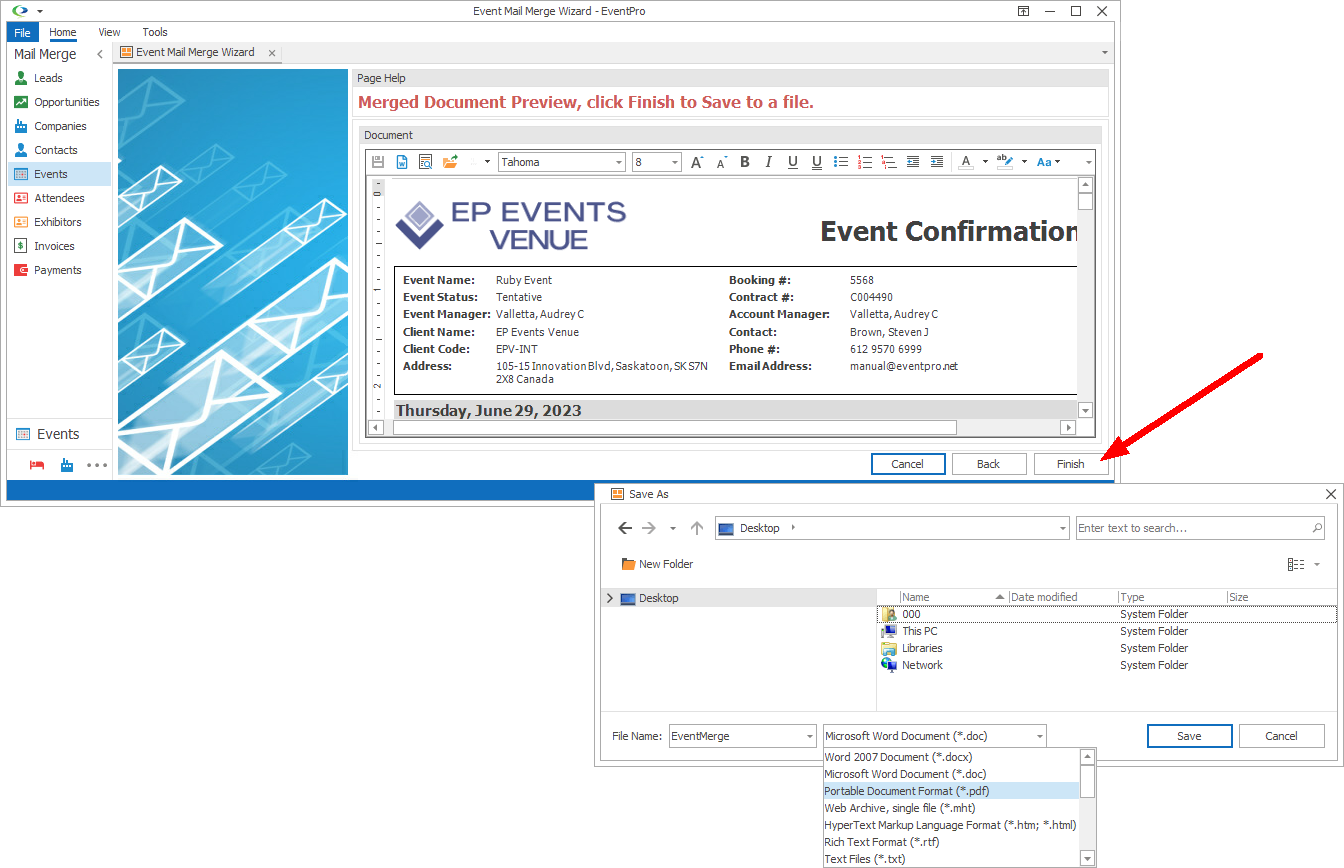
•Document: The Merged Document Preview page appears, displaying the selected Attachments merged with recipient information.
oTo save the merged document, click the Finish button.
oIn the Save As window that appears, navigate to the folder you want to save the document in.
oEnter a File Name, select the file type to save as, and click Save.

Figure 324: Saving Merged Document