•Lead Statuses help you monitor the interest level of potential customers, and track their reasons for choosing or not choosing your event services. (Lead Statuses are relevant to Sales Management, which is a separately purchased module.)
•In EventPro Setup, you will define both Lead Statuses and Opportunity Statuses.
•To clarify the distinction between the two, we will review the difference between a "Lead" and an "Opportunity" in EventPro:
oA "Lead" is a person or company you would like to have as a client, e.g. a client who rents your event venue and/or hires your event planning services.
▪When you determine that a Lead has reached a serious enough level of interest, you can convert the lead into an "Account", i.e. either a Contact (person who can be attached to a company, or not) or Company.
oAn "Opportunity" is the potential event that the Lead wants to hold.
▪When you are ready to confirm the booking of the potential event, the Opportunity converts into an Event.
1.Go to Setup > CRM > Lead Statuses.
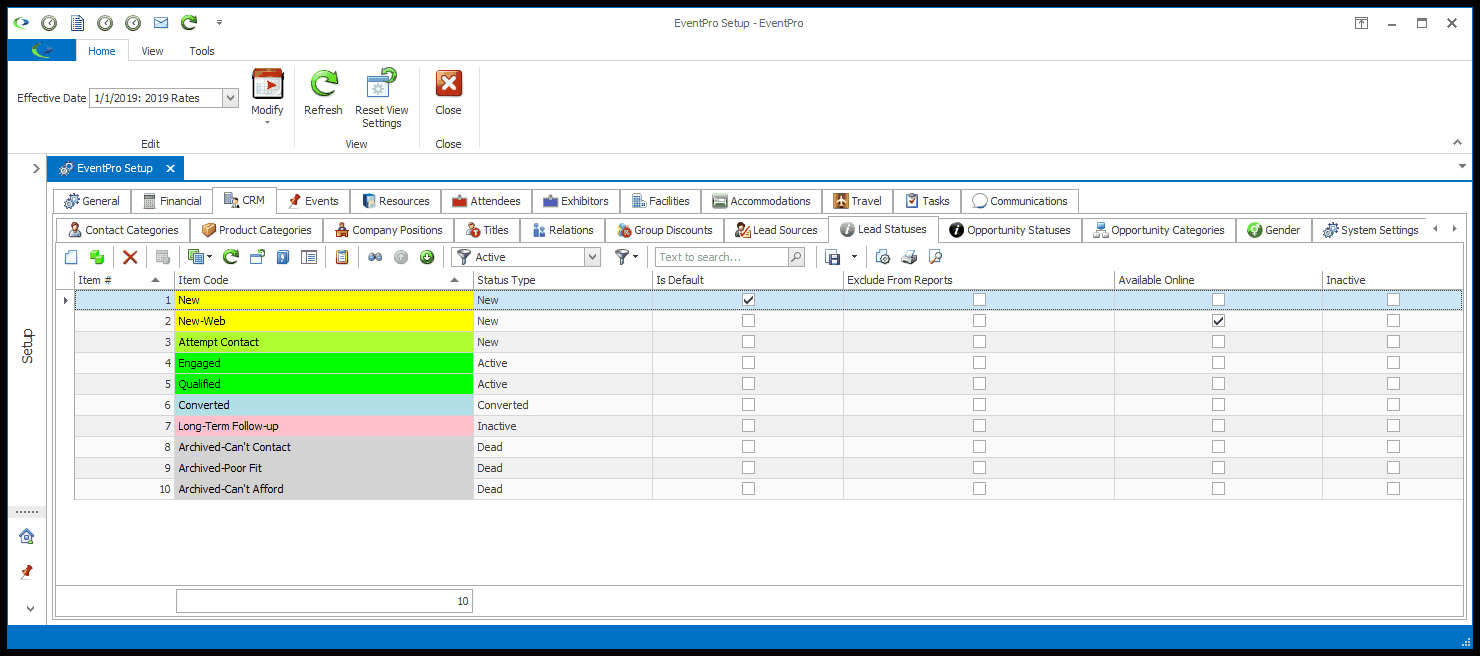
2.Start a new record or edit an existing record under the Lead Status tab.
3.The Setup Lead Status edit form opens.
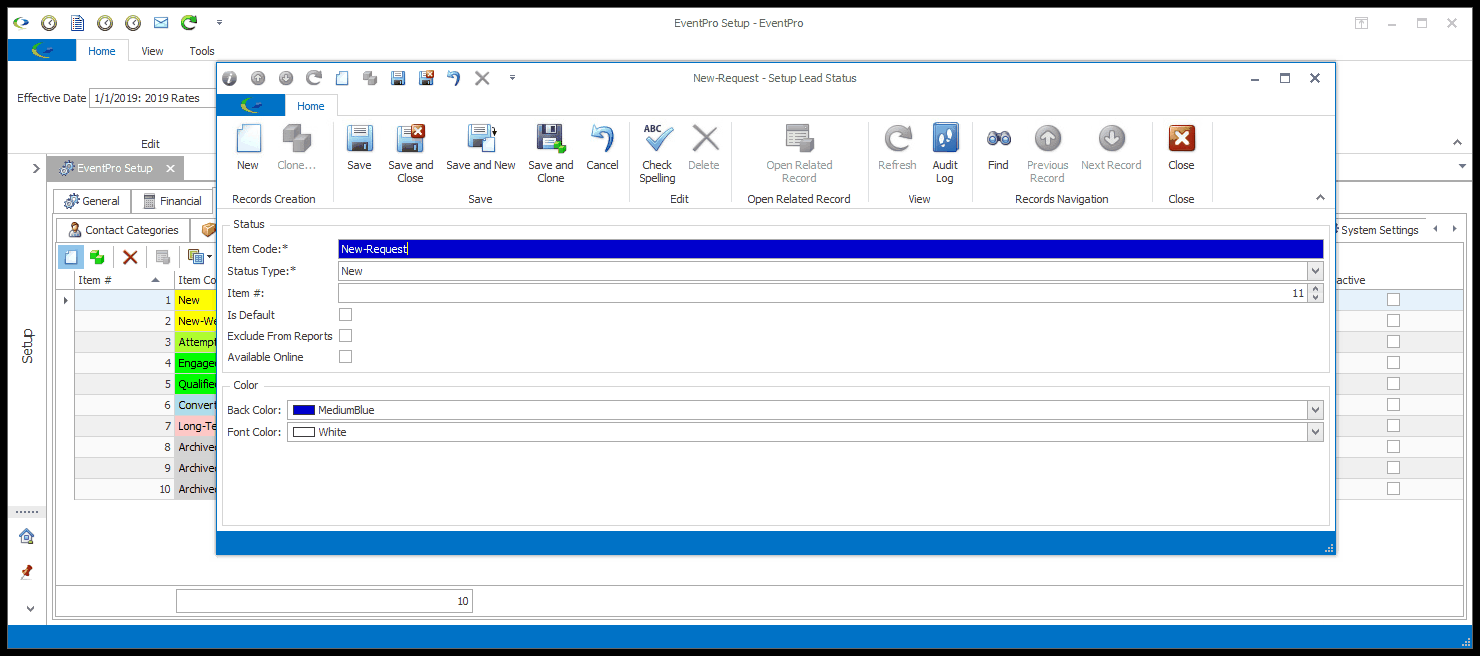
4.Item Code: Enter the name for this lead status.
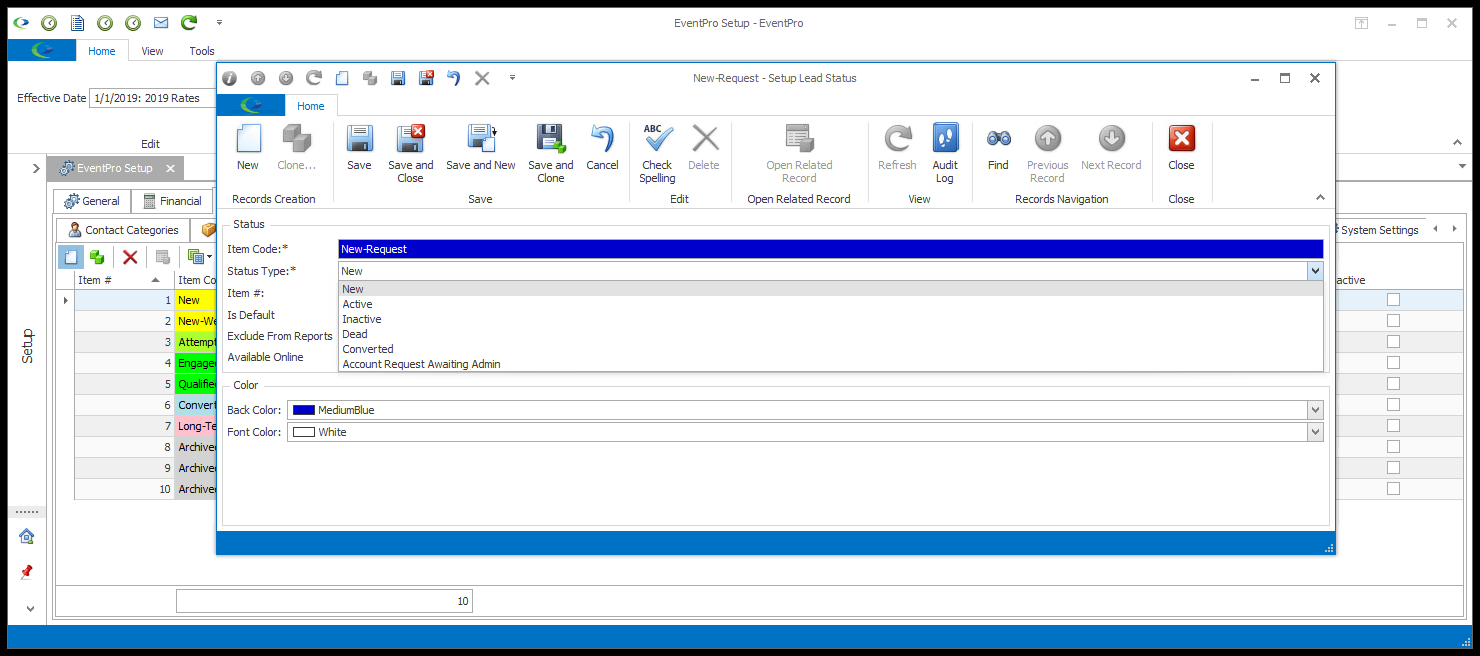
5.Status Type: Choose the Lead Status Type from the drop-down: New, Active, Inactive, Dead, Converted, or Account Request Awaiting Admin.
6.While it is ideal to have a Lead Status of each Status Type, you will need at least:
a.At least one non-Converted type status to apply to newly entered Leads.
b.At least one Converted type Status, if you intend to convert Leads to Accounts.
7.The Account Request Awaiting Admin is a specialized Status Type used for the Account Request functionality in EPConnect. If you set up the Request Account area in EPConnect, you can set a default status for requests awaiting administrative approval. See EPConnect Setup > Account Request > Area Definition. IMPORTANT: Ensure you check the Available Online checkbox for this status, as you will be using it online.
8.Item #: The Item Number determines a record's position relative to other records in a list sorted by Item #. Change the Item # to change the record's position in the sort order.
9.Is Default: You can set one of your Lead Statuses to be the default status for new leads. Select the Is Default checkbox if you want this particular status to be the default.
10.Exclude from Reports: Select this checkbox if you want leads of this status excluded from reports.
a.If you have purchased the EPConnect Opportunities module, select this Available Online checkbox to make leads of this status visible online.
b.You will also need to select this Available Online checkbox for statuses that will be used for processes involving EPConnect. For example, if you set up the Request Account area in EPConnect, you will need "Available Online" Lead Statuses for Approved and Declined Requests, as part of the Admin Review process.
c.Please note that EPConnect Opportunities is a separately available module, so if you have not purchased it, you will not see the related tabs and screens.
12.Back Color and Font Color: Select the color to represent this lead status where it appears elsewhere in EventPro. Select the background color from the Back Color drop down, and the text color from the Font Color drop down.
13.When you're done, click Save and Close.