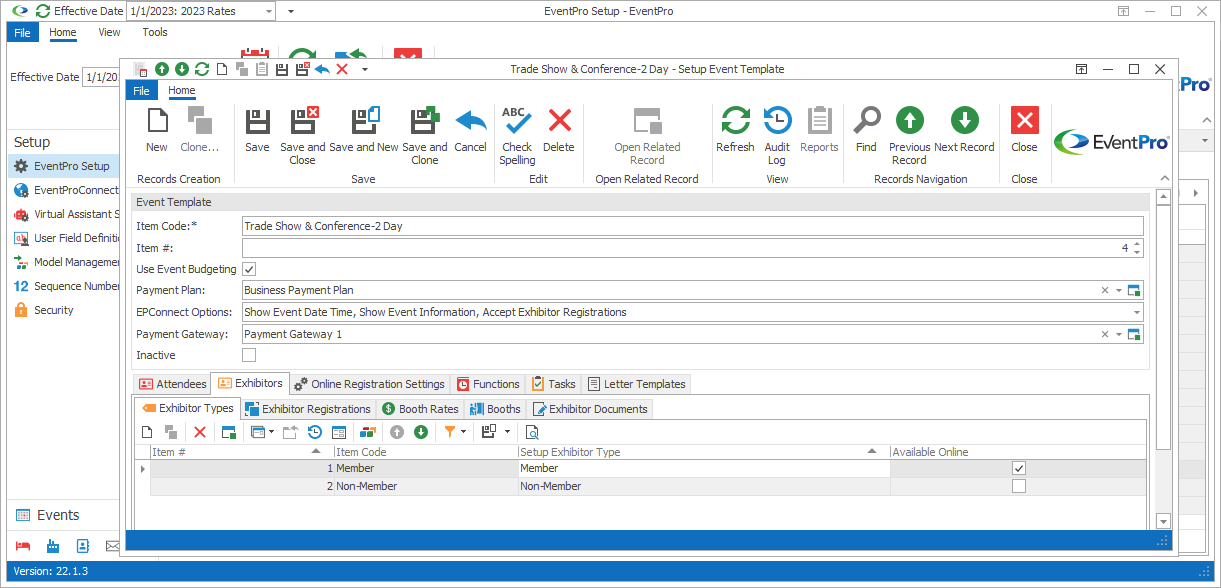
To add Exhibitor Types to the Event Template, start a New record under the Exhibitors / Exhibitor Types sub-tab.

Figure 464: Adding Exhibitor Detail to Event Template
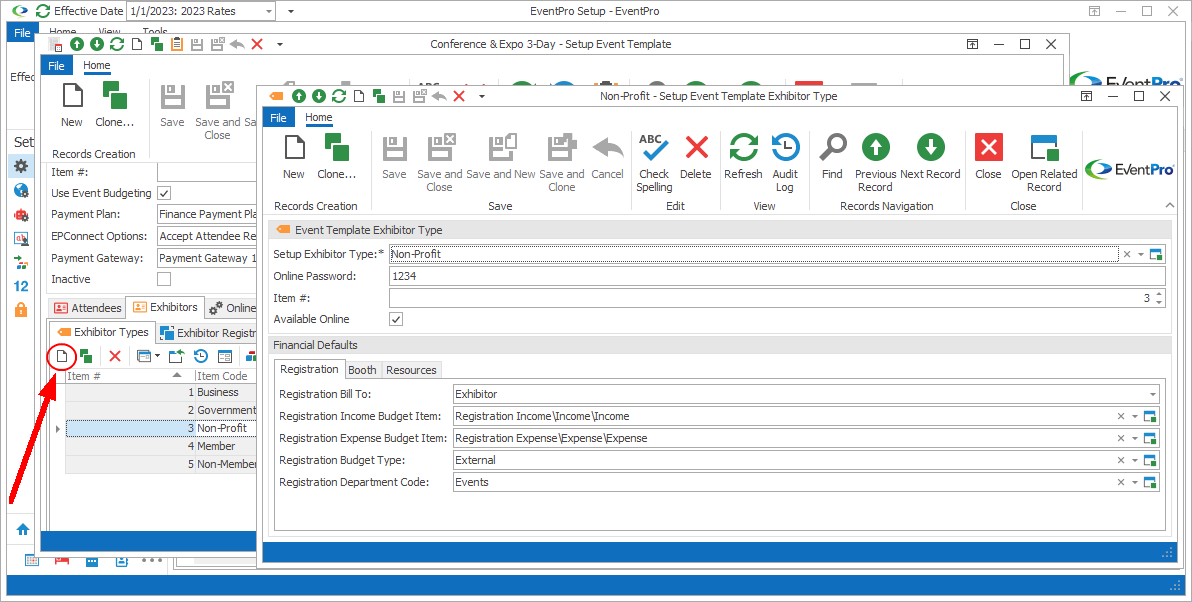
The Setup Event Template Exhibitor Type edit form opens.

Figure 465: Adding Exhibitor Type
1.Setup Exhibitor Type: Select an Exhibitor Type from the drop-down list. The drop-down list is populated by the Exhibitor Types defined under Exhibitor Setup.
2.Online Password: If attendees of this Exhibitor Type will have online access, you can type in the Password here.
3.Item #: The Item Number determines a record's position relative to other records in a list sorted by Item #. Change the Item # to change the record's position in the sort order.
4.Available Online: Select the Available Online checkbox if you want this Exhibitor Type to be available online. The Available Online checkbox may already be selected by default, depending on the Setup Exhibitor Type you selected.
5.Financial Defaults: The Financial Defaults under the Registration, Booth, and Resources tabs will be set to the selections made back in Setup for the Setup Exhibitor Type, but you can change them here.
When you are done setting up this Exhibitor Type for the Event Template, click Save and Close.
You will return to the Setup Event Template edit form.
Continue adding as many Exhibitor Types as you require for this Setup Event Template.
Next topic: Exhibitor Registrations