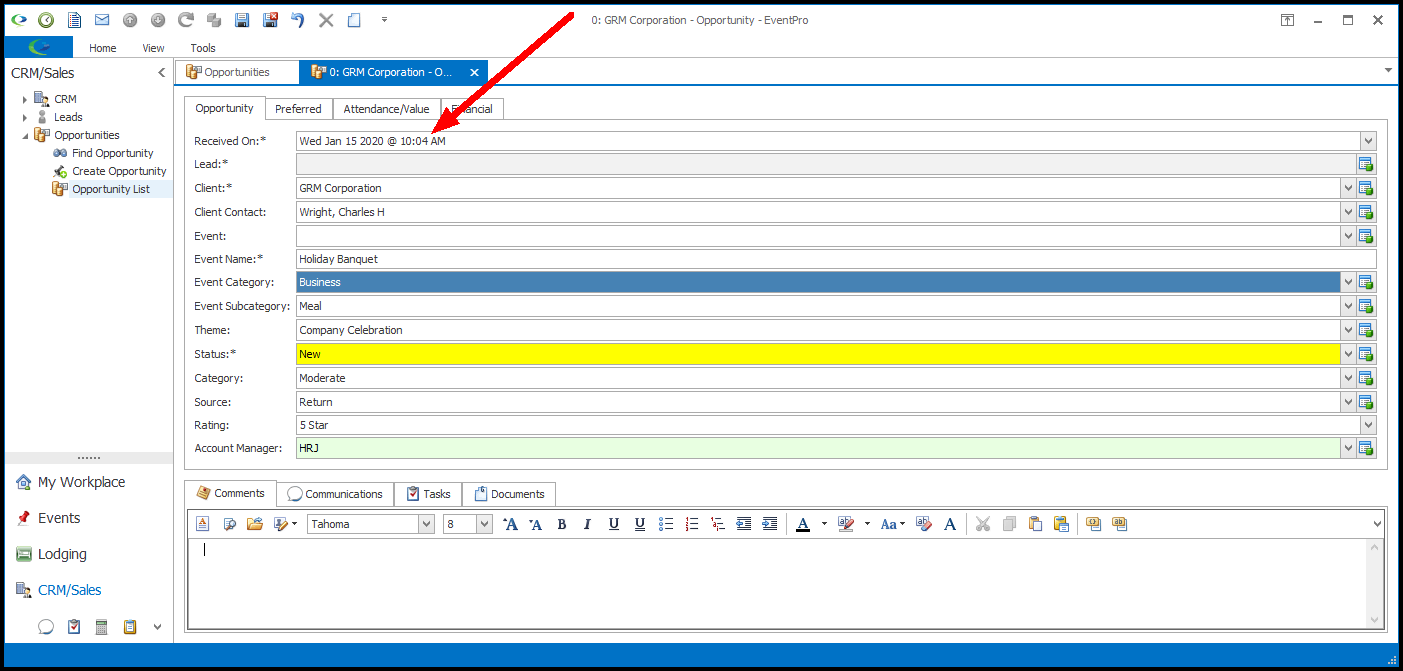
1.Received On: This field will default to the current date, but you can select a different date if necessary.
a.NOTE: There is an option to customize the Opportunity edit form so that you can record the Received On Date and Time. See Interface Customization > Model Editor > Add Opportunity Time Field.
a.If you started this Opportunity from within a Lead's record, the Lead will already be in this field.
b.Otherwise, select a Lead from the drop-down list.
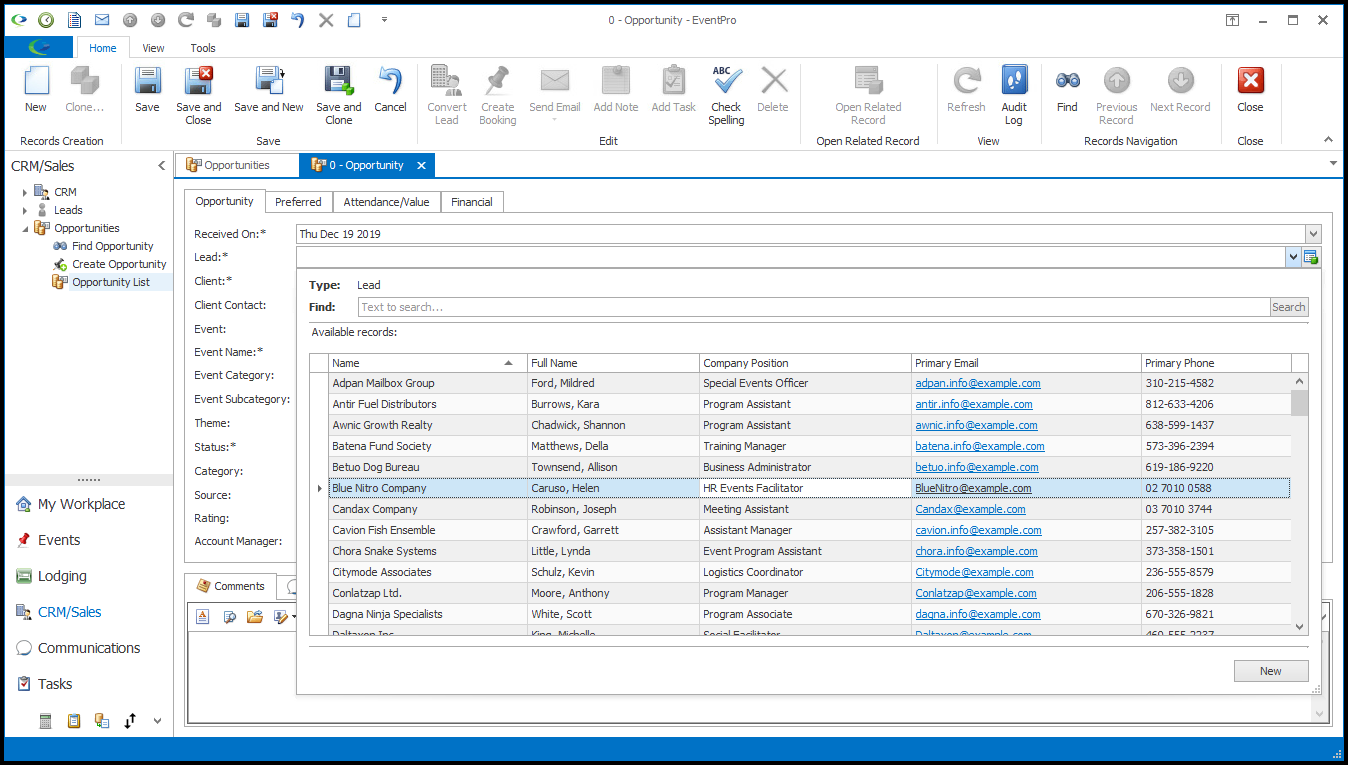
c.If you started this Opportunity before creating the Lead, you can start the new Lead record now by clicking the New button at the bottom of the drop-down list, and following the instructions in Create Lead.
d.If this Opportunity is for an existing Account, leave this Lead field blank. You will be able to choose an existing Client and Client Contact for the Opportunity next.
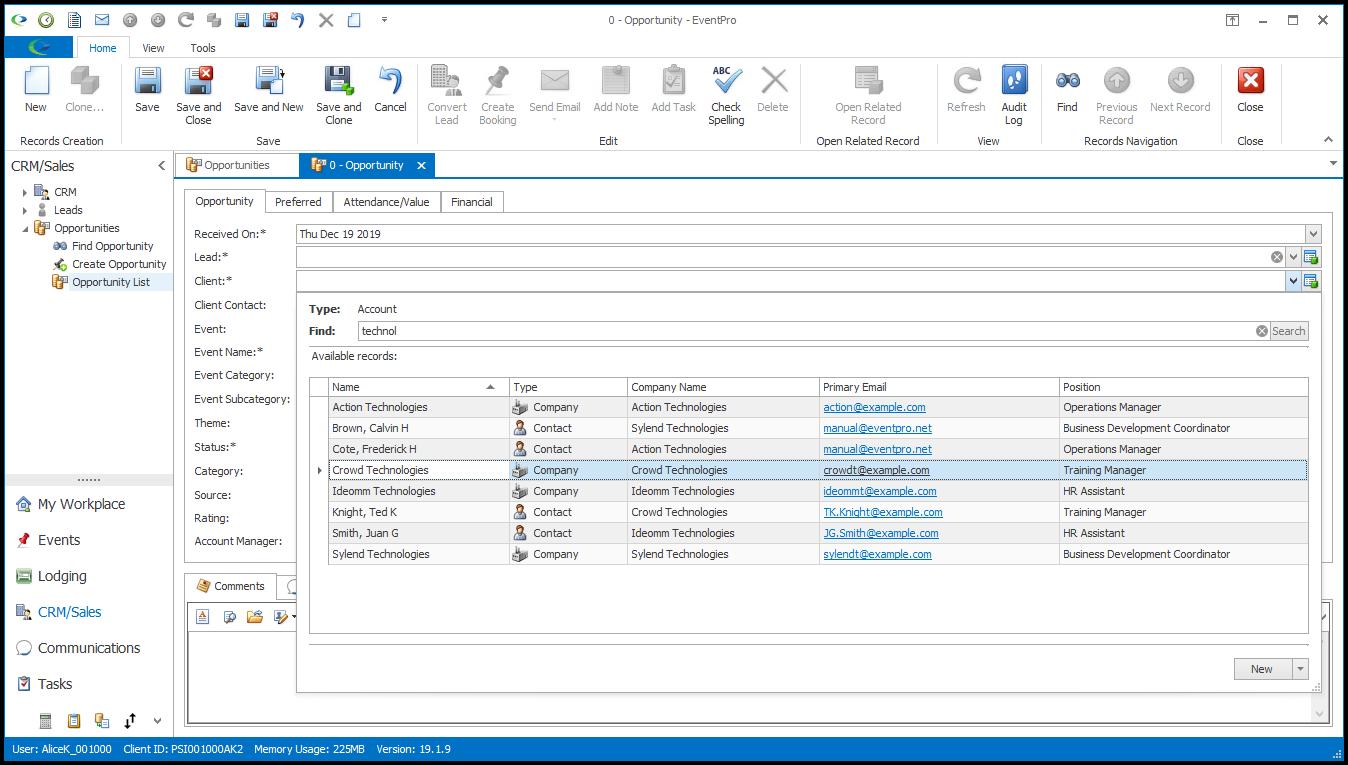
a.If you have a Lead selected above, you will not be able to select a Client and Client Contact, since an Opportunity is for either a Lead or a Client.
b.If the Lead field is blank, you can choose a Client and Client Contact from your existing Accounts.
The Client can be a Company or Contact, while the Client Contact must be a Contact.
You can search for the relevant Client and Client Contact among your existing Accounts using the Find field in the drop-down lists.
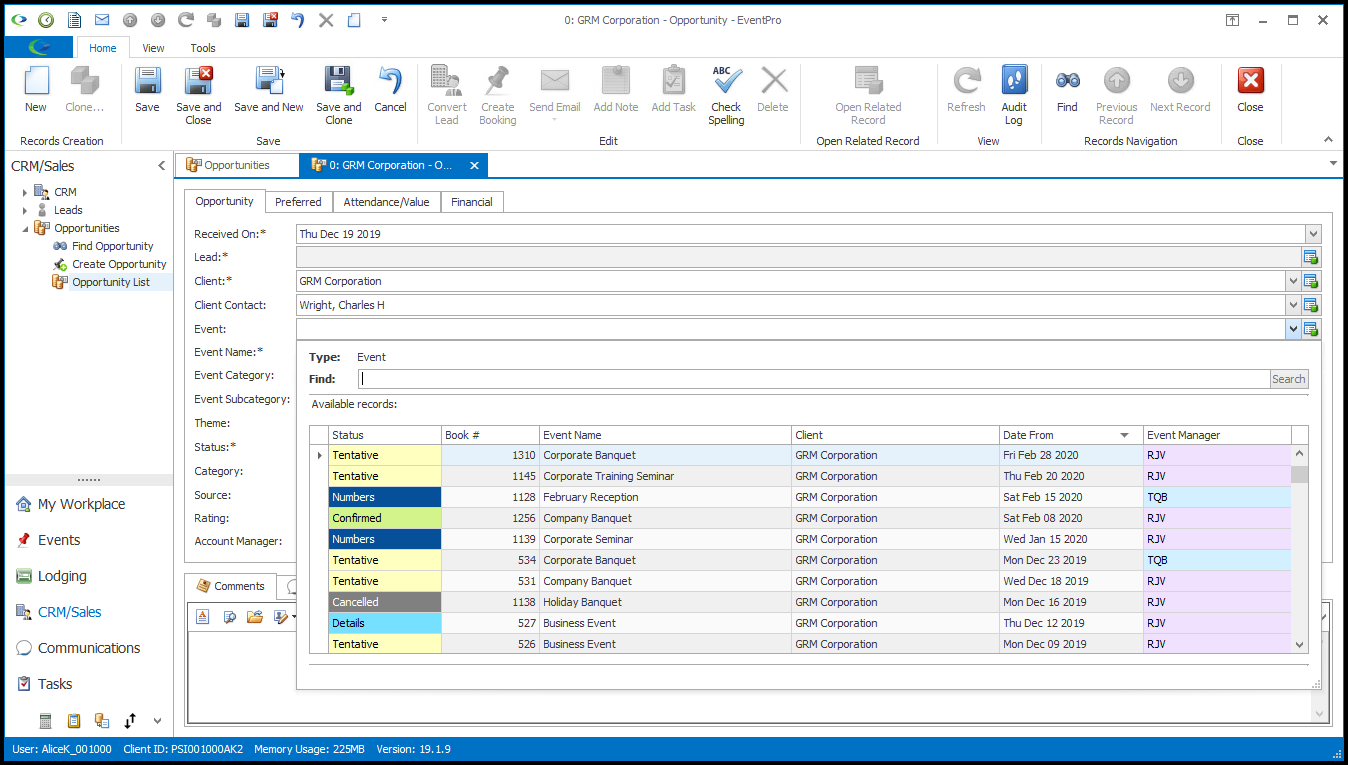
4.Event: Typically, if this is a new Opportunity, there won't already be an existing event linked to it.
However, if you want to assign this Opportunity to an existing Event, you can do so by selecting an Event from this drop-down list.
If you selected a Client above, the Event drop-down will only display events belonging to that selected Client.
5.Event Name: Enter the name for the potential event.
6.Event Category: Select the applicable Event Category from the drop-down list, which is populated by the categories you created under EventPro Setup > Events > Event Categories.
7.Event Subcategory: You can also select an applicable Event Subcategory from this drop-down, which is populated by the subcategories you created under EventPro Setup > Events > Event Categories.
8.Theme: If applicable, you can select the relevant Theme for this Opportunity. This drop-down is populated by the themes you created under EventPro Setup > Events > Event Themes.
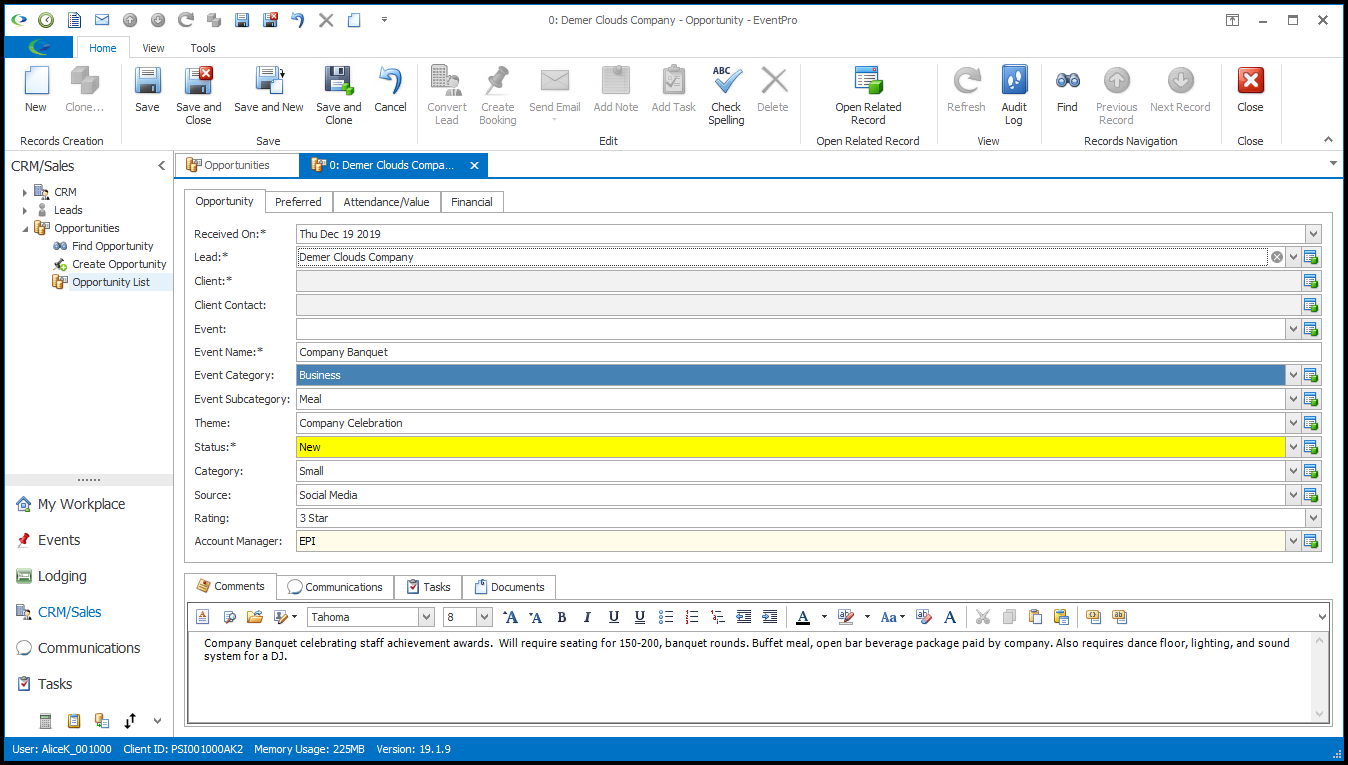
9.Status: Choose the Status that applies to this Opportunity from the drop-down list, which is populated by the records you created under EventPro Setup > CRM > Opportunity Statuses.
10.Source: Select the Source of this Opportunity from the drop-down list, which is populated by records created under EventPro Setup > CRM > Lead Sources. If you are creating this Opportunity from a Lead, the Lead's Source will default in, but you can choose a different Source that is specific to this Opportunity.
11.Rating: This is just another tool to organize and evaluate your various opportunities. It is not necessary to use a rating, but you can choose a rating for this opportunity from the drop-down list if you wish. If you are creating this Opportunity from a Lead, the Lead's Rating will default in, but you can choose a different Rating that is specific to this Opportunity.
12.Account Manager: Select the User who is designated the Account Manager for this Opportunity. If you are creating this Opportunity from a Lead, the Lead's Account Manager will default in, but you can choose a different one if you prefer. Users were created in Setup > Security > Users by a person with applicable security rights.