These are the settings that appear in the New Booking - Area Definition edit form:
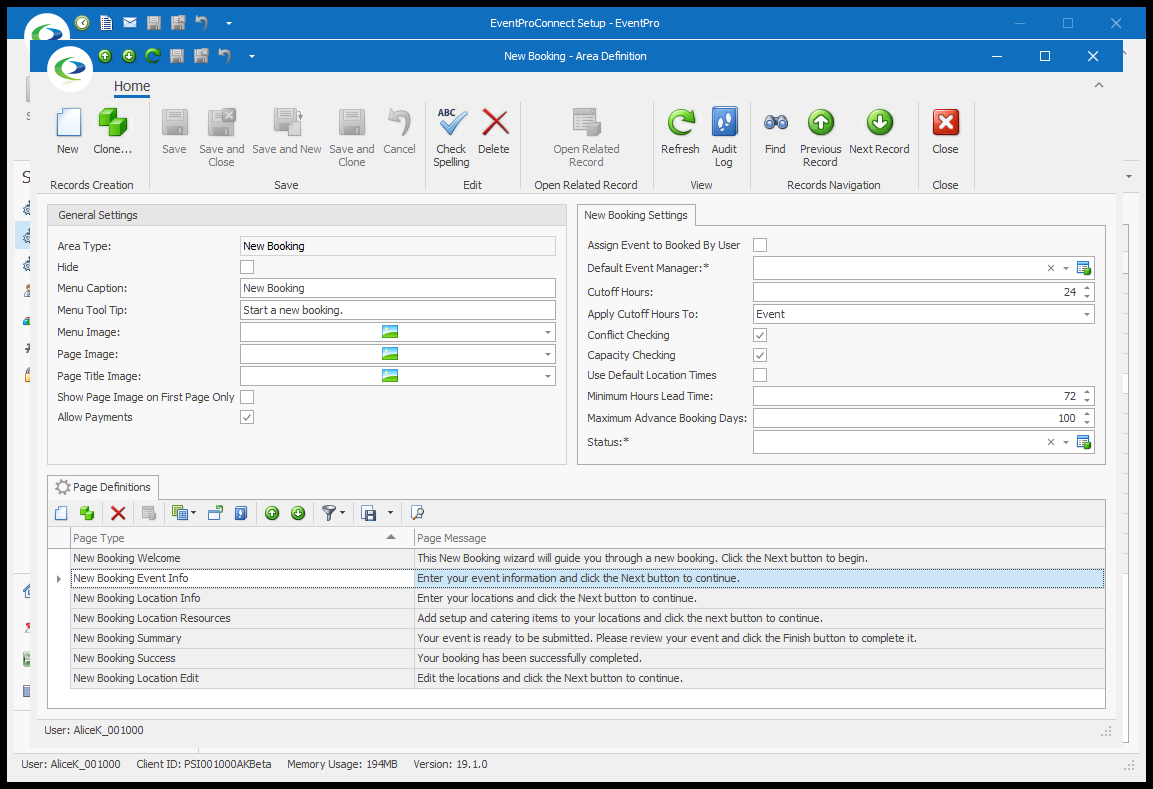
1.General Settings:
a.These first several settings are described earlier, under the common settings for Area Definitions. Review the topic General Settings, if necessary.
b.The other settings are unique to the New Booking Wizard.
i.Show Page Image on First Page Only: Select this checkbox if you want the Page Image to only appear on the first page of the New Booking Wizard online.
ii.Allow Payments: Select this checkbox to allow payments to be made at the end of the online New Booking Wizard.
Note: You also need to configure Payment Settings in order to accept payments online.
2.New Booking Settings: These settings are unique to the New Booking area.
a.Automatically Assign Events to User Creating the Booking (if applicable): Select this checkbox if you want the booking's Event Manager role automatically assigned to the User creating the online booking.
If the User creating the booking is not applicable to be the Event Manager due to access rights, or if you do not turn on this setting, the Event Manager for an online booking will default to the user you select for Default Event Manager below.
b.Default Event Manager: The User selected here will be the default Event Manager for events booked online, unless you have selected the "Automatically Assign Events to User..." setting (and if it is applicable, as explained above).
c.Modify Event Cutoff Hours: Enter the number of hours before an event that users are allowed to make modifications to that event.
d.Allow Modify Locations: Select this checkbox if you want to allow online editing of event booked locations.
e.Allow Modify Location Details: Select this checkbox if you want to allow online editing of booked location details.
f.Conflict Checking: If you select this checkbox, attempting to book a conflicting event location will display an error, unless the conflict involves an event location set to an "Ignore" conflict level status. Review your Event Statuses in Setup to see which Conflict Level was assigned to each.
g.Capacity Checking: Select this checkbox if you want a location's capacity checked when booking an event online.
h.Use Default Location Times: Select this checkbox if you want the Function Start and End Times in the New Booking Location Edit page of the Booking Wizard to default to the Function Start Time and Function End Time set in your Events System Settings.
Otherwise, the Function Start and End times in the New Booking Location Edit page will default to 12:00 AM.
i.Minimum Hours Lead Time: Enter a number representing the minimum number of hours that a new event must be booked in advance. If Users attempt to make a new online booking without sufficient lead time, they will receive a warning.
j.Maximum Advance Booking Days: Enter a number representing the maximum number of days in advance that you can create a new event. If Users attempt to make a new online booking beyond this range, they will receive a warning.
k.Status: From the Status drop-down, select the status you want applied to New Bookings made from EPConnect. You can choose from the Event Statuses created under Event Statuses, but only those marked as "Available Online".
When you are done with the General Settings and New Booking Settings, go to New Booking Page Definitions.