For some of your EPConnect webpages, you will create an online form containing Fields in which the user will enter information.
When the user submits the online form, the information is transferred back to the corresponding fields in your EventPro application.
When defining the data entry fields included in an online form, you will group the fields under headings to better organize the appearance of the online form.
Those groups are your "Form Field Groups".
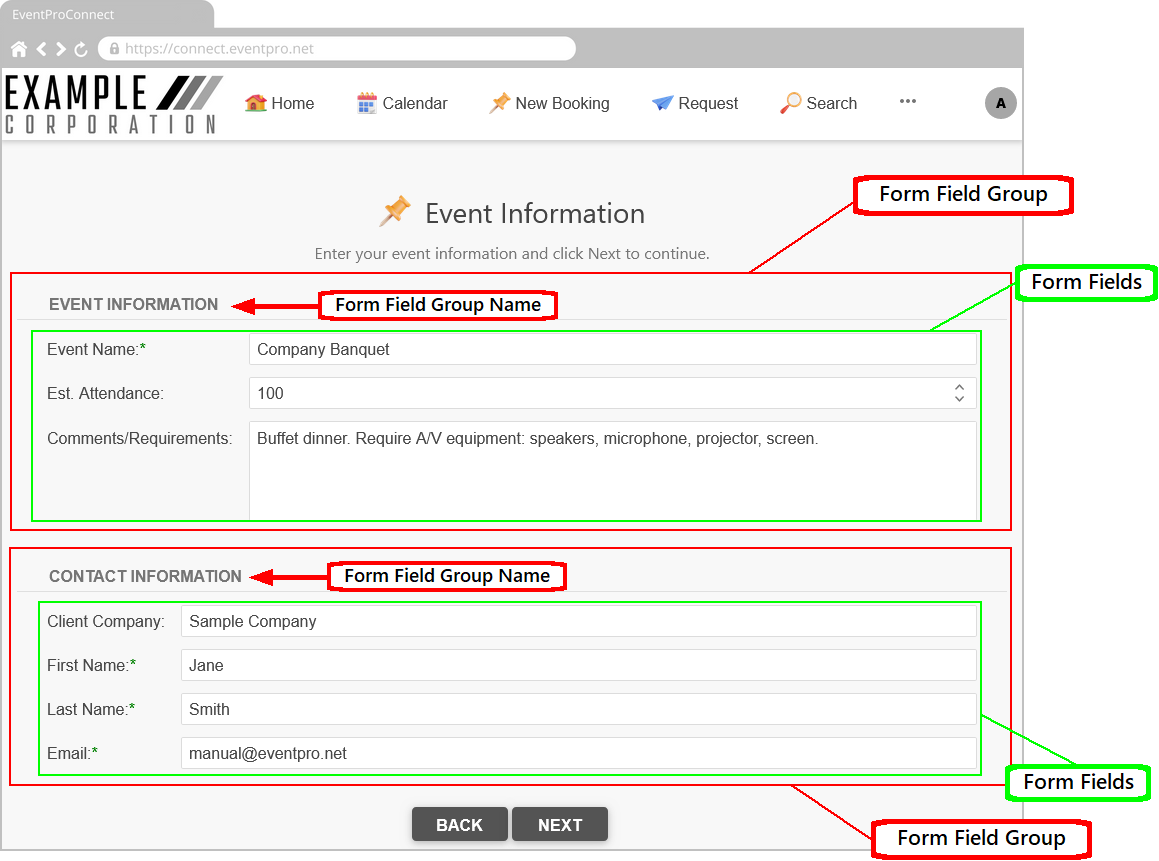
Figure 624: Viewing Form Field Groups and Fields
While the Form Fields available in each Page Definition are different, the general process of adding, editing, and deleting a Form Field Group is essentially the same for most pages.
As noted earlier, Form Fields Groups are contained within Page Definitions, which are nested within Area Definitions.
You first need to open the relevant Area Definition and Page Definition to access the Form Field Groups.
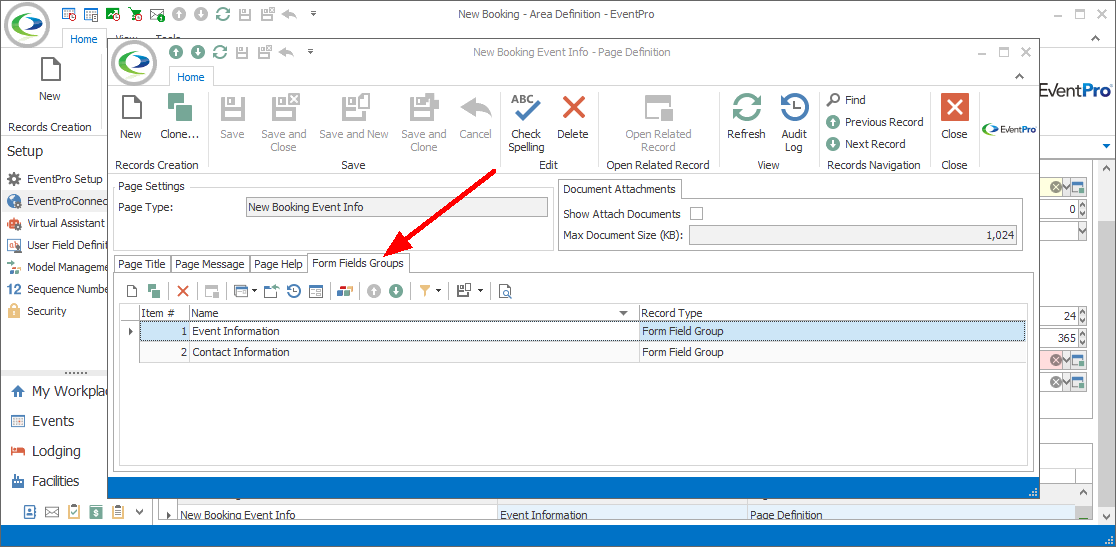
Figure 625: Form Field Groups
Typically, if applicable for the Page Type, a Page Definition will already have default Form Field Groups and Form Fields that were pulled in when the Page Definition was created.
However, if necessary, you can add, edit, or delete the Form Field Groups. Follow the instructions below.
(Remember that these instructions will not be relevant for all Pages, as not all Pages will contain Form Fields.)
Add Form Field Group
1.Open the relevant Area Definition and Page Definition edit form, and click the New button under the Form Fields Groups tab.
2.A new Form Field Group edit form appears.
3.Type in the Name of the Form Field Group. The Name of the Form Field Group will appear as a heading above the group of fields in the online form, as you can observe in the screenshot above.
4.Select a Form Field Caption Position from the drop-down list.
a.This setting determines the position of a Caption relative to the corresponding Form Field.
b.This is just the default setting for Form Fields added to this Form Field Group.
c.You will have the option to set a different caption position for individual Form Fields, if you want.
5.Select an Item # for this Form Field Group. If there are multiple Form Field Groups on the webpage, the Item # will determine the sort order of the groups, with 1 (one) starting at the top of the page.
6.There is a Form Fields selection grid at the bottom of the Form Field Group edit form.
a.When creating a Form Field Group, it is not populated automatically with default Form Fields. Form Fields need to be added manually.
b.We will learn how to add, edit, and delete Form Fields under Form Fields: Add, Edit, Delete.
7.Ensure that you Save the Form Field Group edit form, as well as the Page Definition edit form in which you created it.
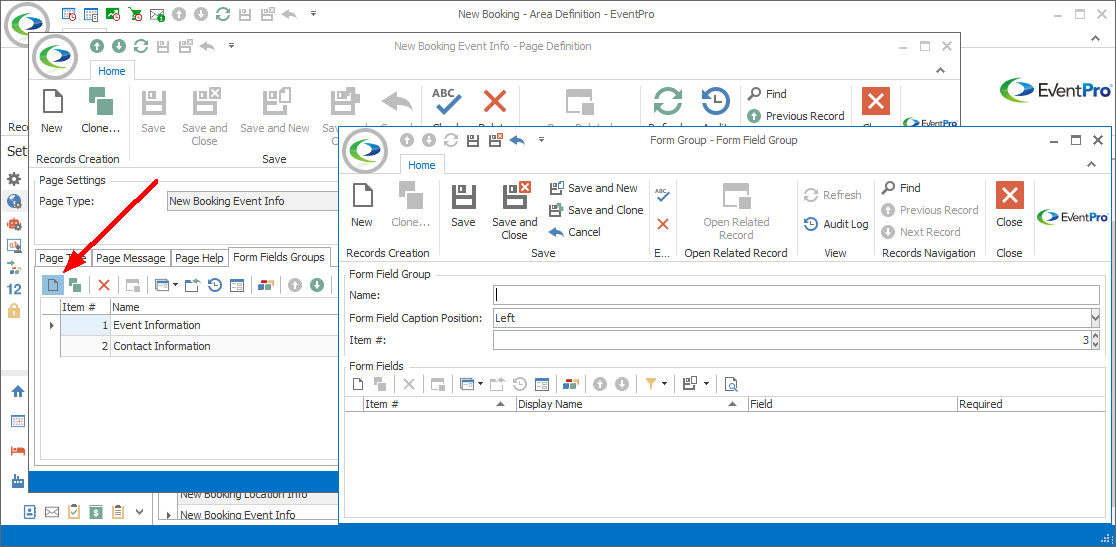
Figure 626: Adding Form Field Group
Edit Form Field Group
1.Open the relevant Area Definition and Page Definition edit form to locate the Form Field Group you want to edit.
2.Under the Form Fields Groups tab of the Page Definition edit form, double-click the Group you want to edit.
3.The corresponding Form Field Group edit form appears.
4.Make the changes you require.
5.Ensure that you Save the Form Field Group edit form, as well as the Page Definition edit form from which you opened it.
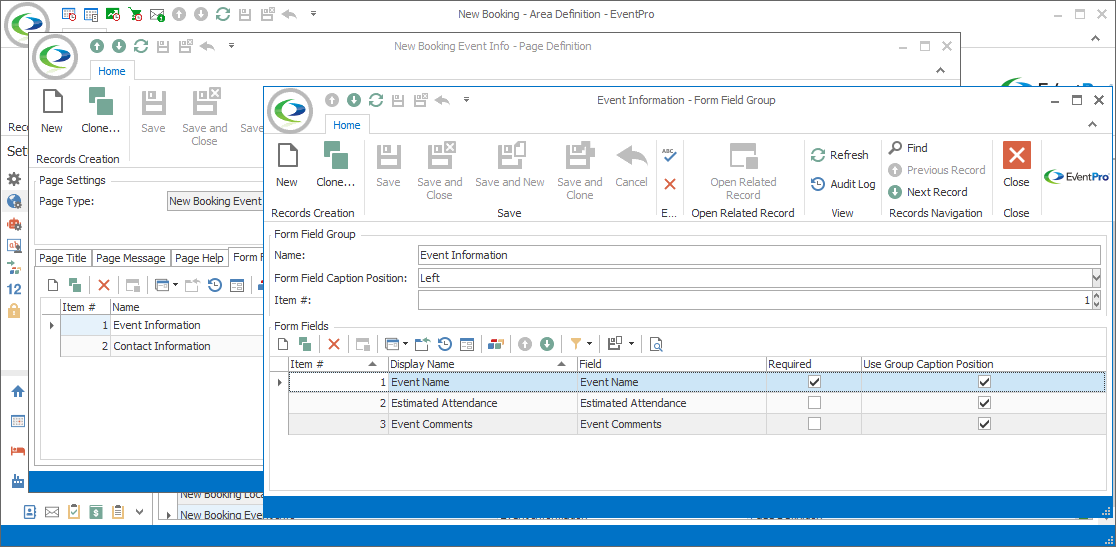
Figure 627: Editing Form Field Group
Delete Form Field Group
1.Open the relevant Area Definition and Page Definition edit form to locate the Form Field Group you want to delete.
2.Select the Form Field Group you want to delete and click the Delete button under the Form Fields Groups tab.
3.The Delete dialog will appear. Click Yes if you are certain that you want to delete the Form Field Group.
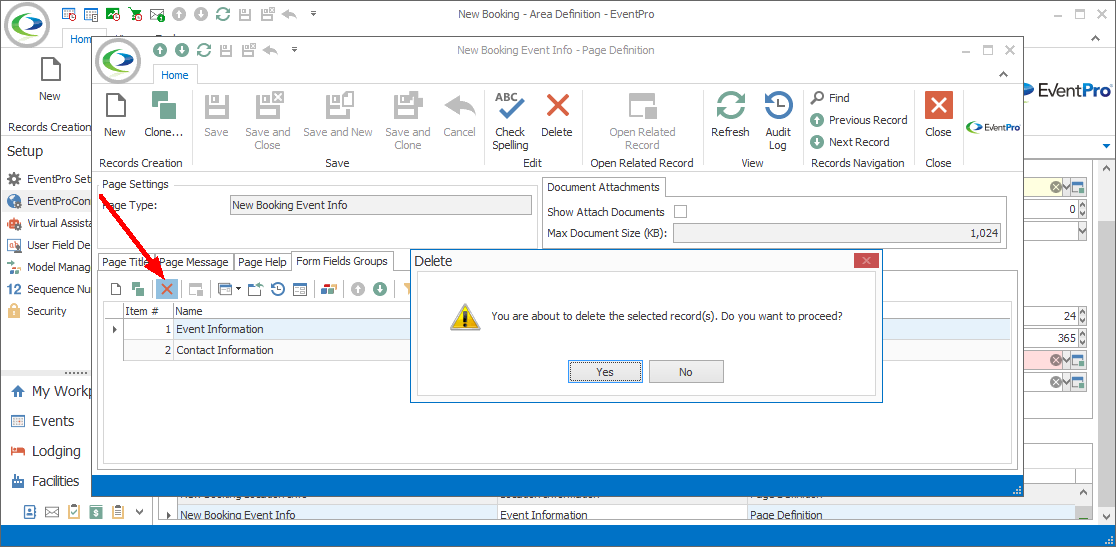
Figure 628: Deleting Form Field Group