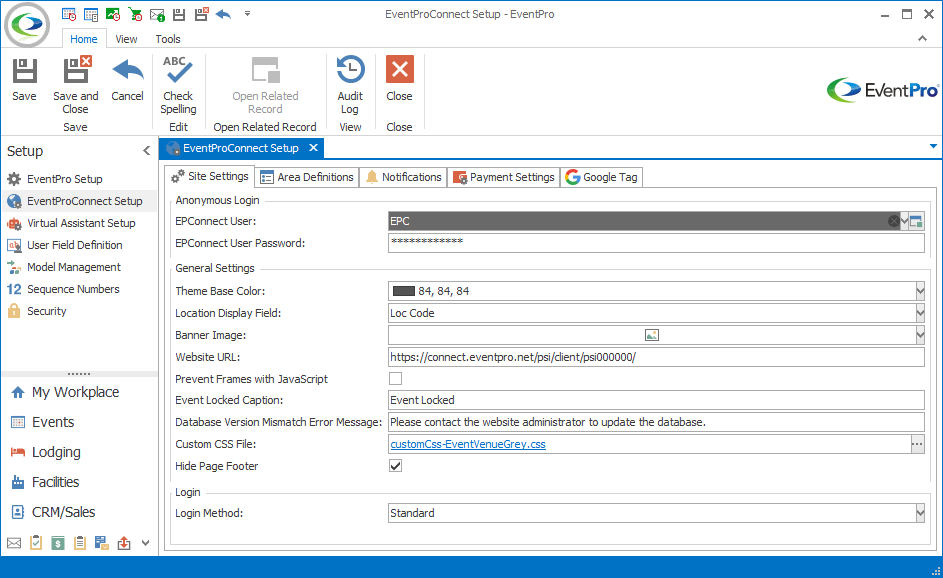
Figure 575: Setting Up EPConnect
1.Theme Base Color:
The default color you select here will be applied to the website's controls, footer, selected menu item, and login avatar, unless overwritten by the Custom CSS File below.
2.Location Display Field:
Choose whether you want the names of Venue Locations to displayed online by their Loc Code or Description.
This may or may not make a difference, depending on whether the Locations' Loc Codes (Names) are different from their Descriptions. Review how you set up Location Names and Descriptions in the topic Add Location under EventPro Setup / Facilities / Venue Information.
3.Banner Image:
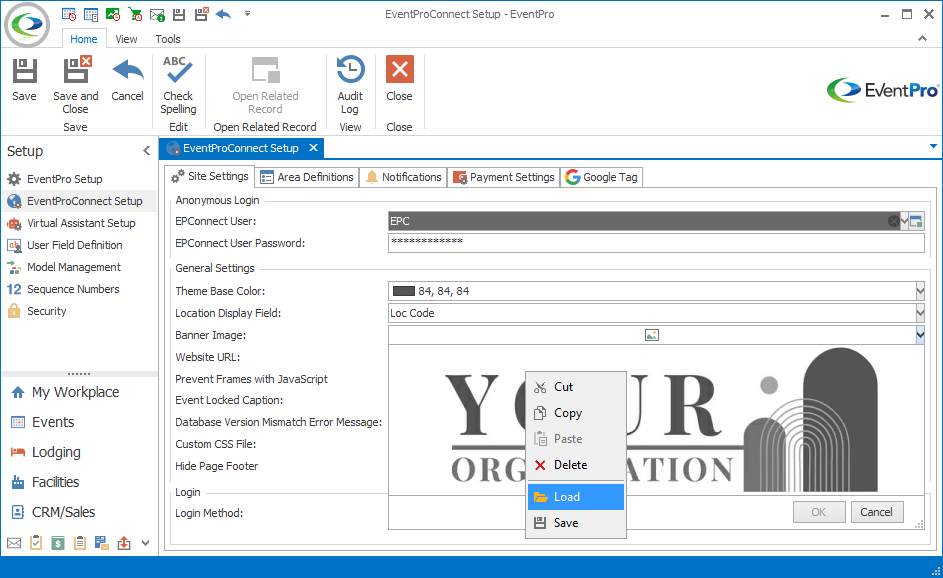
Click in the Banner Image field. The image appears in a drop-down.
If you wish to change the image, right-click on the image and select Load.
In the Open window, select the image you want to use and click Open.
Note: The ideal image size is 600x150.

Figure 576: Loading Banner Image
If applicable, enter the name of the website to which you want to direct attendees or clients.
This will be useful for communications, where you can use the Website URL merge field to direct recipients to the correct website for event registration and other activities.
5.Prevent Frames with JavaScript:
Select this checkbox if you want to use JavaScript code to prevent your website from running in frames from an external Web site, i.e. to prevent your page from being embedded in other websites.
6.Event Locked Caption:
Enter the page caption that will appear if a user attempts to access a locked event.
7.Database Version Mismatch Error Message:
Enter the page message that will appear if a database version mismatch error occurs.
If you want to use a custom CSS file for the website, click the ellipsis next to this field.
In the Open window, find and select the CSS file. Click Open.
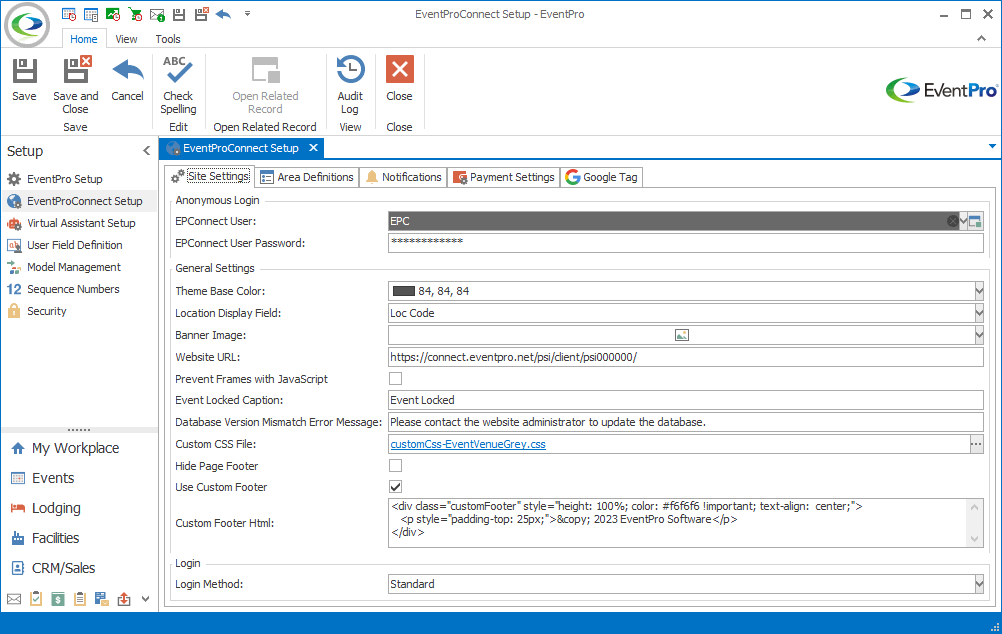
9.Hide Page Footer:
Select this checkbox if you want to hide the website footer altogether.
If you do not select this checkbox, the website will display the footer, which by default will only contain the text "Powered by EventPro", unless you define a custom footer.
Select this checkbox if you want to define a custom footer.
11.Custom Footer HTML:
If you selected the Use Custom Footer checkbox above, this field will become available.
Enter the HTML for the custom footer you want to add.

Figure 577: Defining Custom Footer
Whenever you make any changes to your Site Settings, be sure to SAVE them in order to see the changes in effect on your website.
Next topic: Login