Remember: Before you can assign Booths to Event Exhibitors, you need Booths set up for the Event.
•Earlier, in the Edit Event Window, you would have created Booths and defined Booth Rates, either copying them from an Event Template, or creating new for the Event.
•You may have also edited the Booths in the Edit Event Window, or under the Unassigned Booths tabs.
Under the Event's Exhibitors tab, locate the Exhibitor to which you want to assign a booth.
You can begin the booth assignment from a few different places.
•If the Exhibitors tab has a split screen List/Detail view, you can select the Exhibitor in the grid, and click the New button under the Booths tab to the right.
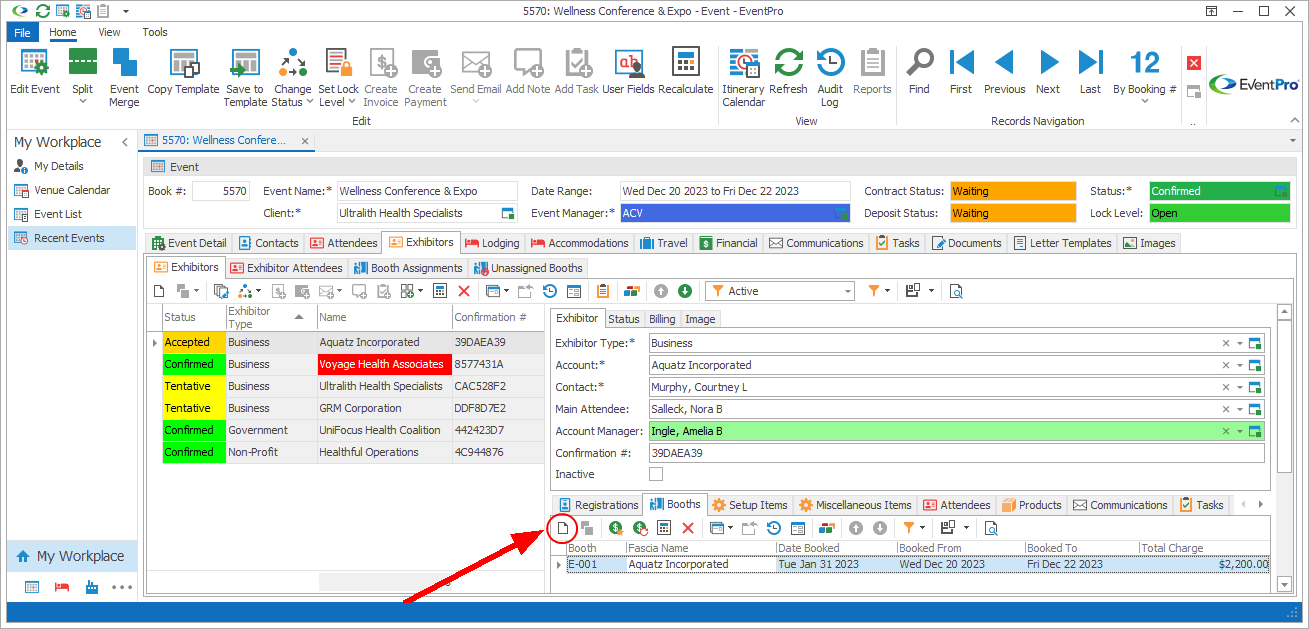
Figure 375: Adding Booth to Exhibitor from Detail View
•You can double-click the Exhibitor record in the grid to open the Event Exhibitor edit form, and click the New button under the Booths tab.
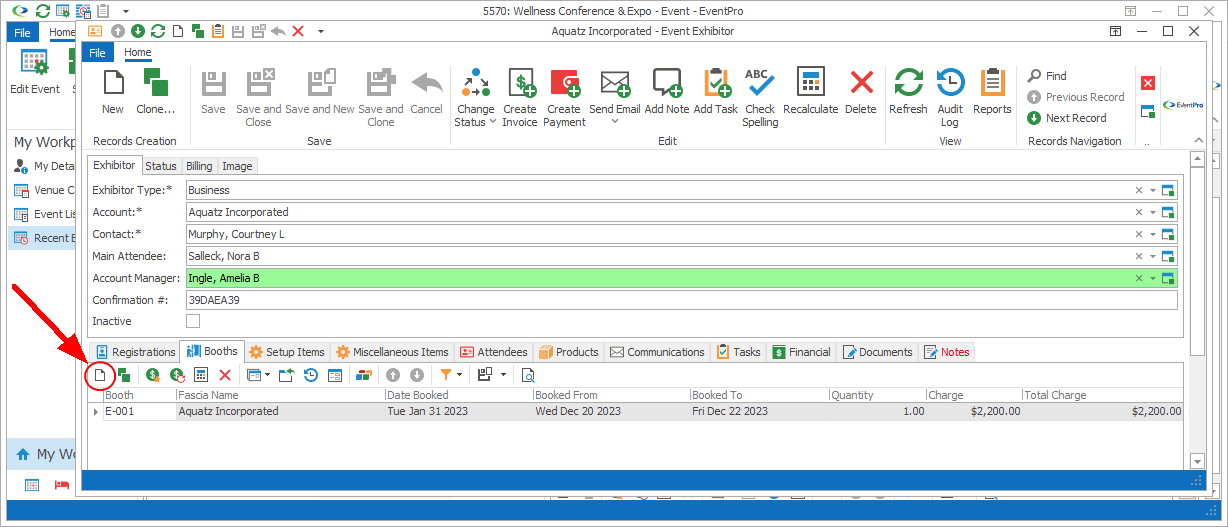
Figure 376: Adding Booth from Exhibitor Edit Form
•You can also go to the Event's Booth Assignments tab, and click the New button.
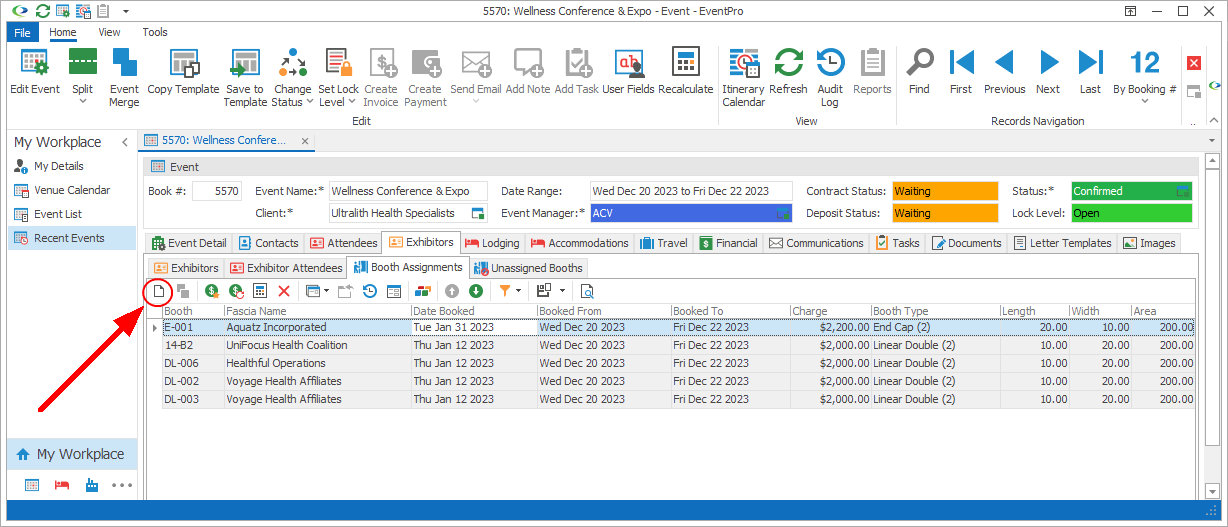
Figure 377: Adding Booth from Booth Assignments
Event Exhibitor Booth edit form
Whichever way you choose to start the record, the Event Exhibitor Booth edit form appears.
The edit form is divided into various field groups and tabs, described below.
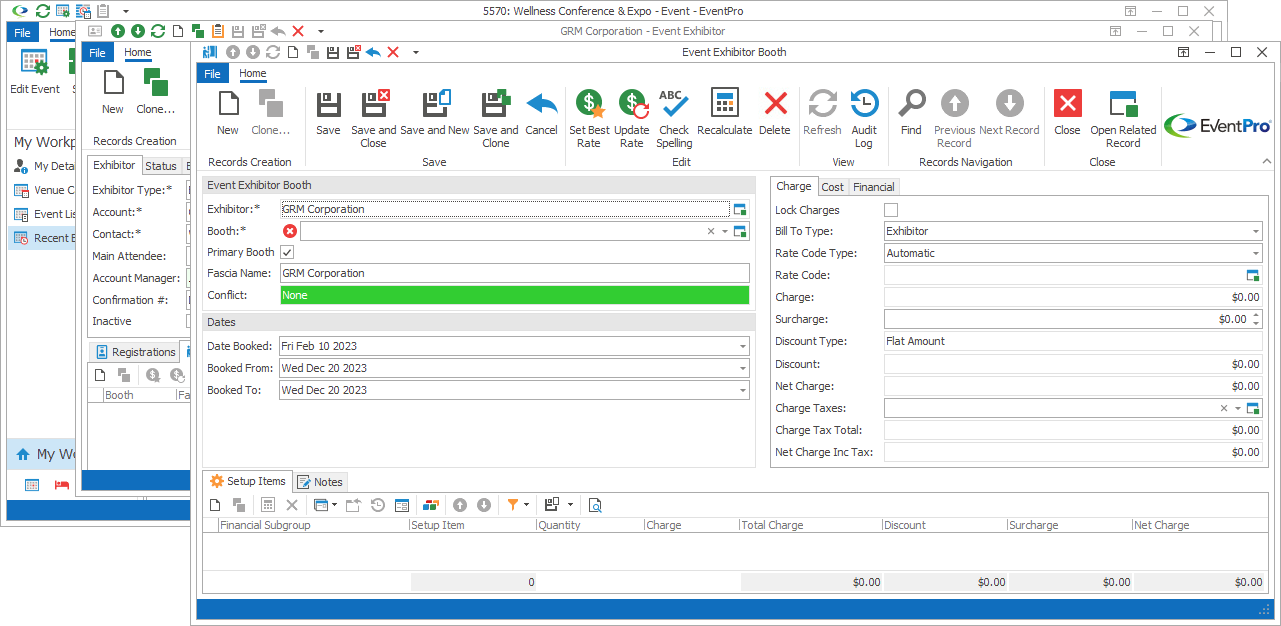
Figure 378: Adding Booth to Exhibitor
Event Exhibitor Booth
Exhibitor
If you started the booth assignment from within the Exhibitor's record, the Exhibitor's name will already be displayed.
Otherwise, select the applicable Exhibitor from the drop-down list.
Booth
Select a Booth from the drop-down.
These are the booths you created earlier under Event Management / Edit Event Window / Exhibitor Setup / Booths.
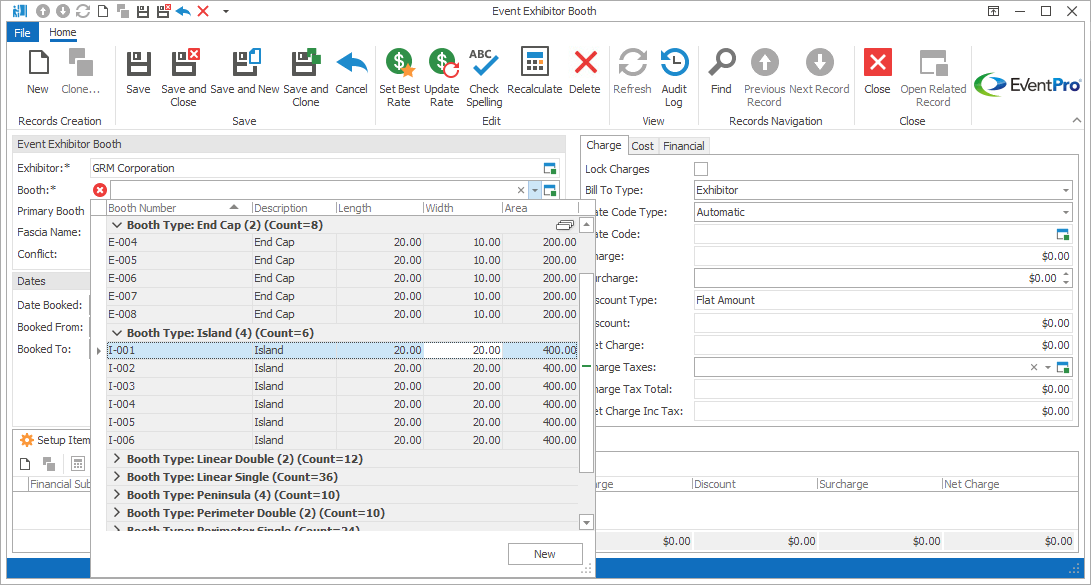
Figure 379: Selecting Booth Number
Primary Booth
If you are going to assign multiple booths to an Exhibitor, you can select this checkbox to indicate that the current booth is the Primary Booth.
Fascia Name
This will default to the Exhibitor's name, but you can edit it, if you want.
Conflict
This read-only field will indicate whether there is a scheduling conflict for this booth.
If there is a conflict, the Conflicts tab will also appear below, displaying the conflicting Exhibitor Booth Assignment.
Dates
Date Booked
This will default to the current date, although you can select a different date.
Remember, however, that changing the Date Booked could cause a different Rate Code to apply, if Rate Codes are based on "Days Before" the event. (For example, review Booth Rates set up in the Edit Event window.)
Booked From and Booked To
If this is a multi-day event, you can assign this Booth for part or all of the event.
Select the Booked From and Booked To dates from the drop-down calendar.
In the drop-down calendar, the event dates will be bold, while the other non-event dates will be gray.
Charge
Lock Charges
Once you have the charges set for this booth assignment, if you want to lock them so that they cannot be edited, select the Lock Charges checkbox.
Bill To Type
If you don't want to use the default Bill To Type, you can choose a different option.
Rate Code Type, Rate Code, Charge
The Rate Code Type will default to Automatic, but you can also select Default, Manual Rate, or Custom.
The Rate Code Type will determine what options you have in the Rate Code and Charge fields.
Automatic
If there is an applicable auto-lookup Booth Rate, i.e. the assignment circumstances meet the rate criteria, that Rate Code will be applied automatically and its Charge will default in.
You can review how Booth Rates were set up under Edit Event Window > Exhibitor Setup > Booth Rates. Remember that you can set criteria based on Days Before, Exhibitor Types, Booth Types, etc.
If you select Automatic, but there are no applicable auto-lookup rates, the Rate Code will be blank, and the Charge will be set to the Default rate, which is the default Charge set up on the Booth in Edit Event Window > Exhibitor Setup > Booths.
Default
If you select Default, the Rate Code will remain blank, and the Charge will be set to the Default rate, which is the default Charge set up on the Booth in Edit Event Window > Exhibitor Setup > Booths.
Manual Rate
Select Manual Rate if you want to choose one of the other Rates from Edit Event Window > Exhibitor Setup > Booth Rates, even if the auto-lookup criteria of those other Rates have not been met, or if the Rates do not have auto-lookup criteria.
Select a Rate Code from the drop-down below, and its Charge will default in.
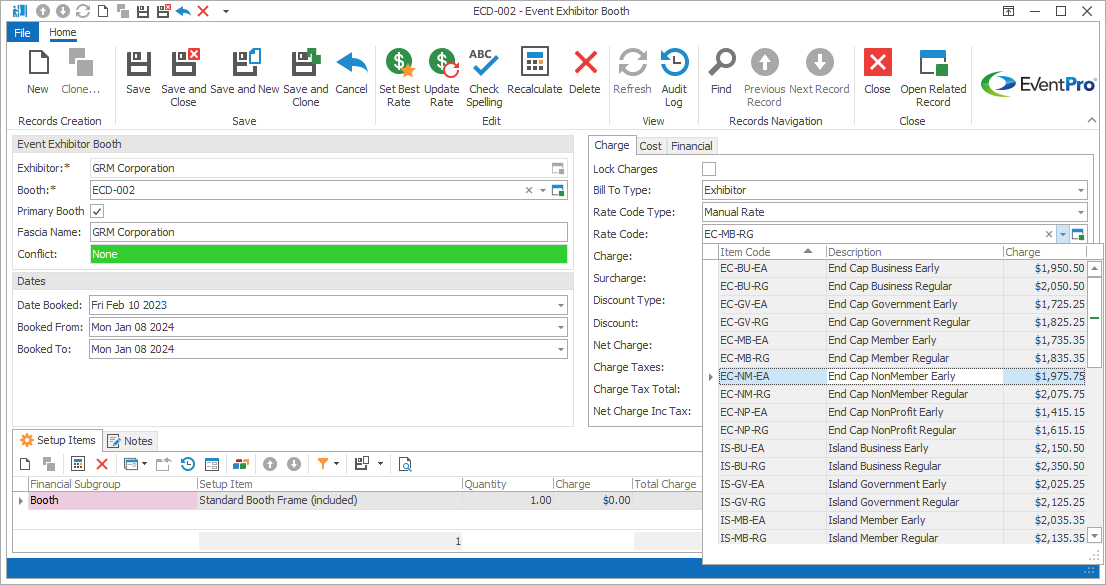
Figure 380: Selecting Manual Rate
Custom
Select Custom if you want to enter a completely new charge for this Booth. The Rate Code field will remain blank.
Type in the Charge.
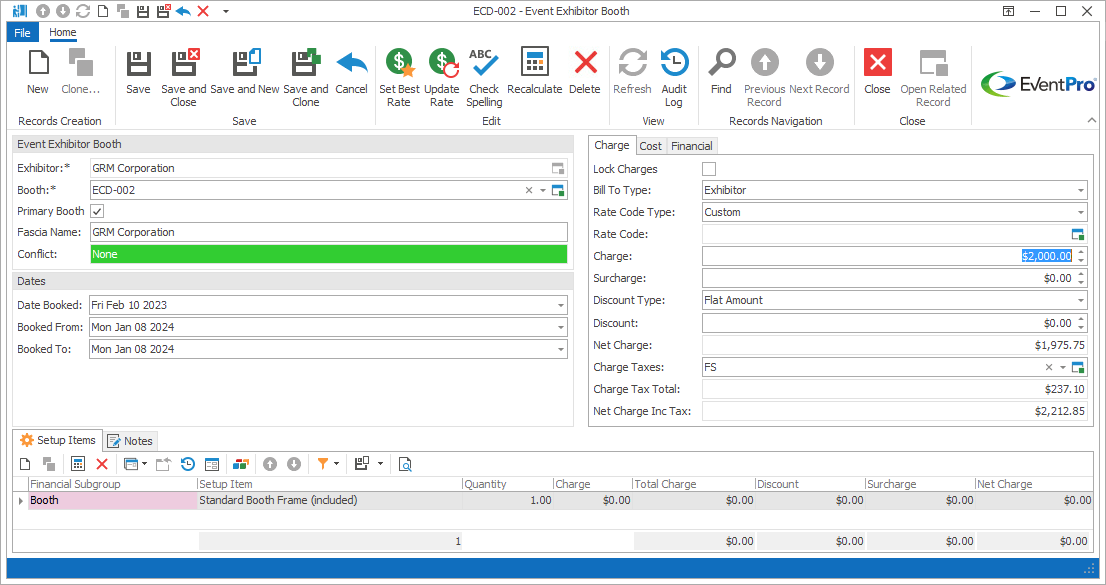
Figure 381: Entering Custom Charge
Cost
If applicable, you can enter Cost information under this tab.
Note that you will only be able to use the Markup fields to set the Charge if the Rate Code Type is set to Custom.
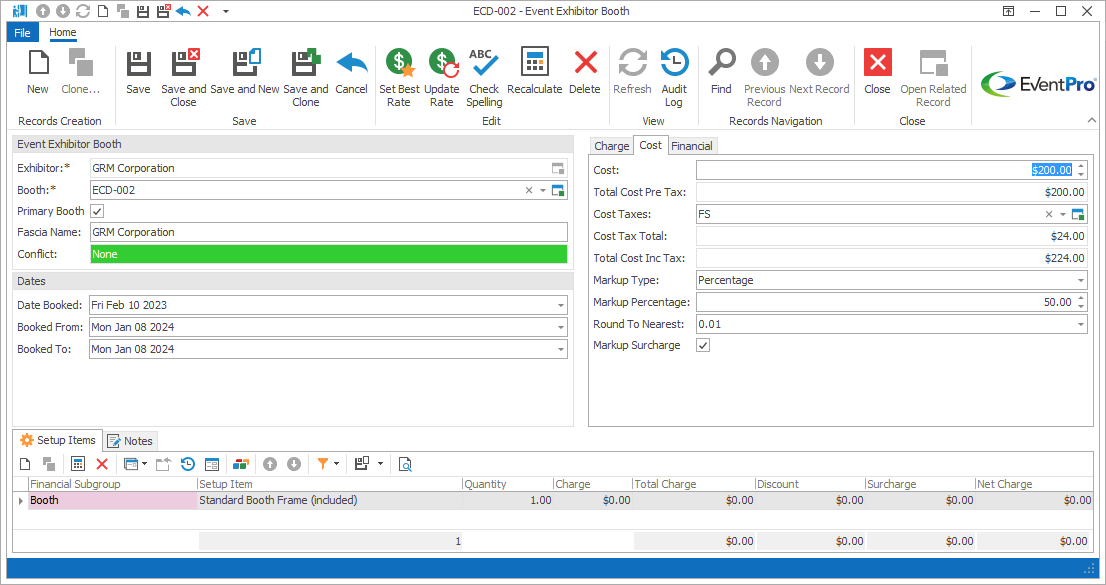
Figure 382: Adjusting Booth Cost
Financial
If you don't want to use the defaults under the Financial tab, you can choose different options from the drop-down lists:
•Cost Center
•Financial Category
•Department Code
•Income Budget Item
•Income Budget Types
•Expense Budget Item
•Expense Budget Types
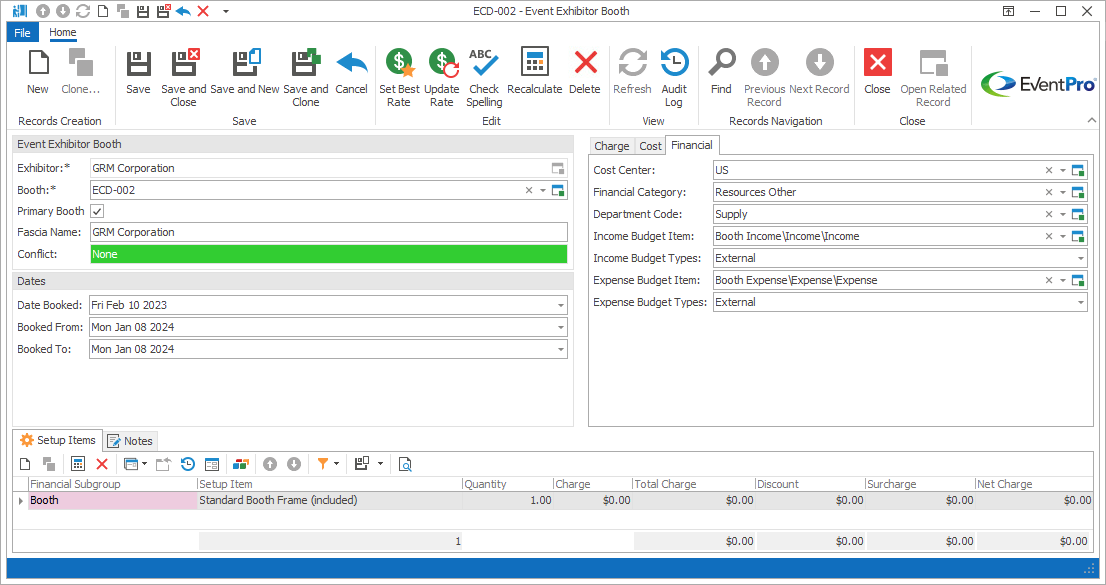
Figure 383: Booth Financial Tab
Setup Items
If there were Setup Items added to the Booth in the Edit Event Window and/or the Unassigned Booths tab, those Setup Items will be pulled through to this Setup Items tab.
You can also add, edit and/or delete Setup Items here for the purposes of this booth assignment.
•To edit a Setup Item, double-click the record in the grid under the Setup Items tab.
•To add a Setup Item, click the New button under the Setup Items tab.
Booth Setup Item edit form
The Event Exhibitor Booth Setup Item edit form opens.
Select the Setup Item from the drop-down list. The drop-down list is populated by the Setup Items created under EventPro Setup > Resources > Setup.
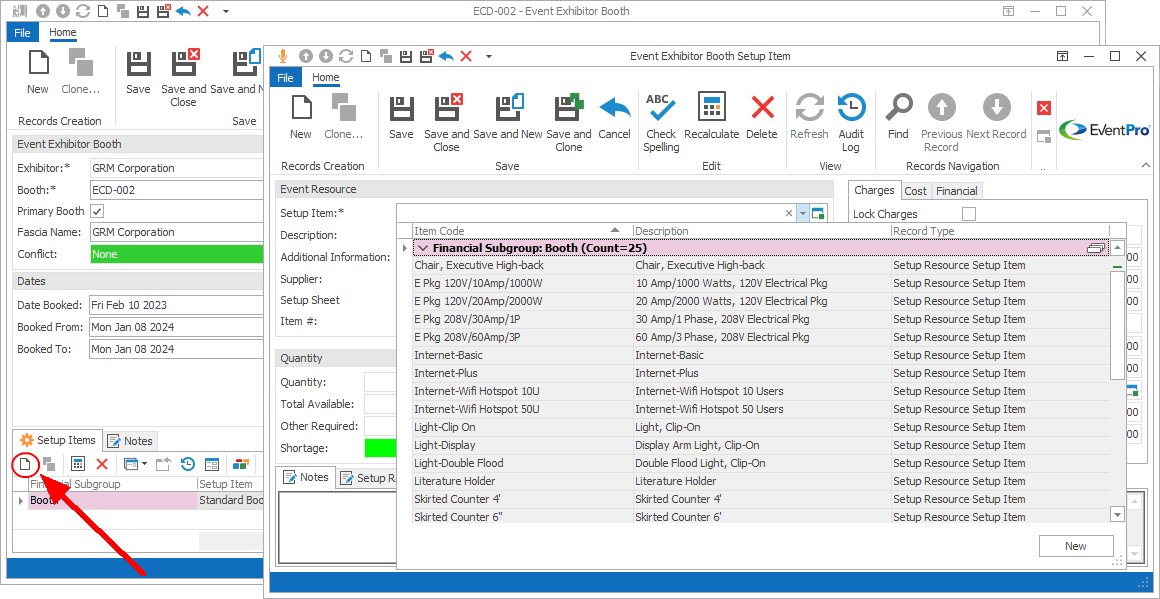
Figure 384: Adding Setup Item to Booth
Much of the information will default into the fields and tabs below from the Setup Item record in Resources Setup, but you can edit it as you require.
For example, you may want to change the Item #, Quantity, Discount, etc.
You may also need to adjust the information under the Financial tab - e.g. Financial Category, Department Code, Income Budget, and Expense Budget - if you don't want to use the defaults.
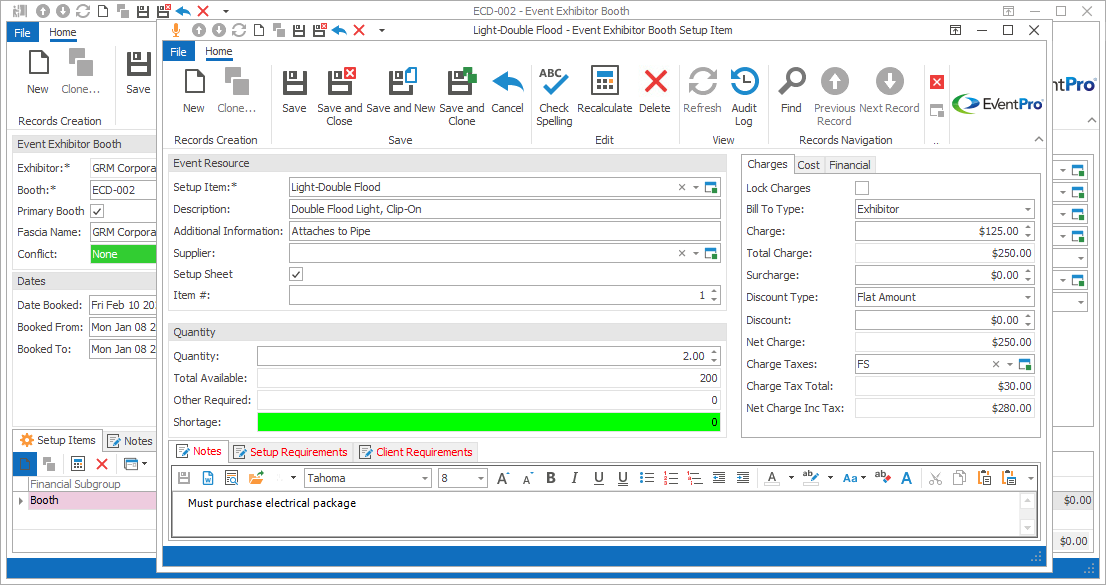
Figure 385: Adjusting Booth Item Details
The Notes and Setup Requirements will be pulled from the Setup Item's record in Resources Setup.
However, the Client Requirements tab is unique to this edit form. You can add any notes you require for this item when assigned to this specific Exhibitor's Booth.
When you are done with the Event Exhibitor Booth Setup Item edit form, click Save and Close. The item will be added to the Booth's Setup Items tab.
Notes
If there were General Notes added to the Booth in the Edit Event Window and/or the Unassigned Booths tab, those General Notes will be pulled through to this Notes tab.
You can add and edit Notes here, as require. You can review the functionality of the Notes tab under Common Procedures > Notes & Comments.
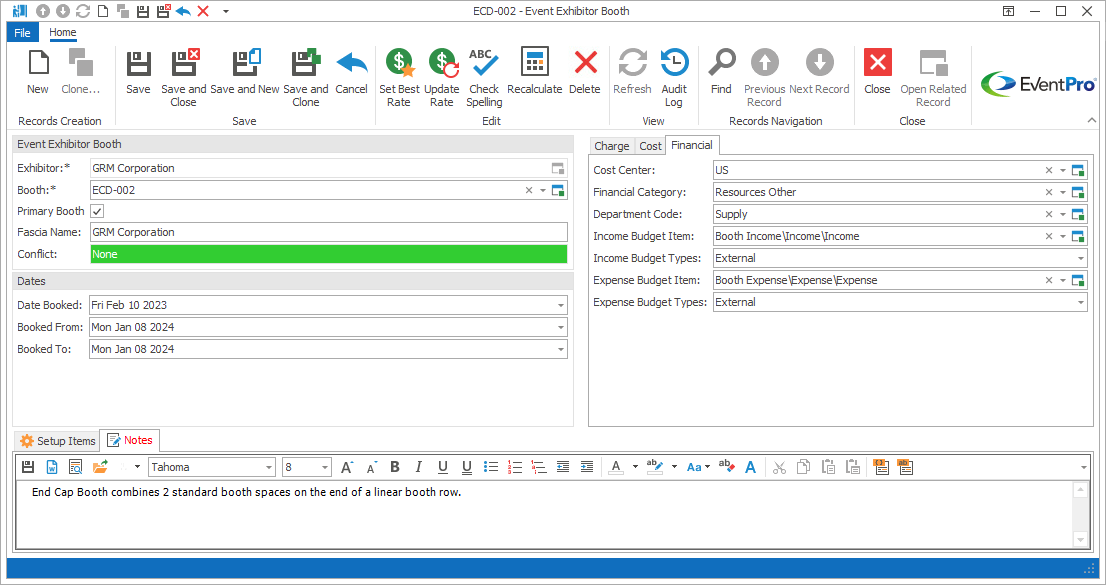
Figure 386: Adding Notes to Booth
When you are done with the Event Exhibitor Booth edit form, click Save and Close.