1.Import Options:
a.Import Exhibitors From: You have selected File.
b.Import File: Click the ellipsis next to the Import File field.
i.The Open window appears.
ii.Navigate to the folder that contains the import file you want to use.
iii.Select the file and click Open.
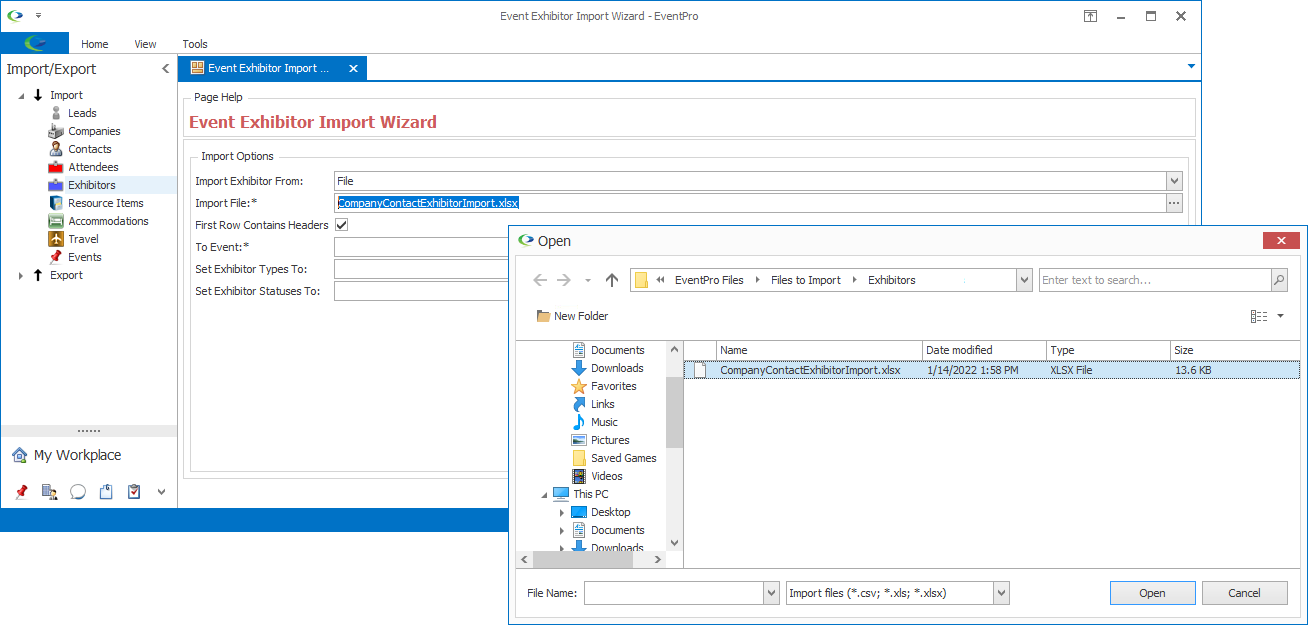
c.First Row Contains Headers: If the import file contains headers (i.e. Column Titles) in the first row, select this checkbox. If the first row of the file starts directly with exhibitor data, leave the First Row Contains Headers checkbox unselected.
d.To Event: From the drop-down, select the Event into which you are importing Exhibitors.
e.Set Exhibitor Types To:
i.From the drop-down, choose the default Exhibitor Type to which all the imported Exhibitors will be set initially. You will be able to edit individual Exhibitors later.
ii.The drop-down is populated by the Exhibitor Types from the selected "To" Event. (Review Event Management > Edit Event Window > Exhibitor Setup > Exhibitor Types.)
iii.If you don't have any Exhibitor Types set up in the "To" Event, this drop-down will be blank. The "To" Event needs at least one Event Setup Exhibitor Type in order to import exhibitors.
f.Set Exhibitor Statuses To:
i.From the drop-down, choose the default Exhibitor Status to which all the imported Exhibitors will be set initially. You will be able to edit individual Exhibitors later.
ii.The drop-down is populated by the Statuses created under EventPro Setup > Exhibitors > Exhibitor Statuses.
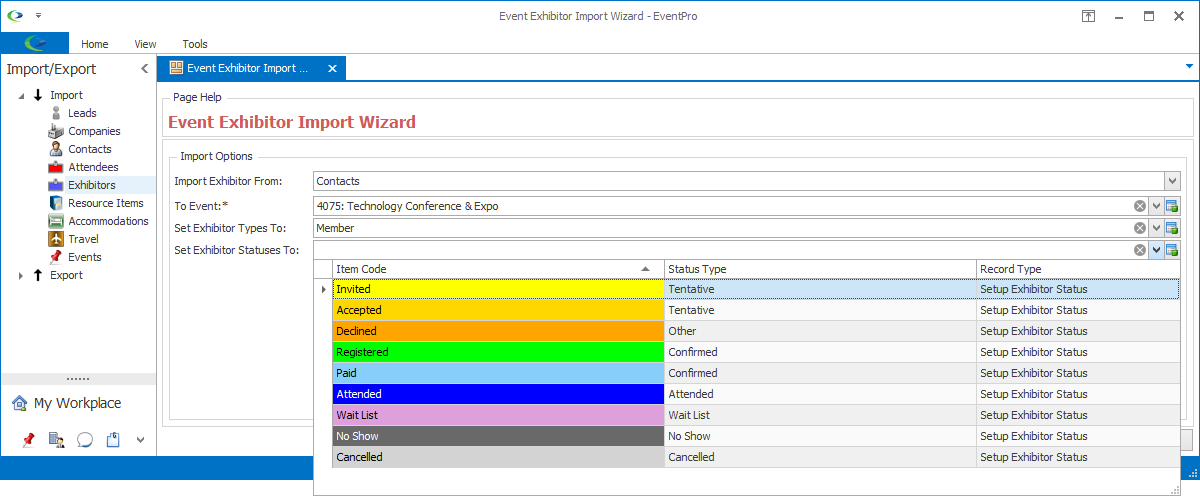
g.When you are done adjusting import options, click Next.
2.Import Template & Imported Data:
a.On this page, the Exhibitor information from the import file will appear in the main selection grid, Imported Data.
b.If the first row of the import file contained headers, those headers will appear at the top of the columns in the Imported Data grid. If the import file did not have first-row headers, the columns will be titled Column 1, Column 2, etc.
c.Field Mappings:
i.To the right of the Imported Data grid, there is a Field Mappings tab, where you will assign the columns of data to fields in EventPro.
ii.The headers from Imported Data appear under Import Field Name - either the first-row header names from the import file, or Column 1, Column 2, etc.
iii.For each Import Field you want imported, click the drop-down arrow to scroll through the available Mapped Member fields, and select the EventPro field into which that imported data should go.
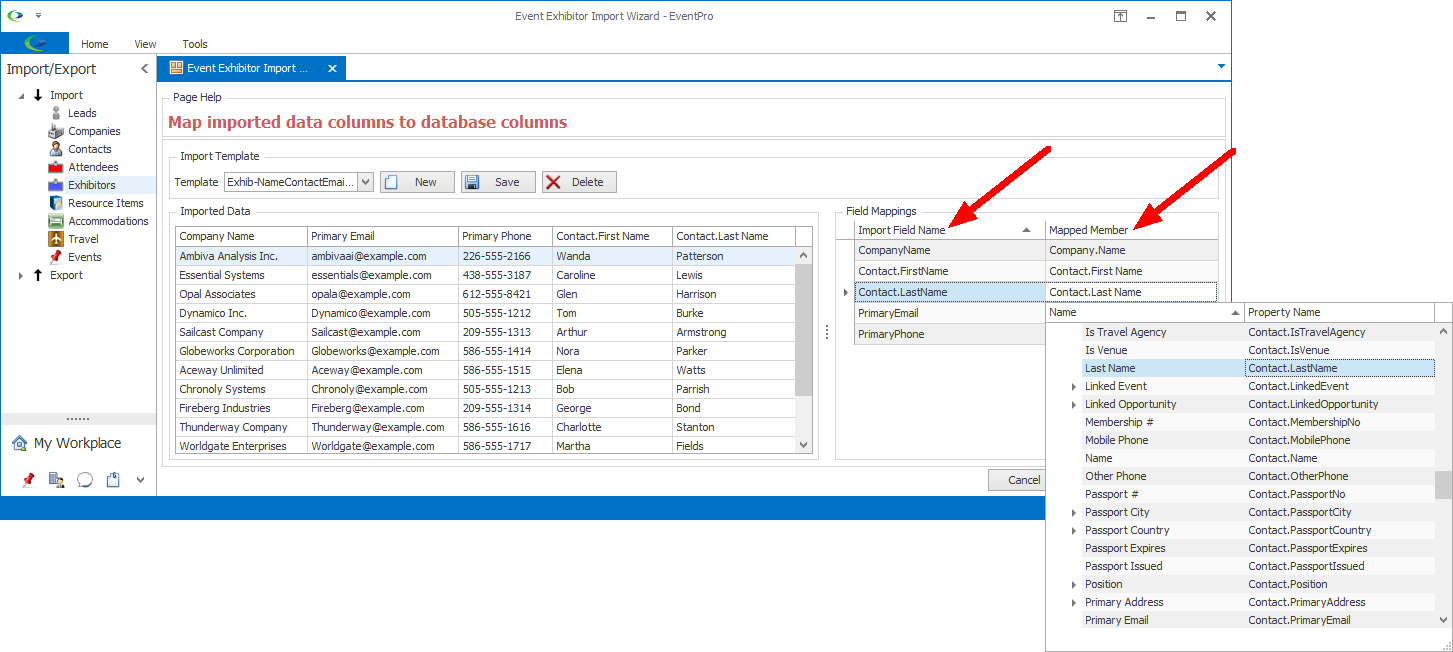
d.Mapping Requirements:
i.At minimum, each Exhibitor needs to be assigned an Account (Company or Contact) and Contact.
ii.This means that the mapped fields must reference Company.Name and Contact.Name (Last Name, First Name format) or Contact.LastName and Contact.FirstName (and Contact.Initial, if applicable, particularly if you want the imported Contacts to match up with existing CRM Contacts that have a First Name, Last Name, and Initial).
iii.When the import sees a Company. mapping or Contact. mapping, it will create the Company/Contact record(s) and assign them to the Exhibitor.
iv.At the finalizing stage, the import will check to see if the Company and/or Contact are duplicates of an existing record in CRM. If the Company and/or Contact already exist in CRM, the import will re-assign the Exhibitor to those existing Company/Contact records. If the import file contains any new information for the existing Company/Contact, the newly imported information will overwrite the existing information.
e.Import Template:
i.If you have imported Exhibitor data before, you may already have an Import Template in which Import Fields are mapped to EventPro Fields.
ii.If so, you can select a Template from the drop-down, and the fields will be mapped as specified in the saved template.
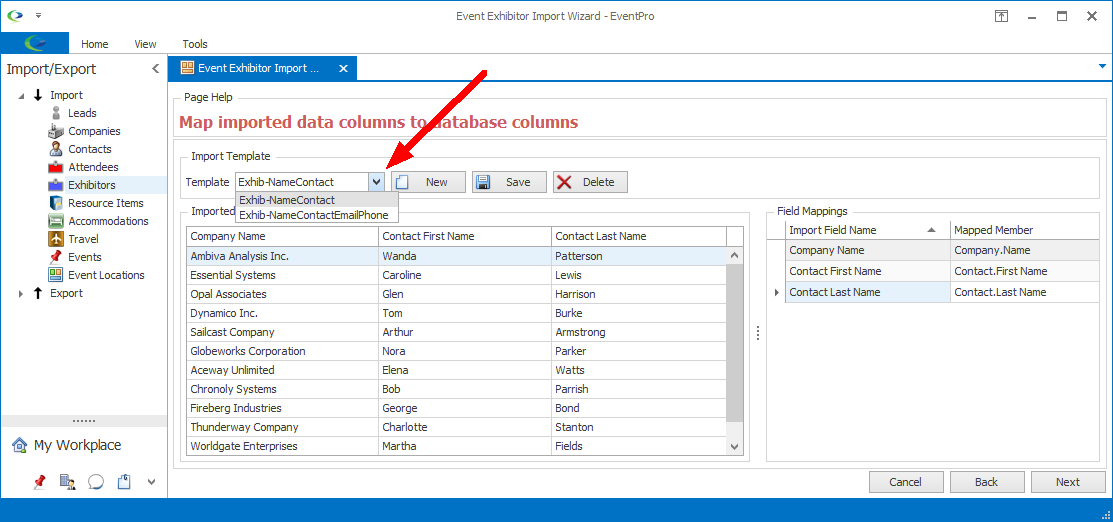
iii.If you make any changes under the Field Mappings tab, and you want to save those edits to the selected template, click Save next to the Template field.
iv.To create an Import Template, click New. In the New Template edit form, enter a Template Name, and click OK. The new template name will appear in the Template field.
v.Map the fields to your specifications and click Save. Now, your Import Template is saved in the drop-down list for future use.
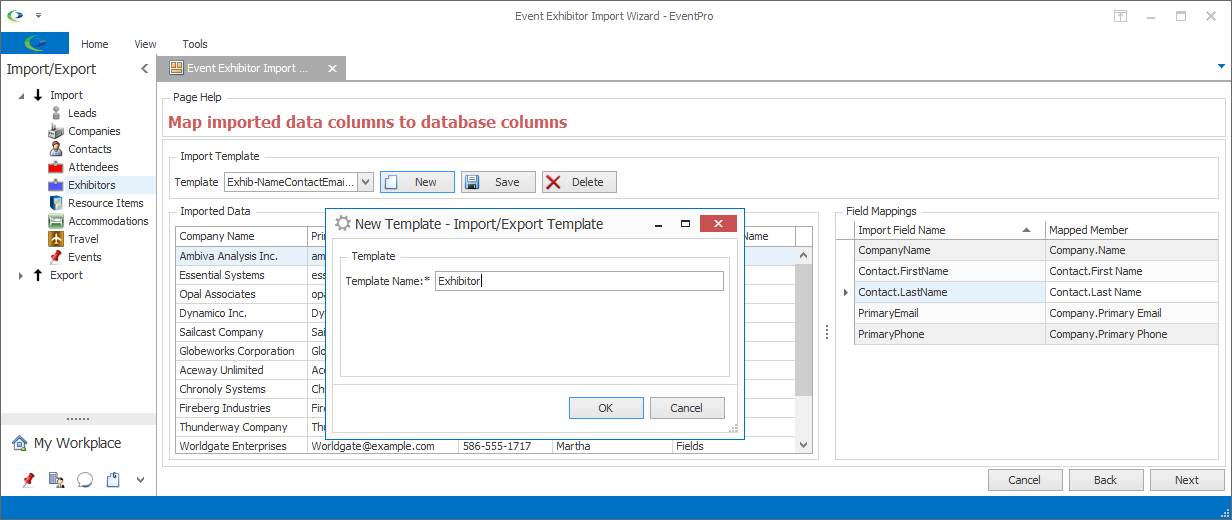
vi.If you want to delete one of the Import Templates, select it in the Template drop-down, and click Delete.
f.When you are done mapping the fields to your specifications, click Next.
3.Import Summary:
a.On this page, you can review the Exhibitors that are about to be imported into the Event.
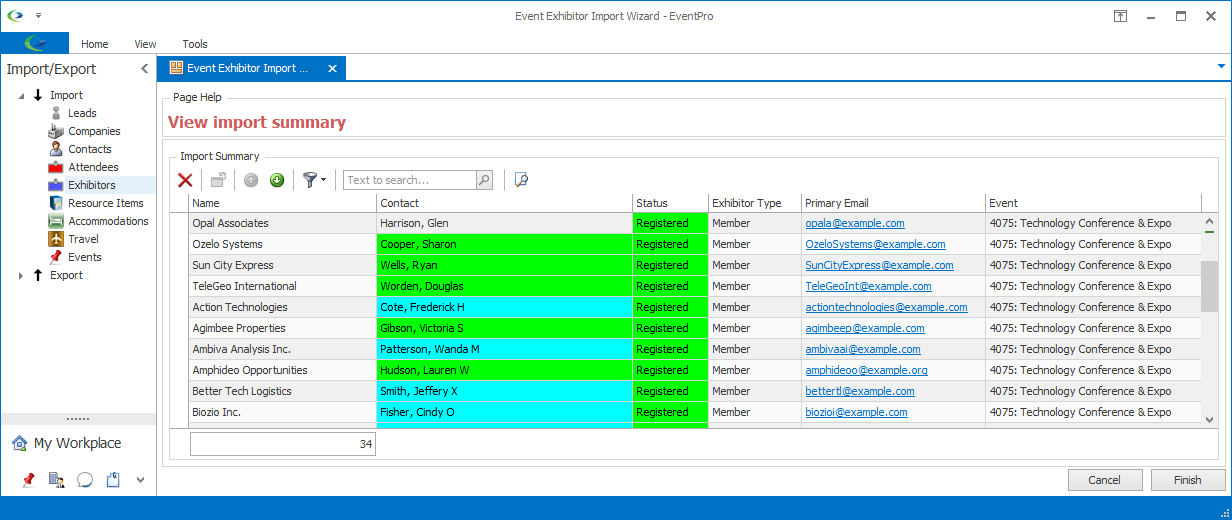
b.If necessary, you can Delete Exhibitors you don't want to import from this page. Select an Exhibitor or multi-select the Exhibitors you want to delete. Click the Delete button ![]() above the selection grid. The Delete dialog asks if you want to proceed with deleting the selected record(s). Click Yes to continue.
above the selection grid. The Delete dialog asks if you want to proceed with deleting the selected record(s). Click Yes to continue.
c.When you are done making adjustments in the Import Summary page, click Finish.
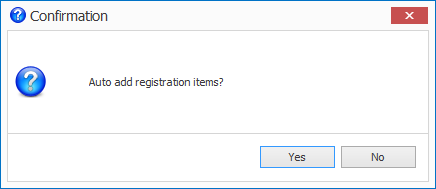
4.If you have Auto-Add Exhibitor Registrations set up for the event (review Event Management > Edit Event Window > Exhibitor Registrations), the Confirmation dialog will ask if you want to Auto Add Registration Items.
a.Click Yes or No.
b.The import will proceed whether you click Yes or No, but if you click Yes, the Auto-Add Registrations (if they exist) will be added to any applicable Exhibitors (depending on Exhibitor Type).
5.The imported Exhibitors will appear in the Exhibitors tab of the selected "To" Event. If you don't see the newly imported Exhibitors in the grid immediately, click the Refresh  button to refresh the screen.