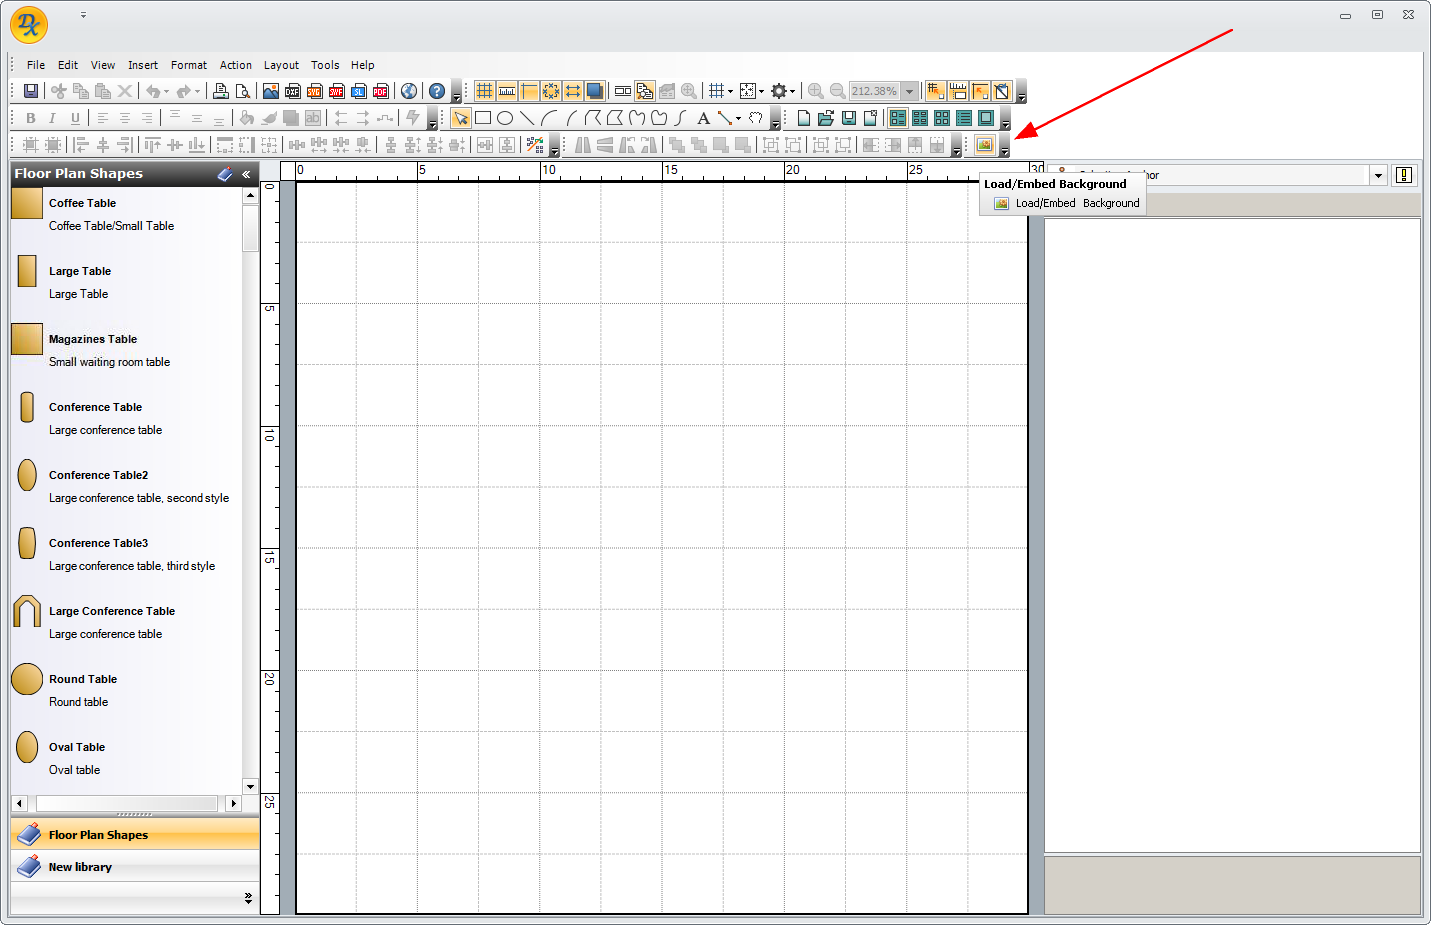
1.We will begin by adding your scanned or saved image of the room's layout.
When preparing the images of your rooms, please note that all dimensions in the Floor Plan Designer are measured by Foot.
Click the Load/Embed Background button in the top command ribbon. 
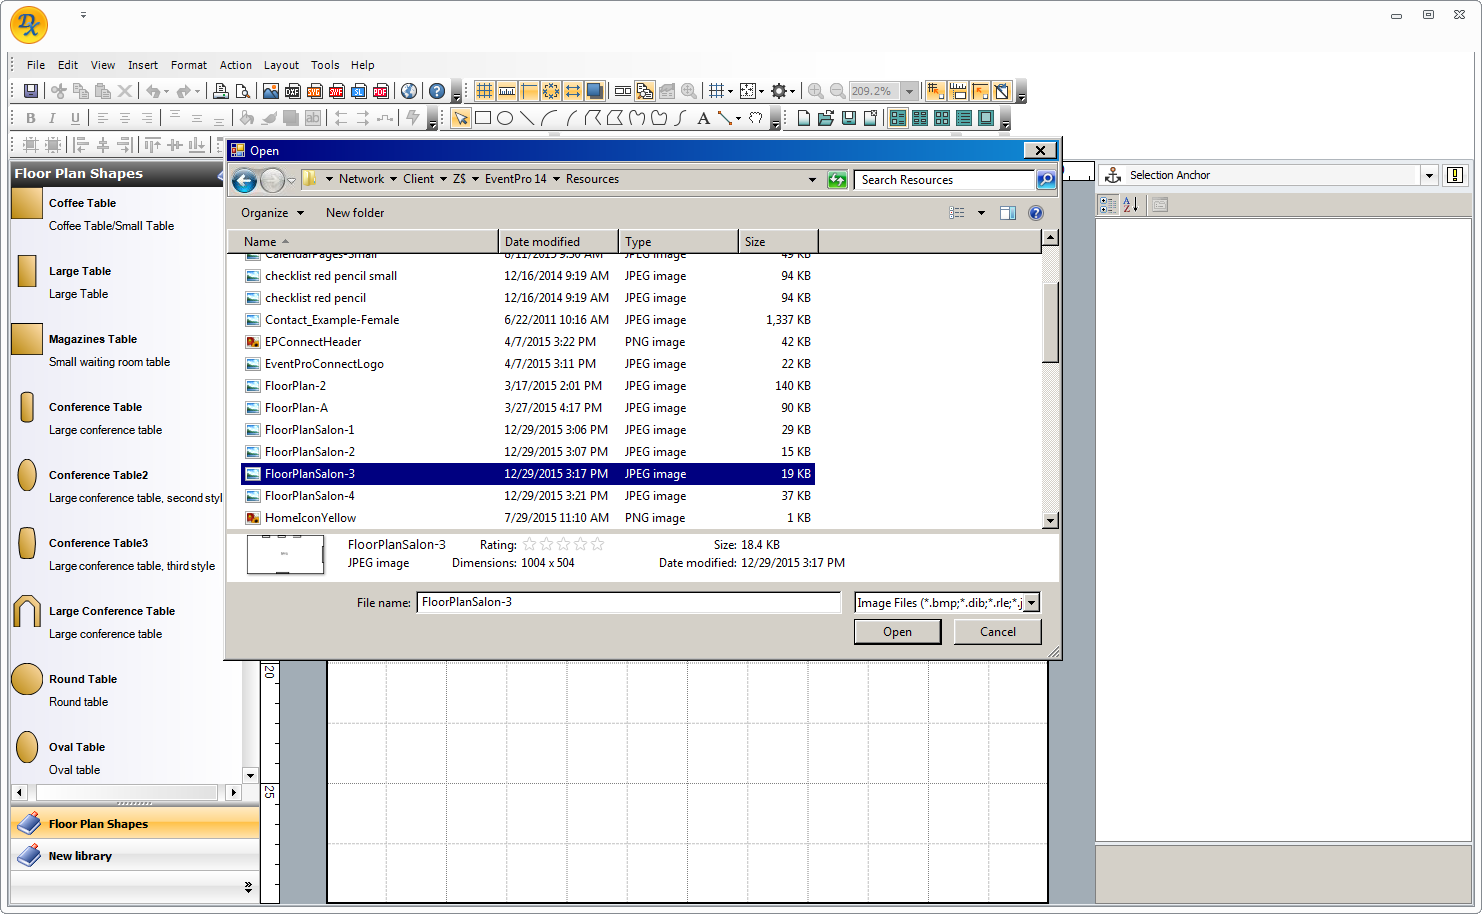
2.In the Open window, select the image you want to use and click Open.
3.The image will be pulled into the Floor Plan designer, but you will notice that the image will not be proportioned correctly at first (unless the image happens to be a perfect square).
In the next step, you will learn to scale the image.
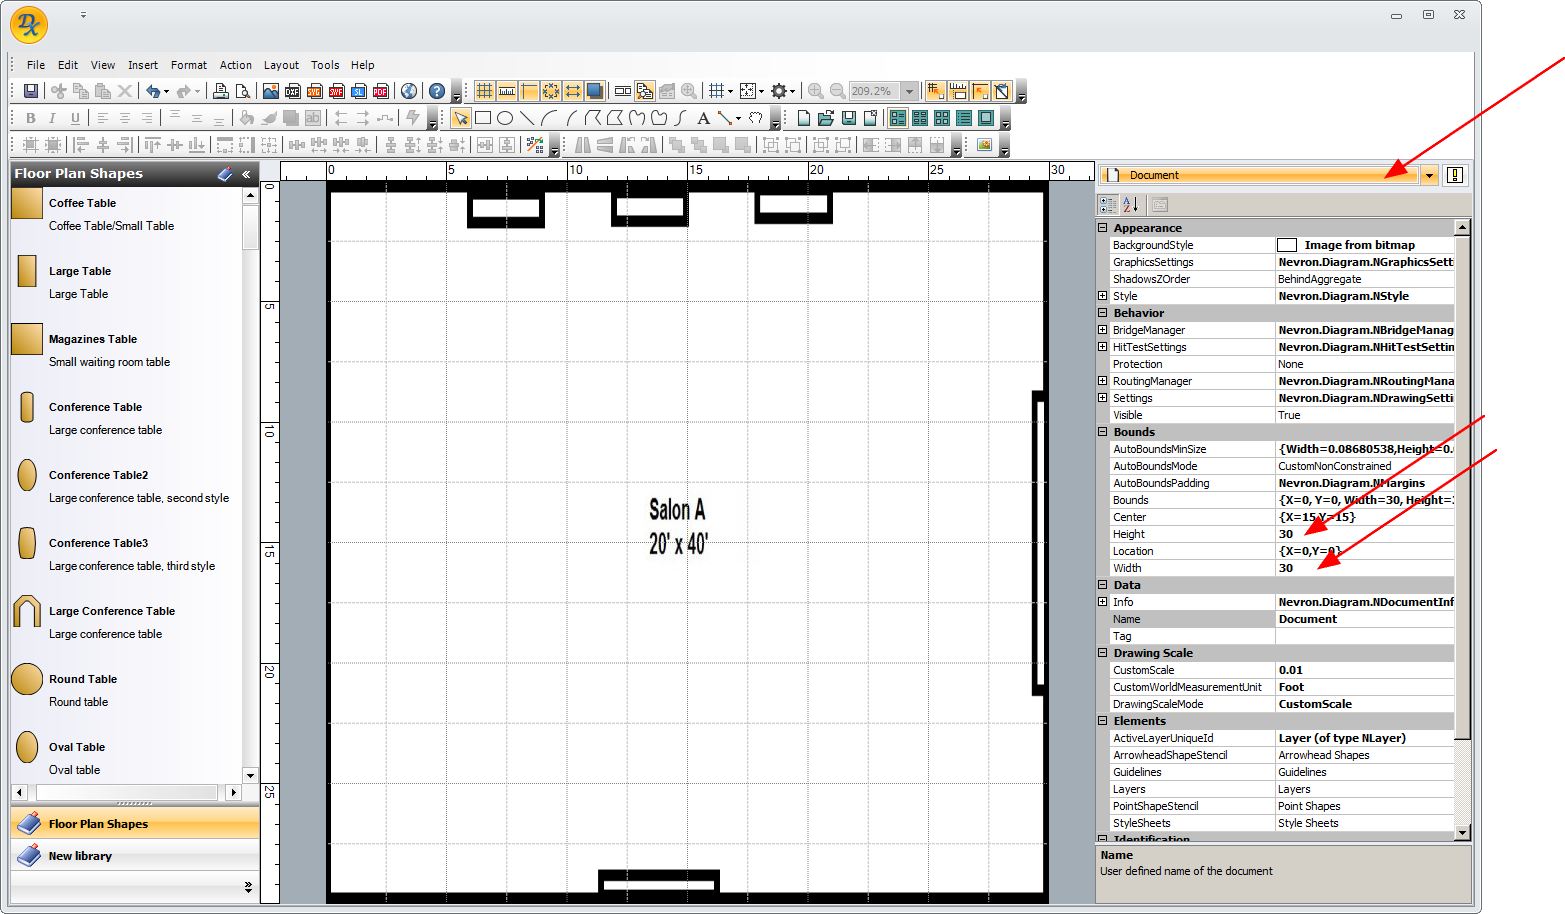
4.From the drop-down list at the top of the right-hand panel, select Document.
Under the section titled "Bounds", enter the Height and Width of the image in Feet. DO NOT CHANGE any other fields in the right-hand panel, other than the Height and Width.
IMPORTANT: You need to enter the dimensions as measured by the boundaries of the image.
a.In this example below, the room boundaries extend all the way to the edges of the image, so you can enter the Height as 20' and the Width as 40'.
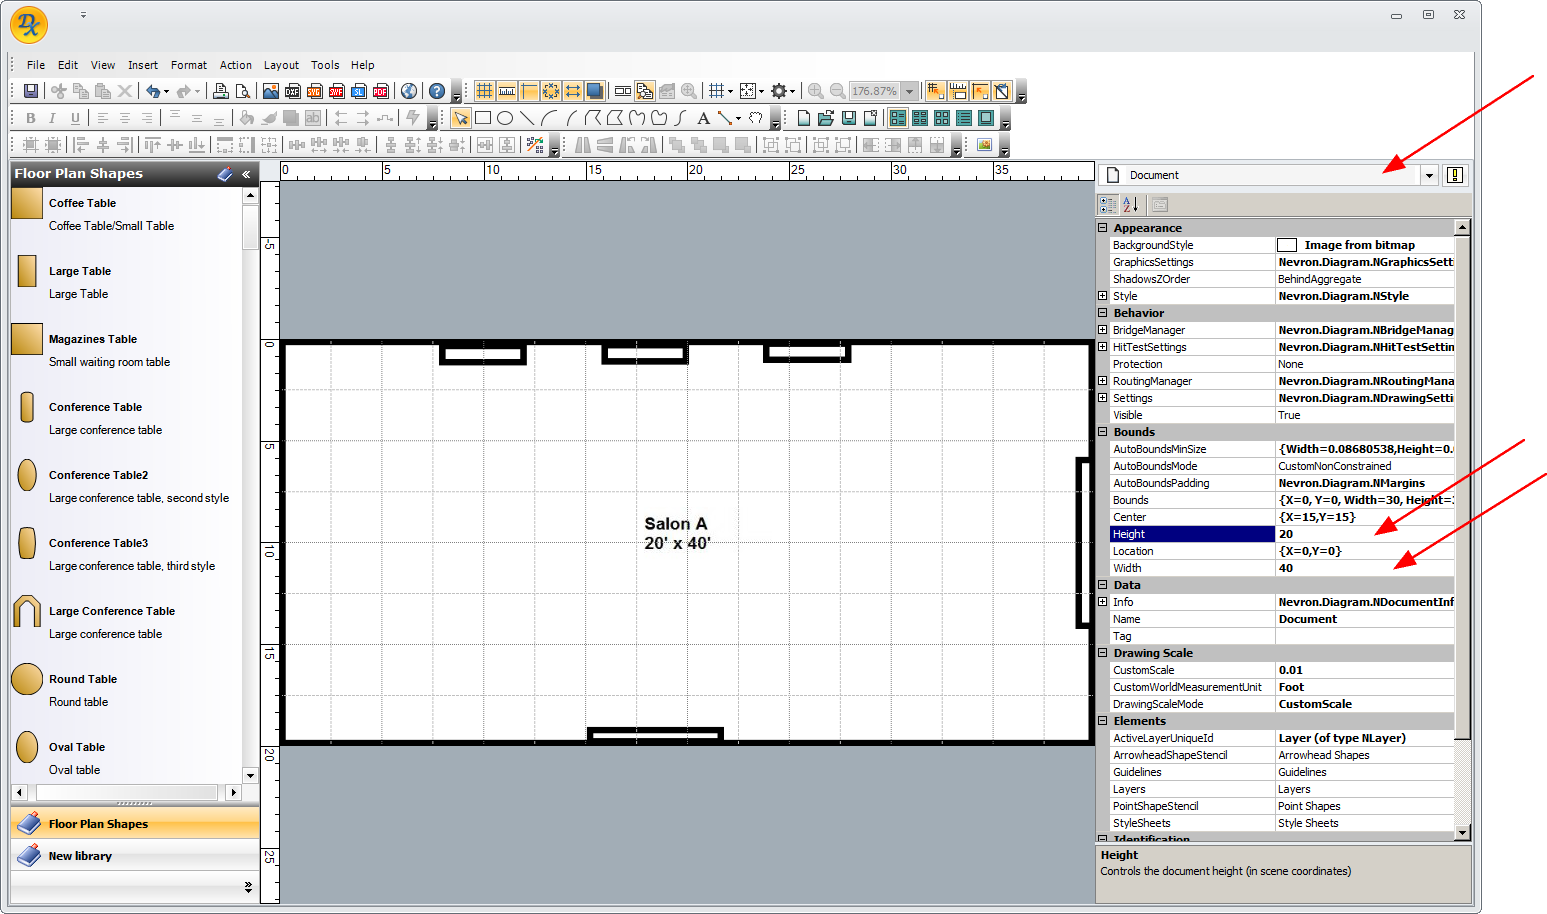
b.However, if you load an image in which the room boundaries are smaller than the image edges, you cannot use the room dimensions alone.
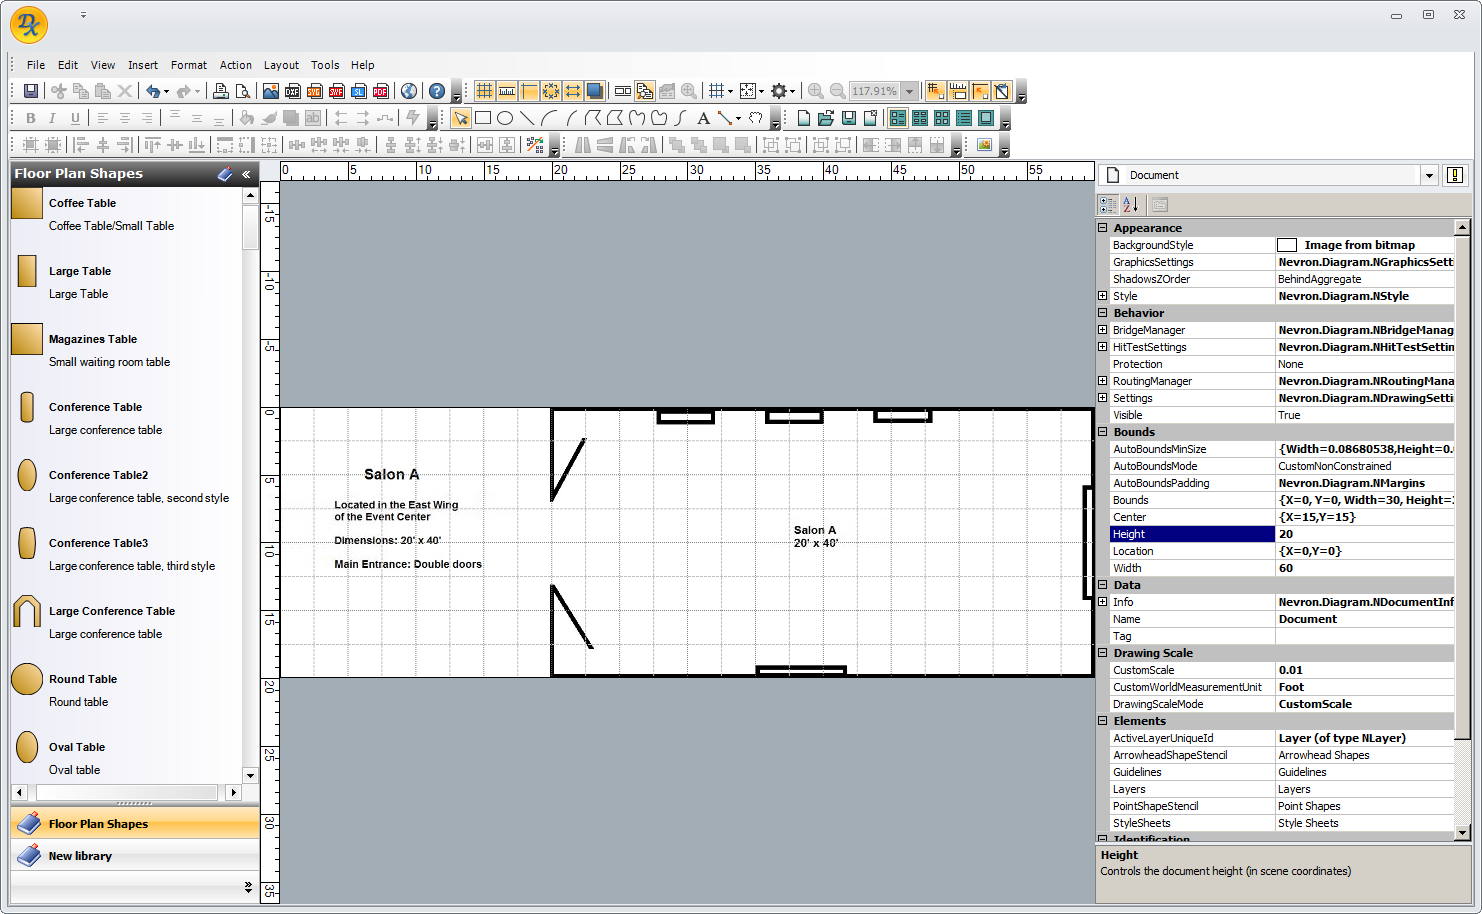
As you see in this new example below, the room boundaries do not extend all the way to the edges of the image. If you entered just the room dimensions, i.e. Height = 20', Width = 40', the image will not scale correctly.
If you do not want to crop out the unused space in the image, you need to calculate the true Height and Width of the entire image, including any non-room spaces.
In our example, we have determined that the Width of the entire image is 60'.
How did we calculate the image width? See Calculate Pixels per Foot.
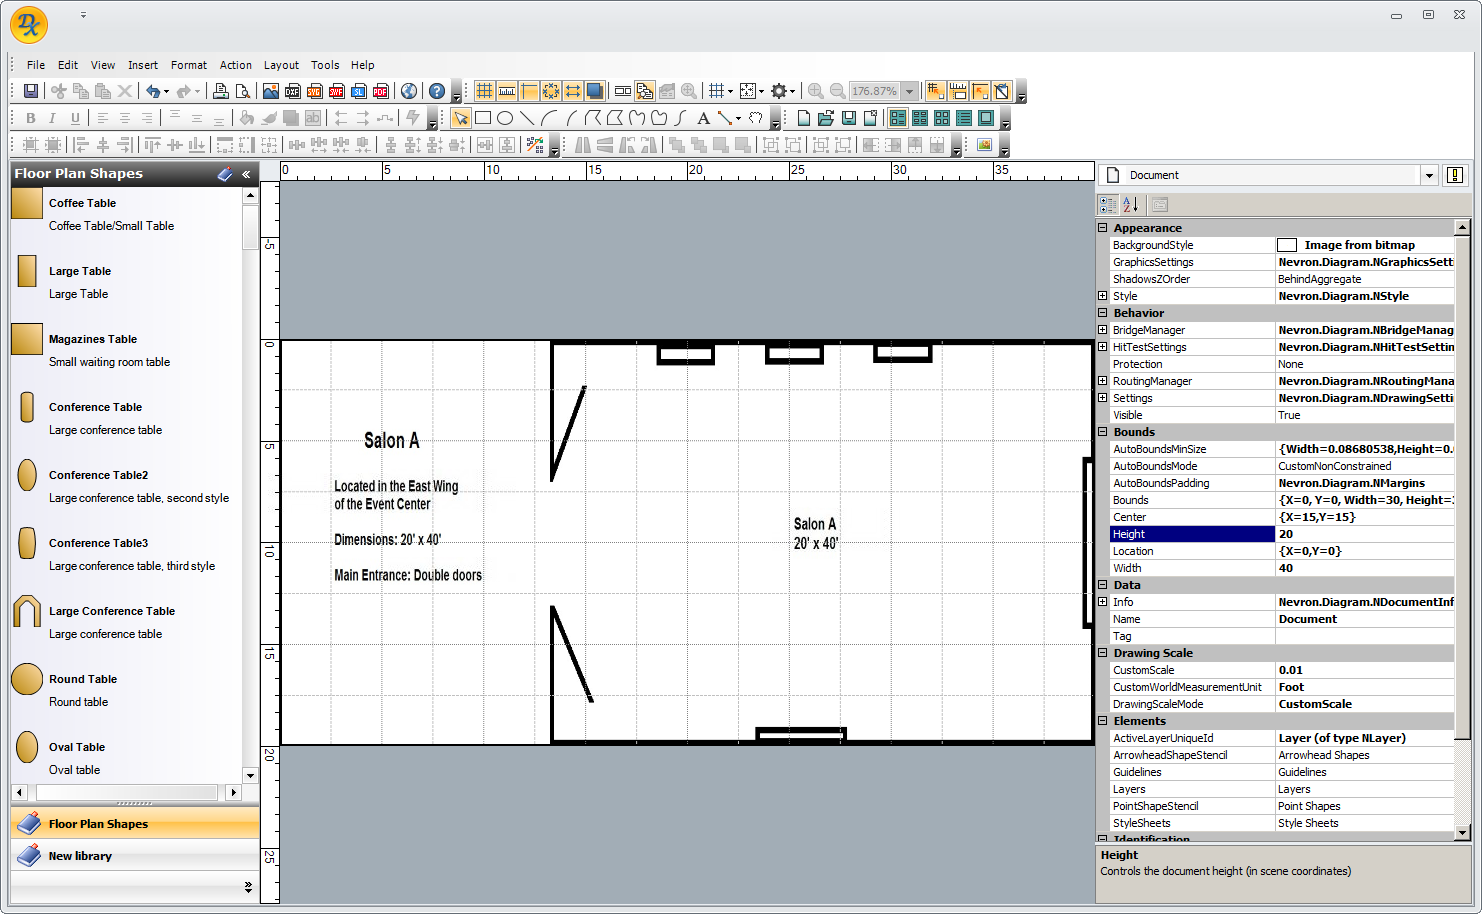
When we enter the image's true dimensions, Height = 20', Width = 60', you see that the room is scaled correctly.
5.Once you have the background image scaled, you should Save your changes.
Click the SAVE button in the top ribbon. 
6.You can now add re-positionable objects to the room.
Or, if this is enough of the floor plan for the purposes of Venue Setup, you can save the floor plan as is.
You can always add objects later when this location is booked for a specific event. It's up to you whether you want objects set up in advance.