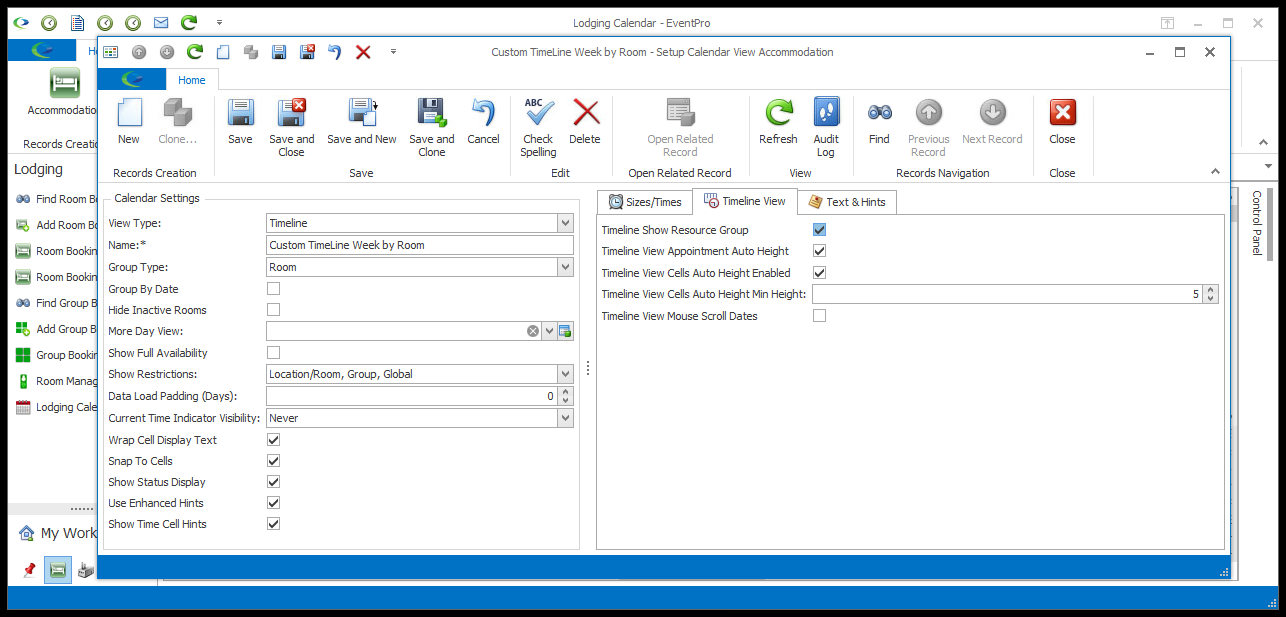
•The name of this View tab and the settings within will vary, depending on the View Type you selected, so it may be Timeline View, Day View, Week View, and so on.
•These instructions will describe the various different options, but remember that you may not see all of the described options.
•Many of these settings and options can also be found in the Venue Calendar and Event Calendar views. You can review those instructions and examples under Calendar Views & Settings > Customize Calendar Views > View for Type.
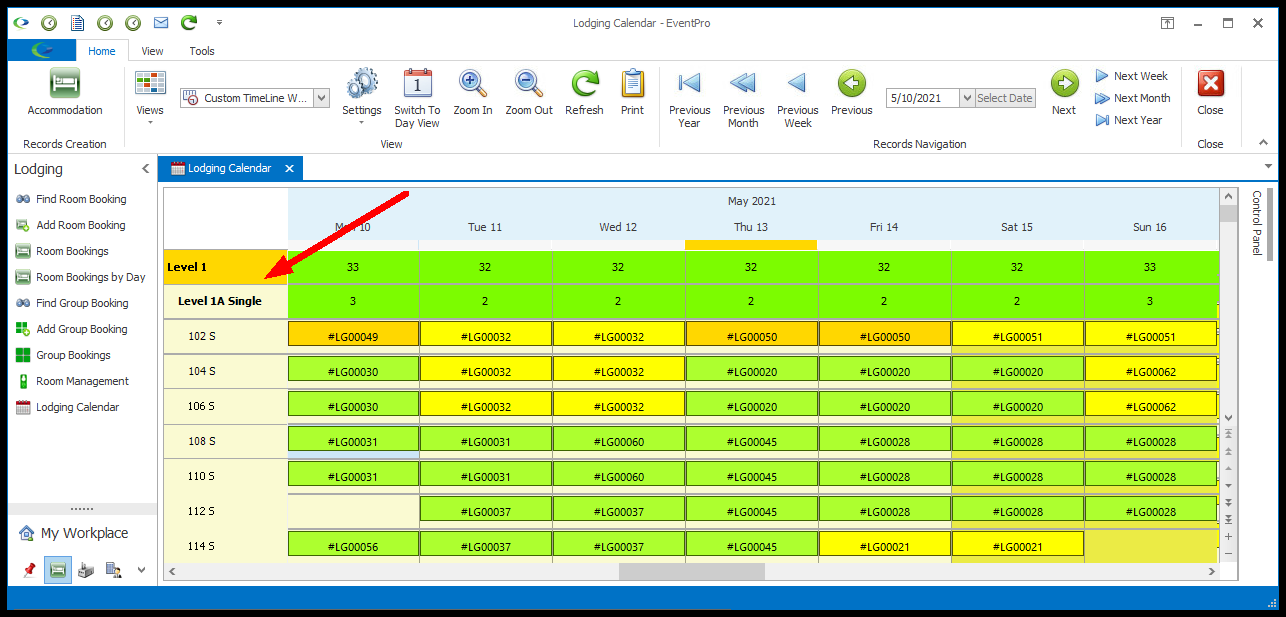
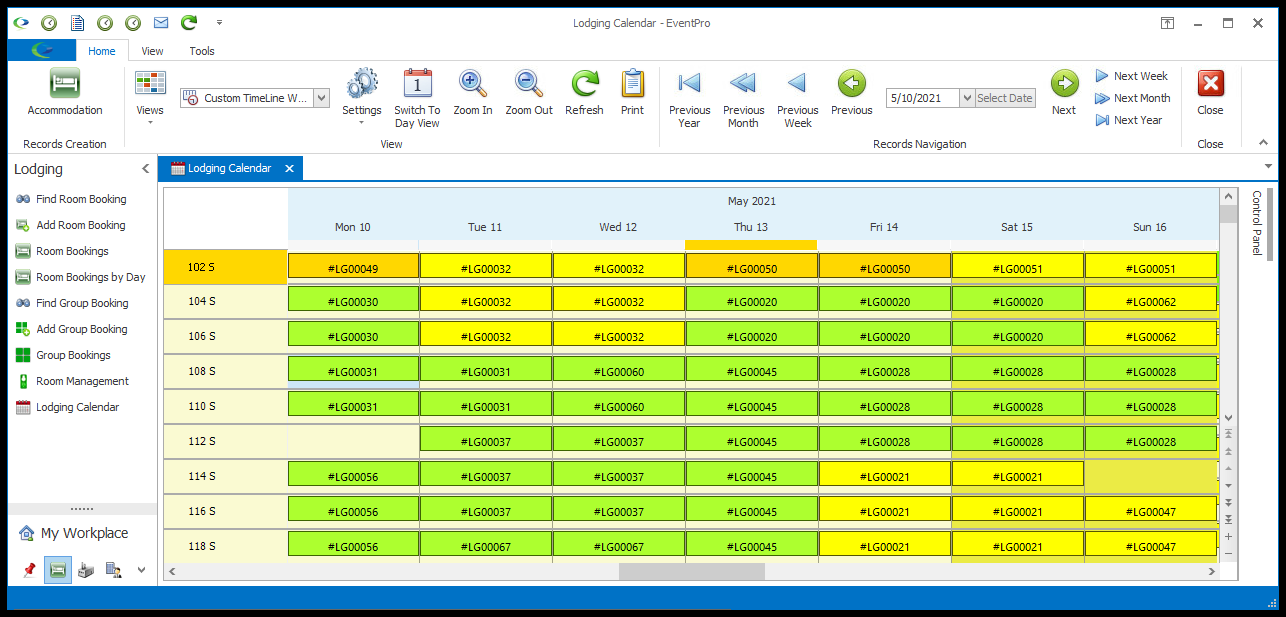
1.Show Resource Group (Timeline & Gantt): This setting, applicable only to Timeline views, relates to the Resource cells displaying Rooms.
Select this checkbox if you want the Room Groups and Subgroup rows displayed on the Calendar.
a.Example: Timeline Location Week with Show Resource Group checkbox selected:
b.Example: Timeline Location Week with Show Resource Group checkbox not selected:
2.Appointment Auto Height: This setting determines the height of the "appointment", which is the color-coded portion of the cell representing the Lodging Booking. If you want the appointment height to automatically adjust to best fit the text content and the cell space available, select this Appointment Auto Height checkbox. The calendar view will attempt to keep the color-coded appointments visible to the extent possible, but it depends on the number of resources displayed in the view, as well as the size of the window. If the application window is resized, and the containing cell shrinks to a certain minimum height, the appointment will only display an arrow icon.
3.Appointment Height: If you do not select the Auto Height option, you can manually enter the preferred height here. The calendar view will keep all appointments at this set height, but if the window is resized and the containing cell becomes smaller than this set appointment height, the color-coded appointment will be hidden and display only an arrow icon.
4.Cell Height (Timeline & Gantt):
a.Cells Auto Height Enabled: If you select this checkbox, the calendar view will attempt to adjust the relative cell heights according to the appointments within the cells. For example, if you have a row with a cell that contains multiple appointments, and another row with no appointments, the row without appointments will shrink down to the minimum height you set.
b.Cells Auto Height Min Height: If you selected the Cell Auto Height Enabled checkbox, you can enter the Minimum Height for a cell that does not contain any appointments. The calendar view will attempt to respect the minimum height, although if the window space gets too small and there are too many resources in the view, the cells will eventually be smaller than this set height.
c.If you do not select the Cell Auto Height Enabled checkbox, all of the cell heights will be the same, equally divided across the space available, regardless of which cells have appointments.
5.Mouse Scroll Dates (Timeline & Gantt):
a.If you want the mouse scroll button to move the calendar view horizontally (by date), select the Mouse Scroll Dates checkbox.
b.If you want the mouse scroll button to move the calendar view vertically (by Room/Status), unselect the Mouse Scroll Dates checkbox.
6.Day View Day Count (Day): Enter the number of days you want displayed in this Day View.
7.Alternate Time Ruler 1 and Alternate Time Ruler 2 (Day, Work Week, Full Week): The Time Ruler in the calendar will display the Local Time of your EventPro application, but you can add up to two alternate rulers for different time zones.
a.Alternate Time Ruler 1 Time Zone: From the drop-down, select the Time Zone you want to use for the first Alternate Time Ruler.
b.Alternate Time Ruler 1 Caption: Enter a caption that will appear above the this Time Ruler in the calendar view.
c.Alternate Time Ruler 2 Time Zone and Caption: To add another Time Ruler, select the Time Zone and enter a Caption for the Alternate Time Ruler 2.
8.Month View Show Weekend and Month View Compress Weekend (Month):
a.If you want the weekends to be displayed on the calendar view, select this Month View Show Weekend checkbox.
b.If you want weekends hidden, unselect the Month View Show Weekend.
c.If the weekends are visible, i.e. the Month View Show Weekend checkbox is selected, but you want the weekends to take up less room in the view, select the Month View Compress Weekend checkbox.
9.Month View Week Count (Month): Enter the number of weeks you want displayed as a Month.