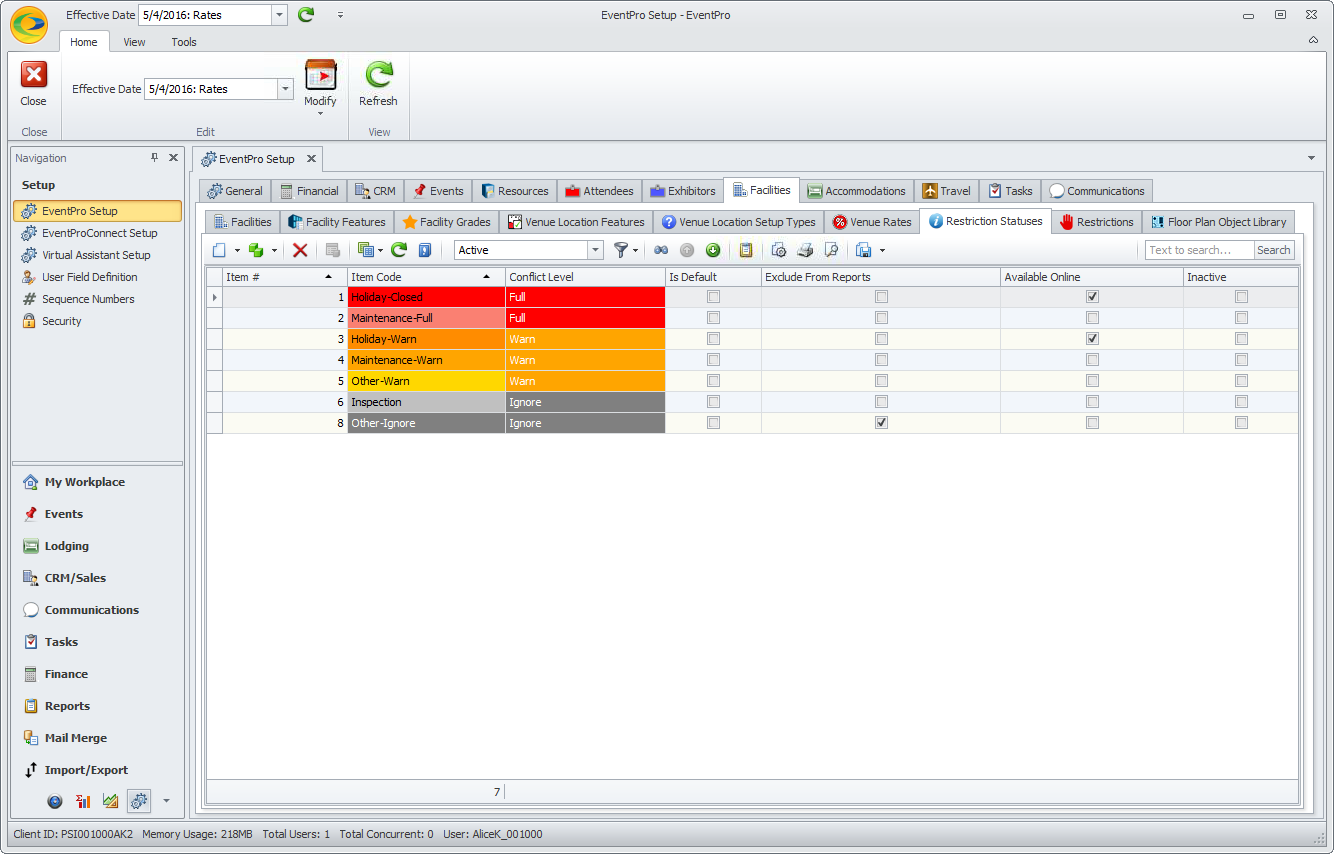
•Restrictions are non-Event occurrences that use your Venues spaces and Lodging rooms, such as cleaning, maintenance, renovations, inspections, holidays, and so on.
•The Restriction Statuses you are defining here will be used to determine how the Restrictions of each status will respond to booking conflicts, i.e. prevent, warn about, or ignore the conflicting booking.
•You will apply these Restriction Statuses to Restrictions created in the next tab of Facilities Setup.
1.Start a New record under EventPro Setup > Facilities > Restriction Statuses.
2.The Setup Restriction Status edit form will appear.
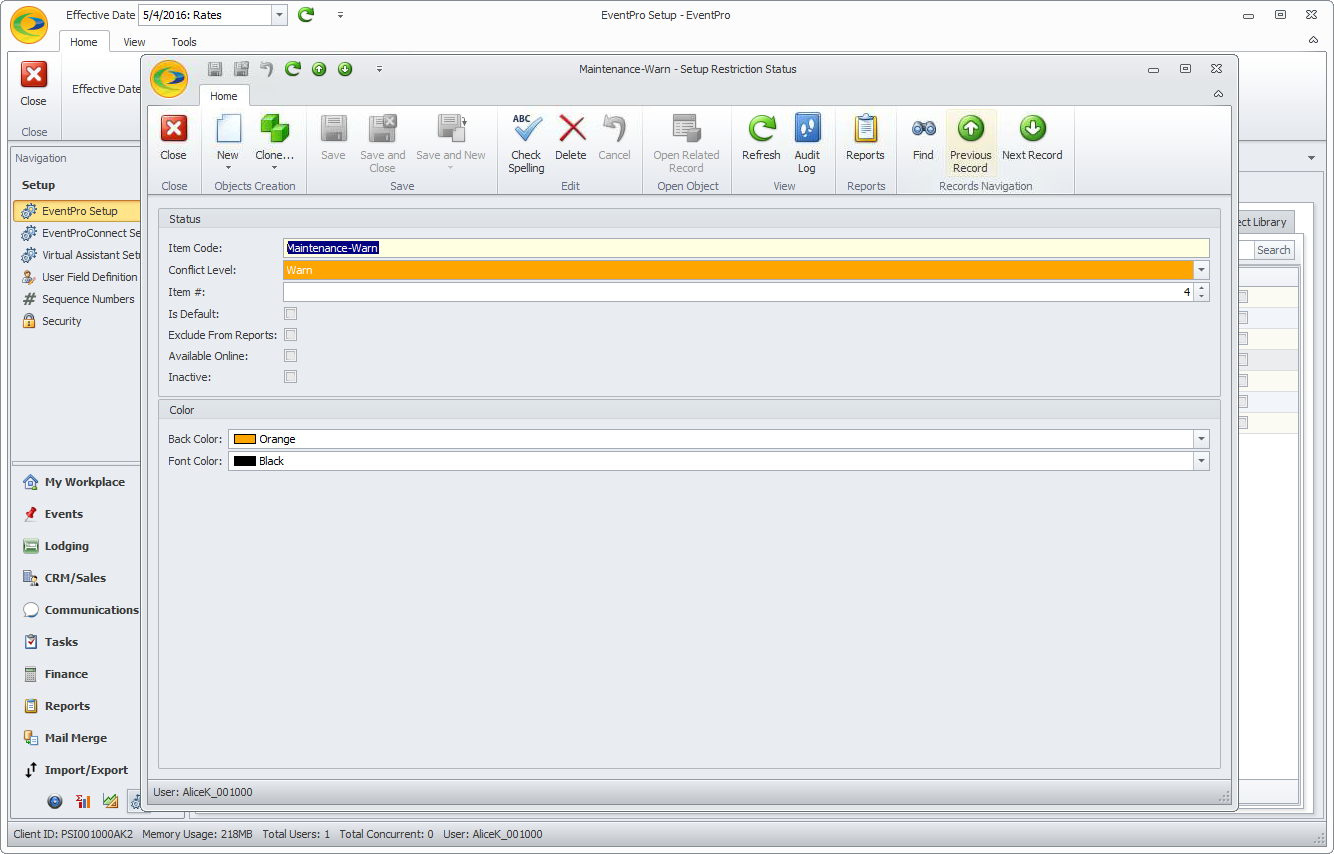
3.Item Code: Enter the name of the Restriction Status.
4.Conflict Level: By assigning a Conflict Level, you tell EventPro what to do when a User attempts to book a Location/Group/Room that has a Restriction of this Status.
a.Full: If a Restriction Status conflict level is set as “Full”, you will not be able to book a conflicting event. Once a Restriction with a “Full” conflict level setting is in a time slot, nothing else can use that time slot (except for an event with the “Ignore” conflict level). This is a very restrictive setting.
b.Different: If a Restriction Status conflict level is set as “Different”, you can book a conflicting event if the conflict level of that event is also “Different”. EventPro would still trigger a conflict warning but you would be able to ignore it. Remember, however, that an event with a conflict level of “Different” cannot be booked in conflict with a “Full” restriction.
c.Warn: If a Restriction Status conflict level is set as “Warn”, EventPro will warn you of any booking conflict, but will not prevent the booking.
d.Ignore: A Restriction Status with the "Ignore" conflict level will not conflict with any events and will not be considered when EventPro performs a conflict check.
5.Item #: The Item # - which allows you to determine a sort order for the records - will default in, although you can change it.
6.Is Default: Select this checkbox if you want this Status to be the default for newly created Restrictions.
7.Exclude from Reports: Select this checkbox if you want Restrictions of this Status excluded from reports.
8.Available Online: If you have purchased the EPConnect Suite, select this Available Online checkbox if you want Restrictions of this Status to be visible online.
Please note that the EventPro Connect web modules are available separately or as part of the EPConnect Suite. If you have not purchased the relevant module or suite, you will not see the related tabs and screens.
9.Back Color and Font Color: Select the background color from the Back Color drop-down, and the text color from the Font Color drop-down.
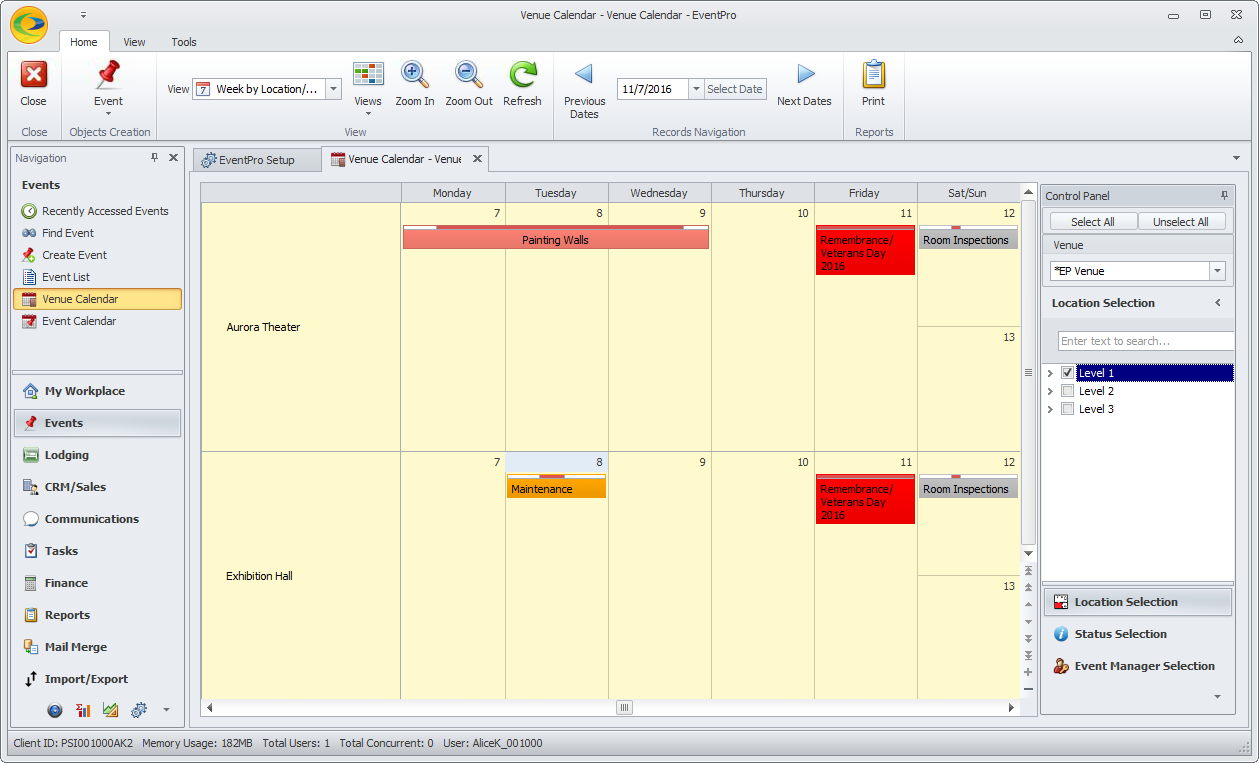
These are the colors that will represent this Restriction Status elsewhere in EventPro, particularly in graphical calendars like the Venue Calendar.
10.When you have entered all the information you need for this Restriction Status, click Save and Close.
11.Continue adding as many Restriction Statuses as you require.