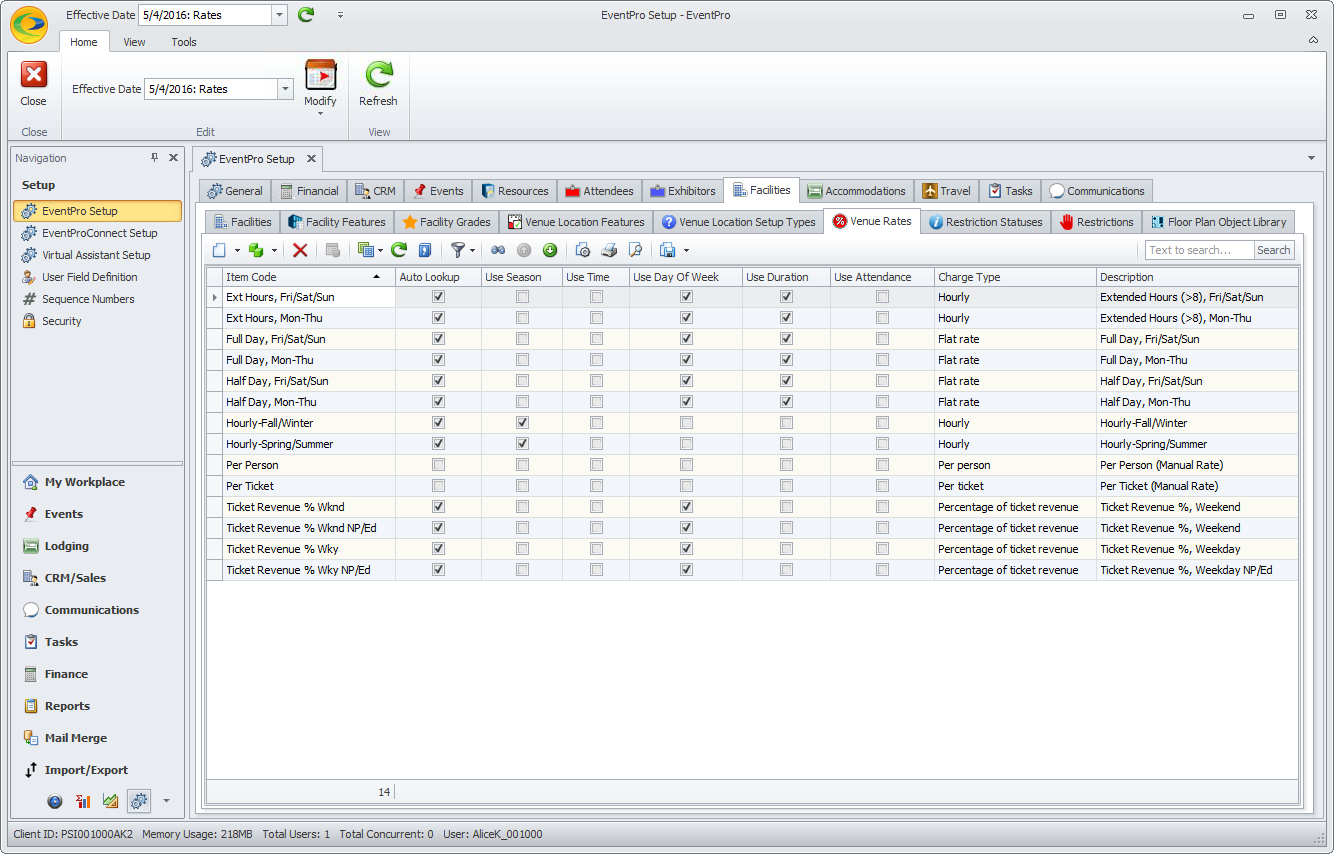
•Under Venue Rates, you will enter every kind of rate that could apply to any Location in the Venue, and define the criteria under which these rates apply.
•Note that not all Venue Rates will necessarily be appropriate for every Location. At this point, all you want to do is create a list of all the possible rates.
•Also, at this time, you are not actually entering the numerical rates. You will enter the numbers later when you apply these Rates to the Venue (see Venue Information > Rate Codes).
1.Start a new record under EventPro Setup > Facilities > Venue Rates.
2.The Setup Venue Rate Code edit form appears.
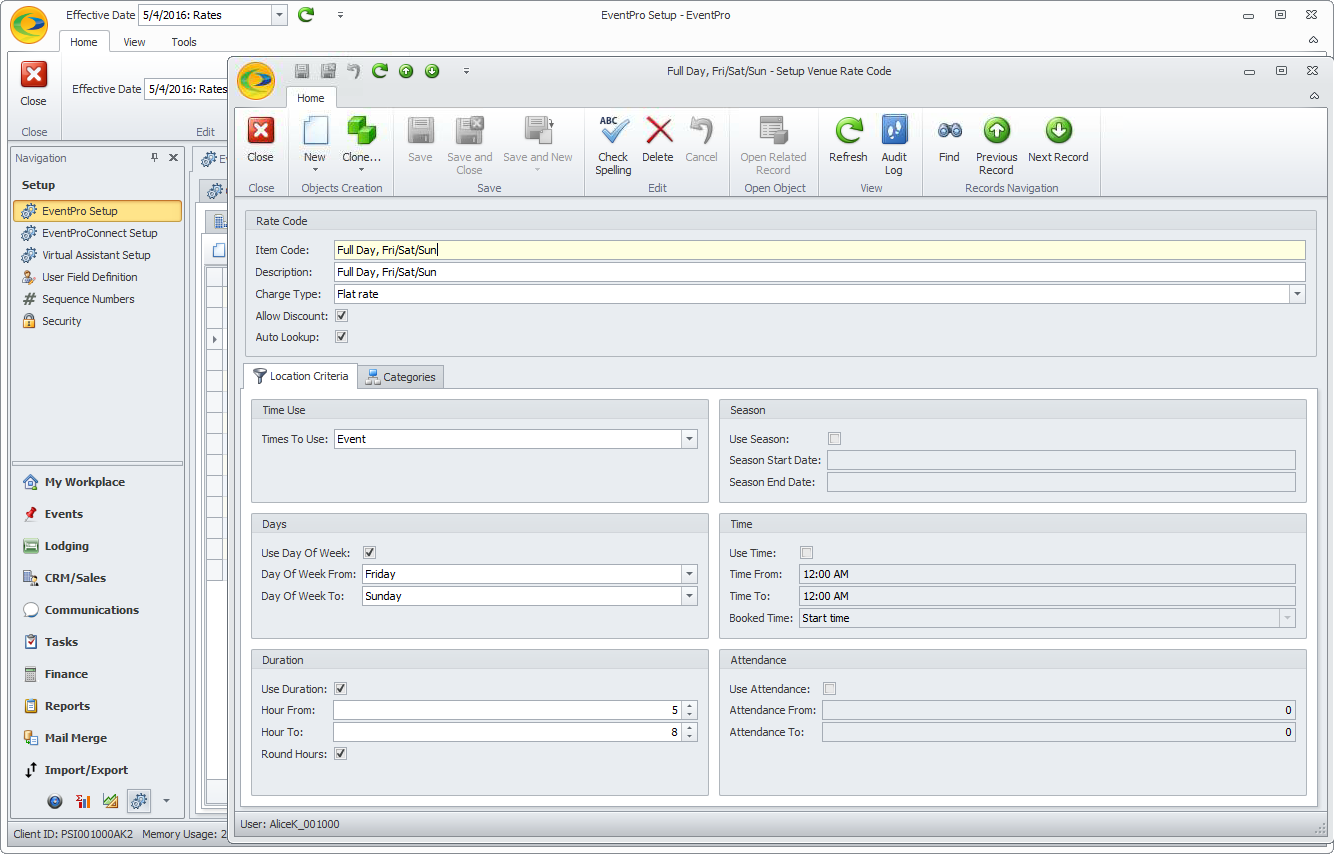
3.Item Code: Enter the name of this Rate Code.
4.Description: When you tab down from Item Code, the Description field will default to the rate code, but you can edit the Description to provide more information, if you prefer.
5.Charge Type: From the Charge Type drop-down list, select how the room rental will be calculated:
a.Flat Rate
b.Hourly
c.Percentage of Ticket Revenue
d.Per Ticket
e.Per Person
As you've noticed, you are not actually entering numbers for the Charge at this time. You will enter the numbers later when you apply these Rates to the appropriate Venues (see Venue Information > Rate Codes).
6.Allow Discount: Select the Allow Discount checkbox if you want to allow Users to apply discounts to this rate.
7.Auto Lookup: Select the Auto Lookup checkbox if you want EventPro to automatically assign this Rate when the criteria you enter for the rate code are fulfilled.
8.Location Criteria: Under the Location Criteria tab, you can define criteria related to the use of the Event Location.
a.Time Use:
i.From the Times to Use drop-down, select whether you want EventPro to use the Booked time or the Event time when determining the correct rate code.
ii.Remember that the "Booked" time of an event location may be longer than the "Event" times. For example, an Event may take place from 6 p.m. to 11 p.m. (Event Time), but if setup and teardown require an hour each, the Location is actually “booked” from 5 p.m. to midnight (Booked Time).
b.Days:
i.Select the Use Day of Week checkbox if you want the rate to apply to a location if the event occurs on certain days of the week.
ii.Select the day or range of days to which this rate applies from the drop-down lists: Day of Week From and Day of Week To.
c.Duration:
i.Select the Use Duration checkbox if you want the rate to apply to a location if the event or booking is for a certain number or range of hours.
ii.Enter the range of hours in the Hours From and Hours To fields.
iii.Select the Round Hours checkbox if you want EventPro to round event times up to the nearest hour.
d.Season:
i.Select the Use Season checkbox if you want the rate to apply to a location if the event occurs during a certain range of days, weeks or months, i.e. seasons.
ii.From the Season Start Date and Season End Date drop-down calendars, select the start and end dates of the season you want to define for this rate code.
e.Time:
i.Select the Use Time checkbox if you want the rate code to apply to a location if the booking occurs during a specific time-of-day range.
ii.Select the Time From and Time To from the drop-down lists.
iii.From the Booked Time drop-down, choose Start Time (the rate applies if the booking/event Start Time falls within the Time range), End Time (the rate applies if the booking/event End Time falls within the Time range) or Between Times (the rate only applies if the booking/event both starts and ends within the Time range). Remember that whether EventPro uses the Booked time or Event Time for the calculation depends on what you chose in Time Use above.
f.Attendance:
i.Select the Use Attendance checkbox if you want the rate to apply to a location if the event attendance is a certain number or range.
ii.Select the range of attendance by entering numbers in the Attendance From and Attendance To fields.
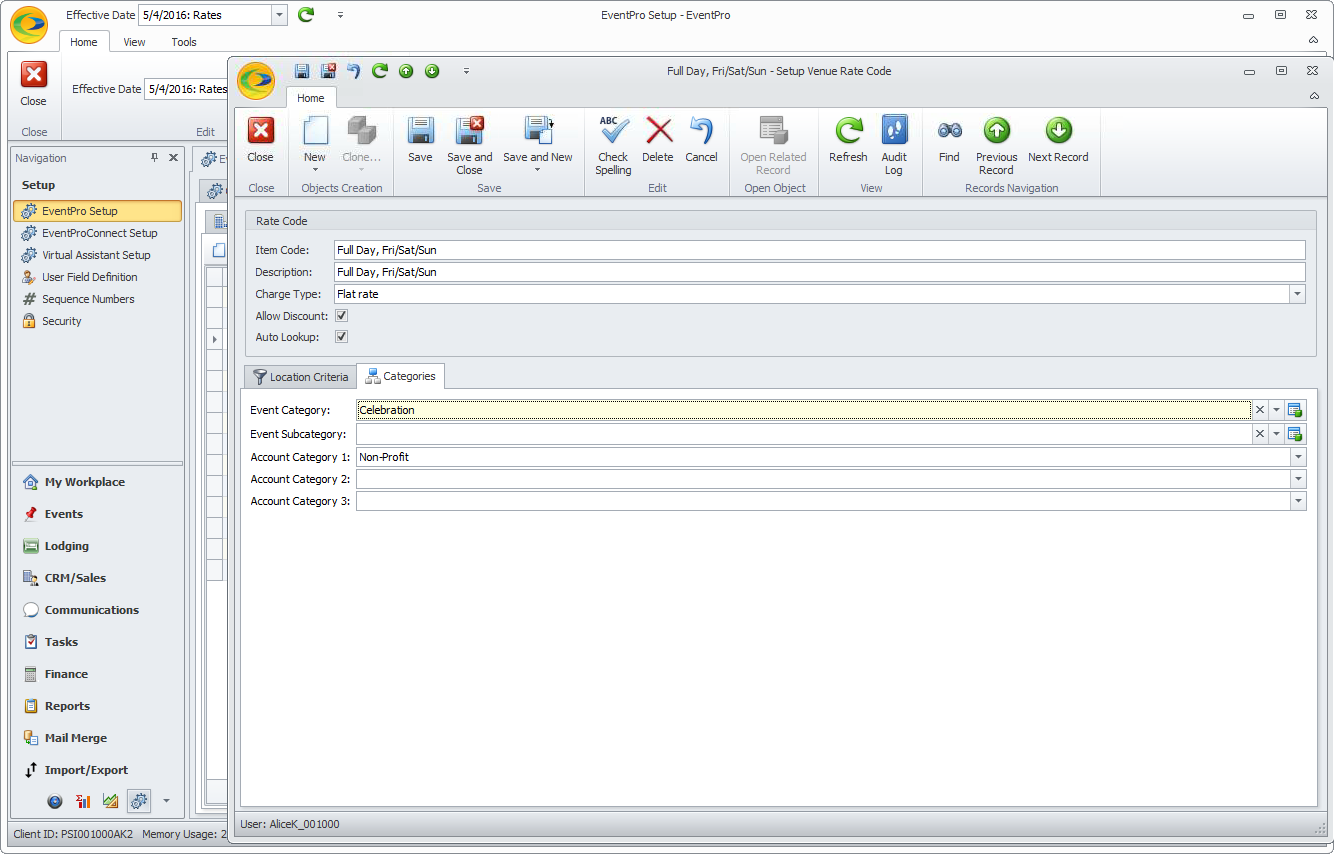
a.Event Category: If you want the rate to apply to a location only for events of a certain Event Category, select that Event Category from this drop-down. Event Categories and Subcategories are created under EventPro Setup > Events > Event Categories.
b.Event Subcategory: If you selected an Event Category above, you can further limit the rate to be applicable only for a certain subcategory by selecting the Event Subcategory from this drop-down.
c.Account Category 1, 2 and 3: If you want the rate to apply to a location for events booked by certain categories of Accounts (Companies or Contacts), select the relevant Category or Categories from the Account Category 1, Account Category 2 and/or Account Category 3 drop-down lists. Account Categories are created under EventPro Setup > CRM > Account Categories.
10.When you are done creating the Venue Rate, click Save and Close. Continue adding as many Venue Rates as you require.
11.If your Venue is already set up, you can now add Rates to the Venue (Venue Information > Rate Codes), and then apply Rates to Locations (Add Location > Applicable Rates).