You can have the Charge and Cost tabs work in conjunction by basing the Charge on a markup of the Cost. Alternatively, you can set the Charge and Cost independently, or you can use the prices of the individual items in the Package. It depends entirely on how you want to set up your Resource Package Pricing.
A.Charge:
1.Use Item Charges: Select this checkbox if you want the charge of the Package to be calculated using the charges of the individual items in the package on the day of the event.
If you want to be able to manually enter a charge for this Package, do not select this checkbox check this box.
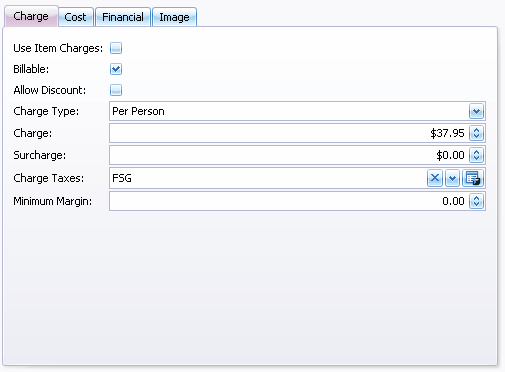
2.Billable: Check this box to indicate that the package is billable by default. Non-billable items will not show up in invoices.
3.Pre Paid: Select this checkbox if you want this package's Bill To Type to default to Pre-Paid when added to an event.
“Pre Paid” indicates that the item's charges have already been paid for and accounted for outside of EventPro. You record the pre-paid item in EventPro for informational purposes, but it doesn’t affect finances in EventPro.
4.Allow Discount: Check this box if you want to allow users to discount the Package.
5.Charge Type: If you do not want to use the item charges, select the Charge Type you want to use from the drop-down list: Per Person or Flat Rate.
6.Charge: You can manually enter the Charge for the Package here, taking into account whether this is a Per Person or Flat Rate charge, as per your selection above.
However, if you want the Charge to be based on the Cost (e.g. you have obtained this package through a supplier, and want to pass the cost plus markup onto your client), leave this blank for now and go to the Cost tab (see below), where you can enter the Cost and Markup, which will automatically calculate the resulting Charge.
7.Surcharge: You can manually enter a surcharge for this Package, if applicable.
However, if you want the Surcharge to be based on the Cost Markup, leave this blank for now and enter the Markup and Surcharge information in the Cost tab first (see below).
8.Charge Taxes: Select the default applicable taxes for the Package Charge. You set up taxes earlier in EventPro Setup > Financial > Taxes.
9.Minimum Margin: If you want, you can enter a Minimum Margin percentage here, which will prevent users from discounting the Package below the set margin when adding it to events.
B.Cost:
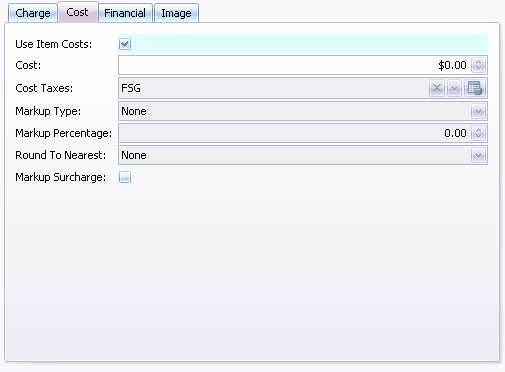
1.Use Item Costs: Select this checkbox if you want the cost of the package to be calculated using the costs of the individual items in the package on the day of the event.
If you check this box, you will not be able to manually enter a Cost. If you want to enter a flat Cost, leave this checkbox unselected.
2.Cost: If applicable, enter the Cost of the package.
3.Cost Taxes: Select the default applicable taxes for the package Cost. You set up taxes earlier in EventPro Setup > Financial > Taxes.
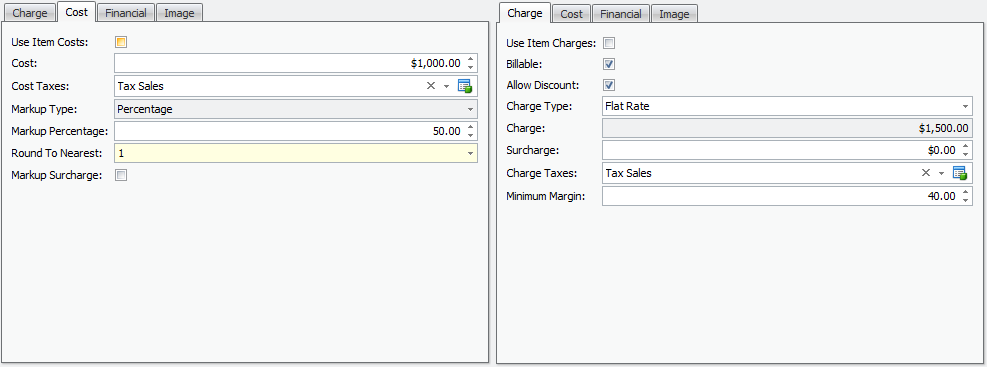
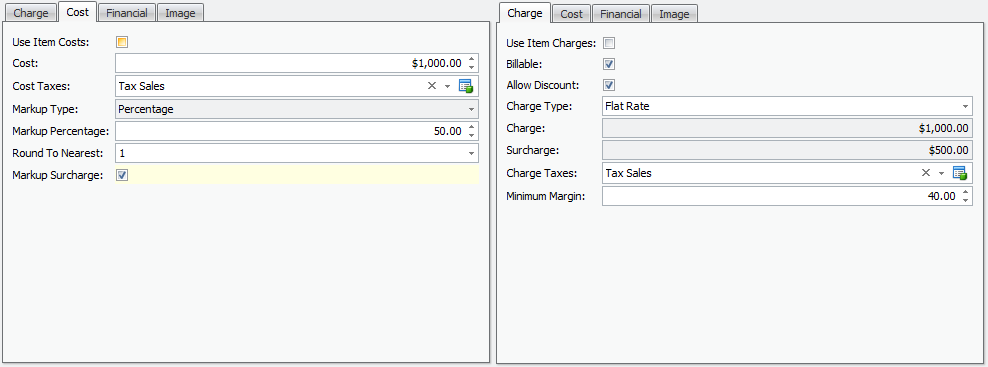
4.Markup Type: If you want to apply a markup to this cost, which will calculate the resulting Charge back in the Charge tab (see above), select the Markup Type from the drop-down: Percentage, Cost, or None.
a.If you choose Percentage, the Charge will be set to the Cost plus the Markup amount determined by the percentage number you enter below.
b.If you choose Cost, the Charge will be set to the same as the Cost.
c.If you choose None, you can manually set the Charge to anything you want.
5.Markup Percentage: If you selected Percentage as the Markup Type, enter the Percentage number here.
6.Round To Nearest: Also, if you selected Percentage as the Markup Type, you can choose to Round the resulting Charge to an option in this drop-down.
7.Markup Surcharge: Select this checkbox if you want the Markup amount to be separated out as a Surcharge, which you will see in the Surcharge field of the Charge tab.
If you want the Markup and Cost combined together into one amount for the Charge, leave this checkbox unselected.
Next, go to the Financial tab of the Setup Resource Package edit form.