•This specialized Account Requests area under CRM Leads is designed specifically for approving and processing Account Requests submitted online though EPConnect.
•EPConnect Setup > Account Request > Process Flow describes the online Account Request process from the viewpoint of a requester.
•EPConnect Setup > Account Request describes in detail how to set up the Account Request area in EPConnect.
oFor the purposes of these instructions, the most important setting to note is the Request Account Verification Process. There are two options: Admin Review or Email Confirmation.
oThis Account Requests area is only relevant if you selected the Admin Review verification process, as it requires you to manually review and approve the requests. The Email Confirmation verification process bypasses this area.
1.Assuming that your Account Request process uses Admin Review, the requests submitted through the EPConnect Request Account page will end up in this EventPro Account Requests area.
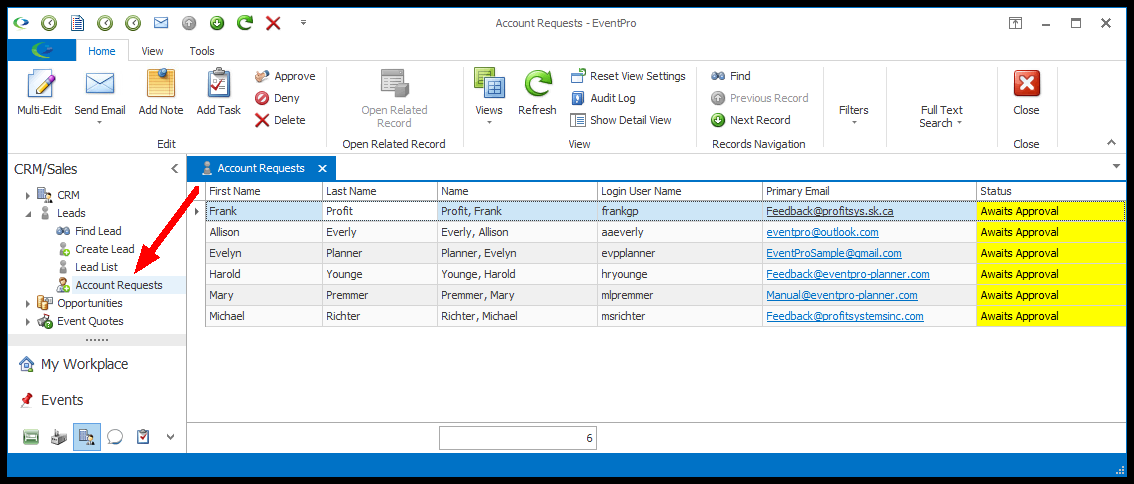
2.These account requests are brought into EventPro as "Leads", although they are different than regular Leads.
a.In the top ribbon, you can see the specialized commands related to Account Requests: Approve and Deny.
b.If you double-click an Account Request/Lead record in the selection grid, the edit form looks like a regular Lead edit form. However, if approved, an Account Request/Lead undergoes a specialized conversion process into both a CRM Contact and a Security User.
c.The Status of an Account Request/Lead will initially be set to the default Awaiting Admin Status, which was selected in the EPConnect Account Request Area Definition. This Status would have been created under EventPro Setup > CRM > Lead Statuses, and has the Status Type of "Account Request Awaiting Admin".
3.To simply ignore an Account Request, without sending an "Approved" or "Denied" email in response, select the relevant record and click the Delete button in the top ribbon.
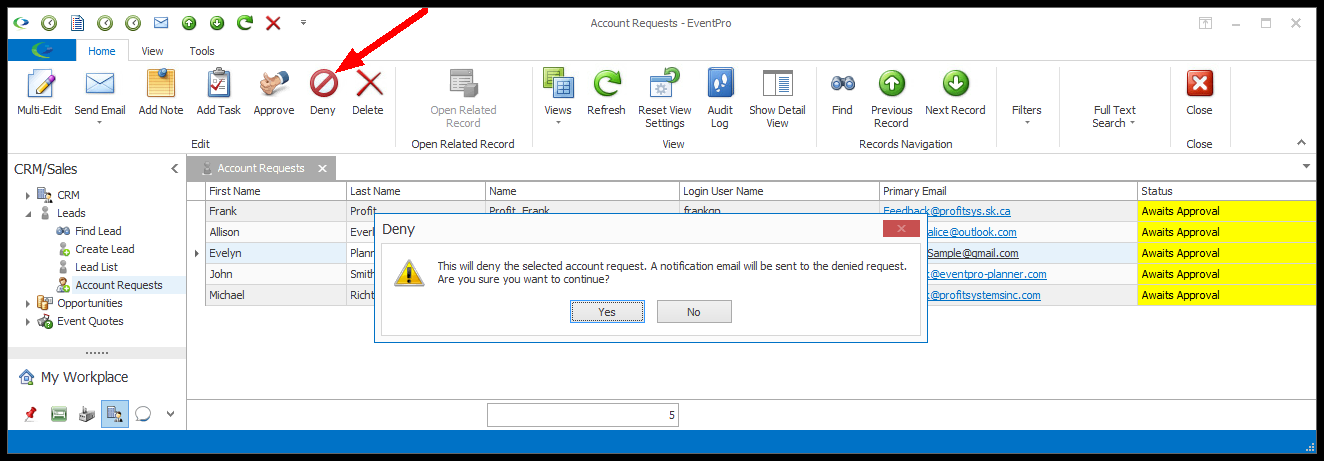
4.To deny an Account Request, click on the relevant record in the selection grid and click the Deny button.
a.The Deny dialog appears. Click Yes if you want to continue.
b.The requester will receive the notification email defined by the Request Account Denied Notification in EPConnect Setup > Notifications.
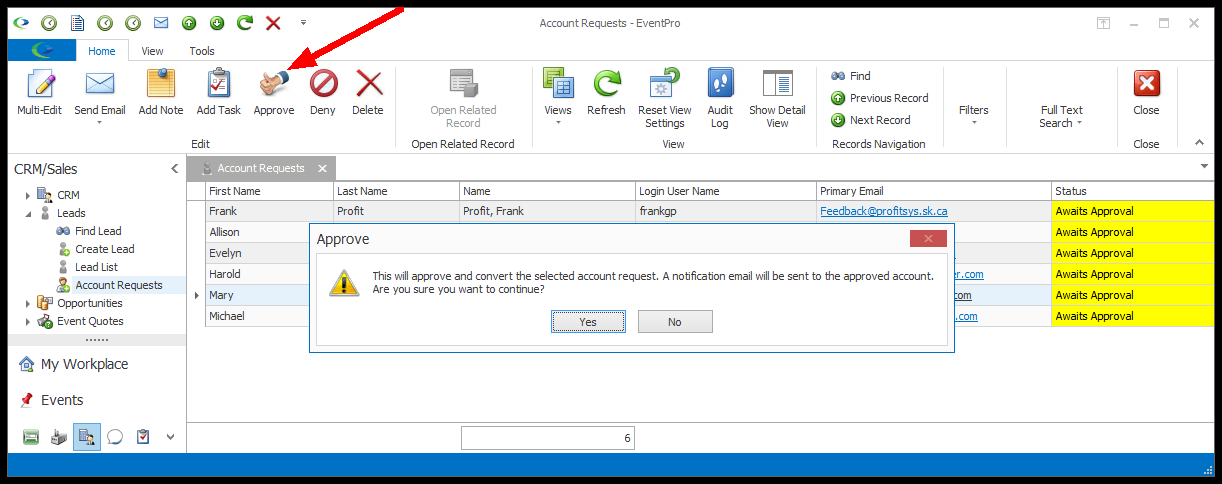
5.To approve an Account Request, click on the relevant record in the selection grid and click the Approve button.
a.The Approve dialog appears. Click Yes if you want to continue.
b.Next, the Lead to Account Conversion wizard will appear.
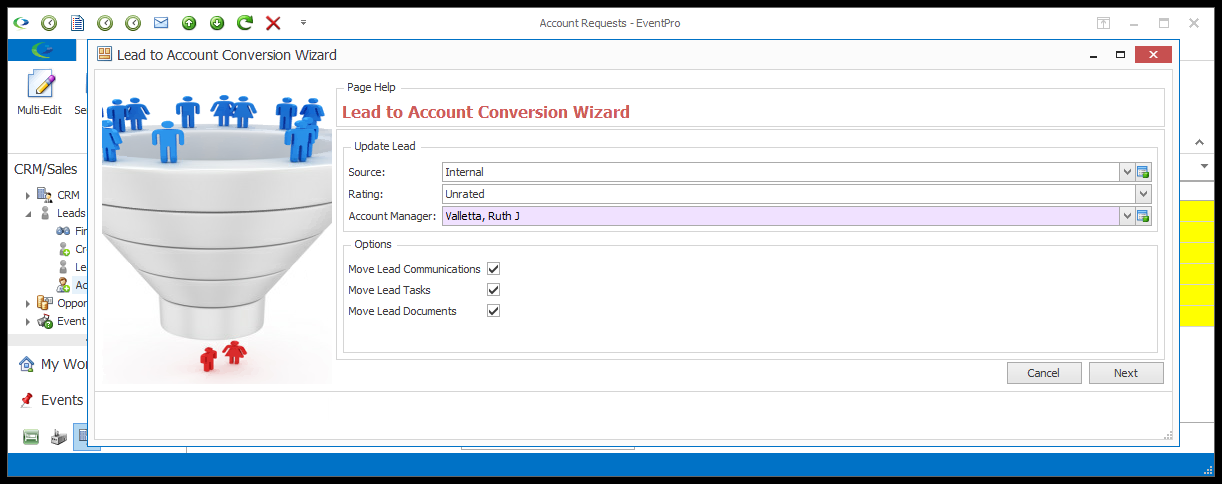
6.On the first page of the Lead to Account Conversion wizard, you can select the Source, Rating, and Account Manager, if you want.
a.The Source will initially be set to the default Request Lead Source, which was selected in the EPConnect Account Request Area Definition.
b.Select the checkboxes if you want to Move Lead Communications, Move Lead Tasks, and/or Move Lead Documents.
c.When you are done with this page, click Next.
7.The next page of the Lead to Account Conversion wizard asks for the new account's Contact Information.
a.Some of this information will be pulled in from the request submitted through EPConnect. You can enter additional information, as relevant.
b.Under Options, from the Contact Create Option drop-down, choose how to create this contact: Create New or Use Selected.
c.If you want to create a new contact with this information, select Create New.
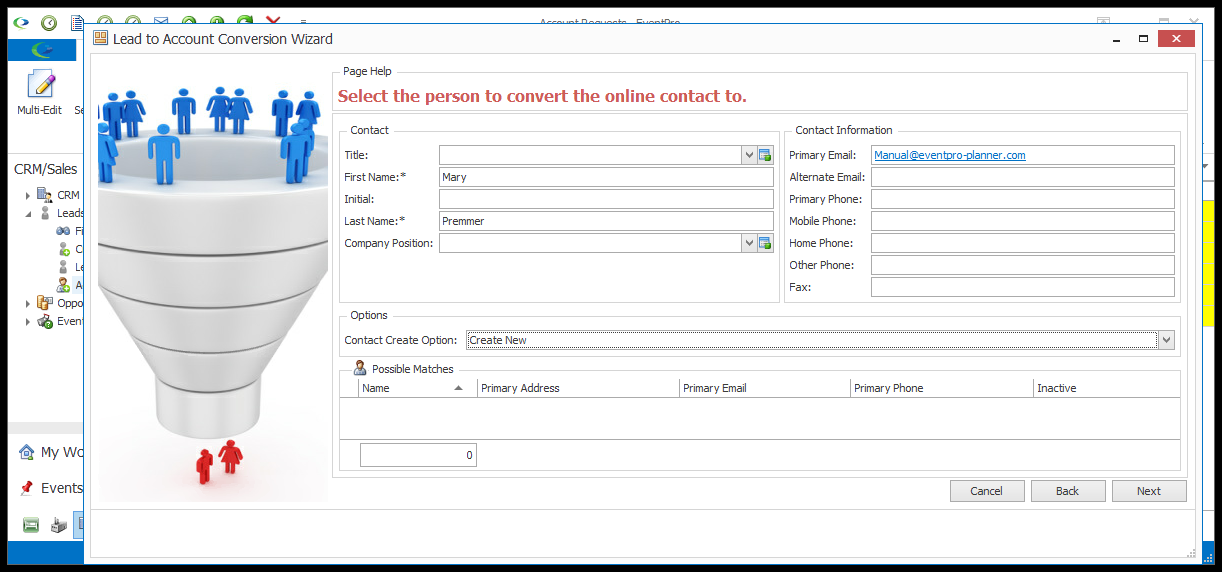
d.The Use Selected option is only relevant if any Possible Matches appear in the selection grid below. If the contact information brings up possible matches, and you want to use one of those existing contacts, choose Use Selected from the drop-down and select the relevant Contact.
e.If you select the Use Select option, a second drop-down appears for the Copy Properties Option, where you decide how to copy the new Request Contact's properties to the existing Contact: None, Append, or Overwrite.
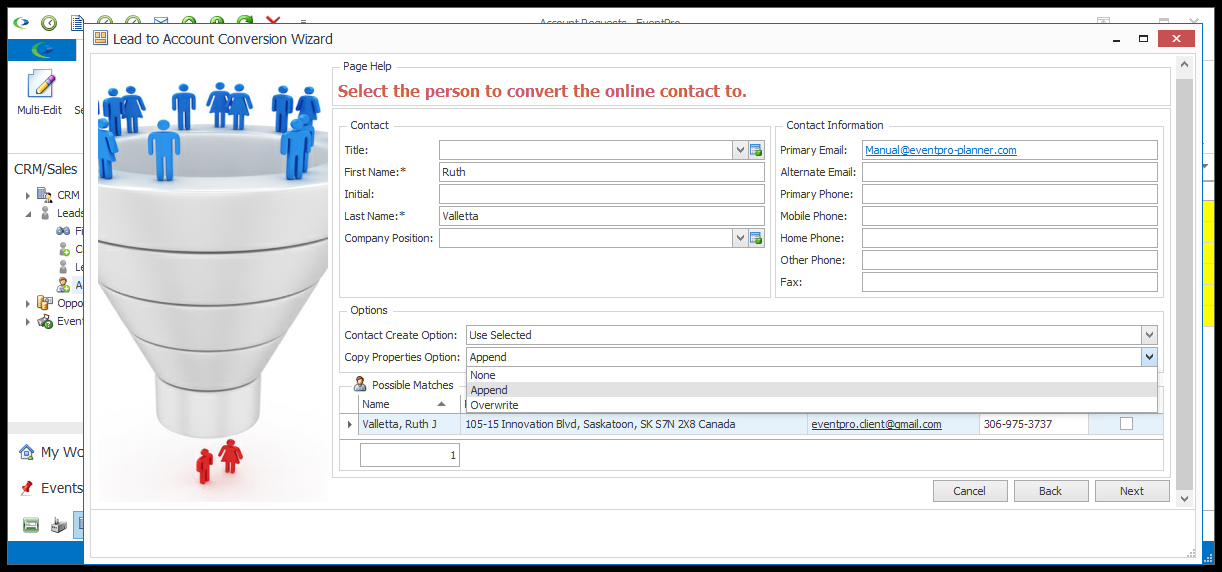
i."None" means that none of the new information is copied over to the existing Contact.
ii."Append" will update the existing Contact's Addresses, Phone Numbers, and Email Addresses if new values are provided by the new Request Contact's information.
For example, if both the existing Contact and new Request Contact have different Mobile Phone numbers, "Append" will update the existing Contact with the new Mobile Phone number from the Request Contact. Similarly, if the existing Contact has a blank Mobile Phone field, "Append" will still update it to the new number from the Request Contact. However, if the existing Contact has a Mobile Phone number, but the new Request Contact's Mobile Phone field is blank, "Append" will not erase the existing Contact's Mobile Phone number.
If both the new Request Contact and the existing Contact have Do Not Contact By selections, the new selections will be added to the existing Contact's selections.
If the existing Contact already has Account Categories set, "Append" will not update them, but if the existing Contact's Account Categories are blank, "Append" will assign the Account Categories from the new Request Contact, if they have any.
"Append" will not update the existing Contact's First Name or Last Name, even if the new Request Contact's information is different.
iii."Overwrite" means that the new information will overwrite the existing Contact's information, even if it leaves fields blank. New information and/or blank fields will overwrite existing values for Addresses, Phone Numbers, Email Addresses, and Account Categories.
For example, if the existing Contact has a number in the Mobile Phone field, but the new Request Contact's Mobile Phone field is blank, "Overwrite" will erase the existing Contact's Mobile Phone number. As with the "Append" option, "Overwrite" will also replace the existing Contact's Mobile Phone number with the new Request Contact's Mobile number, if they have one.
Also, "Overwrite" will replace the existing Contact's Title, First Name, Initial, and Last Name if the new Request Contact's information is different.
f.When you are done with the Contact Information page, click Next.
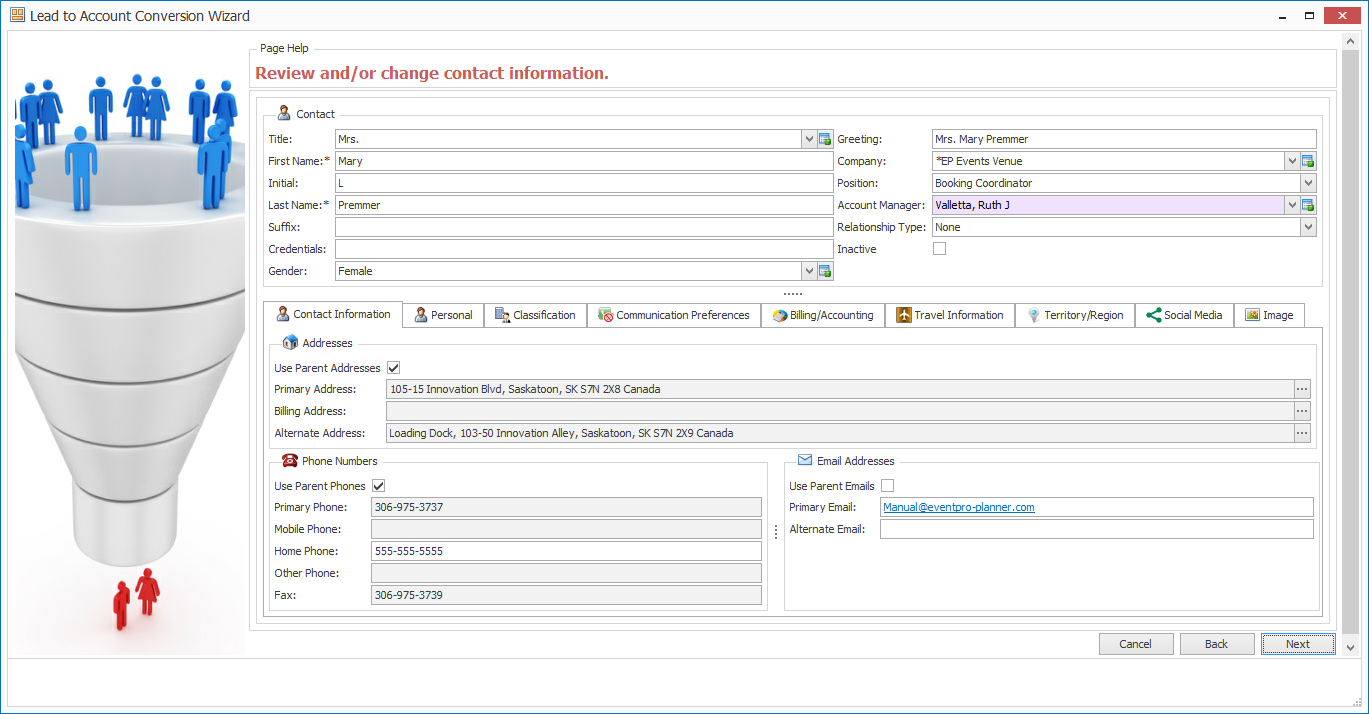
8.On the next page of the Lead to Account Conversion wizard, you can review and/or change the contact information. When you are done, click Next.
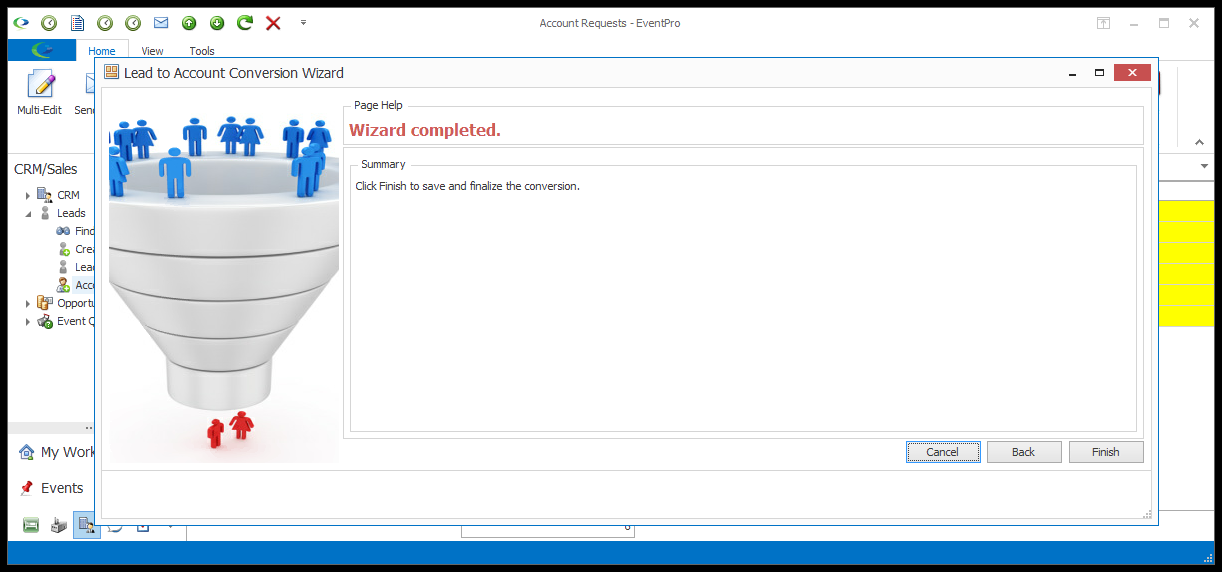
9.On the last page of the Lead to Account Conversion Wizard, click Finish to save and finalize the conversion.
10.After you finish the Lead to Account Conversion Wizard, the requester/new user will receive the Request Account Success Notification email with the account's Username and Temporary Password, as well as a link to the EPConnect page.
a.The new User can log into EPConnect with the temporary password, but will be asked to create a new password, as described below in EPConnect Setup > Account Request > Process Flow.
b.Later, if the User forgets a password, the EPConnect Account Request area also has a Password Reset Request function. See EPConnect Setup > Account Request > Process Flow.
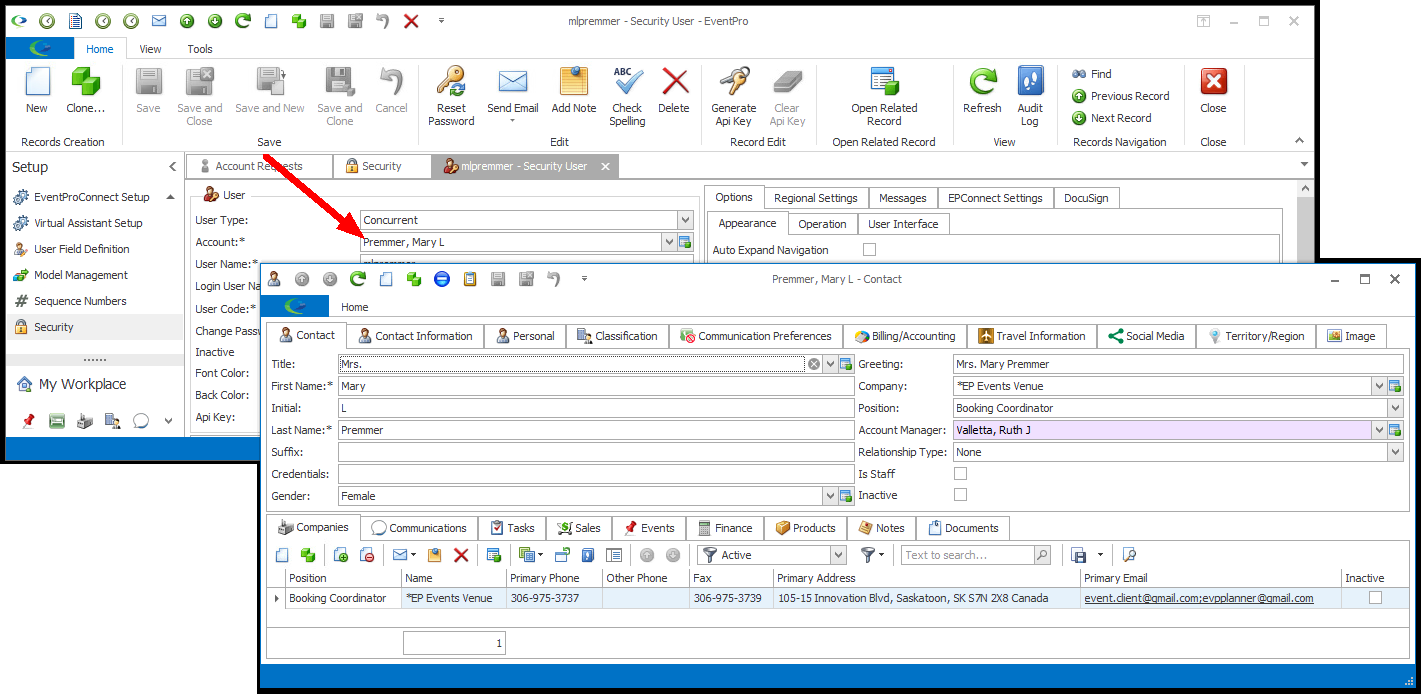
11.If you go to the Setup Security area in EventPro, you will see that the new Security User account has been added.
Note that the User's Security Role has been set to the Default Security Role for Requested Account defined in EPConnect.

12.If you view the linked CRM Account for the Security User, you will see the contact information added from the Lead to Account Conversion Wizard earlier.