In these instructions, we have selected the Assistant Item File Attachment option, which allows you to attach any file that doesn't fit under the other three types (Report, Letter Template, or Calendar Invitation).
1.The Assistant Item File Attachment window opens.
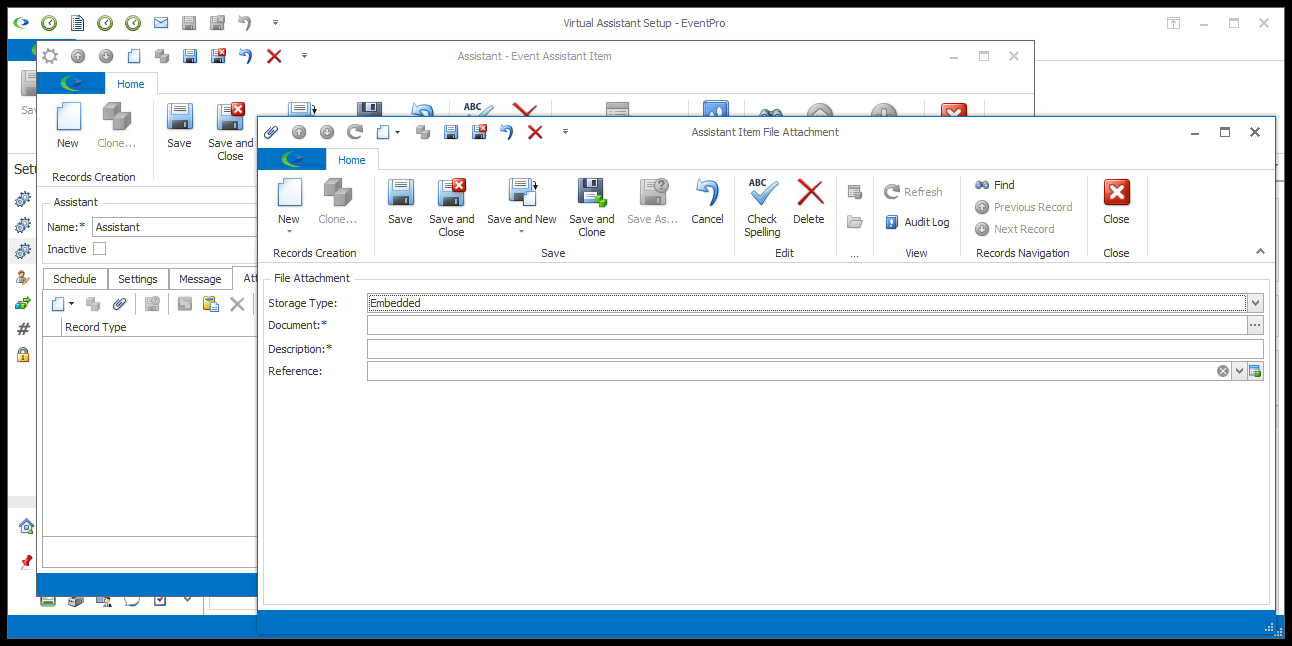
2.From the Storage Type drop-down, choose whether the attachment is Linked, Embedded, or Internal.
a.Linked: This option records only the link to the attached file, while the actual file is saved outside of EventPro, typically on your network.
i.The advantage of linking attachments is that it takes up much less database space than embedding files. However, you need to ensure that users are able to access those files on the network, and that you don't move the files around, breaking the link path.
ii.NOTE: Linked Storage Type is only available for Local/Network Installed EventPro. It is not available for the EventPro Cloud application.
b.Embedded: An embedded file is stored right within EventPro. While it eliminates the concern about broken links or moved files, embedding files can use up a lot of space in your database.
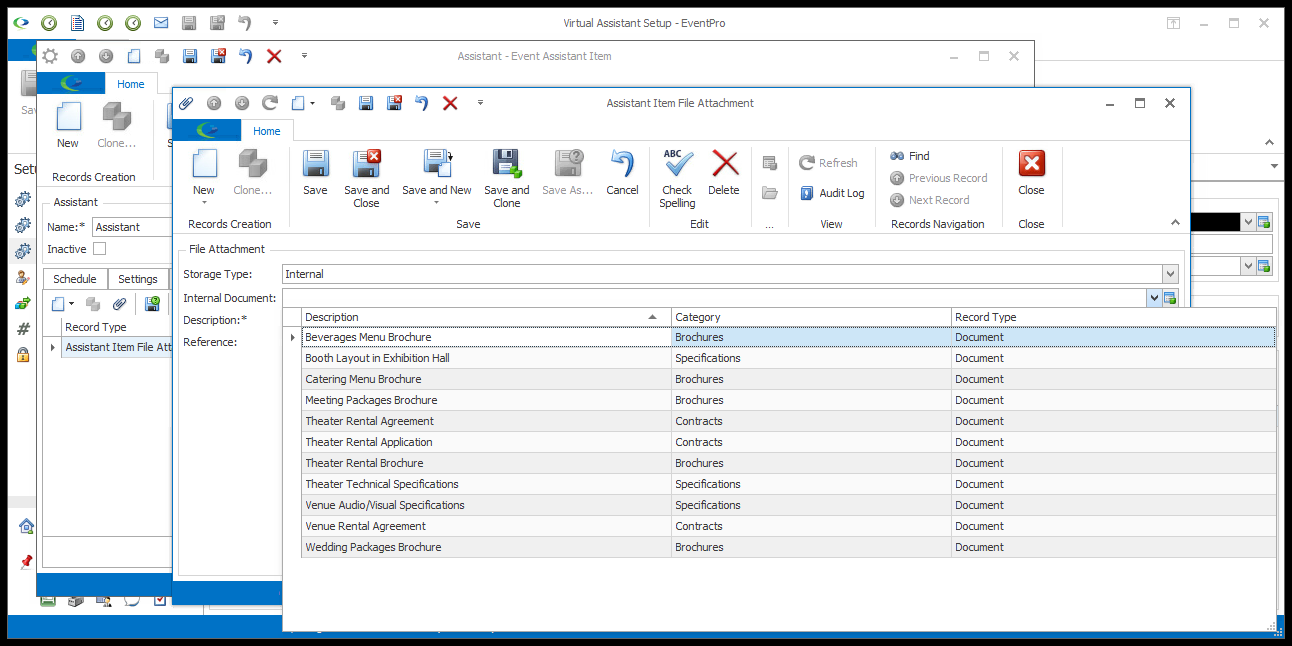
c.Internal: These documents are stored under Document Management > Internal Documents for quick access.
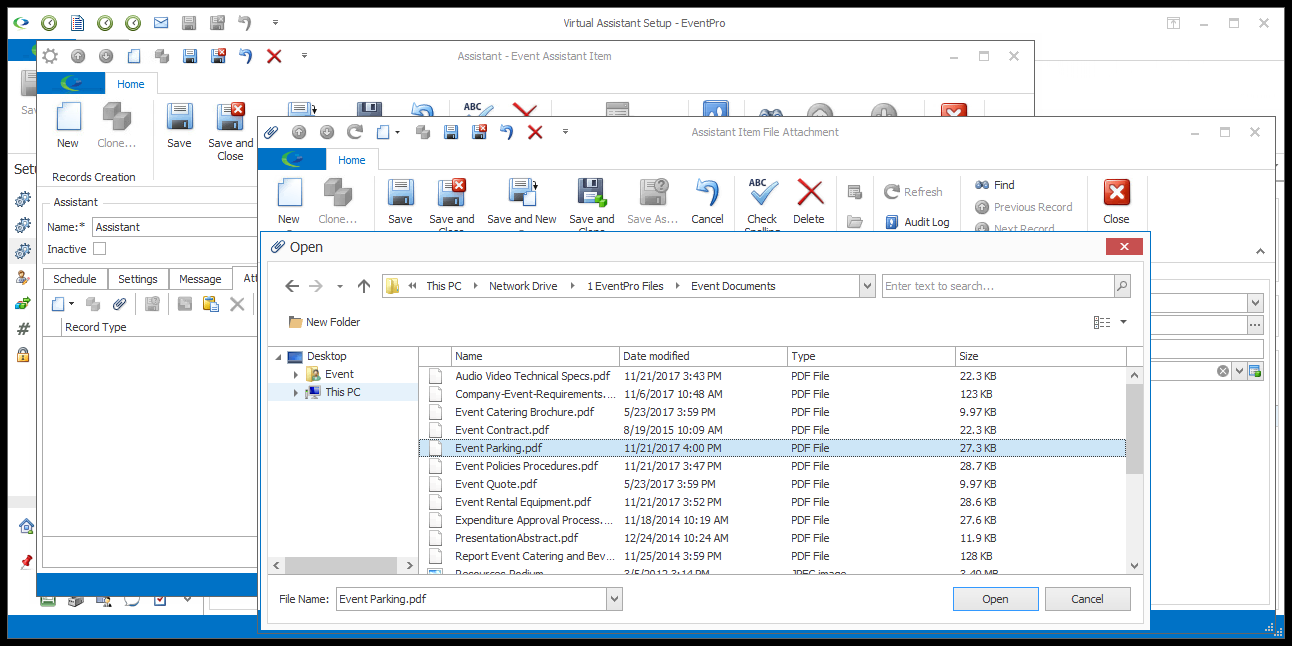
3.If you select Embedded, click the ellipsis next to the Document field. In the Open window, select the document you want to use, and click Open.
4.If you select Linked, click the ellipsis next to the Linked File field. In the Open window, select the document you want to link, and click Open.
5.If you select Internal, you will be able to choose an attachment from Internal Documents, which are the files you added under Document Management > Internal Documents.
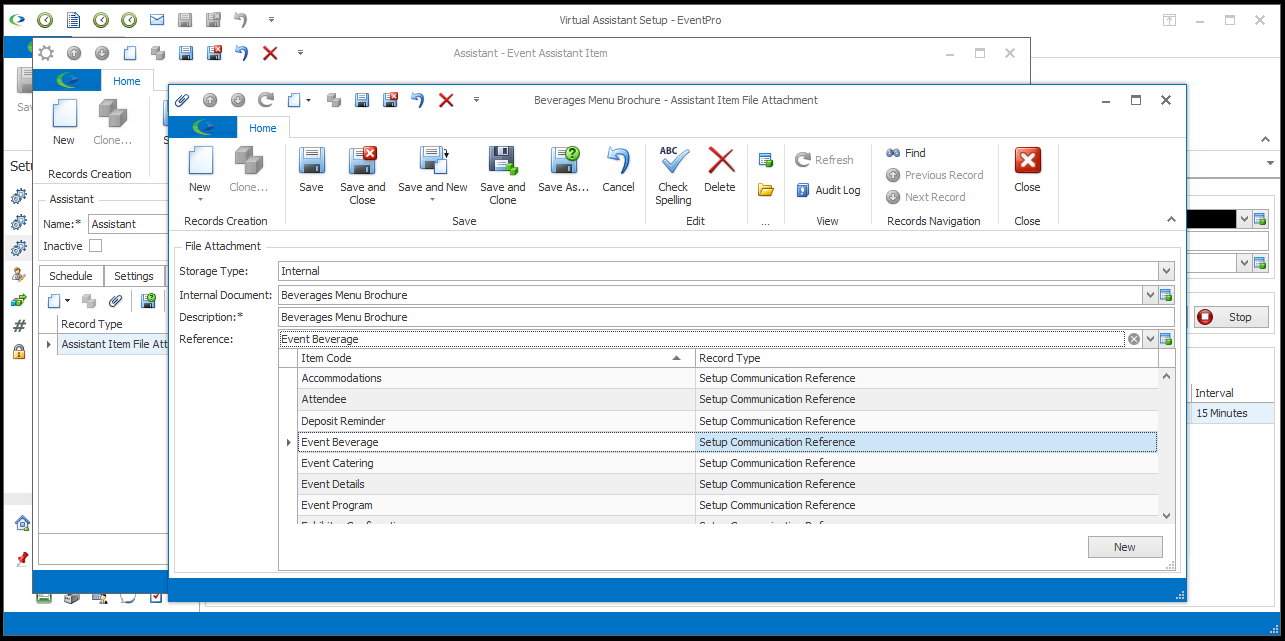
6.A Description will default in for the Attachment - whether Embedded, Linked or Internal - but you can edit it as required.
7.A Reference will also default in, but you can choose a different one from the drop-down, which is populated by the options created under EventPro Setup > Communications > Communication References.
8.When you are done with the Assistant Item File Attachment window, click Save and Close to return to the Assistant Item edit form.