•The Invoice Export Assistant automatically exports invoice data according to the set schedule, with filtering capabilities to determine which invoices are marked for export.
oThe export format is determined separately in Invoice Export System Settings.
•This current section is mainly intended to explain the settings that are unique to the Invoice Export Assistant, but will refer back to the general instructions from Assistant Creation Overview when relevant.
1.Begin: Create a Virtual Assistant, ensuring that you select the Invoice Export Assistant Item.
2.Schedule: Set the Assistant's schedule under the Assistant Schedule Tab.
3.Settings: Adjust the settings under the Assistant Settings Tab. Remember that these settings are specific to the Invoice Export Assistant.
a.Cancel Export if Validation Errors Found:
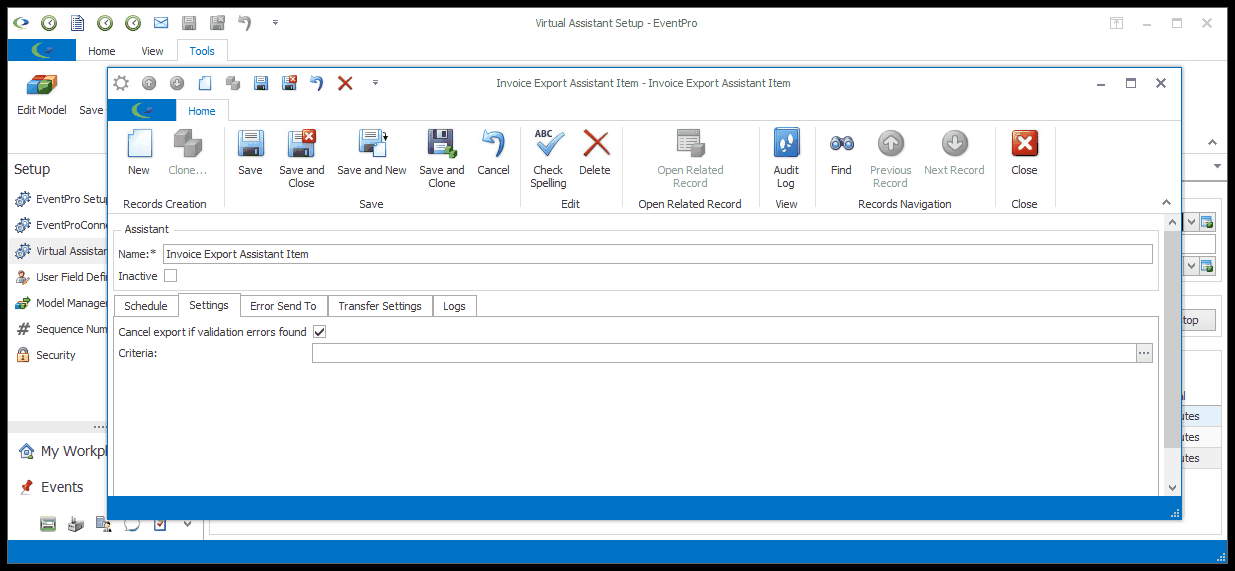
i.Select this checkbox if you want the export to be cancelled if any validation error is found.
ii.If you leave this checkbox unselected, the export will continue even if validation errors are found, but only the valid invoices will be exported.
iii.Whether the export continues or not, if a validation error occurs, an error notification will be sent to the recipient(s) indicated under the Error Send To tab.
b.Criteria:
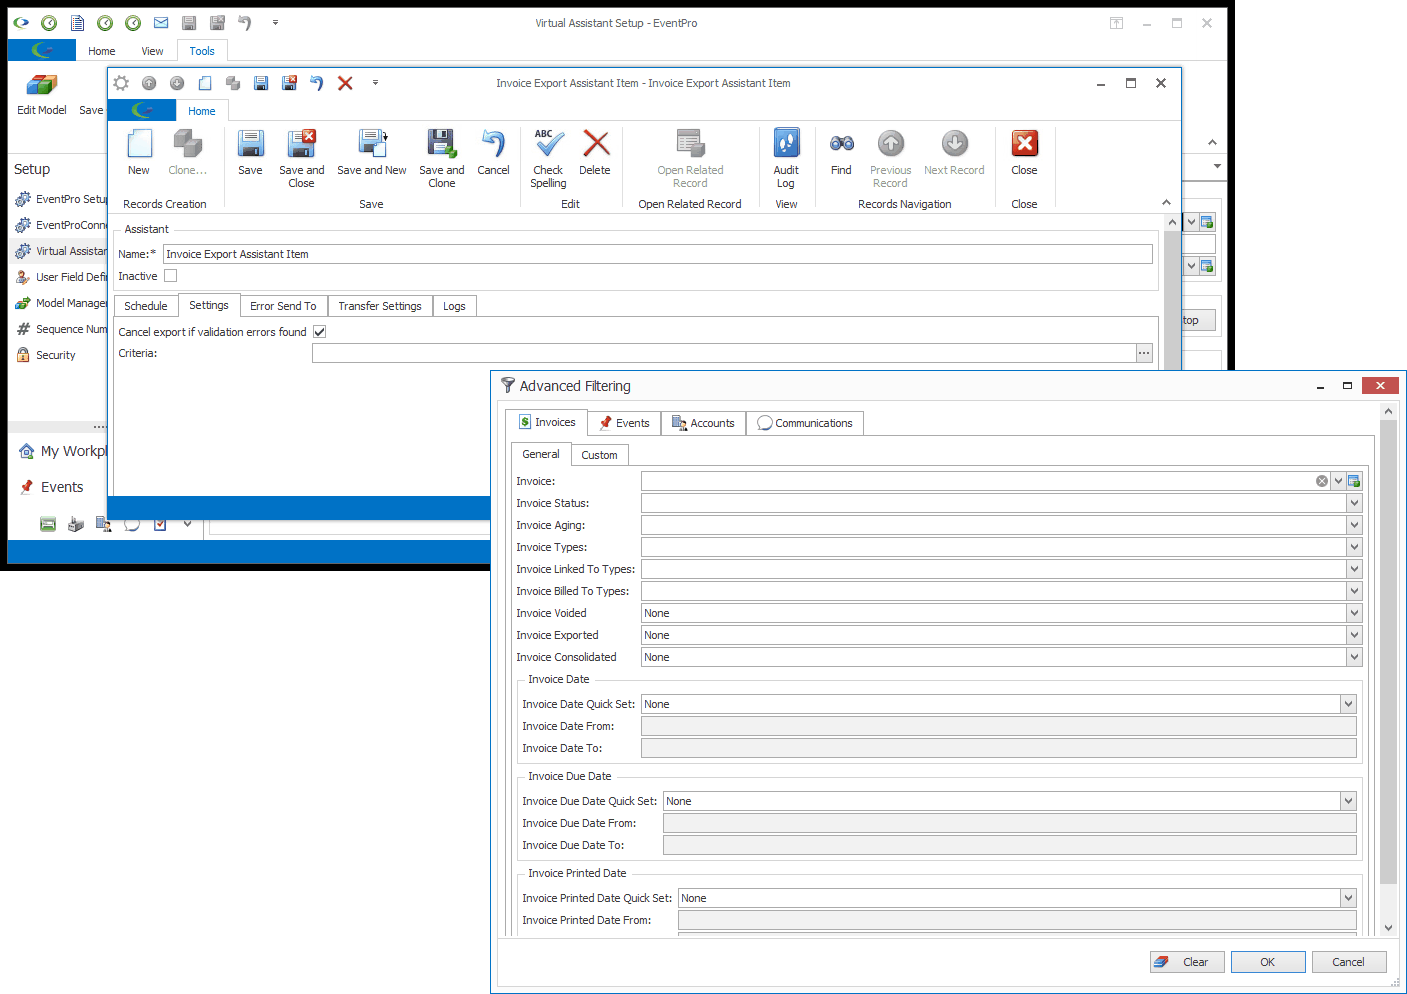
i.Click the ellipsis to the right of the Criteria field.
ii.The Advanced Filtering window opens. This is where you set the criteria to determine which invoices will be exported.
iii.IMPORTANT: The default criteria coded in the program will prevent the export of Voided and previously Exported Invoices.
iv.In this Advanced Filtering window, leaving the Invoice Voided and Invoice Exported fields set to "None" simply means that you have not made changes to those particular pre-set criteria.
v.Note that you will not be able to export an invoice more than once without running SQL.
vi.Make any other criteria selections you want to apply, and click OK.
4.Error Send To: The Invoice Export Assistant has a slightly different Send To tab called Error Send To.
a.If a validation error occurs during the scheduled export, regardless of whether or not the export continues (depending on the Cancel Export if Validation Errors Found setting), an error notification will be sent to the recipient(s) indicated under this Error Send To tab: User, User Group, and/or Email Address.
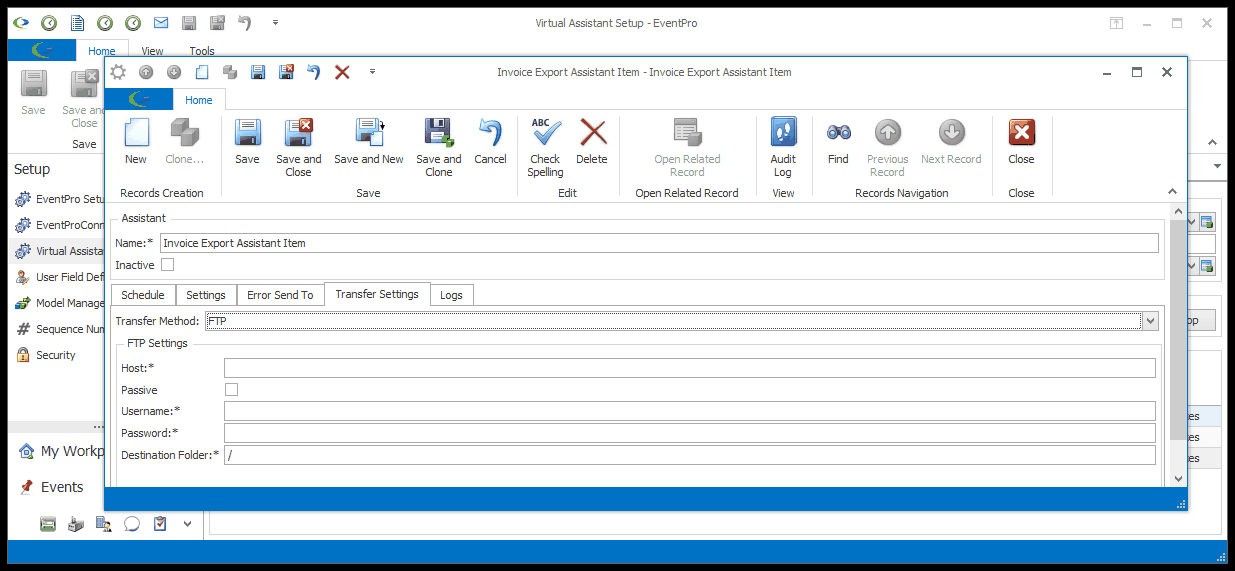
a.Transfer Method: From the Transfer Method drop-down, choose the transfer method you will use: File Copy or FTP.
i.If you are using the EventPro Cloud application, you must select FTP. File Copy is not available for the Cloud application.
ii.If you are running a locally installed version of EventPro, you can use FTP or File Copy as your transfer method. However, in order to use File Copy, the EventPro Virtual Assistant Service must have direct access to your webserver, and be able to access the folder containing the file that your webserver is using.
b.File Copy: Enter the path to the file in the File field.
c.FTP (File Transfer Protocol): If the EventPro Virtual Assistant Suite Service does not have direct access to your webserver, you can FTP the file to the webserver.
i.Host: Enter the name of the FTP server to which you want to connect.
ii.Passive: If the FTP server to which you are connecting requires a passive connection, select this checkbox.
iii.Username: Enter the username used to connect to the FTP server.
iv.Password: Enter the password used to connect to the FTP server.
v.Destination Folder: Enter the path to the folder.
6.Logs: You can later review the Assistant Logs Tab to see if the Assistant has been running successfully.
7.Finish: When you are done with the Assistant edit form, Save and Close the Assistant.