•You can create and save custom Report Filters that you can use any time you run the report.
•The Filters are saved by Report Name, so you can have a separate set of filters for each Report.
•To create report filters, you need to access the report's Filter Settings window.
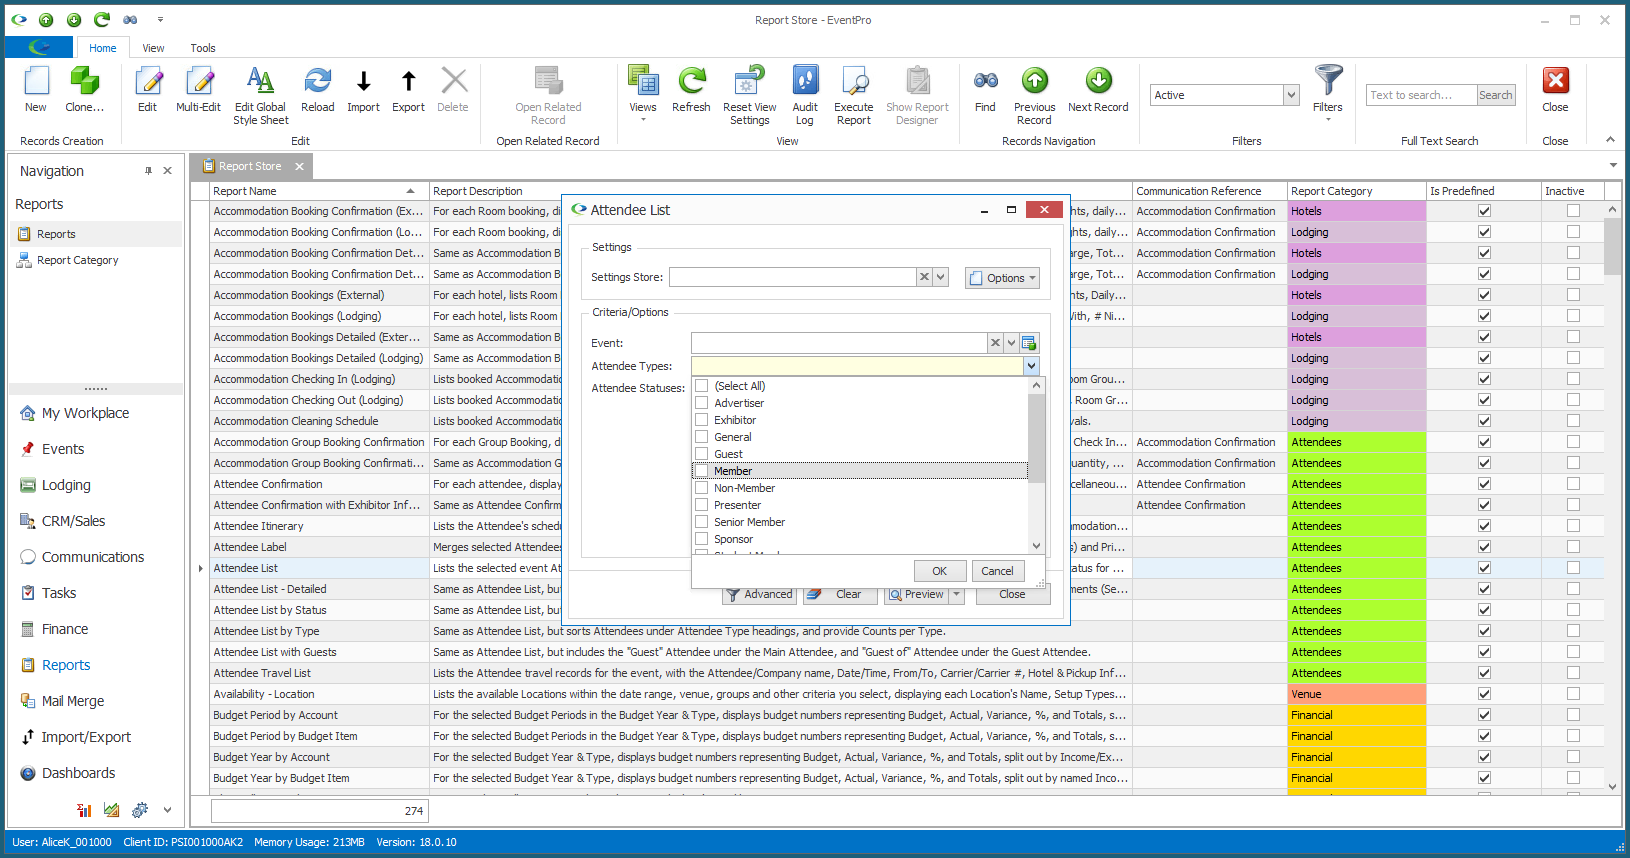
oIn the Report Store, run the report by double-clicking the report record in the selection grid, or select the report and click Execute Report in the top ribbon.
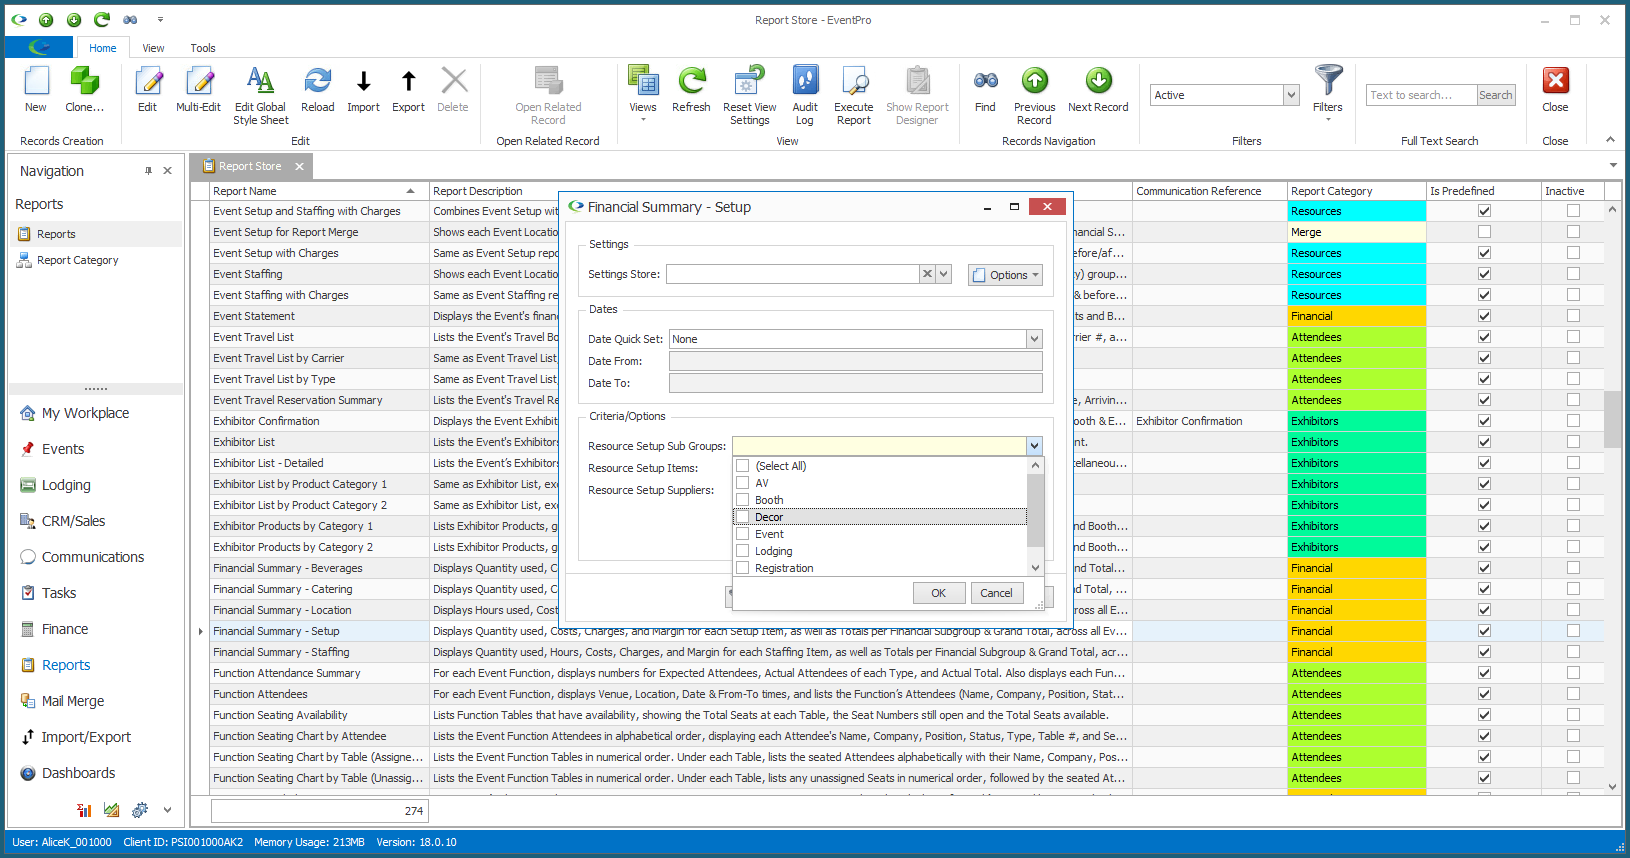
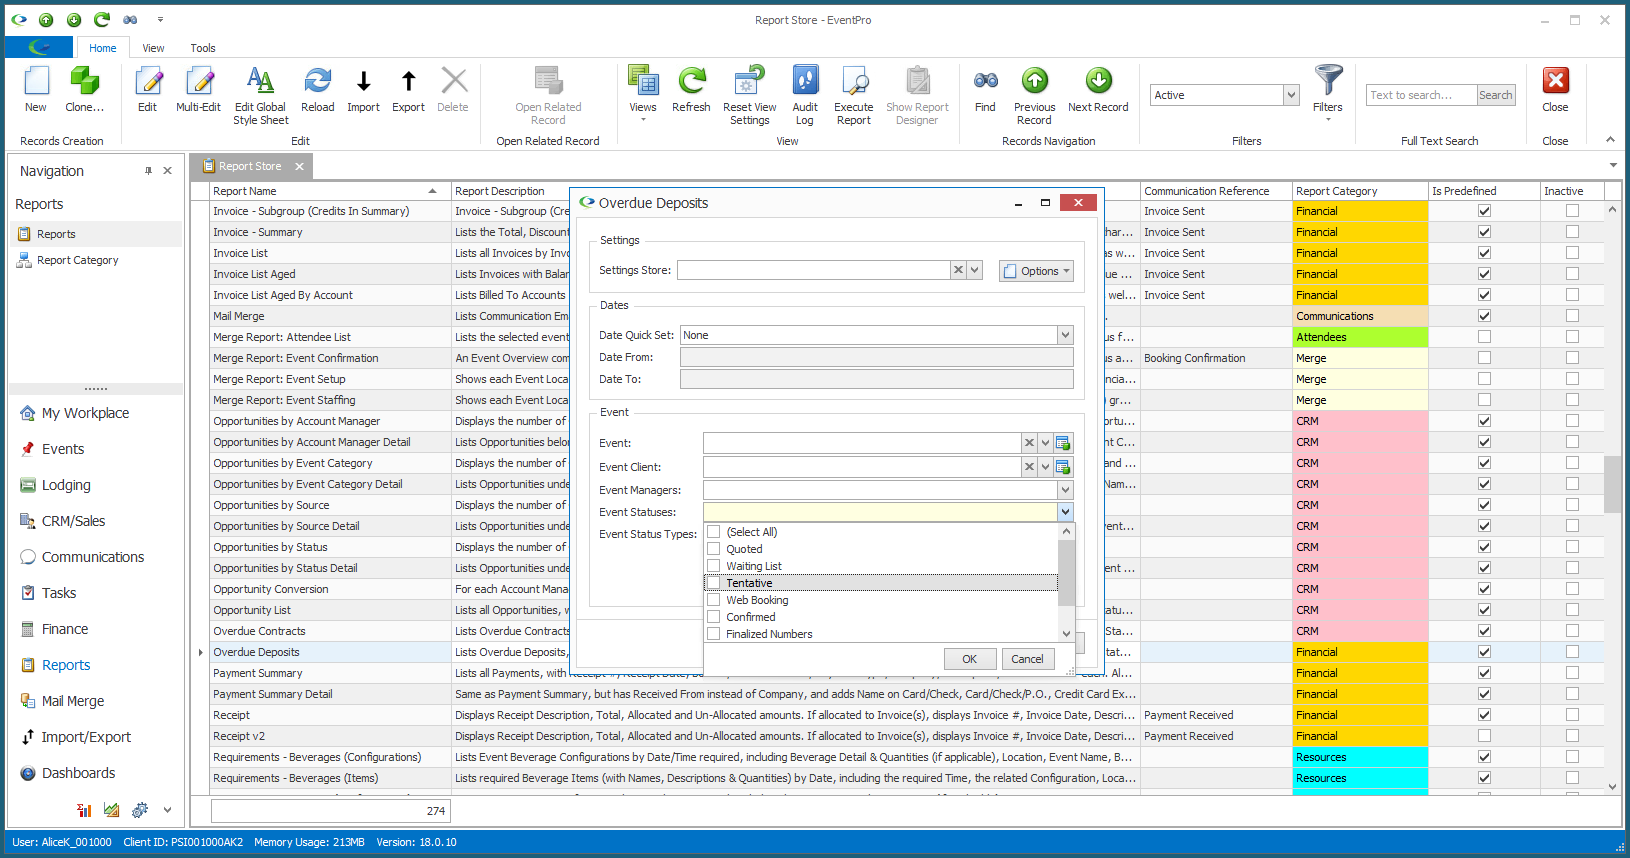
oThe report's Filter Settings window appears.
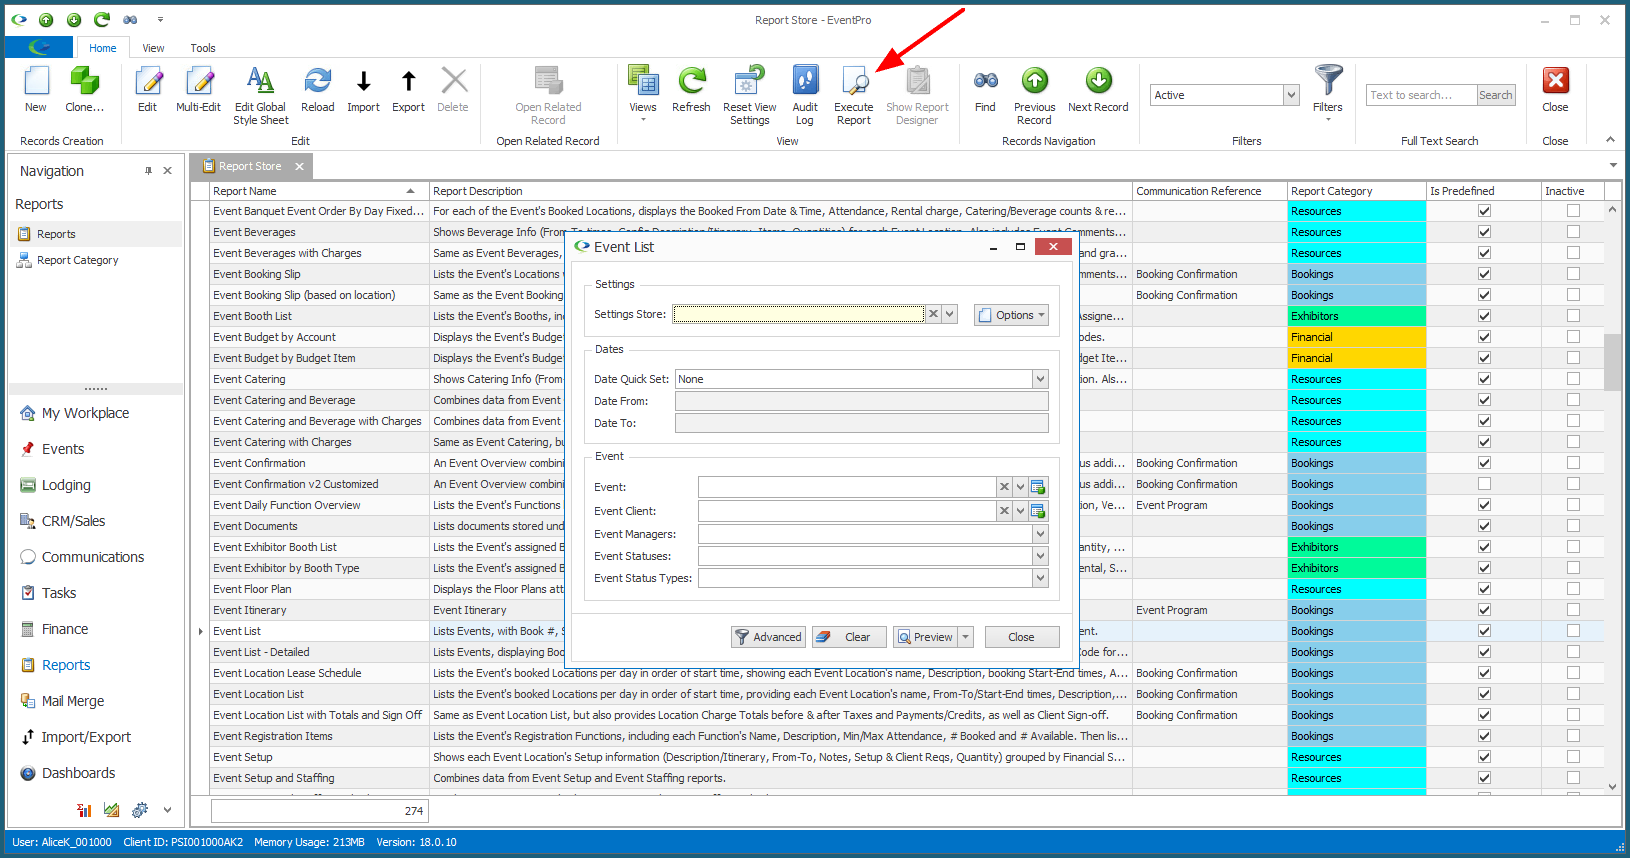
•The Settings Store field is where you access previously saved filters, but if you haven't yet created any filters for this particular report, the Settings Store will be blank.
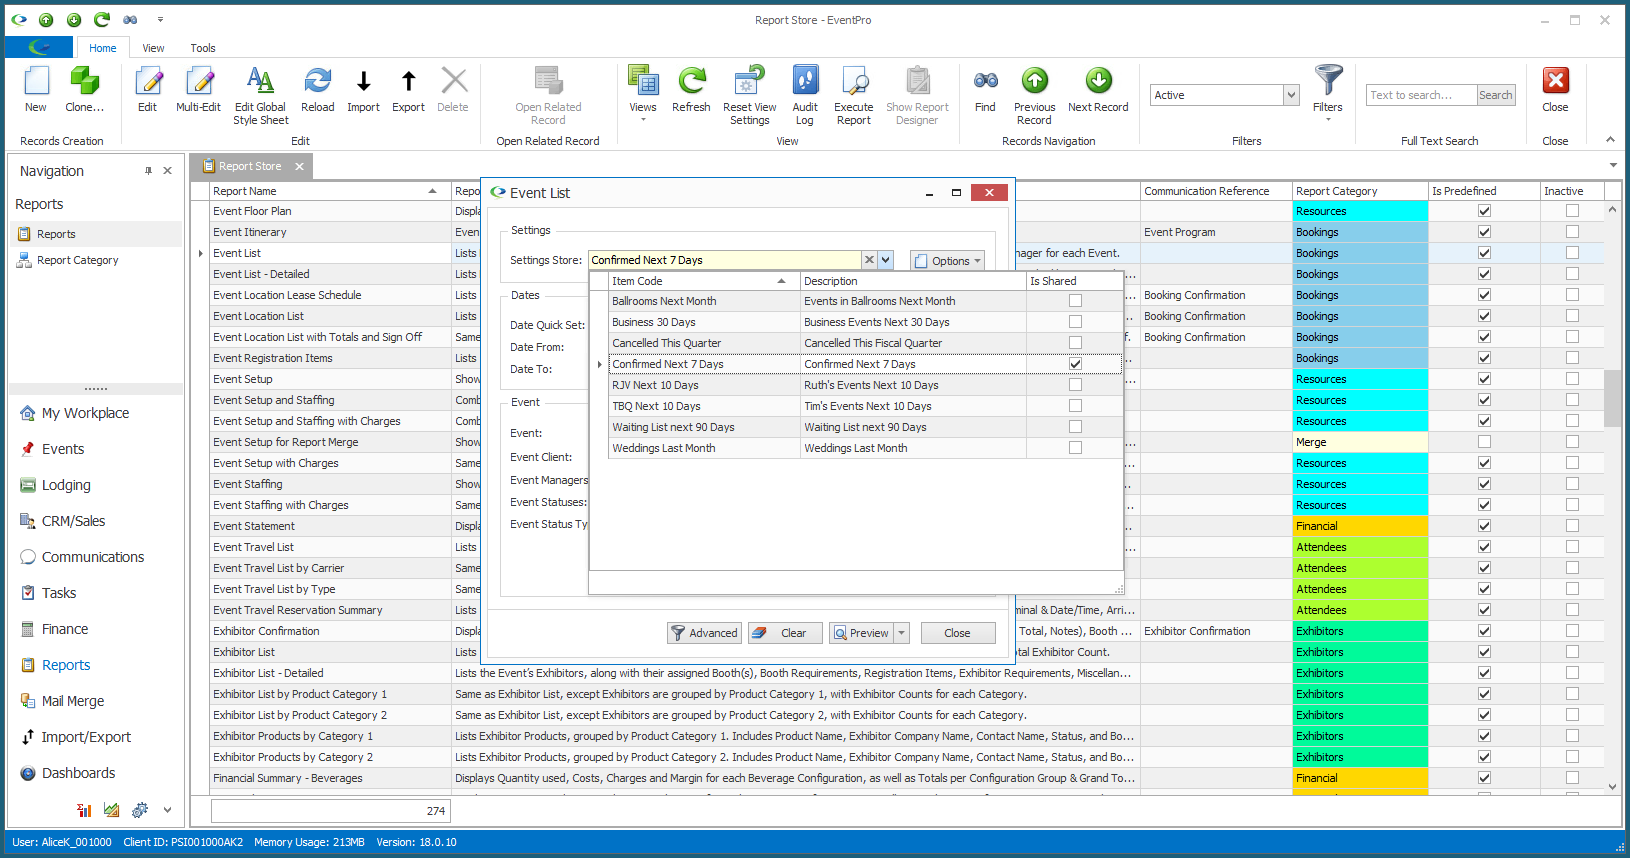
•To create filters, you can approach the process from two different directions:
oYou can first set the filter criteria, and then save that set of criteria under a filter name.
or
oYou can first create the filter name, and then select criteria to save to that filter.
Either path ends with the same results.
In our example, we are going to select the criteria for a new filter, create a new name for the filter, and then save the filter criteria to that new filter name.
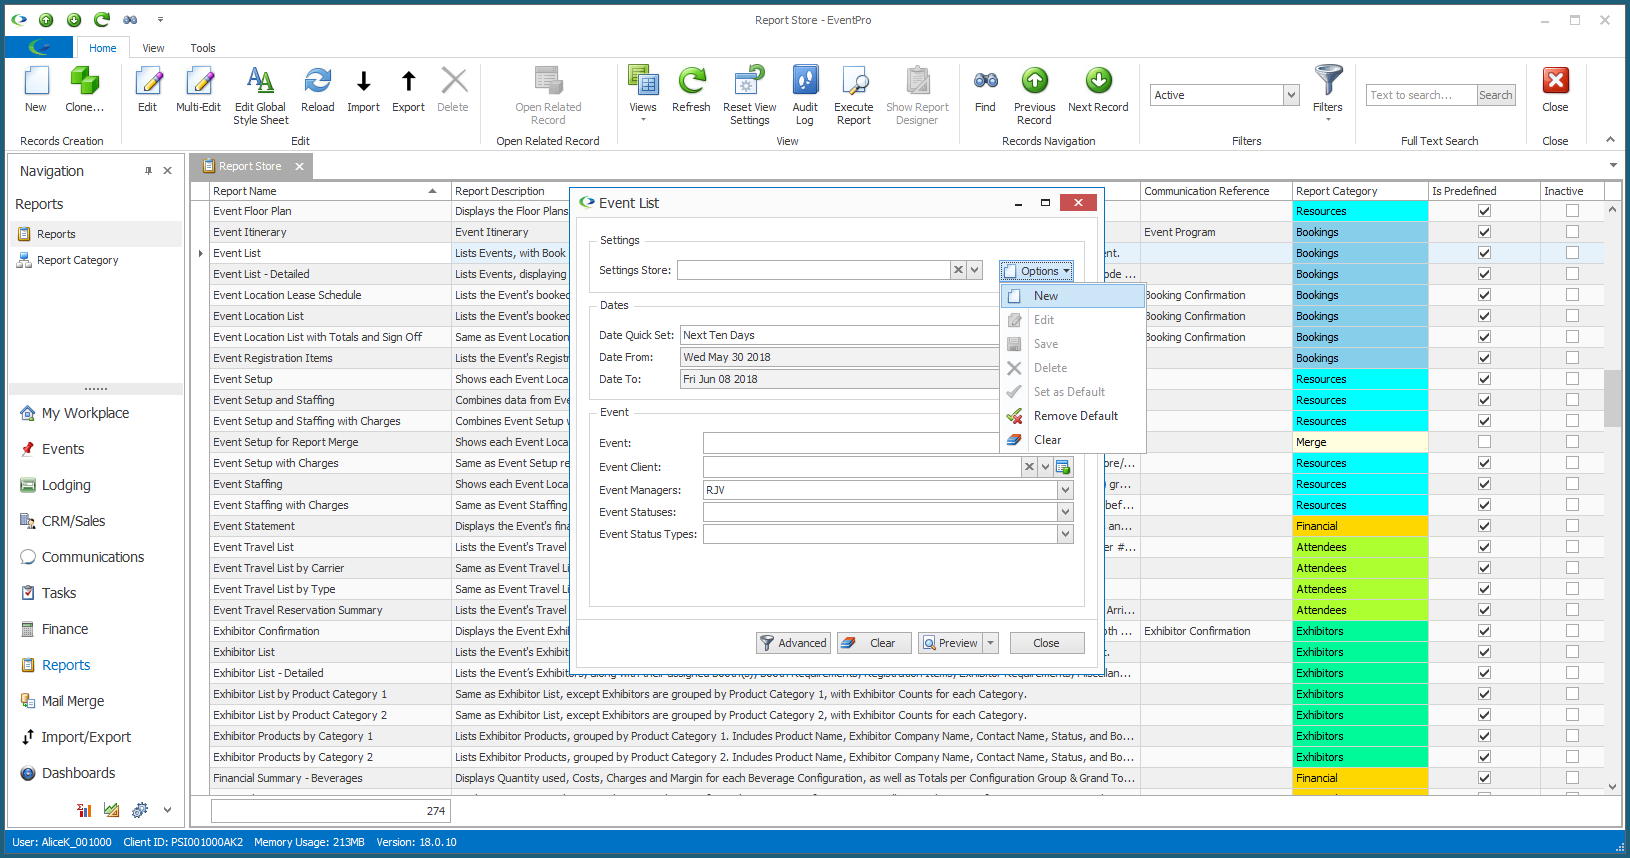
1.STEP 1: Select the criteria you want applied for this filter.
The available criteria will vary widely, depending on the Report you are running. There are some common elements that will appear for many Reports.
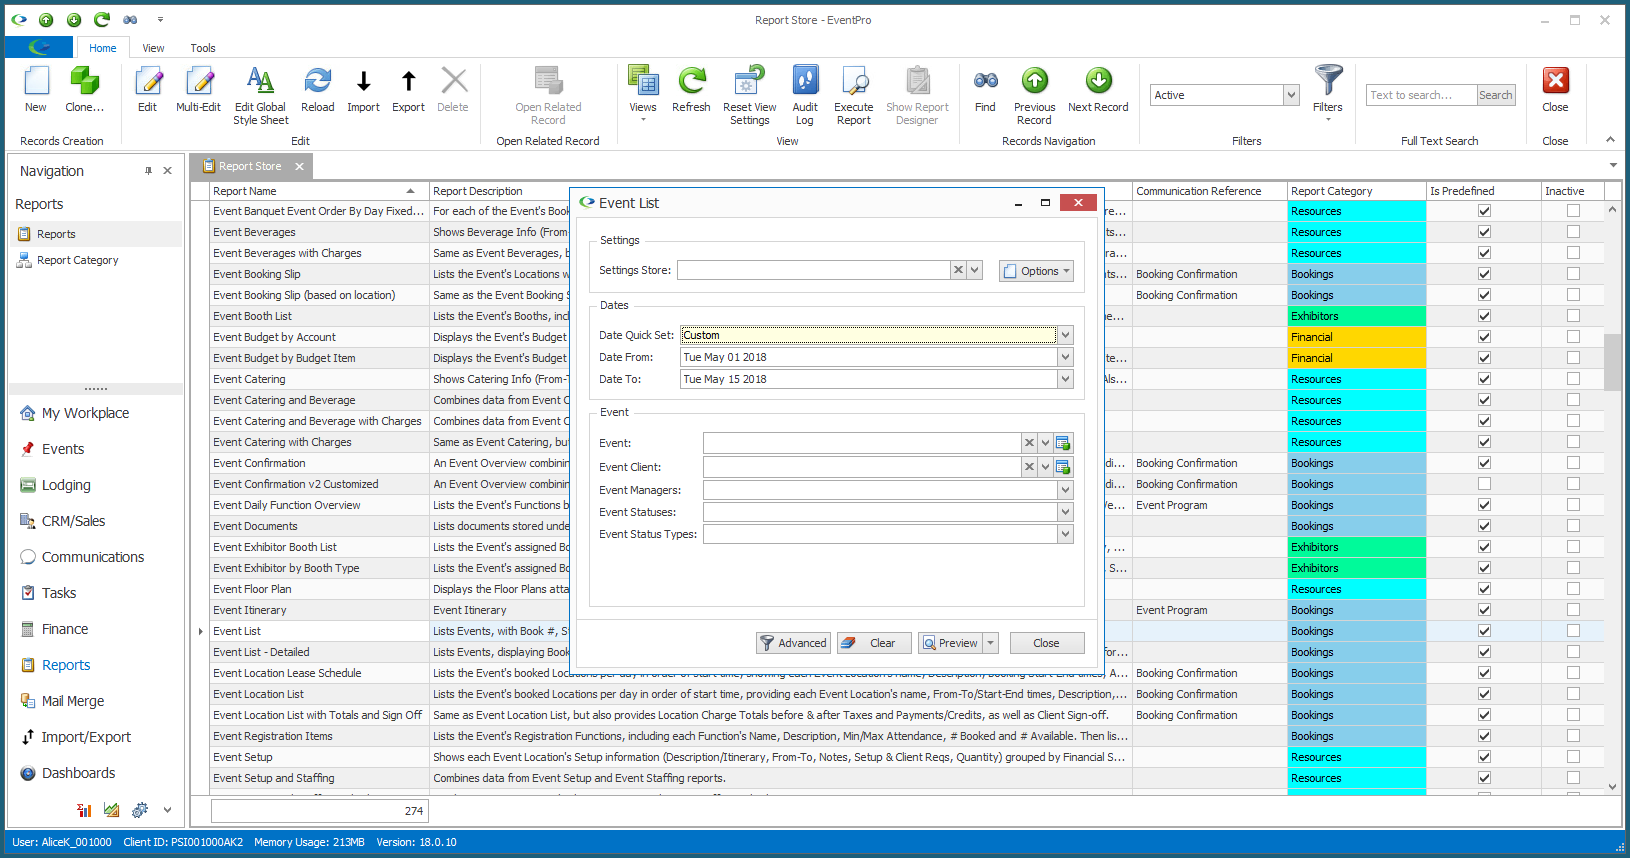
a.One common criteria option will be Dates. You can select a pre-defined range of Dates from the Date Quick Set drop-down.
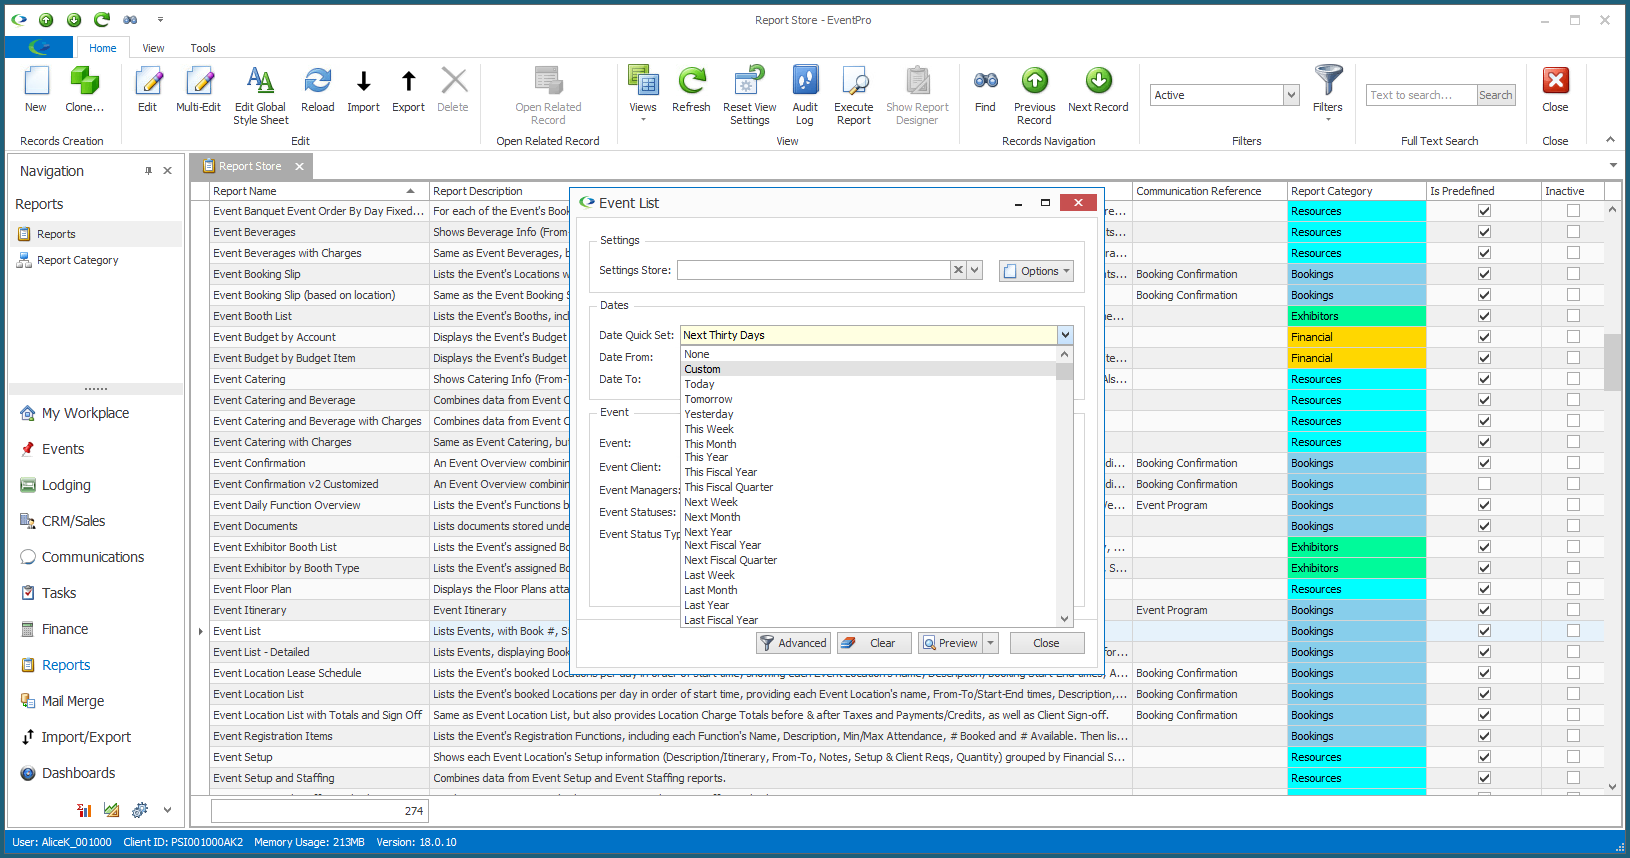
b.To set your own date range, select Custom, and choose the Date From/Date To below.
c.There will be numerous other criteria options for the various reports. For example, you may be able to select the relevant Statuses, Status Types, Setup Subgroups, and much more.
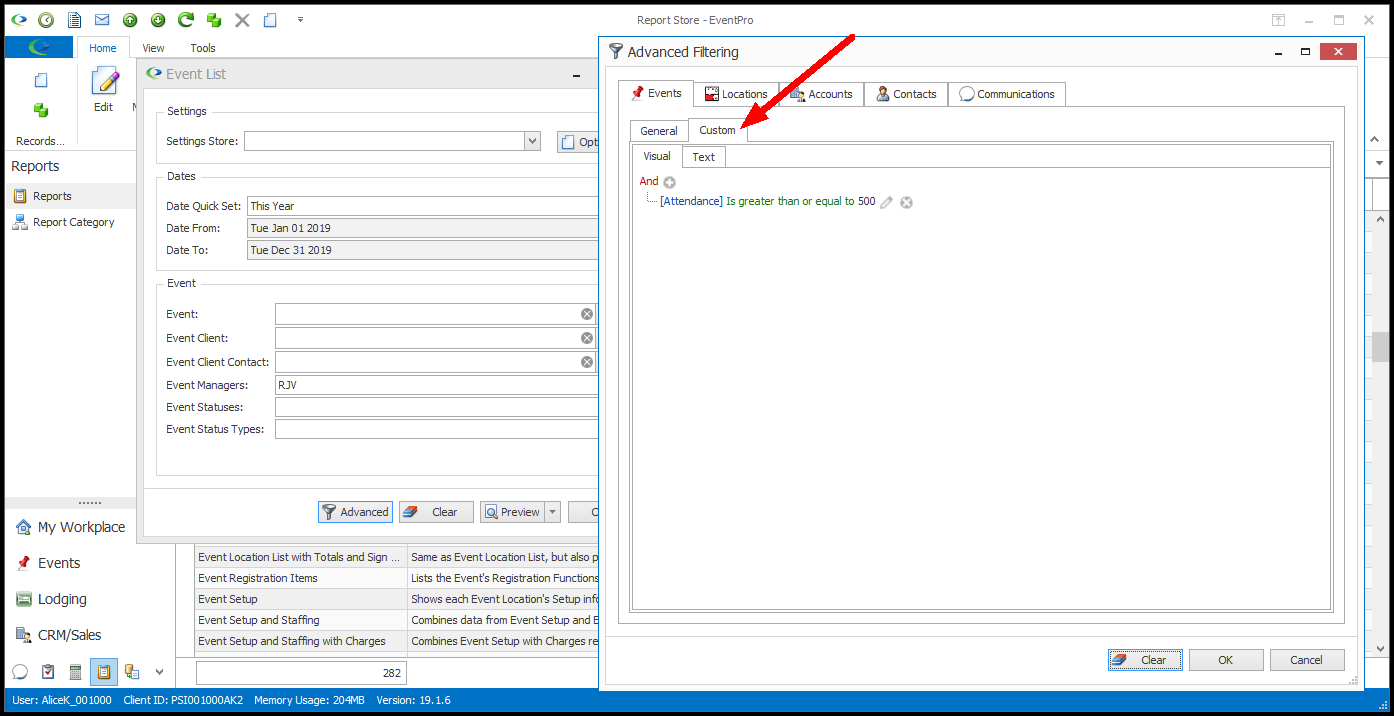
d.Most report Filter Settings will have an Advanced filter option. Click the Advanced button to open the Advanced Filtering window.
There will be various tabs in the Advanced Filtering window, depending on the report you are running.
Each tab will have two sub-tabs:
i.The General tab with pre-set selections.
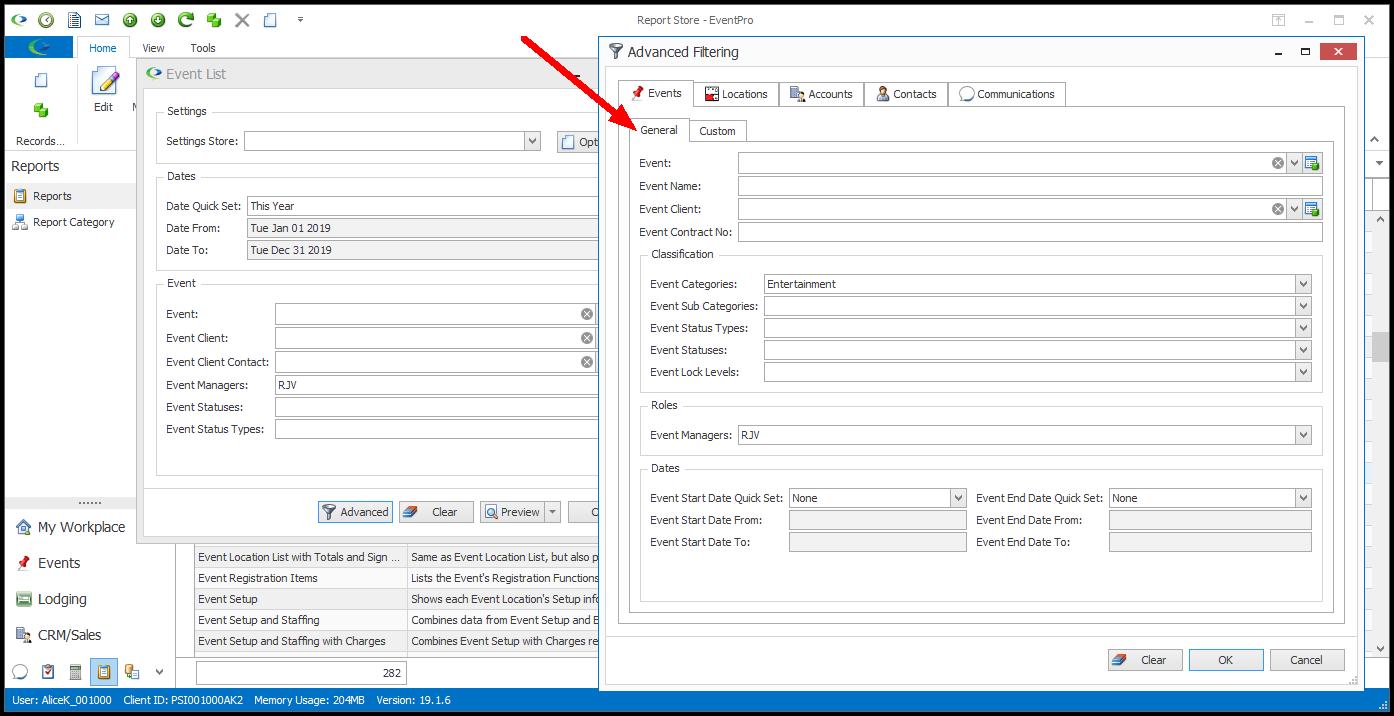
ii.The Custom tab, where you can construct your own custom filter. (For additional instructions about constructing filter conditions, see Common Procedures | Construct Filters.)
e.If at some point, you want to completely clear all filter selections in the Filter Settings window, click the Clear button at the bottom of the window. This will completely clear the filter so that you can start over.
2.STEP 2: Now that the filter criteria are all set, we will create a new name for this filter.
a.Click the Options button and select New.
b.The Filter edit form appears. Enter an Item Code and Description for this filter.
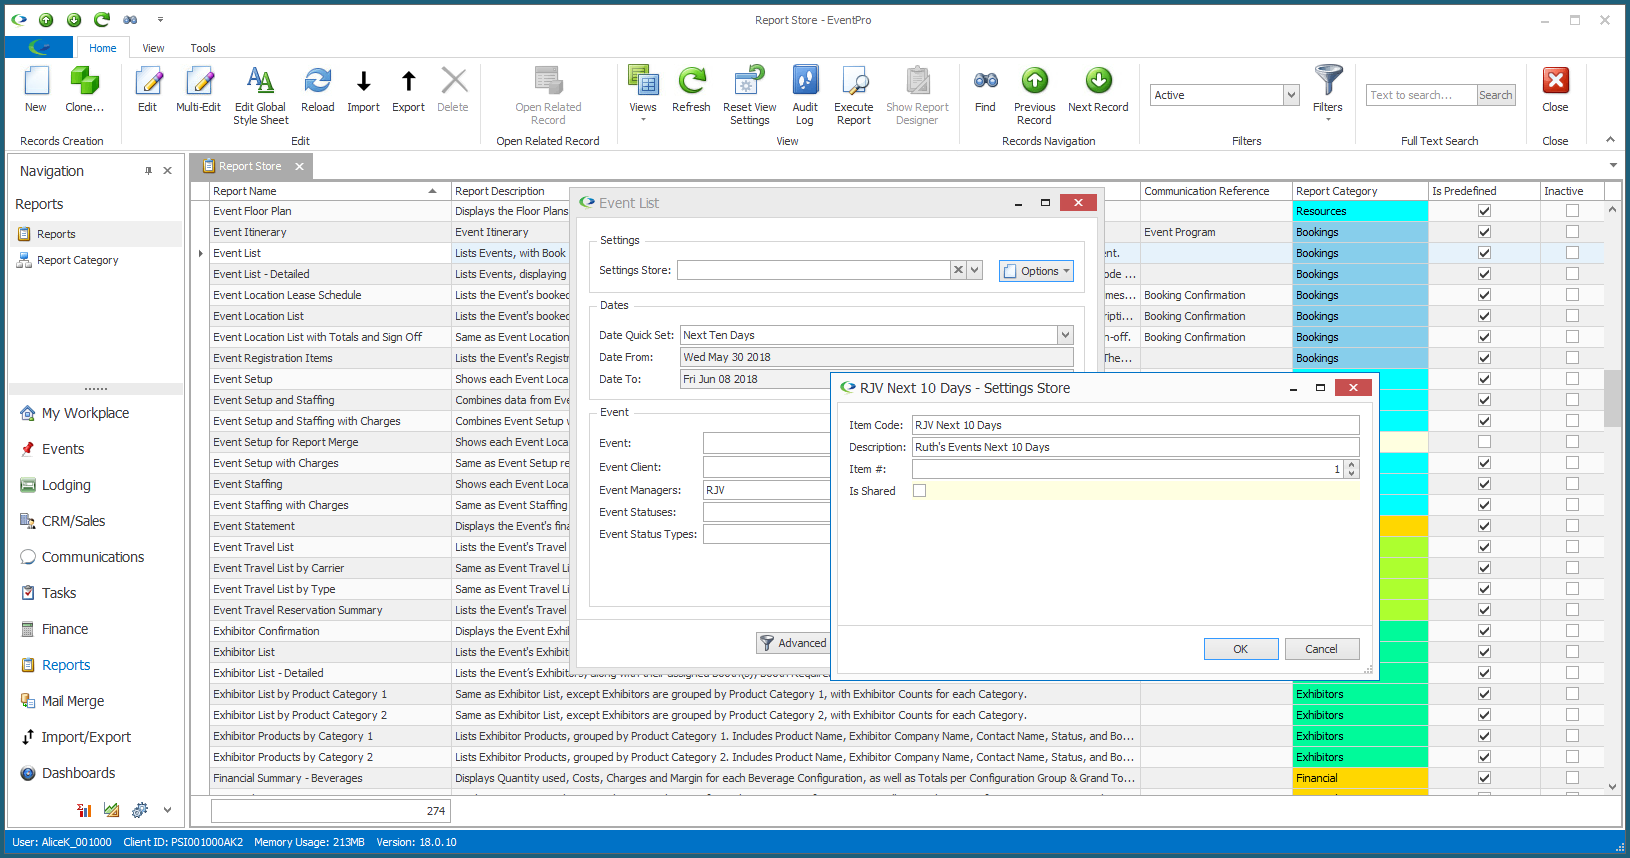
c.The Item # will default in, but you can change it if you want the change this filter's position in the sort order.
d.If you want this filter to be available to other Users, select the Is Shared checkbox. Uncheck the Is Shared checkbox if you want the filter to appear only for you.
e.Click OK to return to the Filter Settings window.
f.You will now see the Filter name in the Settings drop-down.
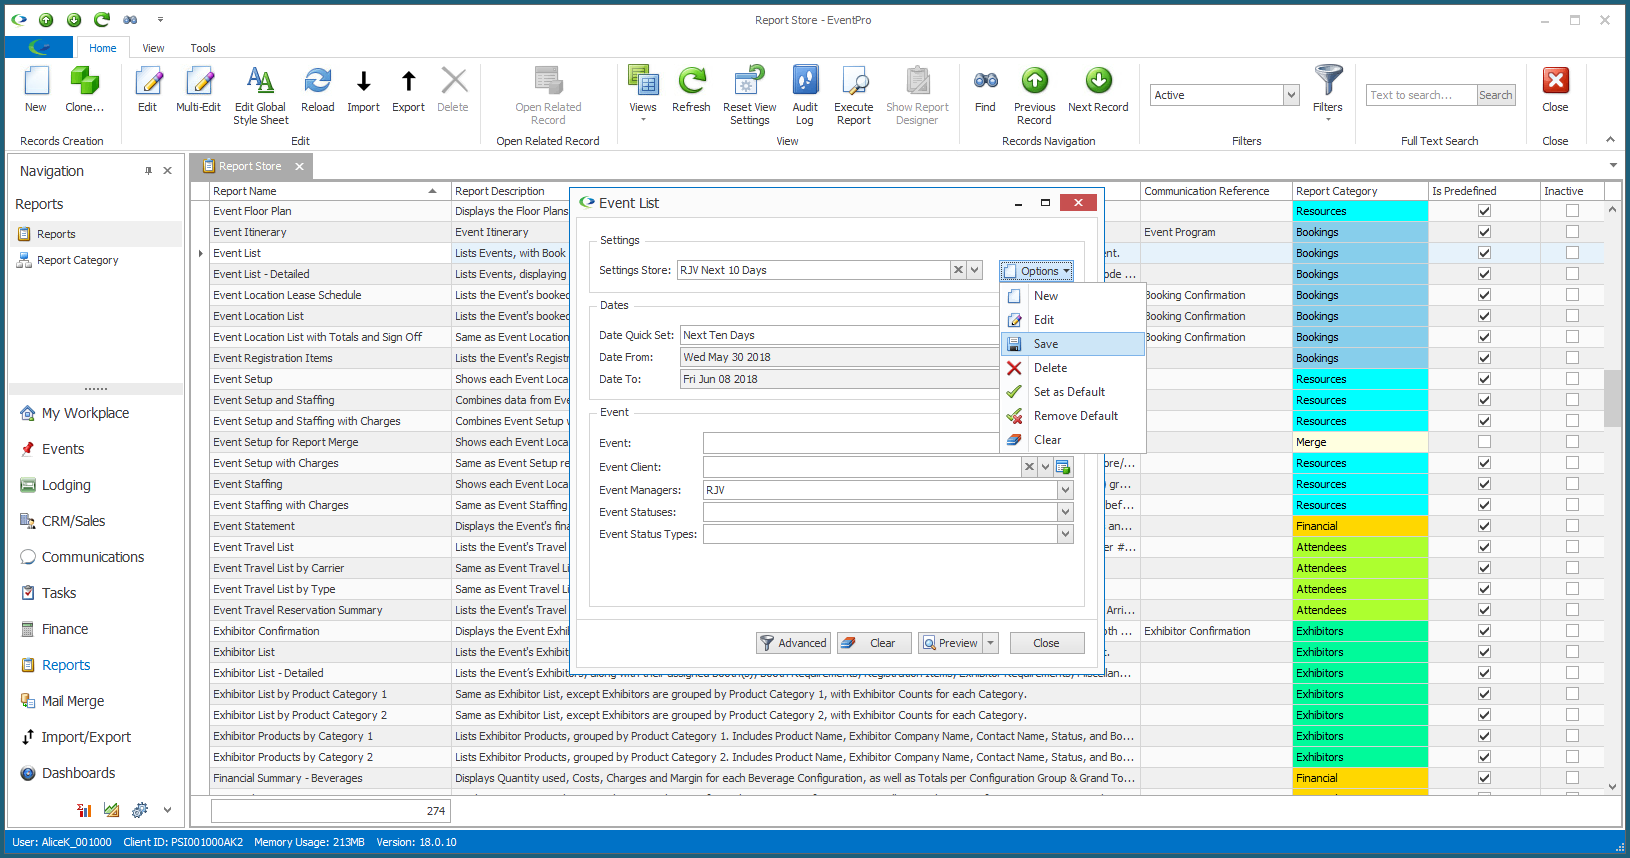
3.STEP 3: You will now save the currently selected filter criteria under the filter name you just created.
Click the Options button and select Save.
The currently selected filter options will be saved to the Filter name that is displayed in the Settings Store drop-down.
•Continue creating more filters for the report, as you require. The Settings Store drop-down will be populated with the filters created for this report.
•Now, when you run the report, you will be able to select from your previously saved filters, as well as create new filters on the fly.
•To learn how to edit, delete, and set default Report Filters, see Edit Report Filters.