•Before setting up the Google Calendar Event Assistant:
oYou need a valid Google Account, and you will require your Google email address and password when setting up your Assistants.
oAlso, you will typically need to turn on the "Allow Less Secure Apps" setting in your Google Account to allow the Assistant to access the calendar. Please consult Google's Sign In & Security documentation if you require more information.
1.Google Email: Enter the Google Email address for the Google Account you're using to authenticate to Google.
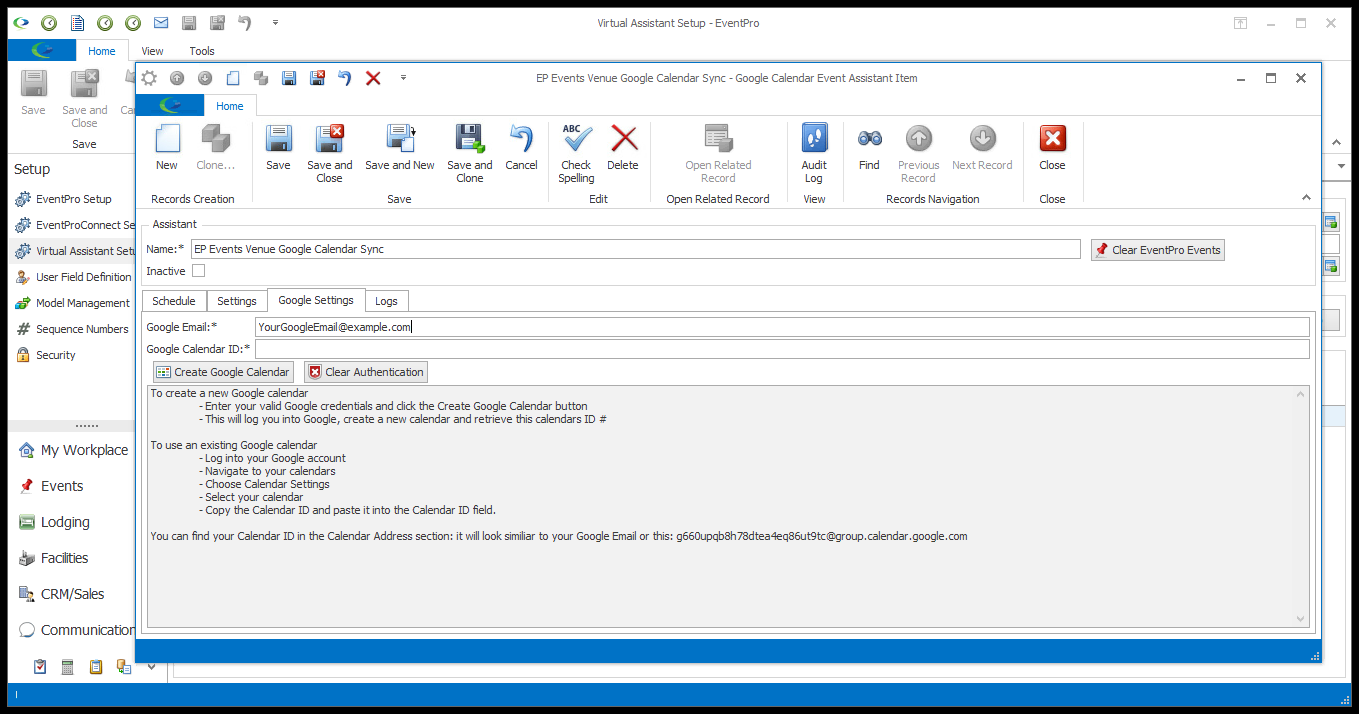
2.Google Calendar ID: Decide whether you want to create a new Google Calendar for this Assistant, or use an existing Google Calendar.
Whether new or existing, remember that this Google Calendar must have access rights that allow relevant Users to book events from it.
For this Assistant Google Calendar ID, do not use any of the Room/Resource Calendar IDs (i.e. the Venue Location Google IDs used in Linked Locations & Rooms).
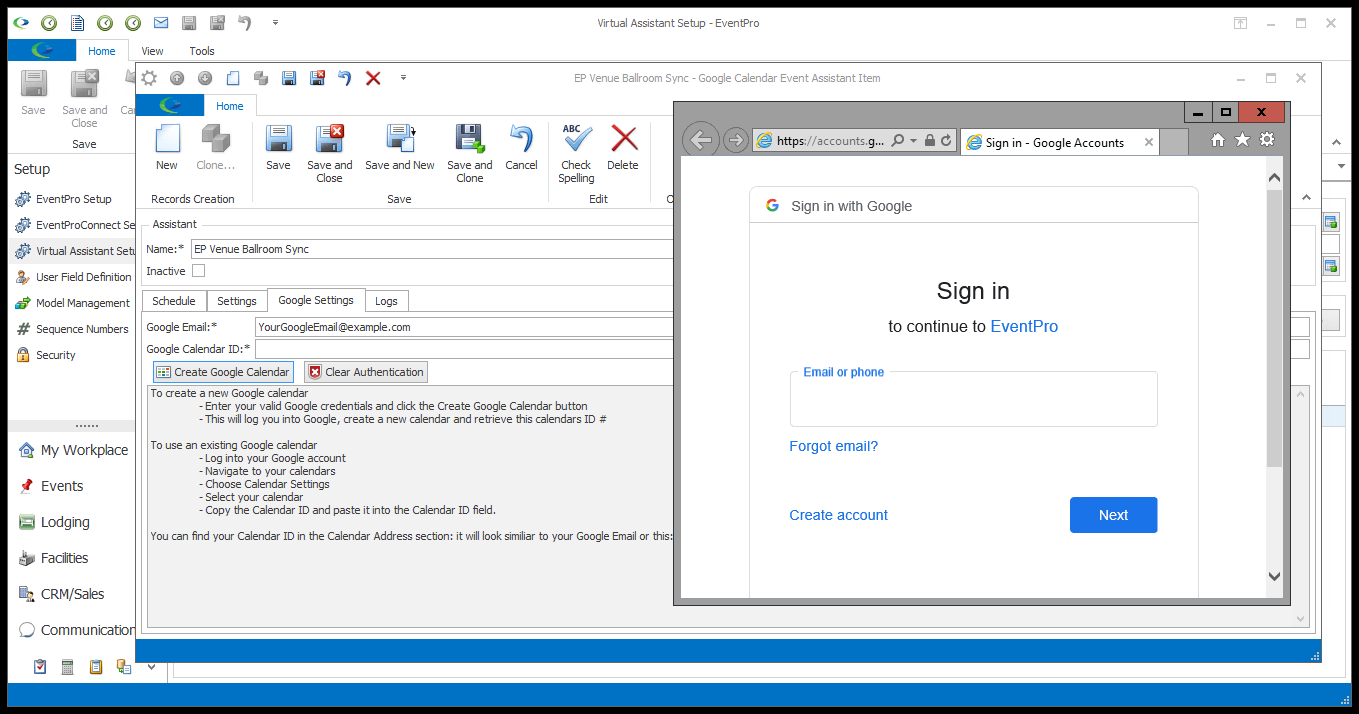
a.New: Leave the Google Calendar ID blank (The new ID will be automatically entered later), and click the Create Google Calendar button. The Sign In window appears.
b.Existing: Enter the existing Google Calendar ID, which you should be able to copy-and-paste from the Google Calendar's Settings.
i.If you're using an existing Google Calendar ID, DO NOT click Create Google Calendar, as that will overwrite the existing ID.
ii.After entering the Calendar ID, don't exit the edit form yet. First, click Save to start the login process. The Sign In window appears.
3.Whether you're creating a new calendar or using an existing calendar, the Sign In window appears. Continue through the Google login process, entering your Google credentials if/when required.
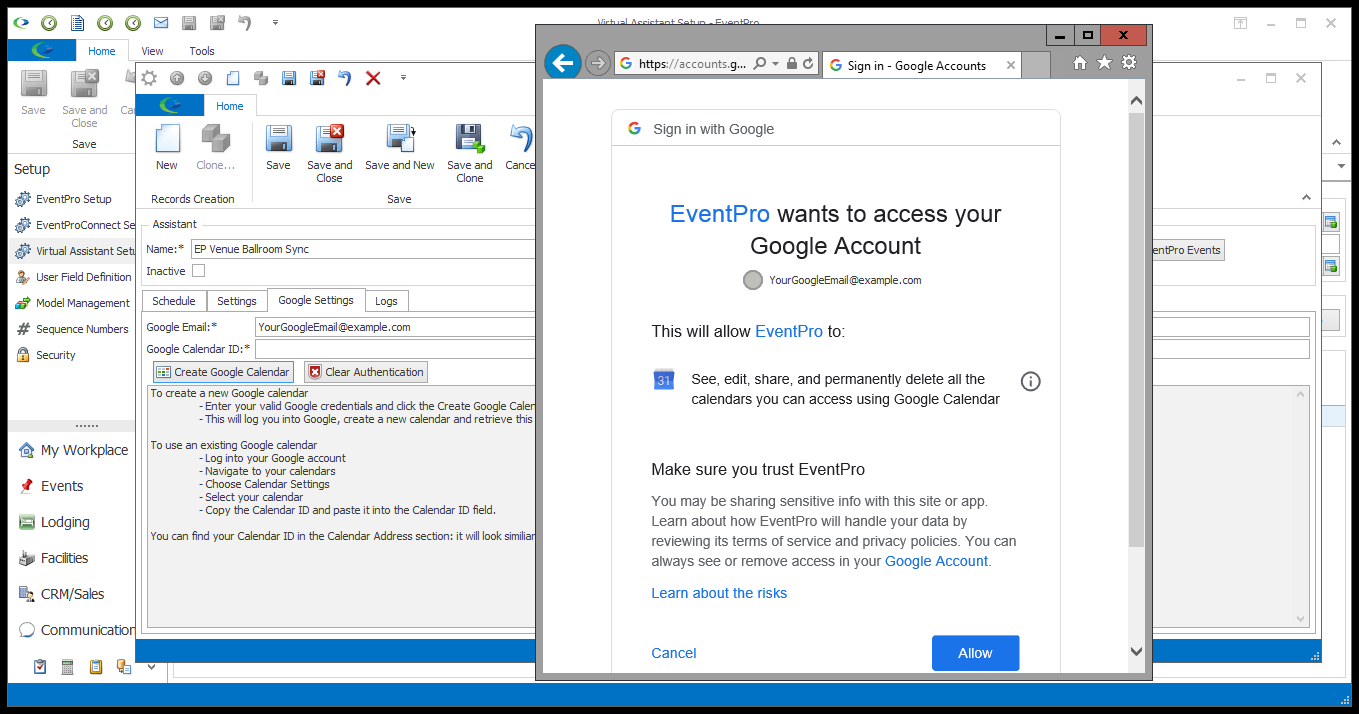
4.The next dialog will ask if you want to allow EventPro to access your Google Account. In order for the Google Calendar Assistant to work, you must click Allow.
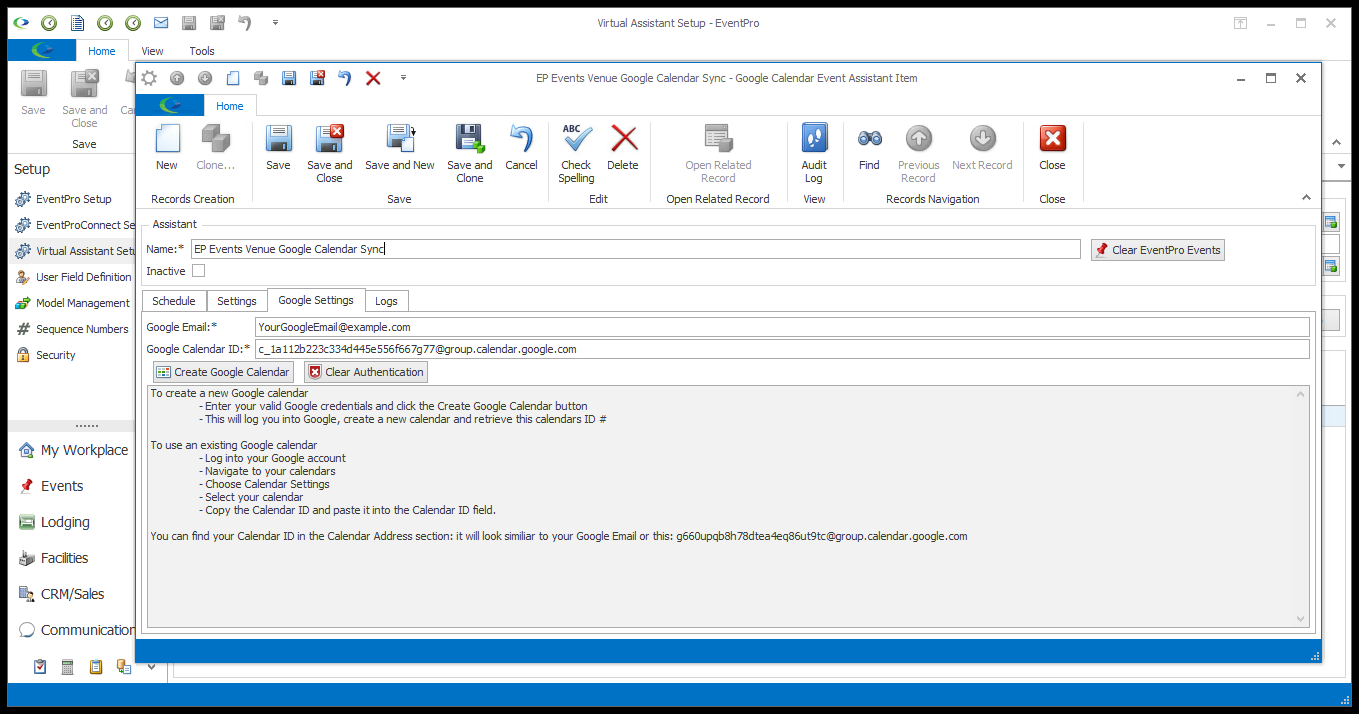
5.You will return to the Google Calendar Assistant Item edit form. If you chose to create a New Google Calendar for this Assistant, you will see the new ID in the Google Calendar ID field.
Next: Save & Close