Many people find that the Venue Calendar is the most convenient place to begin a booking, as you have a visual representation of your locations, dates, and existing events, and can easily determine availability before you start the booking.
You can navigate to the Venue Calendar from the Events area in the navigation panel or menu, or possibly from My Workplace, if you added the Venue Calendar shortcut.
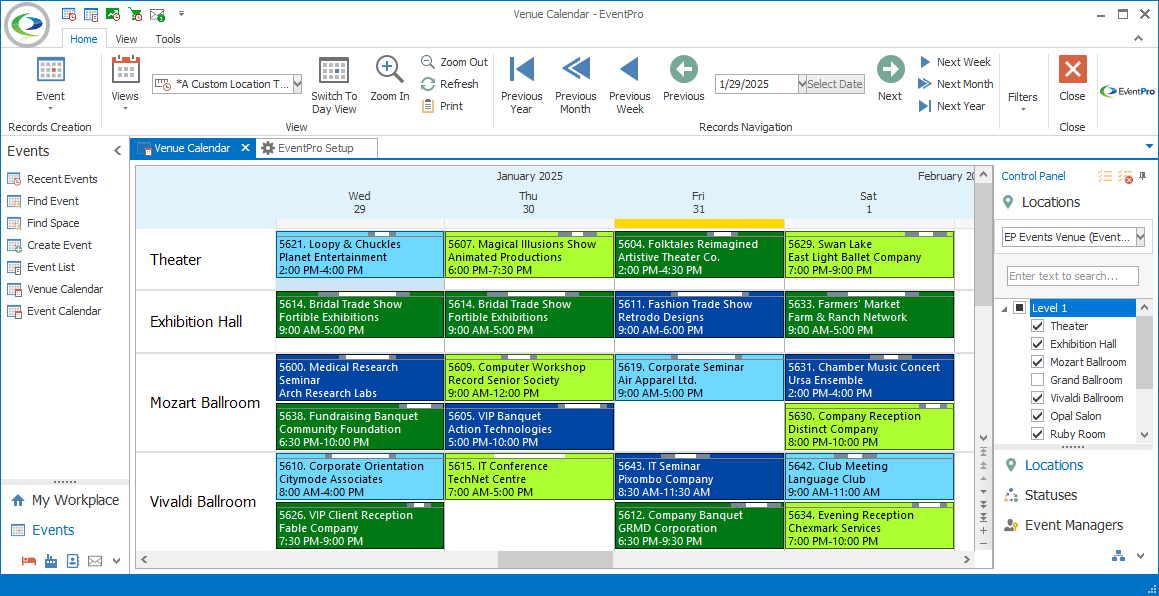
Figure 106: Venue Calendar
Choosing a View for Booking Events
For event-booking purposes, you may find it most convenient to use a Calendar View that displays both dates and locations, such as one of the "by Location" views such as Month by Location, Timeline by Location, etc.
To review how to select, view, navigate, filter, and create Calendar Views, see Venue Calendar & Event Calendar.
Event Creation Options
Before starting the Event Creation process, consider the different booking options available from the Venue Calendar:
•New Event: This option creates a new booking in the one or multiple locations/dates that you have selected on the Venue Calendar.
•New Quick Event: This command allows you to quickly create an event from a one-page Quick Event Entry screen with minimal fields.
•New Repetitive: This option provides a selection page in which you can choose the locations/dates and repetition cycle for a new booking.
•New from Past Event: This option creates a copy of an existing event, using the locations/dates/duration of the existing event, as well as other event details you have selected to copy, such as Event Comments, Event Detail, Attendee Registrations, etc. The New from Past Event function creates an event using the same number of booked locations and the same duration as the existing event, except that you select a new Start Date for the new event.
•Add Locations to Event: This option allows you to select one or multiple locations/dates on the Venue Calendar that are appended to - added to - an existing event.
•Add Locations to Event - Repetitive: This option allows you to append repetitive locations/dates to an existing event, using the same location/date selection page from New Repetitive.
Selecting Locations/Dates
It is useful to know what kind of event booking you are creating beforehand, as you may want to select the relevant Locations and Dates on the Venue Calendar before launching the Event Creation Wizard.
•Selecting locations/dates will typically be most important when using the New Event, New Quick Event, or Add Locations to Event option in the wizard.
•You can do some preliminary calendar selections for a New Repetitive or Add Locations to Event - Repetitive booking, but the upcoming repetitive options page in the wizard allows you to set the repetitive dates and locations more accurately.
•For a New from Past Event booking, you can select the new event's starting date (which can also be selected during the wizard), but the locations and duration will be copied from the existing event.
•If you plan to connect the event to an existing Opportunity, you may have the option to use one of the preferred sets of locations/dates set up for the opportunity, in which case you may not need to select locations/dates on the calendar.
There are a few different ways you can choose locations/dates and launch the Event Creation Wizard, depending on how many booked locations you want to include in the booking.
One Location/One Day Events
You can use these methods for starting new events with one booked location, appending one booked location to an existing event, or for starting a New from Past Event, New Repetitive, or Add Locations to Event - Repetitive.
Double-Click Start
Double-clicking on a cell in the Venue Calendar will launch one of four options, depending on the default Event Calendar Double Click Action selected in your Security User settings: Create Event, Create Quick Event, Create Event Quote, or Create Quick Event Quote.
If you want to book an event in one location on one day, and your settings default to Create Event or Create Quick Event, you can simply double-click in the cell representing the day/location you want.
Right-Click Start
Find the cell representing the location and date you want to use. Right-click on the cell, and select the relevant event booking option from the speed menu.
Event Records Creation
Select the cell representing the location and date you want to use. In the top ribbon, click the Event button and select the booking option you want to use.
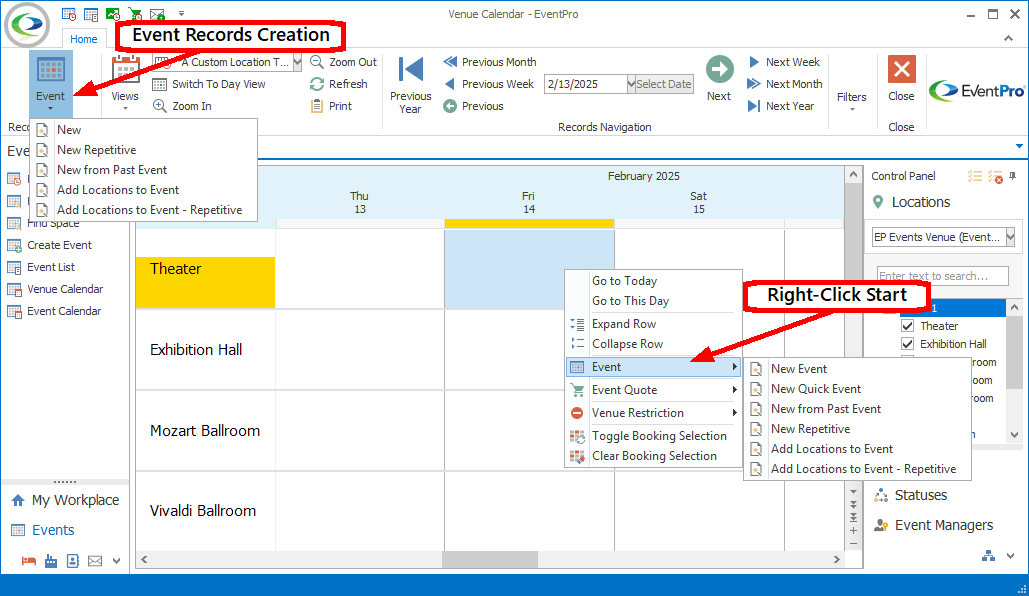
Figure 107: Starting 1-Location Event
Multiple Location/Day Events
REMEMBER: Even if you select multiple locations/dates, you are still creating one Event. As described above, an "Event" is a collection of "Booked Locations".
Selecting multiple locations/days from the Venue Calendar will typically be done when creating New Event, New Quick Event, or Add Locations to Event bookings.
•You don't need to select multiple locations/dates for New Repetitive Events and Append Repetitive Events, since there is a specific Repetitive Location/Date Options page that allows you to precisely set the dates, locations, and repetition cycle.
•There's no point in selecting multiple locations/dates for the New from Past Event option, since the locations/dates are copied from the existing event; you can select the starting date of the new event from the Venue Calendar, but that date can also be set during the wizard.
Select Multiple Locations/Days
You can select multiple location/date cells by holding down the Ctrl key on your keyboard as you click the various cells, or drag the mouse across a series of cells.
The selected cells don't necessarily have to be adjacent, or even on the same screen. To select cells across multiple screens, just hold down the Ctrl key while moving through the dates using the Previous Dates/Next Dates arrows above the calendar and selecting the desired cells.
The selected cells will be shaded, indicating which days/locations will be reserved for your event.
Once you are satisfied with the location/date selection, Right-Click and select a booking option from the speed menu, or click the Event Records Creation button in the ribbon above and select a booking option.
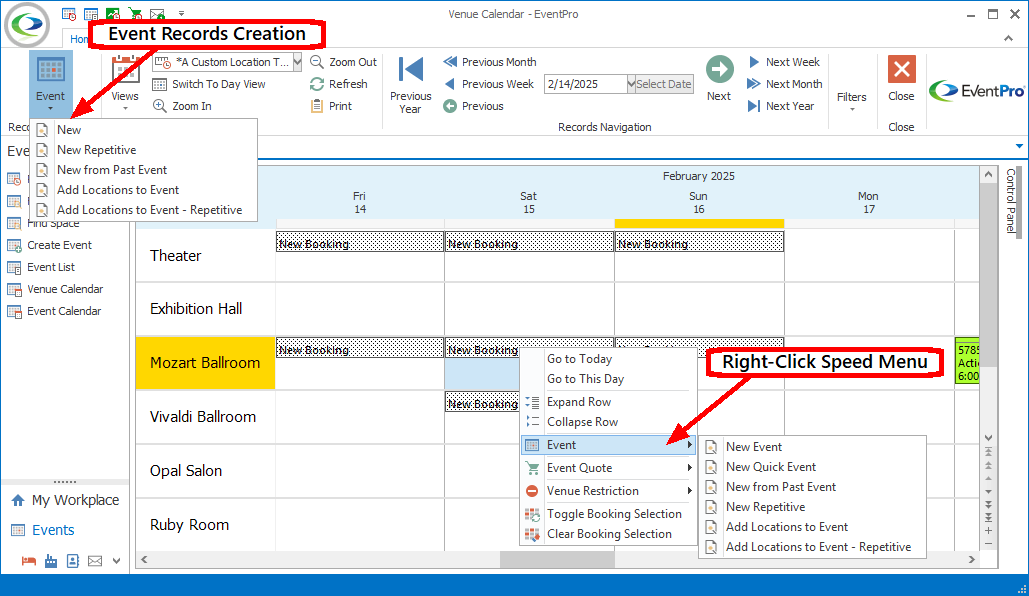
Figure 108: Starting Event for Multi-Selected Locations
Select Multiple Time Blocks
If you are in a calendar view that displays times - e.g. the Day by Location view - you can select the exact block of time that you want to use from the day by clicking-and-dragging your mouse over the cells.
If selecting time blocks from multiple days, hold down the Ctrl key while clicking-and-dragging the mouse over each block of time.
The selected cells will be shaded, indicating which blocks of time will be reserved for your event.
Note that it isn't necessary to select times during this step of the booking process. If you don't, the Booked To/Booked From times and Function Start/End times will default to those set in your Events System Settings, and you will have a chance to define the exact start and end times later in the Event Creation Wizard.
Once you are satisfied with the location/time selection, right-click and select the booking option from the speed menu, or click the Event Records Creation button in the ribbon above, and select a booking option.
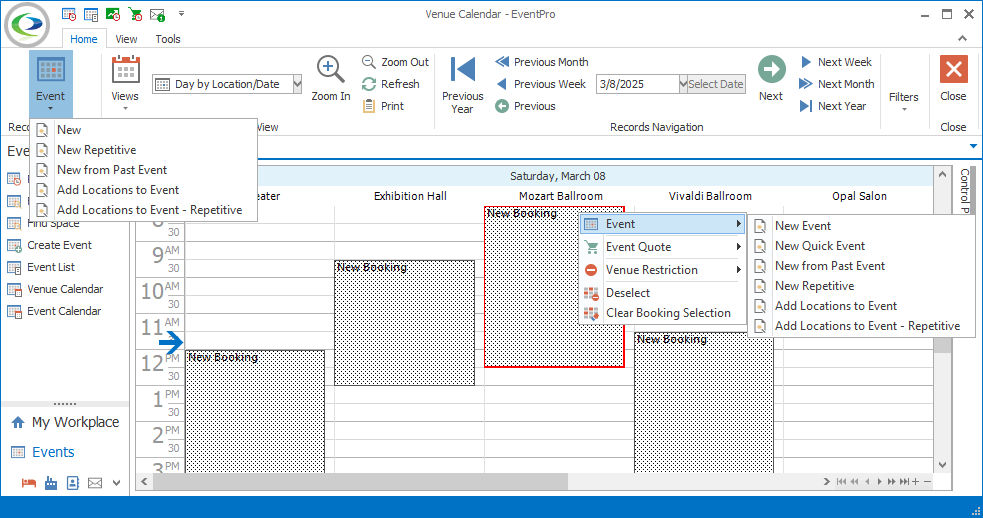
Figure 109: Starting Event from Multi-Selected Time Blocks
Deselect, Clear, or Toggle
If you want to remove one of the cells from your selection, right-click on the highlighted location/date you want to remove, and choose Deselect.
To clear all of the selections and start over, right-click on one of the highlighted cells, and choose Clear Booking Selection.
To toggle between a cell being selected and not selected, right-click in the non-highlighted area of a cell, and select Toggle Booking Selection. Repeat this action to toggle between states.
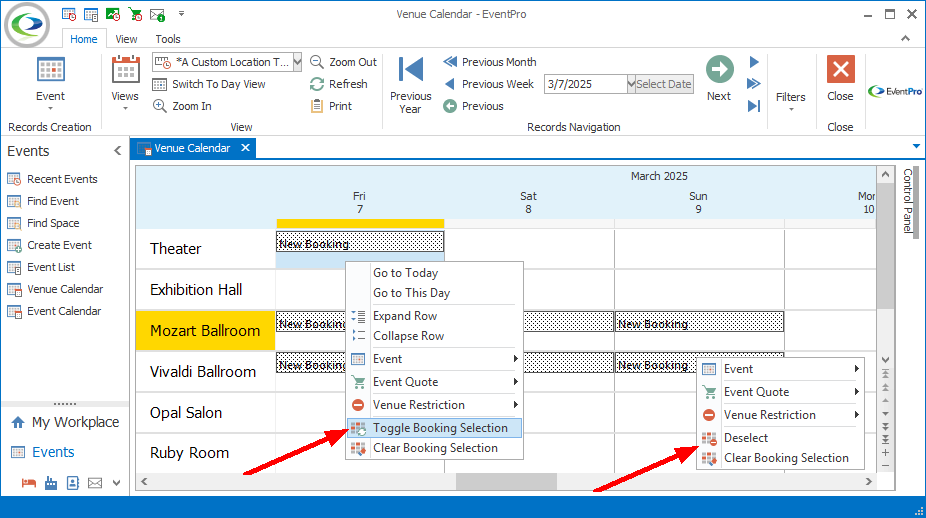
Figure 110: Clearing Selections
After starting the event creation process of your choice, follow the instructions for the relevant option below: