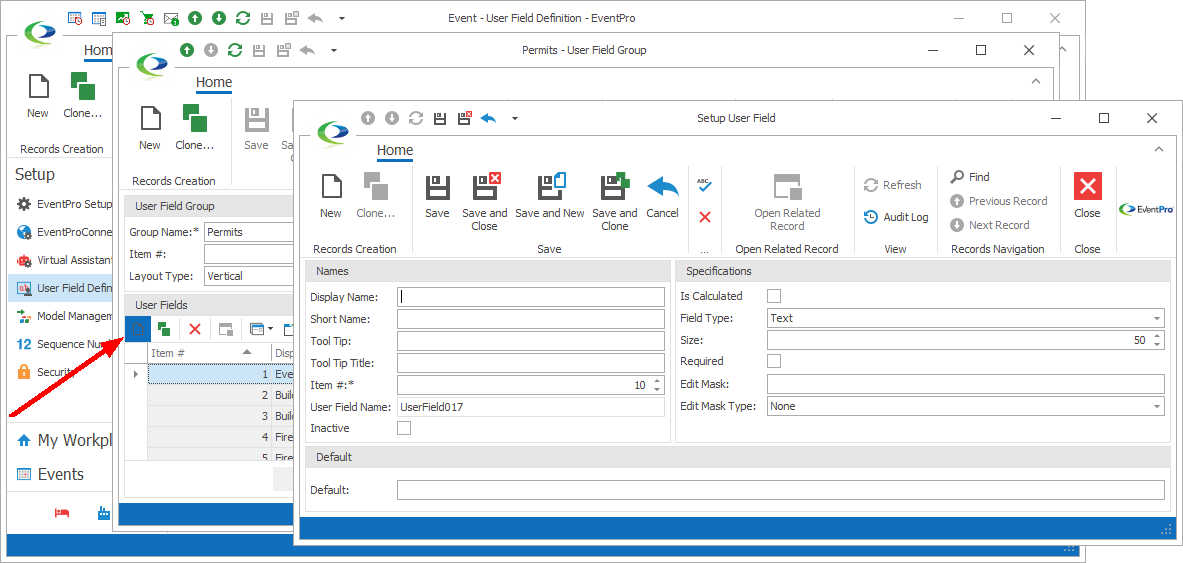
At the bottom of the User Field Group edit form, in the User Fields grid, start a New record.
The Setup User Field edit form appears.

Figure 1020: Adding User Field
Names
•Display Name: Enter the title of the field as it will appear on the edit form.
oThe three fields below - Short Name, Tool Tip, Tool Tip Title - will default to the same title, but you can edit them if you prefer.
•Short Name: Enter an abbreviated name for the field, if you wish.
•Tool Tip: Enter the explanatory text that will appear in the Tool Tip pop-up, which will appear when a mouse pointer is hovered over the user field in the edit form.
•Tool Tip Title: Enter the bold title that will appear above the text in the Tool Tip pop-up.
•Item #: The Item # determines this field's position among other user fields in the tab or grouping. An Item # will default in, but you can change it.
•User Field Name: This view-only field will display the default system name for this user field.
•Inactive: If you no longer want this field to be used, but you do not want to delete it entirely, select this Inactive checkbox.
Specifications
Field Type
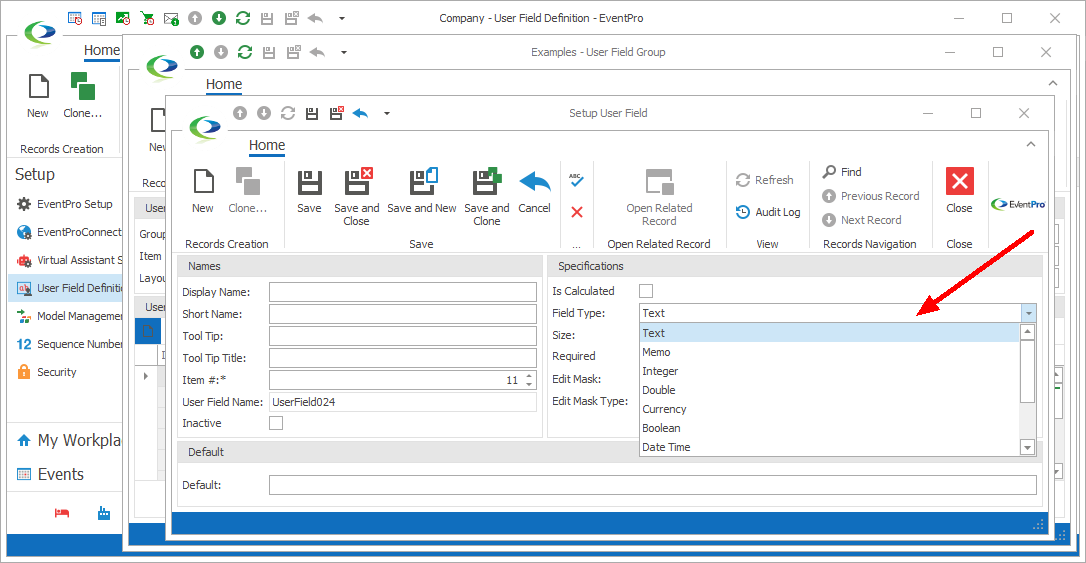
From the drop-down, select the Field Type you want to use.

Figure 1021: Selecting Field Type
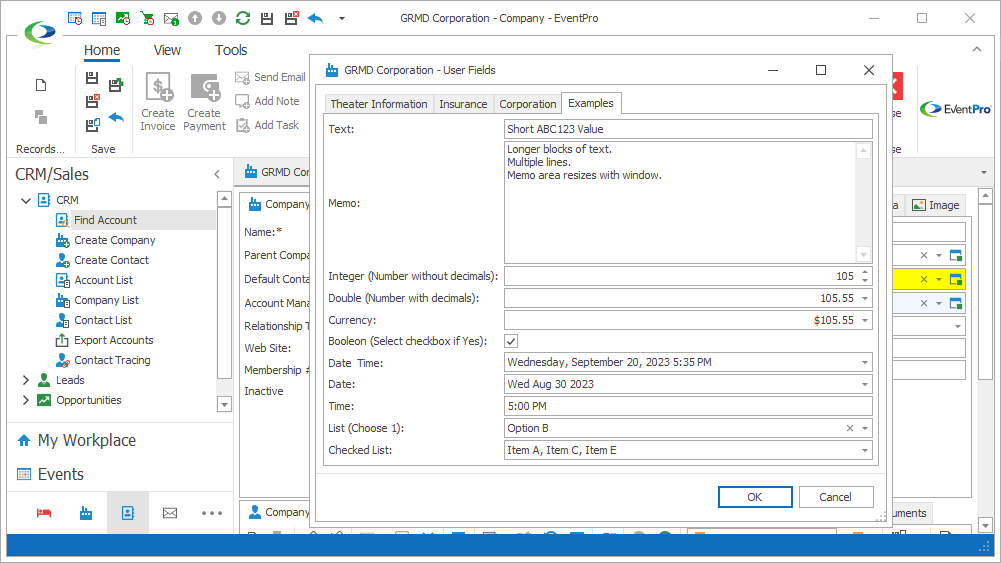
The Field Type determines what kind of information is stored in the field.

Figure 1022: User Field Type Examples
Choose the Field Type you want to create:
•Text: Stores a short alphanumeric value, up to the maximum number of characters defined under Size below.
•Memo: Stores long blocks of text. The memo field allows multiple lines of text, and re-sizes with the edit window.
•Integer: Stores a numeric value that is not a monetary value. Used for numbers without a decimal.
oIf a decimal number is entered in an Integer field, it will be rounded up.
oFor example, if you enter 1234.56, it will be displayed as 1235.
•Double: Stores a numeric value that is not a monetary value. Used for numbers with a decimal.
•Currency: Stores monetary data.
oThe "C" format specifier will be applied to the value by default, so that it displays the currency symbol and other formatting determined by current regional options on the local machine.
oFor example, en-US displays $1,234.12, en-GB displays £1,234.12, fr-FR displays 1 234,12 €, and so on.
•Boolean: Stores a True/False value (also described as Yes/No or On/Off), represented by a checkbox.
•Date/Time: Stores a date and time.
•Date: Stores a date.
•Time: Stores a time.
•List: The user can select a single choice from a set of predefined options in a drop-down list box.
oYou define the list options under List Items below.
•Checked List: The user can choose multiple items from a set of predefined options by selecting checkboxes next to entries in a drop-down list box.
oYou define the list options under List Items below.
The User Field Type you select also determines which other Specifications you can define in the Setup User Field edit form.
Some fields are available for all User Field Types (e.g. Required, Default), while others will only appear for certain User Field Types (e.g. Size, List Items).
Is Calculated
See the topic Is Calculated/Expression.
Size
The Size field is only used for the "Text" Field Type. Enter a number representing the maximum characters allowed in the text field. The default is 50.
Required
If the User Field is "Required" (i.e. the User must enter information in the field in order to save the record), select this Required checkbox.
When later entering information for records of the relevant data type, if a user attempts to save a record while leaving a required User Field blank, a Validation Error will appear.

Figure 1023: Validation Error
Display Format
You do not need to enter anything in this field if you are satisfied with the default formatting of the user field value.
However, if you want the value to be displayed in another specific format, you can enter the relevant specifiers in the Display Format field.
To learn how to specify display formatting, see Display Format below. If you need to review the difference between Display Format and Edit Mask, see Overview: Display Format & Edit Mask.
Edit Mask
You do not need to enter anything in this field if you are satisfied with the method of data entry for this field.
However, if you want to control data entry so that it is entered in a specific format, you can enter an Edit Mask in this field.
To learn how to create an Edit Mask, see Edit Mask below. If you need to review the difference between Display Format and Edit Mask, see Overview: Display Format & Edit Mask.
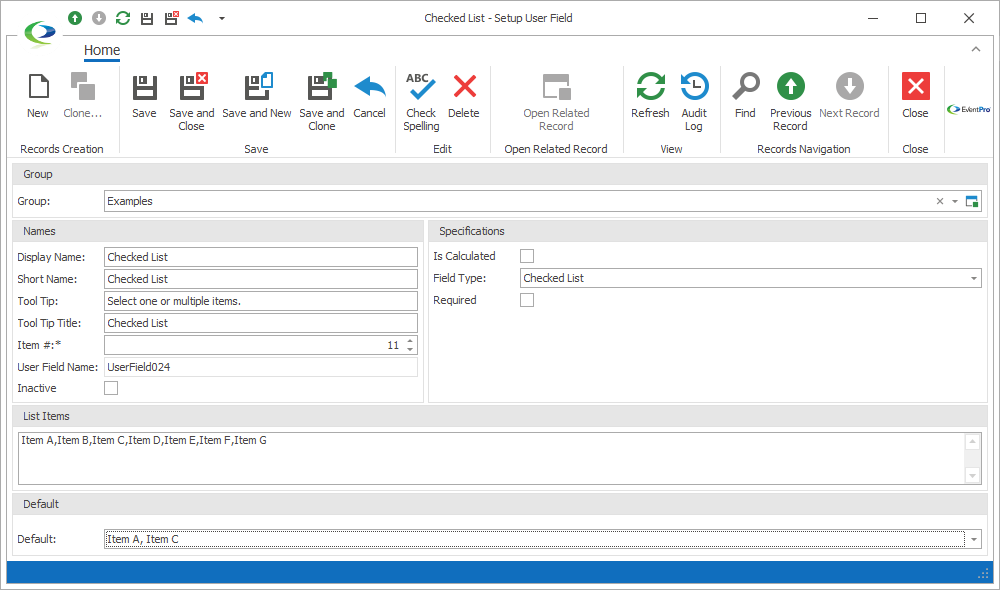
List Items
The List Items field is only used for the "List" and "Checked List" Field Types.
Type in the items that will appear in the drop-down list, separated by commas. Do not put spaces after the commas, but there can be spaces within each entry.

Figure 1024: Defining List Items
Default
If you want a default to appear in the User Field when a User first creates a record of the applicable type, enter or select the Default(s) here.
Save & Close
When you are done entering information in the Setup User Field edit form, click Save and Close.
You will return to the User Field Group edit form.
You can continue adding User Fields to the User Field Group, repeating the process described above in this topic
When you are done adding User Fields to the User Field Group, click Save and Close in the User Field Group edit form.
You will return to the User Field Definition edit form.
You can continue adding User Field Groups to the User Field Definition edit form.
When you are done adding User Field Groups to the User Field Definition, click Save and Close in the User Field Definition edit form.
You will return to the User Field Definition setup area.
IMPORTANT: After you have saved your new or edited User Fields, you still need to exit and log back into EventPro before you will see the changes take effect.
You will now be able to Access User Fields in Other Areas of EventPro.