1.Conditional formatting allows you to apply formatting such as colors and icons to Dashboard Item elements containing values that meet certain conditions.
2.You can apply conditional formatting to Measure or Dimension values, although not all format conditions will be applicable to all types of Data Items. Some Data Items will only support certain Format Conditions.
3.You can add a formatting rule to a Dashboard Item in a couple different ways.
First, select the Dashboard Item to which you want to apply conditional formatting.
You can then:
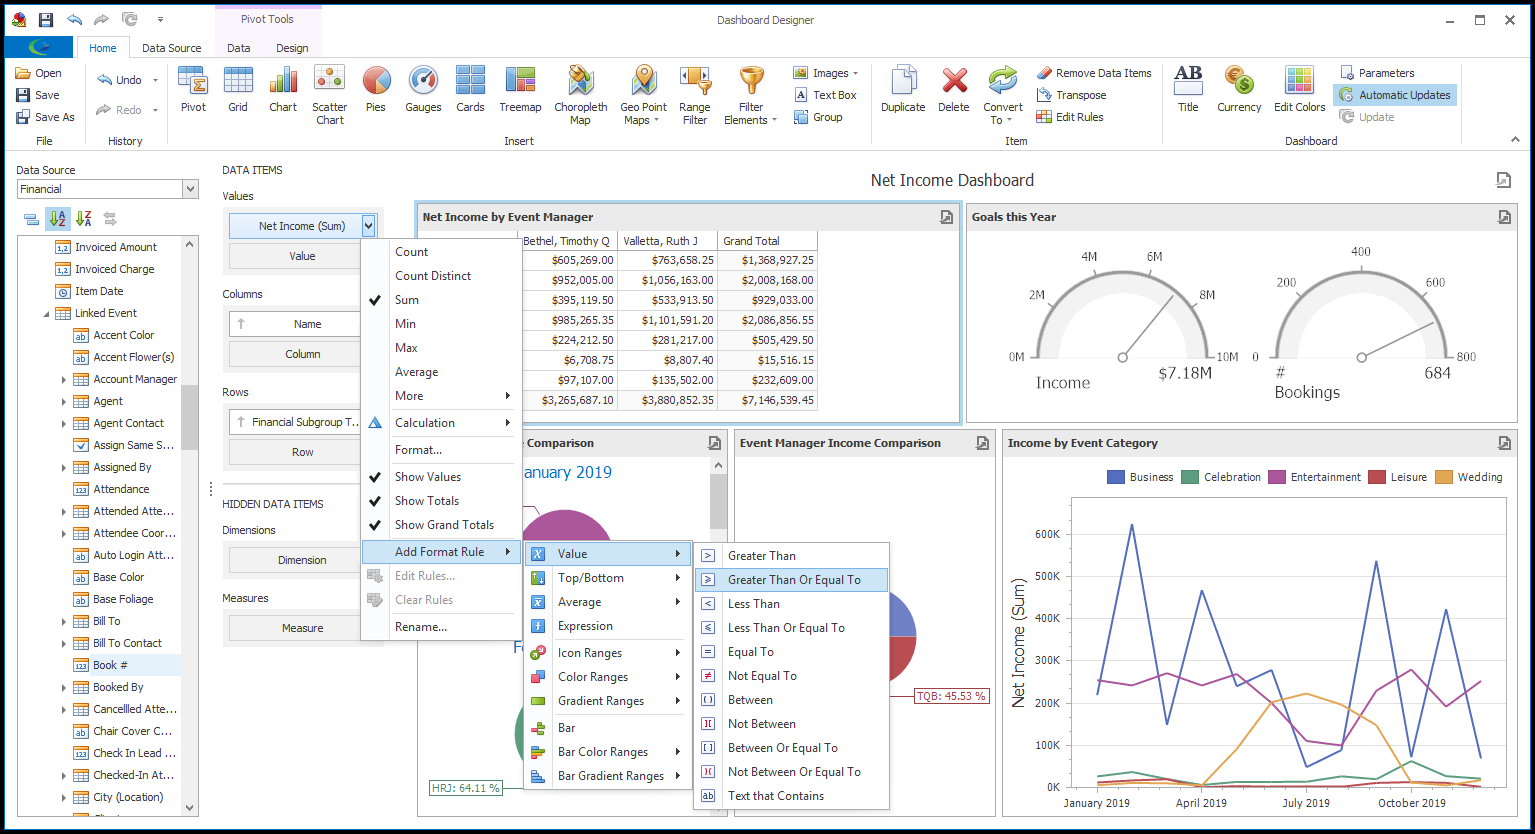
a.Click the drop-down menu for the Data Item containing the Measure or Dimension to which you want to apply formatting rules.
Go to Add Format Rule and select the Condition you want to use.
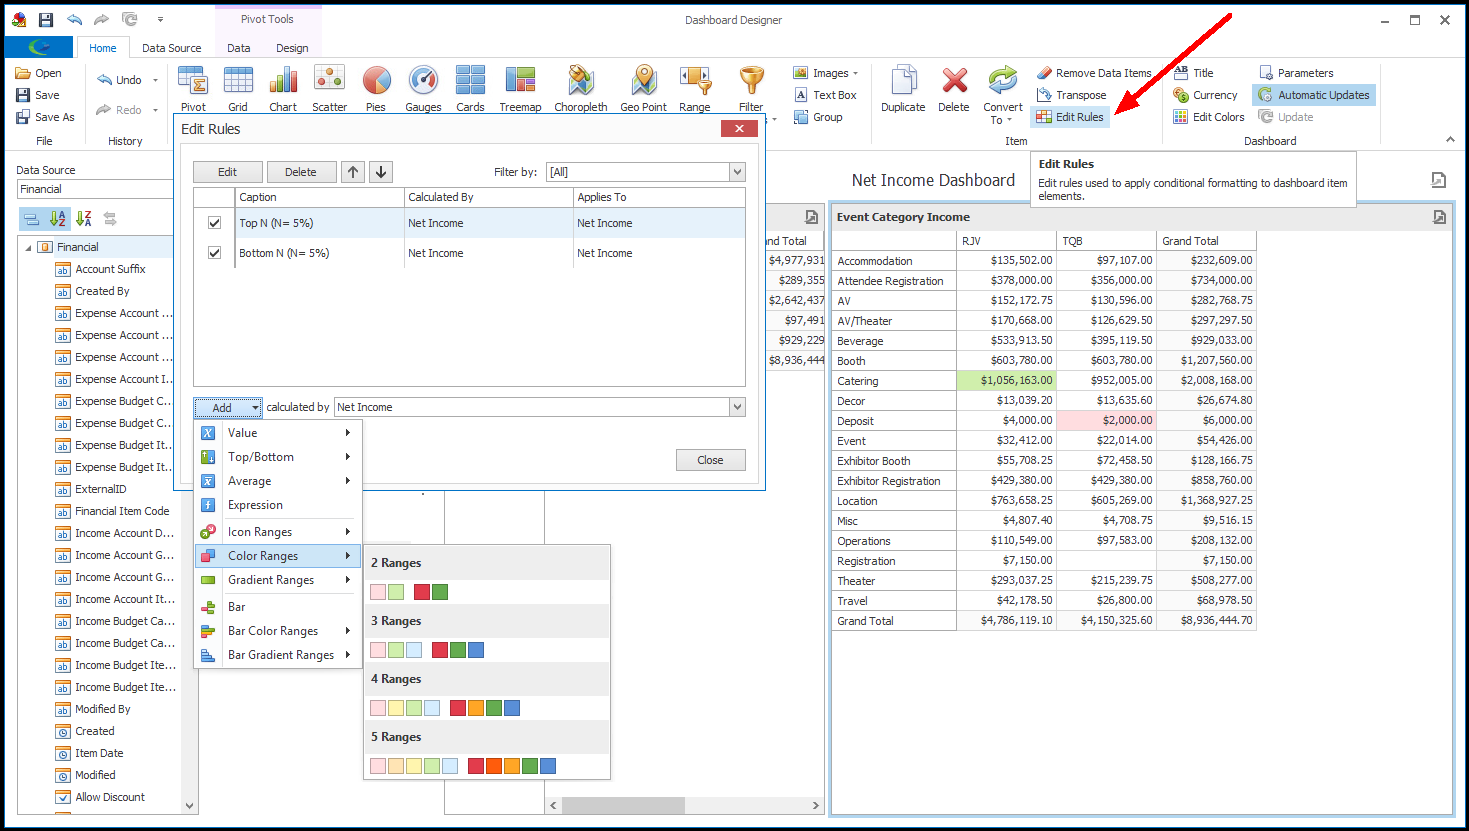
b.Click the Edit Rules button in the Item section of the top ribbon to open the Edit Rules dialog. The Edit Rules dialog will display existing rules applied to the Dashboard Item, if any.
From the Calculated By drop-down, select the Data Item containing the Measure or Dimension to which you want to apply formatting rules.
Click the Add button and select the Condition you want to use from the drop-down menu.
4.Either way, the dialog for the selected Format Condition and the type of Dashboard Item will appear.
The dialog's appearance will vary, depending on the condition and item type.

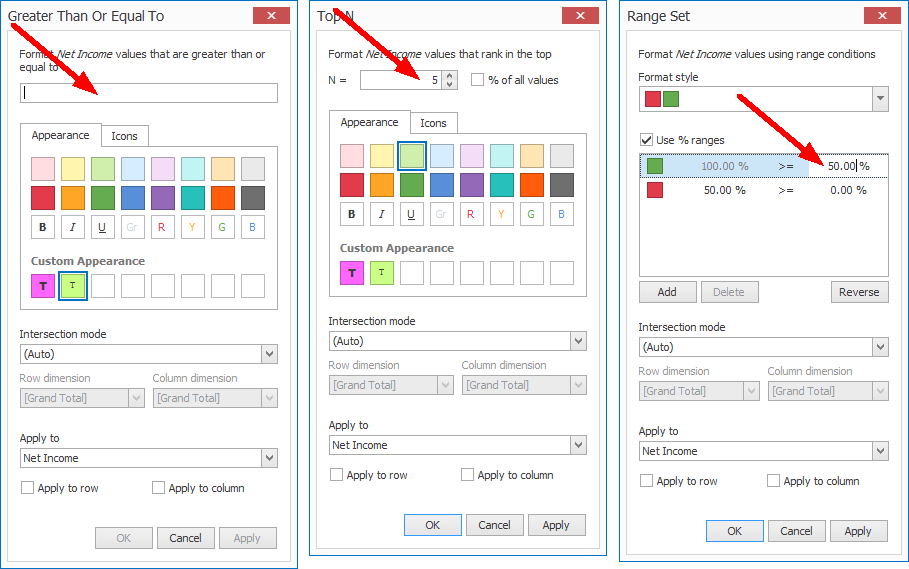
5.In the dialog, enter the settings for the condition.
For example, you could indicate that conditional formatting should be applied to:
a.Values that are greater than, less than, equal to, or not equal to "x".
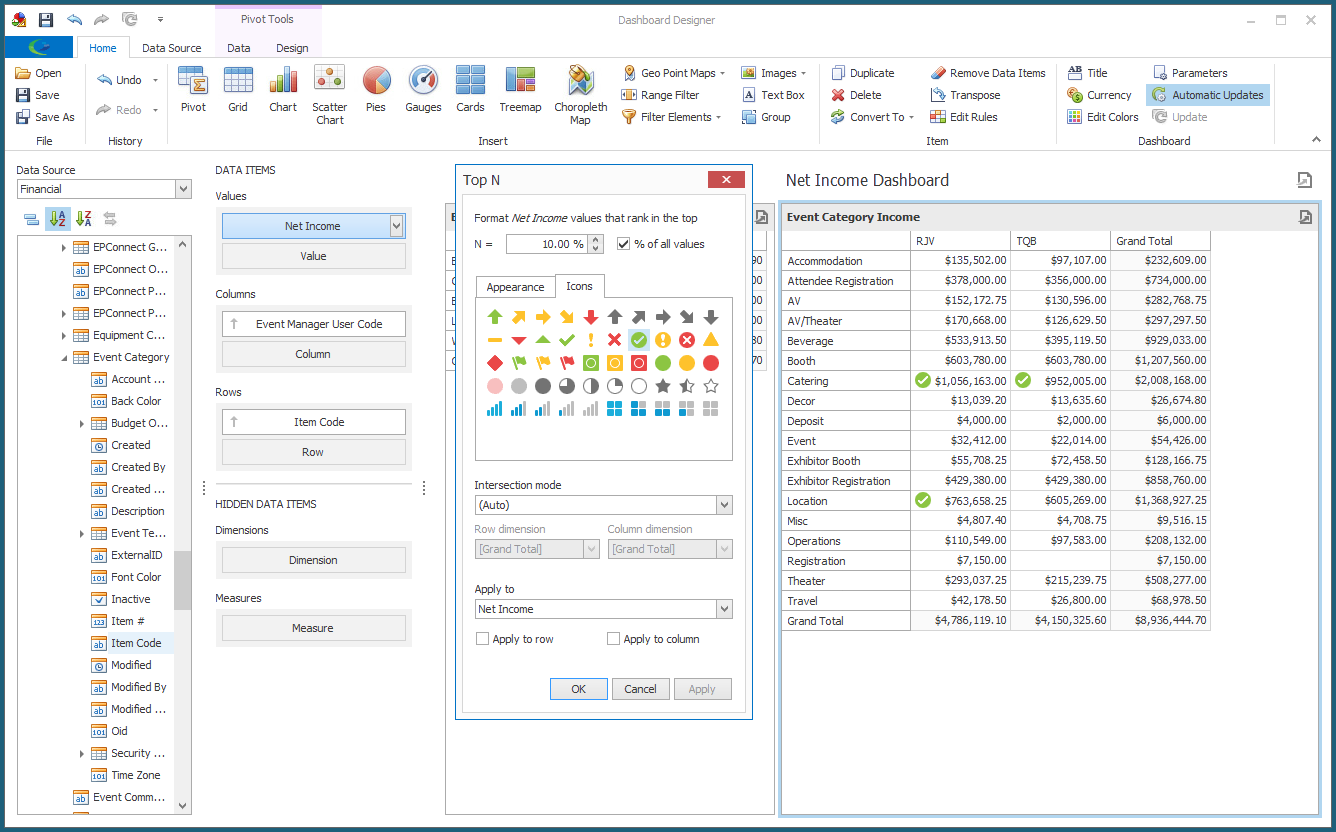
b.Values in the top or bottom "x" or "x%" of all values. To see an example of Top/Bottom formatting rules, see Pivot Grid Example.
c.Values above or below average.
d.Values within specified ranges, by percentages or numbers.
There are many other variations, depending on the Condition and Dashboard Item.
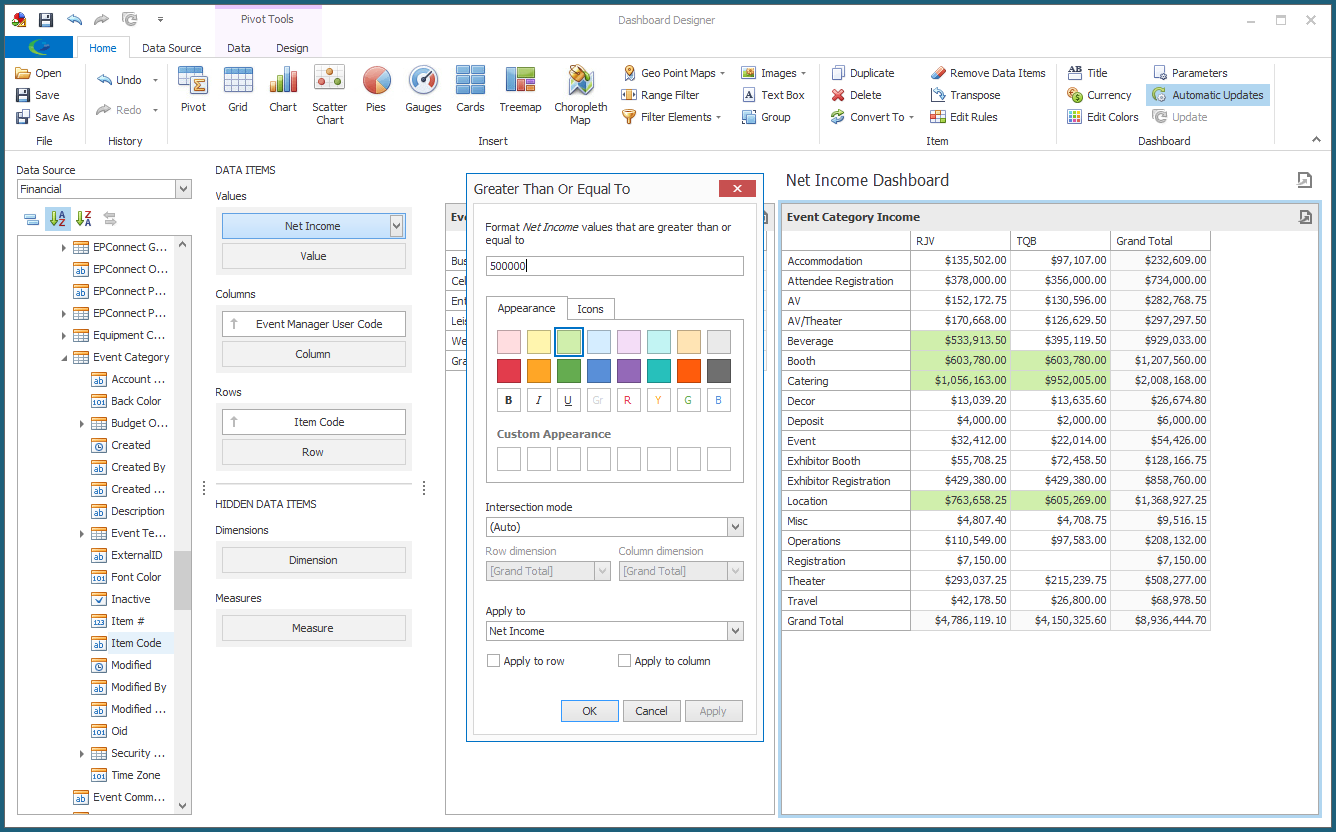
6.You will also specify Appearance Settings in the condition dialog, indicating how elements containing values that meet the condition will be formatted: background colors, font colors, font styles, icons, etc.
a.Appearance Tab: Under the Appearance tab, you can select from pre-defined background colors and font styles.
b.Custom Appearance: If you do not want to use any of the existing background colors or text options, you can create your own custom styles.
i.Click a blank square under Custom Appearance.
ii.The Custom Style Settings dialog appears.
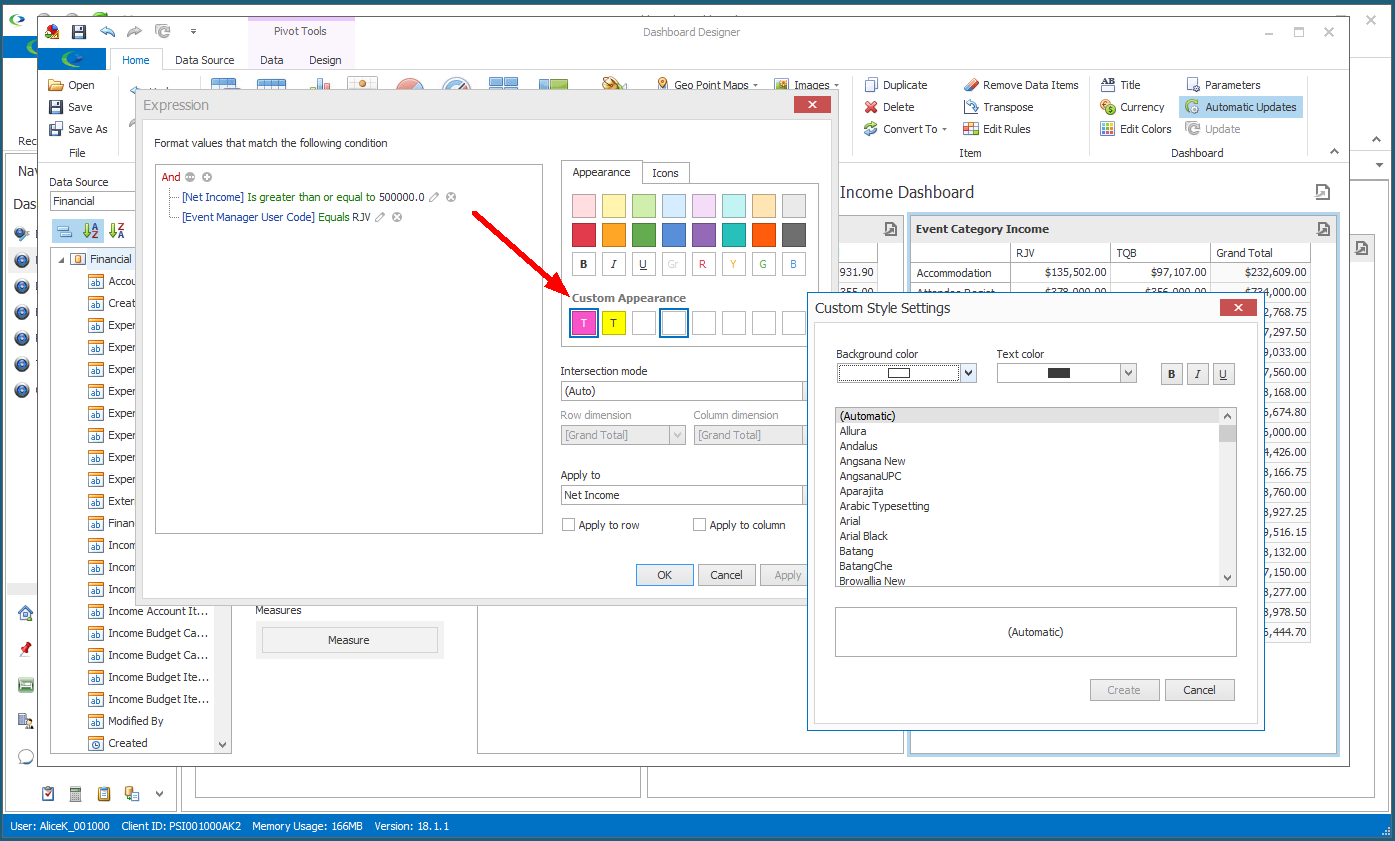
iii.Select the Background Color, Text Color, Font, and/or Font Style, as applicable.
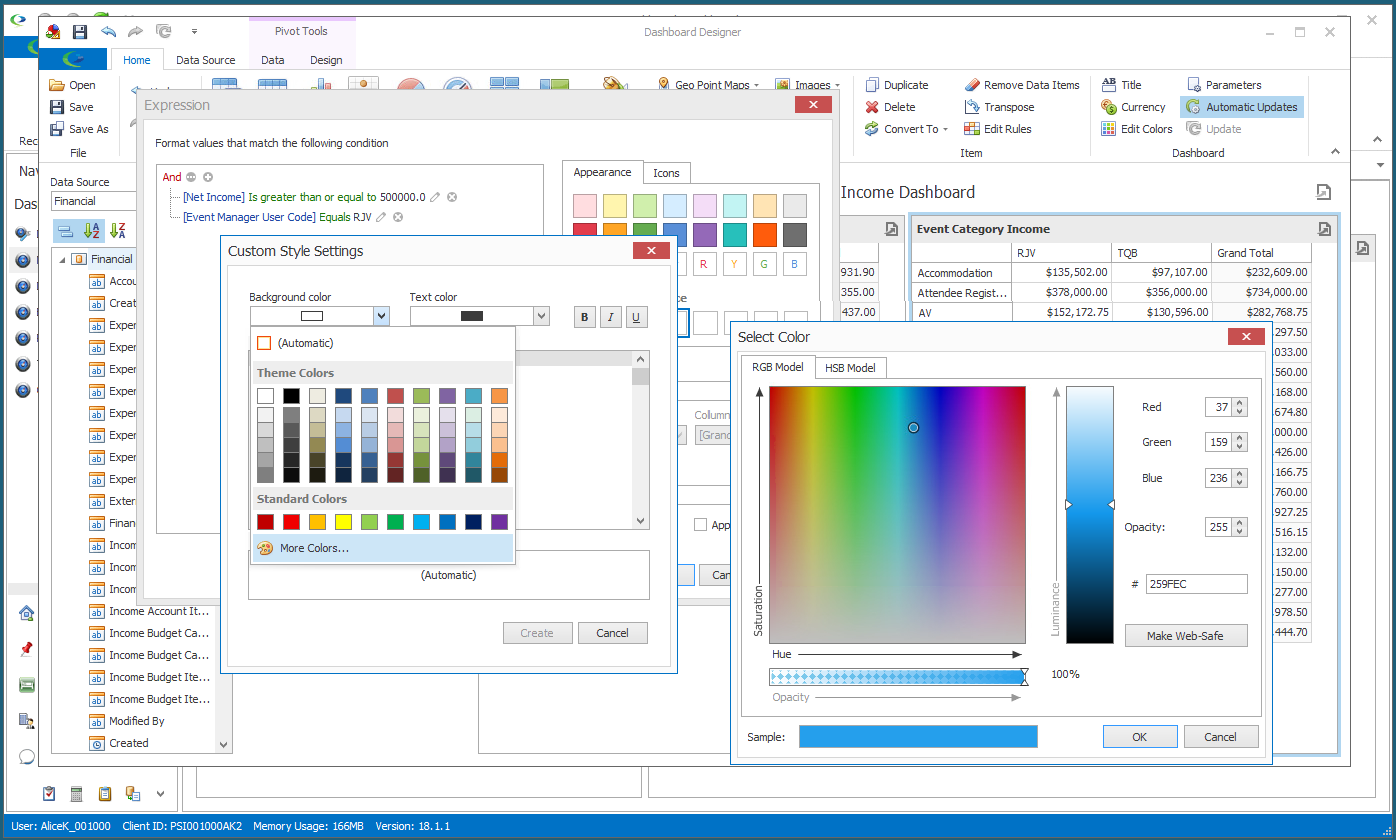
iv.When selecting a color for the Background or Text, if none of the Theme or Standard Colors suit your style, you can click More Colors to open the advanced Select Color dialog. Adjust the color to your preferences, and click OK.
v.When you are done with the Custom Style Settings dialog, click Create. You can now select the custom style in the condition dialog.
c.Icons Tab: Under the Icons tab, you can select from pre-defined icons.
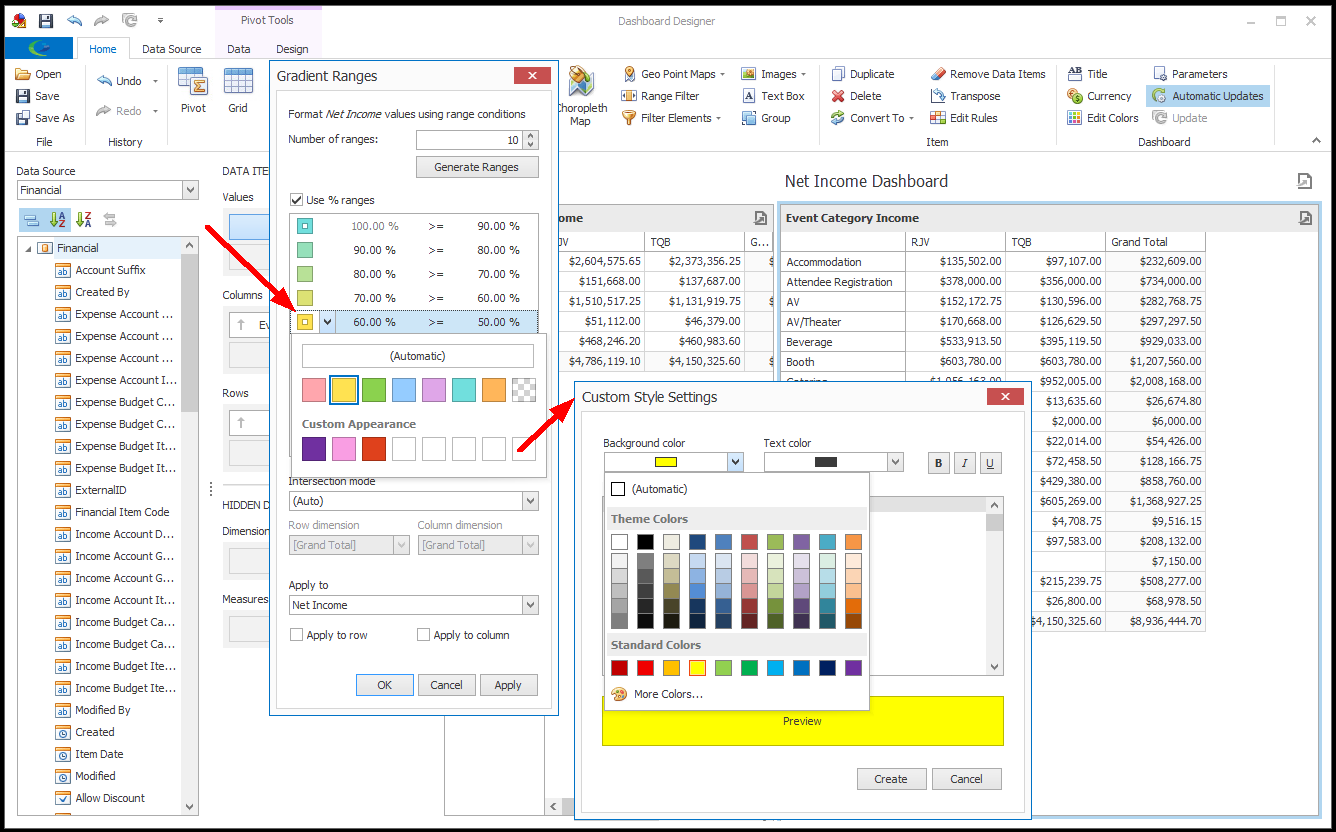
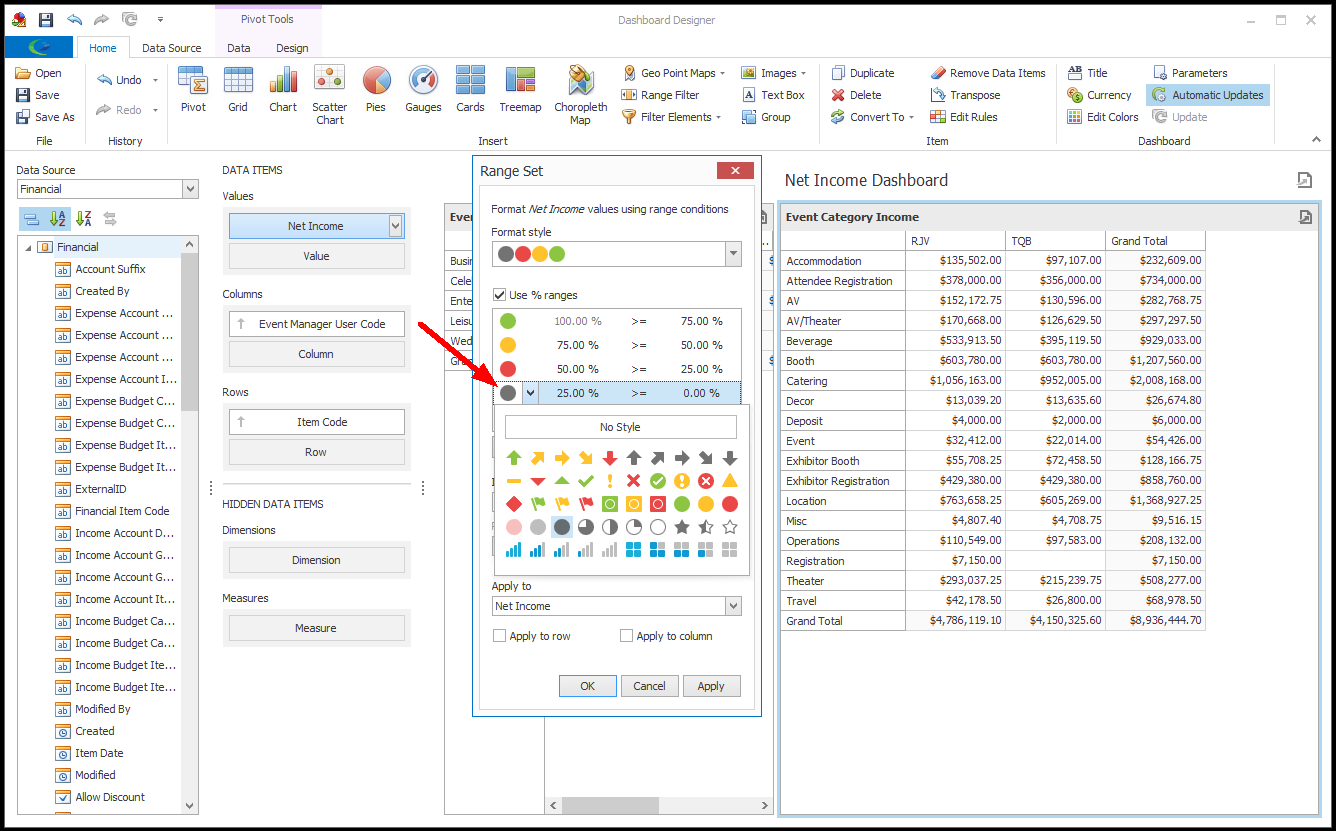
d.Range: If you are using a Range format rule, you can apply different formatting - specified colors, gradient color scales, bars - to different ranges of values.
Initially, a default set of colors or icons will be applied to the ranges. However, you can assign a color or icon of your choice to each range of values.
Click the color or icon you want to change, and use the drop-down to access appearance settings.
i.For Color Ranges or Gradient Ranges, you can select from pre-defined colors, or create your own styles under Custom Appearance, as described above.
ii.For Icon Ranges, you can select from the pre-defined icons.
7.To view the results of the format rule settings in the background without closing the dialog, click Apply.
8.When you have set the format rule's condition and appearance to your satisfaction, click OK.