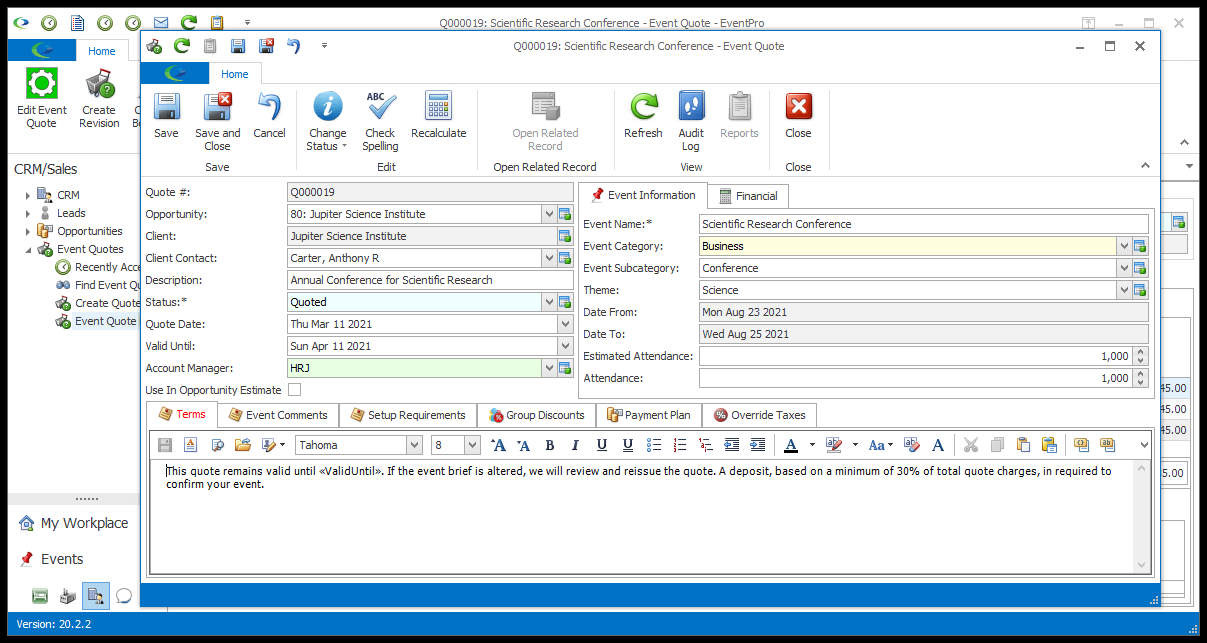
1.To edit general Quote details, click the green Edit Event Quote button in the upper left corner of the Quote Screen to open the Edit Event Quote window. This Edit Event Quote window is similar to the Event Screen's Edit Event Window, although some of the fields and tabs are different, and the Quote window doesn't contain as many details.
2.Much of the information in this window will be pulled in from the Quote Creation Wizard, including any Event Comments you may have recorded in the Notes wizard page. You can add and change this information, as applicable.
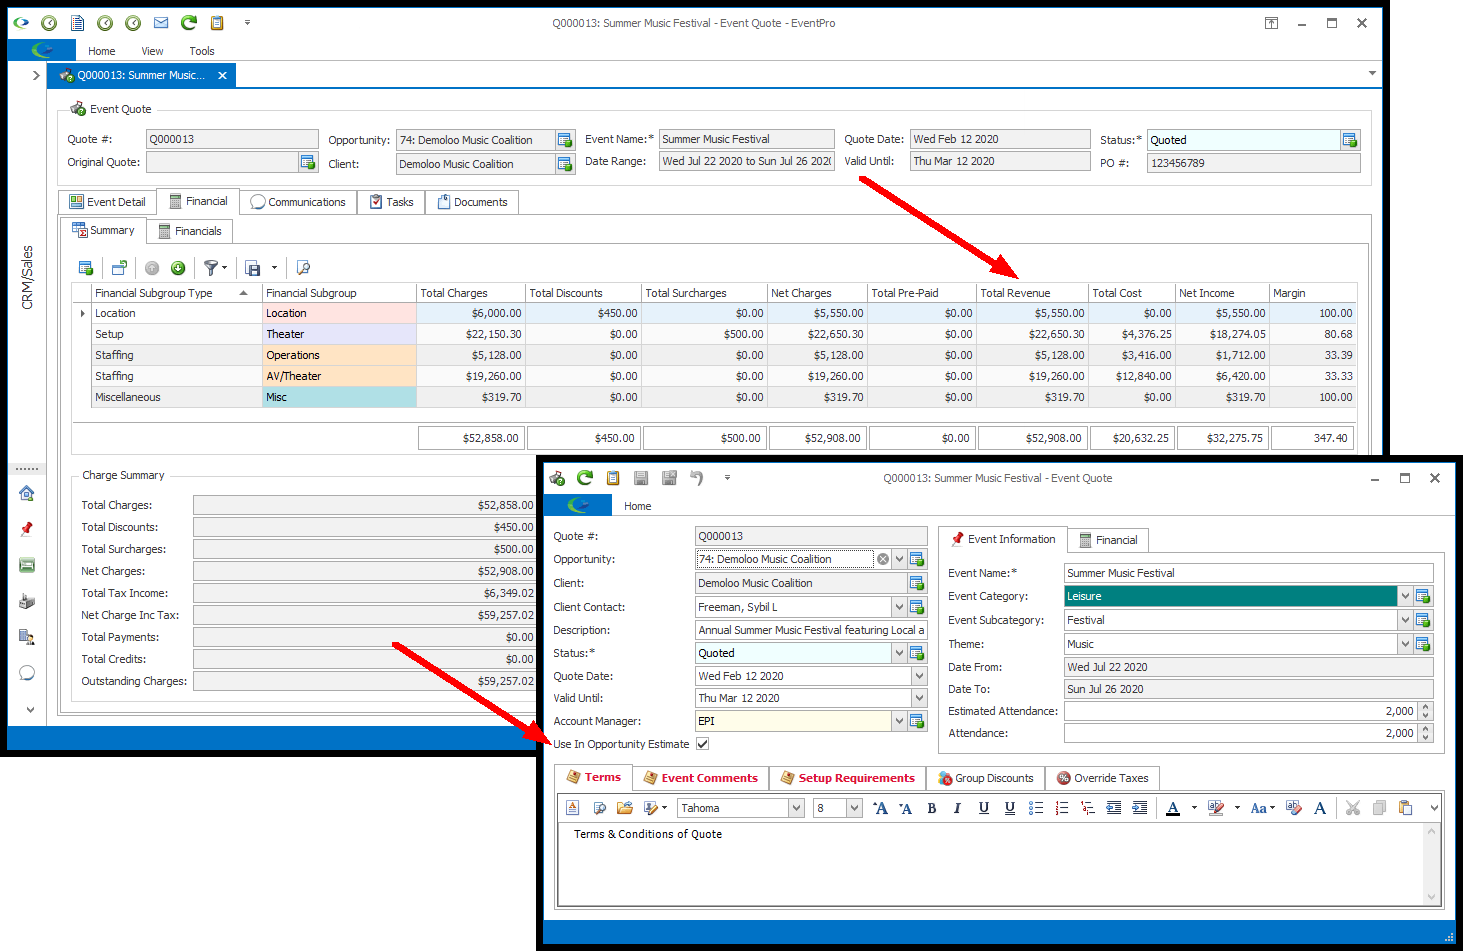
3.Use in Opportunity Estimate: One field to note in the Edit Event Quote window is "Use In Opportunity Estimate". If you select this checkbox, the linked Opportunity will use the Net Charges/Total Revenue from this Quote as the Opportunity's Estimated Value, instead of the manually entered estimate.
a.In this example, you can see the Use In Opportunity Estimate checkbox has been selected for this Quote. Take note of the Quote's Net Charges/Total Revenue under Financial > Summary.
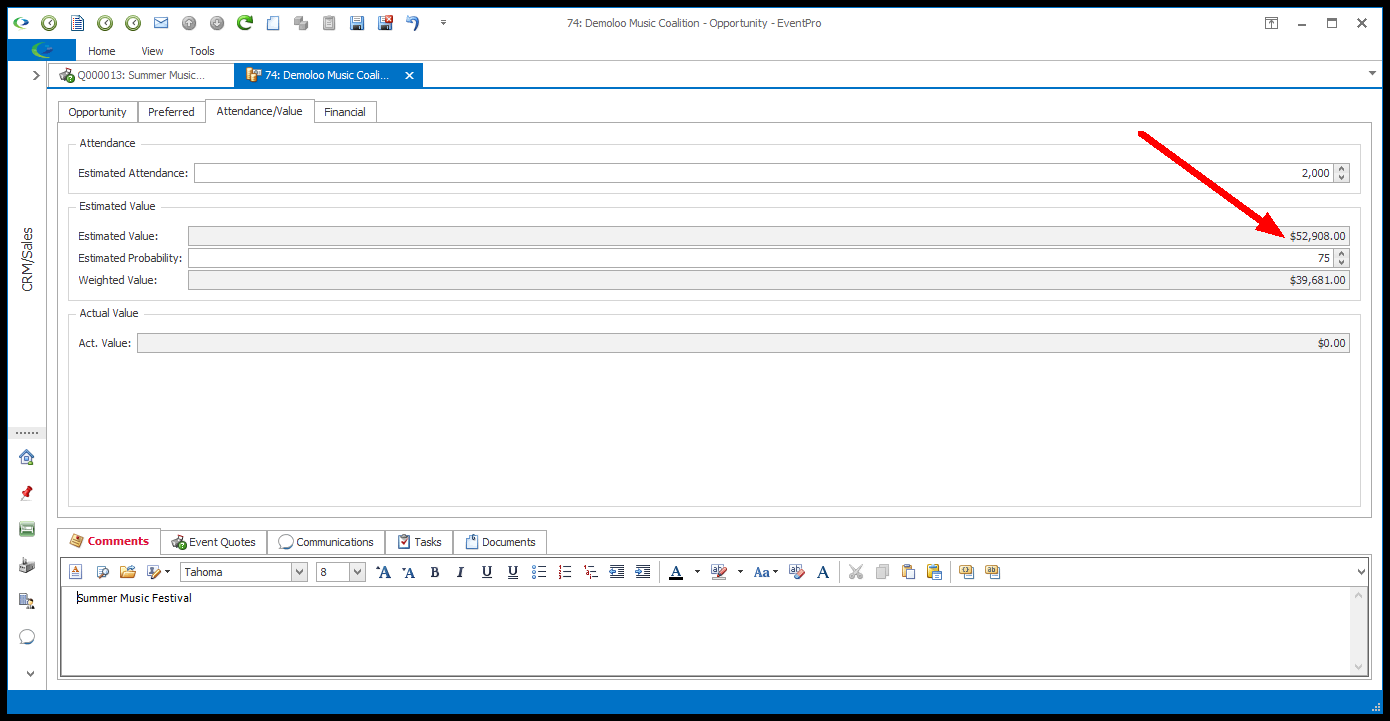
b.Now, when you view the linked Opportunity, you can see that the figure from the Quote's Net Charges/Total Revenue has been pulled into the Opportunity's Estimated Value.
4.Terms: The Terms tab is unique for Event Quotes. You can enter information about the Terms of the Event Quote.
a.There may already be a Payment Plan in the Edit Event Quote window.
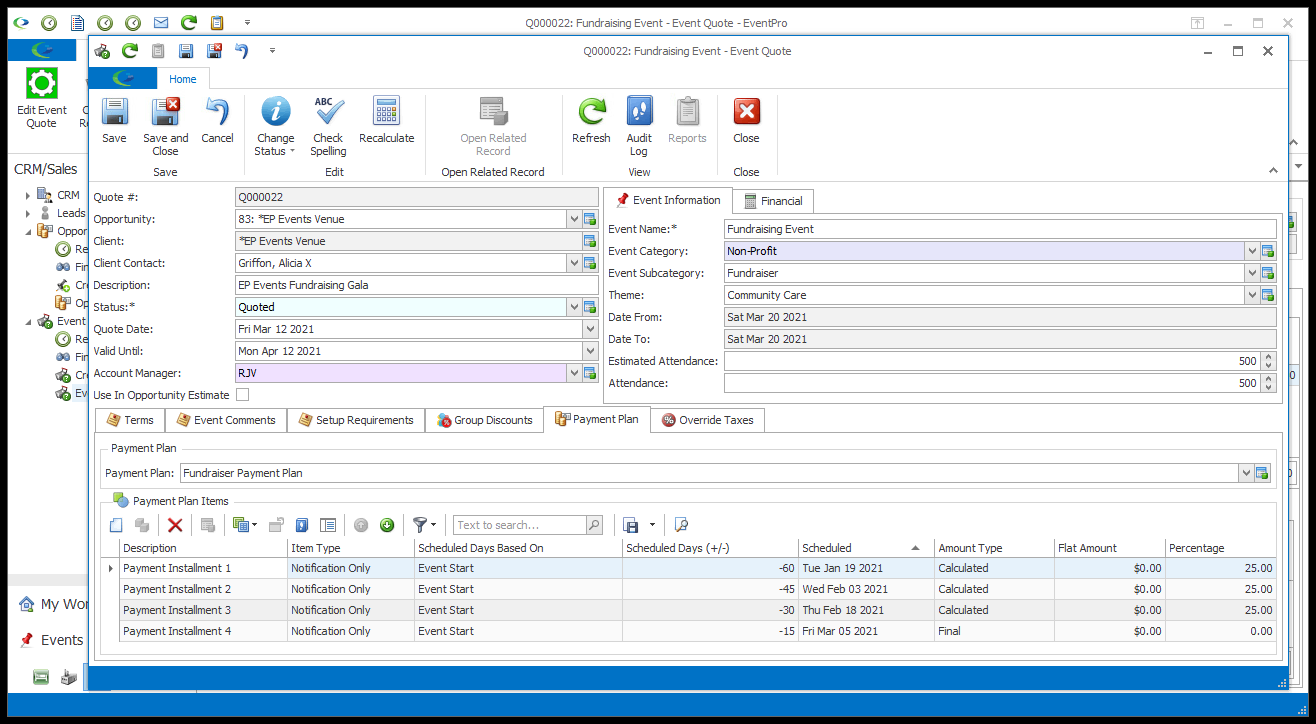
i.Setup Payment Plans can be configured to Auto-Add to Event Quotes of a certain Event Category/Subcategory. If this Event Quote is of the selected Event Category/Subcategory, the relevant Payment Plan has already been pulled into the Event Quote.
ii.If this Quote was created from a past Event (using the "New from Past Event" option for the Quote Creation Wizard), and the Event had a Payment Plan, that Payment Plan will be copied into this Quote.
b.If there isn't a Payment Plan assigned yet, or you want to change the one that is assigned, you can manually add and/or edit a Payment Plan in the Edit Event Quote window. You have a few different options:
i.Use a Setup Payment Plan exactly as is.
ii.Use a Setup Payment Plan, but add/edit/delete Payment Plan Items as required for the particular Quote. NOTE: Any changes you make in this Event Quote Payment Plan will only exist for this Event Quote, and - if converted to a Booking - the resulting Event. The changes won't be saved back in the Setup Payment Plan.
iii.Create entirely new Payment Plan Items for the particular Quote. NOTE: If you add one-off/ad hoc Items in this Event Quote Payment Plan tab, the Items will only exist for this Event Quote, and - if converted to a Booking - the resulting Event. If you want to be able to re-use Payment Plan Items for multiple Quotes/Events, it is recommended that you create them in a Setup Payment Plan.
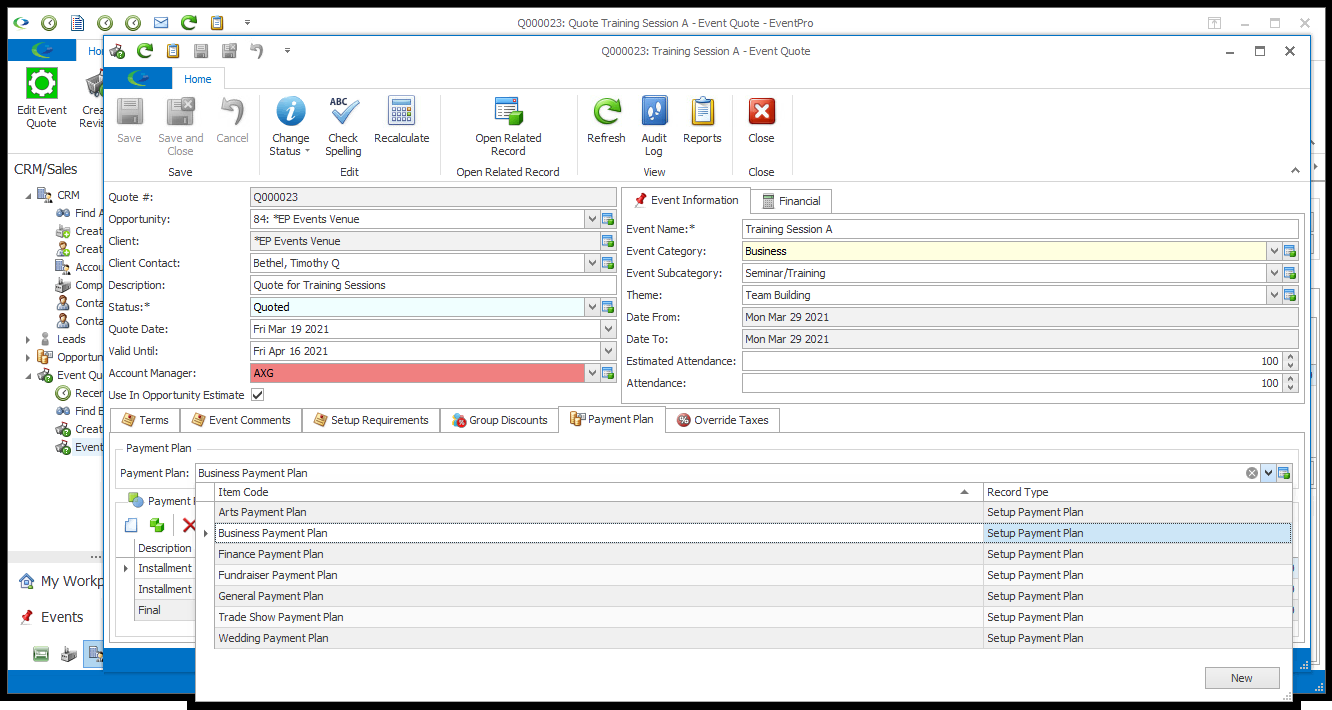
c.To use an already defined Setup Payment Plan, select an option from the Payment Plan drop-down. The defined Payment Plan Items will be pulled into the selection grid. You can edit, add, or delete Payment Plan Items if required for this quote.
If you do not want to use a Setup Payment Plan, do not select anything from the Payment Plan drop-down. You can add individual Payment Plan Items below.
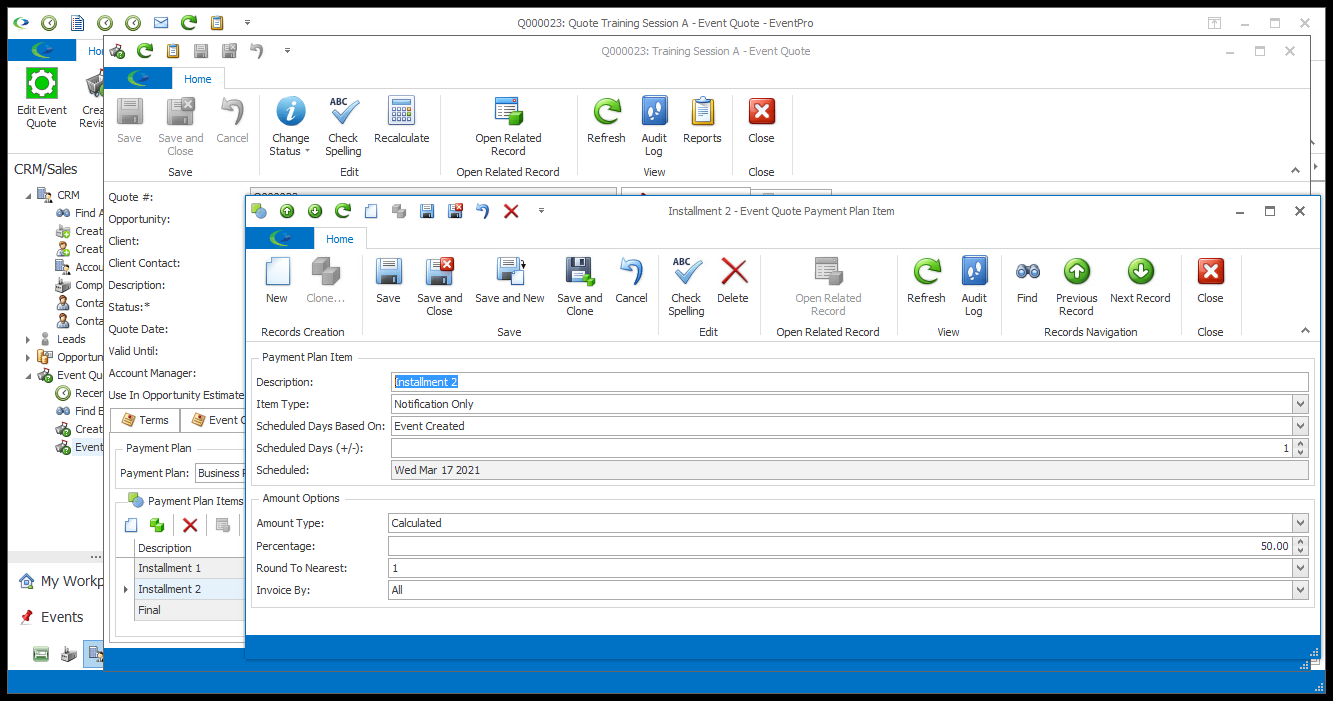
d.To edit an existing Payment Plan Item, double-click the relevant record in the Payment Plan Items selection grid.
i.The Event Quote Payment Plan Item edit form opens.
ii.Make the changes you need for this Payment Plan Item in this Quote. To review the various options in the Payment Plan Item edit form, see EventPro Setup > Financial > Payment Plans.
iii.When you are done editing the record, click Save and Close. REMEMBER: Any changes you make to this Event Quote Payment Plan Item will only exist for this Event Quote, and - if converted to a Booking - the resulting Event.
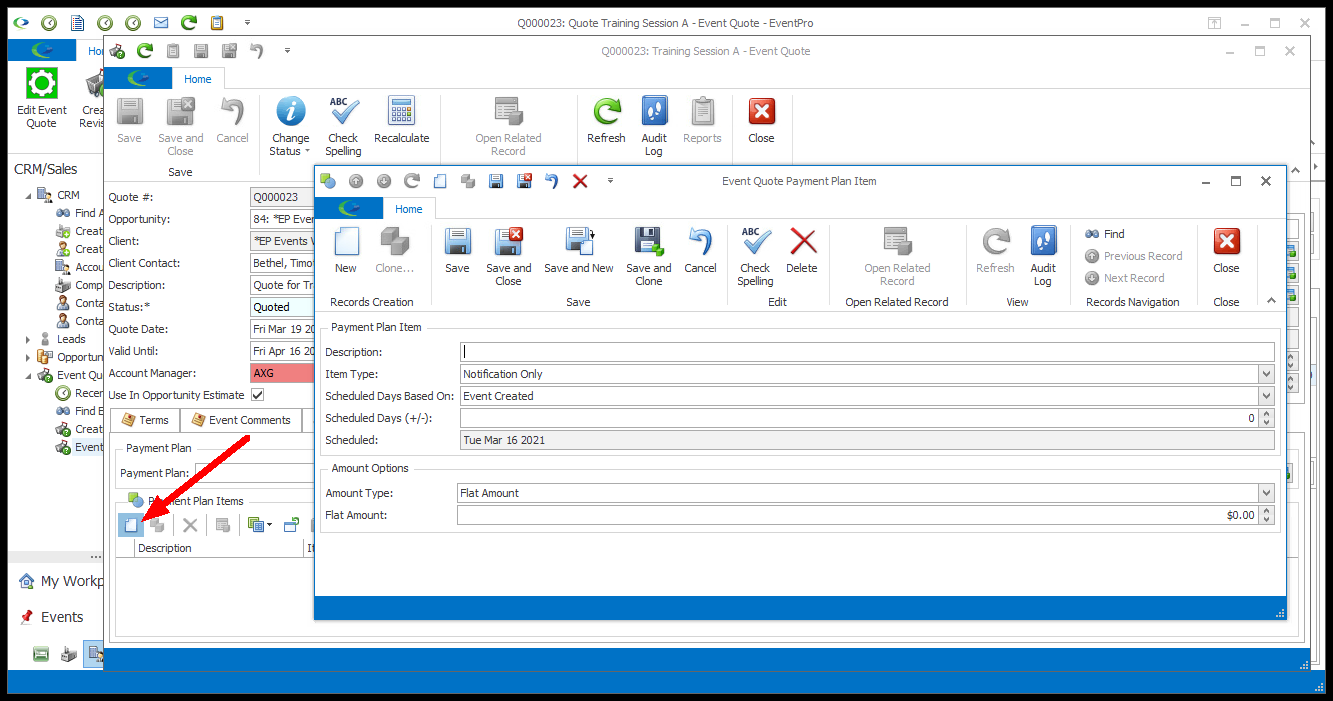
e.To add a new Payment Plan Item, click the New button just above the Payment Plan Items selection grid.
i.A new Event Quote Payment Plan Item edit form opens.
ii.This edit form is very similar to the Setup Payment Plan Item edit form. To review the various options for creating a Payment Plan Item, see EventPro Setup > Financial > Payment Plans.
iii.There is one field in the Event Quote Payment Plan Item edit form that you don't see in Setup: Scheduled. This read-only field shows the Scheduled date of the Payment Plan Item. The Payment Plan Item calculates its Scheduled date from the Event dates in the Quote, except for the Event Creation date, which will be determined when the Event Quote is converted to a Booked Event.
iv.When you are done creating the new record, click Save and Close.
v.Continue adding as many Event Quote Payment Plan Items as you require for this Quote. REMEMBER: The one-off/ad hoc Items you create in this Event Quote Payment Plan tab will only exist for this Event Quote, and - if converted to a Booking - the resulting Event.
f.To delete a Payment Plan Item, select the relevant Item and click the Delete button directly above the selection grid. The Delete confirmation dialog asks if you want to delete the selected record(s). Click Yes to proceed with deleting.
g.When you are done with the Event Quote's Payment Plan tab, ensure you save your changes by clicking Save at the top of the Edit Event Quote window.
h.Note that the Payment Plan Items you create in a Quote are Event Quote Payment Plan Items. EventPro doesn't generate invoices/notifications for Event Quote Payment Plan Items. However, if you create an Event Booking from this Quote, the Payment Plan Items will be pulled through to the Payment Plan tab of the Edit Event window, where they become Event Payment Plan Items, and will trigger invoices/notifications if set up to do so.