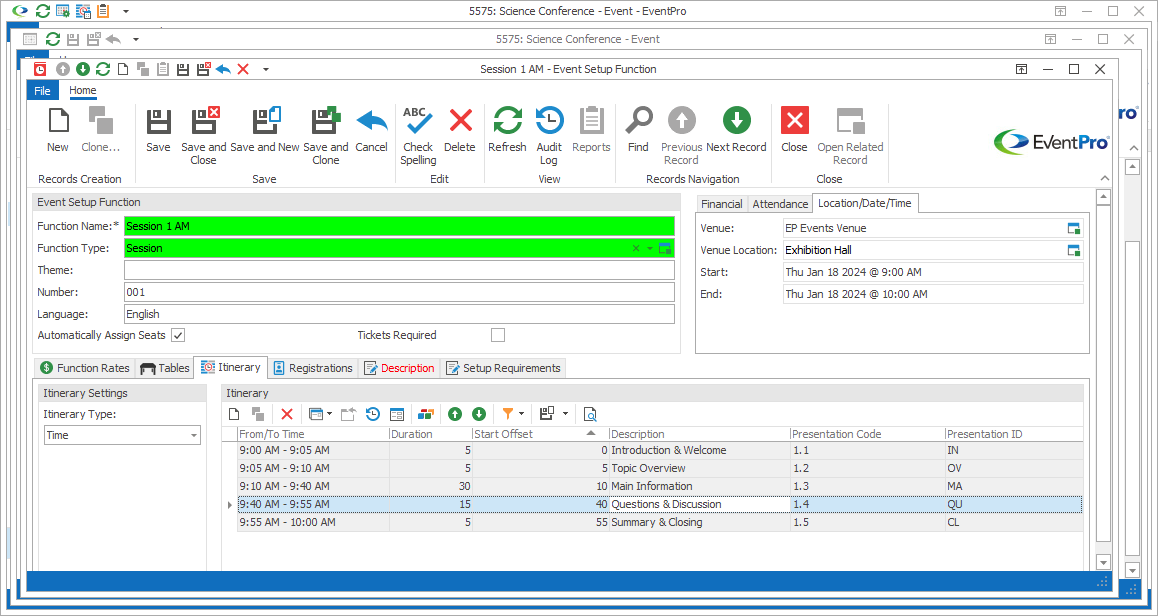
Figure 131: Setting Function Itinerary
Under the Itinerary tab of the Event Setup Function edit form, you can set up Function Itinerary.
The Function Itinerary allows you to break out a Function into smaller blocks of activity.
Note that Function Itinerary is not the same as Event Itinerary.
•Event Itinerary allows you to divide a Booked Location into Functions.
•In comparison, Function Itinerary allows you to divide a Function into smaller sections of time. In other words, Function Itinerary allows you to further sub-divide Functions.
Itinerary Type
To begin, from the Itinerary Type drop-down list, choose the manner in which you are scheduling Function Itinerary:
•Time
•Duration
Time
When you add Itinerary to the Function, you will enter the Itinerary Item's Function Start Offset, i.e. number of minutes from the start of the Function to the start of this Itinerary Item.
So, if you are adding Itinerary to the Function chronologically, each Start Offset number will be larger.

Figure 132: Itinerary Items set by Time
Duration
When you add Itinerary to the Function, you will enter the Itinerary Items in order, setting a Duration (in minutes) for each.

Figure 133: Itinerary Items set by Duration
Add Itinerary
Next, start a New record in the Itinerary selection grid.
The Event Setup Function Itinerary edit form opens. Note that the edit form will be slightly different depending on the Itinerary Type you chose above.
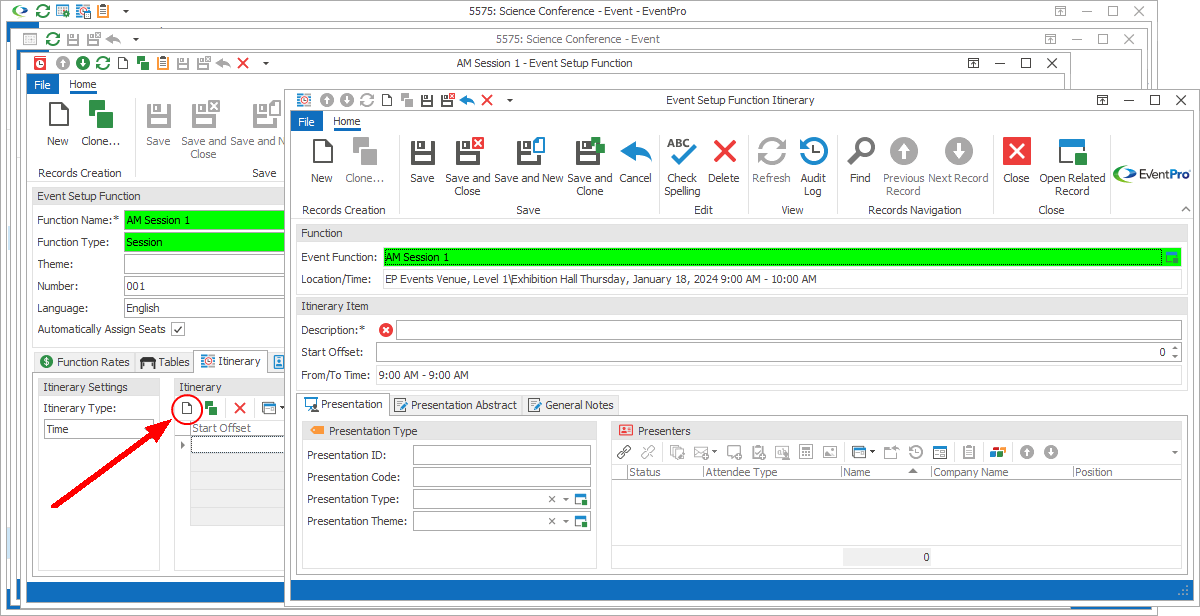
Figure 134: Adding Itinerary Item
Function & Itinerary Item
1.Event Function: This read-only field displays the Function to which you are adding Itinerary.
2.Location/Time: This read-only field will display the Function's scheduled location, date, and time.
3.Description: Enter a description of this Itinerary item.
4.Start Offset (if you selected Itinerary Type = Time): Enter the number of minutes from the start of the Function to the start of this Itinerary Item.
5.Duration (if you selected Itinerary Type = Duration): Enter the Duration of this Itinerary item, in minutes.
Presentation
These fields are not required, but you can enter the information if it will be useful for organizing this Function.
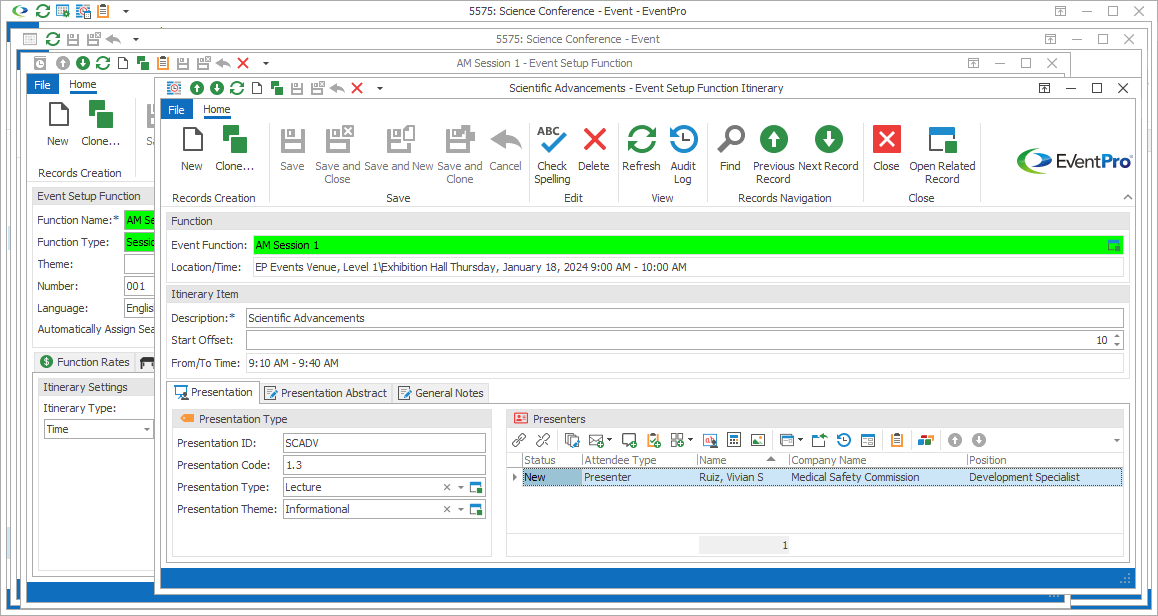
Figure 135: Adding Presentation Information
1.Presentation ID: Type in the Presentation I.D., if applicable.
2.Presentation Code: Type in the Presentation Code, if applicable.
3.Presentation Type: You can select a Presentation Type from this drop-down, which is populated by records created under EventPro Setup / Events / Presentation Types.
4.Presentation Theme: You can select a Presentation Theme from this drop-down, which is populated by records created under EventPro Setup / Events / Presentation Themes.
5.Presenters:
a.If you want to add presenters to this Itinerary item, click the Link button above the Presenters grid.
b.The Event Attendee window opens, displaying Event Attendees that have been assigned an Attendee Type that is marked as eligible for "Function Assignment".
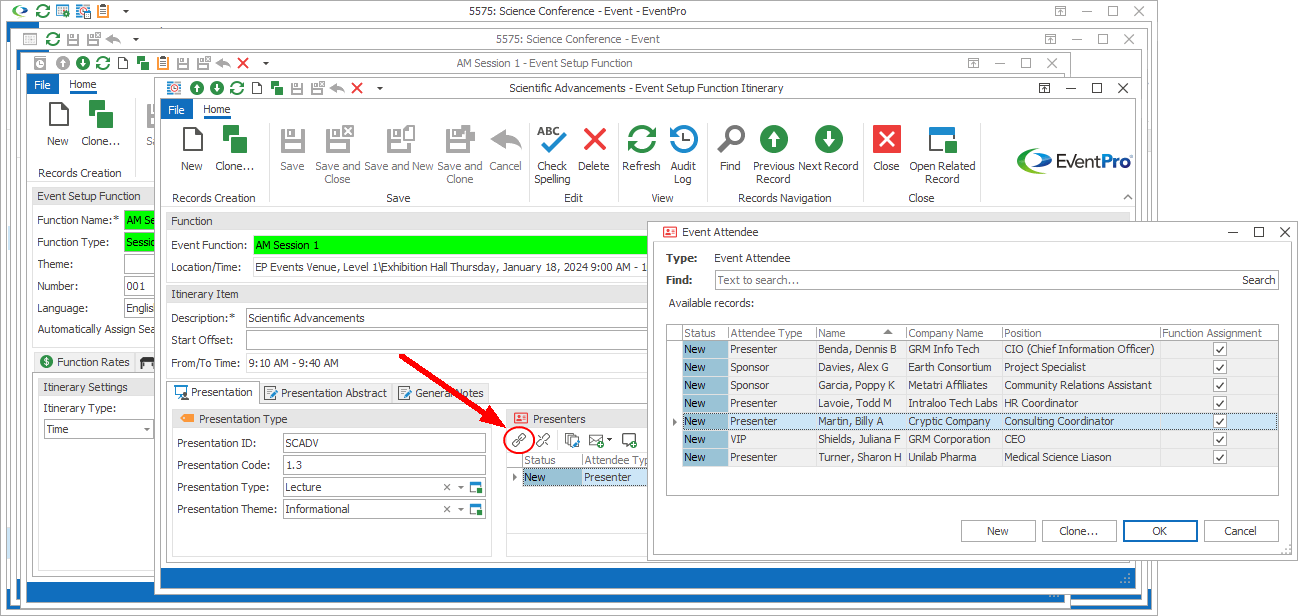
Figure 136: Linking Presenter to Function Itinerary
c.Select the attendee you want to assign as Presenter for this Function Itinerary item, and click OK.
d.The attendee will be added to the Presenter grid of the Event Setup Function Itinerary edit form.
e.You can continue adding Presenters to the Function, as required.
Presentation Abstract
You can enter the Presentation Abstract under this tab.
If you already have the abstract saved in a supported document format, e.g. .rtf, .txt, .htm, .html, .mht, .docx, .odt, .xml, .epub, or .doc, you can open the Word Processor, and open and save the document there. Review Common Procedures / Word Processor / Open Existing Document.
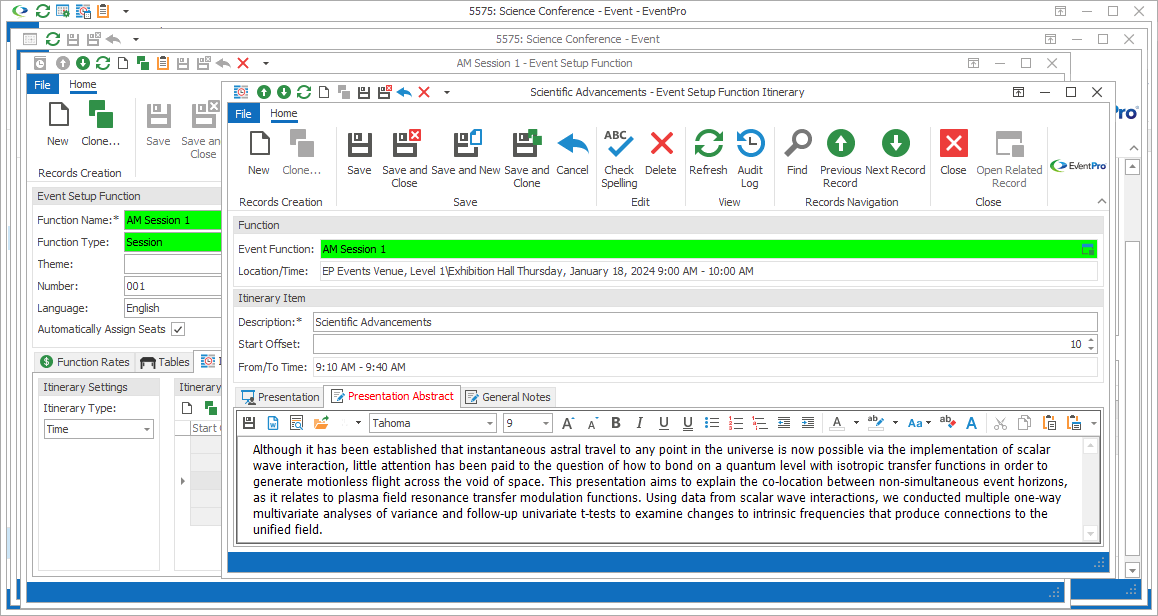
Figure 137: Adding Presentation Abstract
General Notes
If applicable, enter any general notes for this Function Itinerary, using the Word Processor if you require additional functionality.
Save & Close
When you are done entering information in the Event Setup Function Itinerary edit form, click Save and Close.
You will return to the Itinerary tab of the Event Setup Function edit form, where you can continue to add more Itinerary Items to the Function.
Next topic: Registrations