•Before you can register Event Exhibitors, you need Exhibitor Registrations set up for the Event.
•You would have created these under Event Management > Edit Event Window > Exhibitor Setup > Exhibitor Registrations, either copying the Registrations from an Event Template, or creating new Registrations for the Event.
•Take note that some Exhibitors may have been registered as soon as they were added to the event - individually or through an import - because of Auto-Add Registrations. When creating Exhibitor Registrations in Event Setup or EventPro Setup, there is an option to "Auto-Add" registrations to Exhibitors of certain Type (review Event Management > Edit Event Window > Exhibitor Setup > Exhibitor Registrations > Add New Exhibitor Registrations, and EventPro Setup > Events > Event Templates > Add Setup Event Template Exhibitor Registrations.)
These instructions will describe how to register one Event Exhibitor at a time within the Event's Exhibitors tab. You can also register multiple Exhibitors at once, which is covered under Register Multiple Exhibitors.
1.Under the Event's Exhibitors tab, locate the Exhibitor you want to register.
2.You can begin the registration from a couple different places.
a.If the Exhibitors tab has a split screen List/Detail view, you can select the Exhibitor in the grid, and click the New button under the Registrations tab to the right.
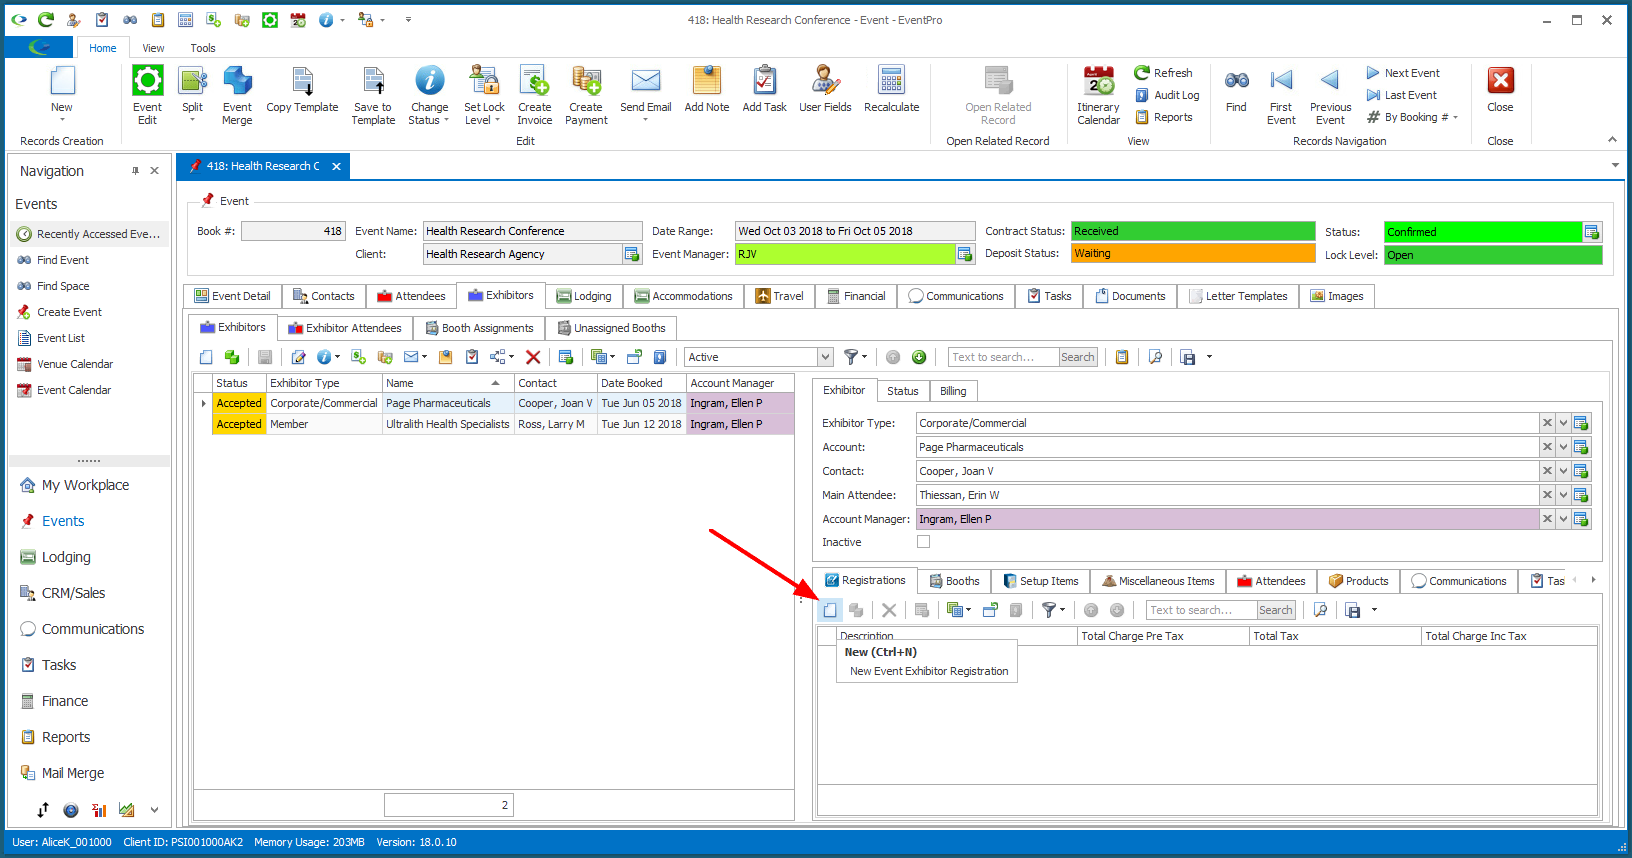
b.You can double-click the Exhibitor record in the grid to open the Event Exhibitor edit form. Click the New button under the Registrations tab (in the bottom half of the edit form).
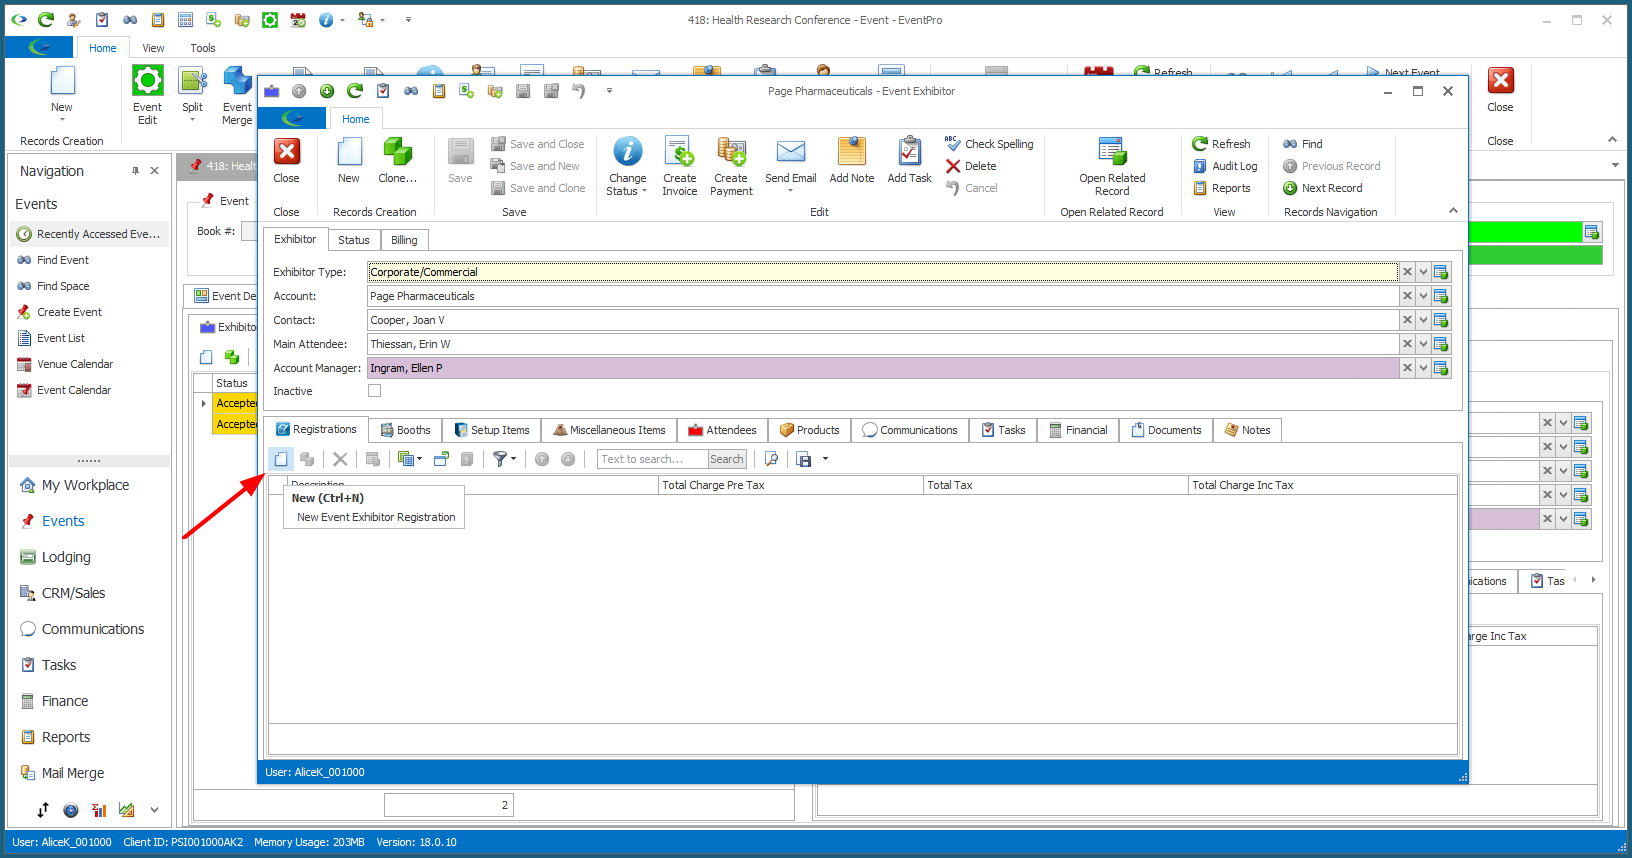
3.Either way, the Event Exhibitor Registration edit form will appear.
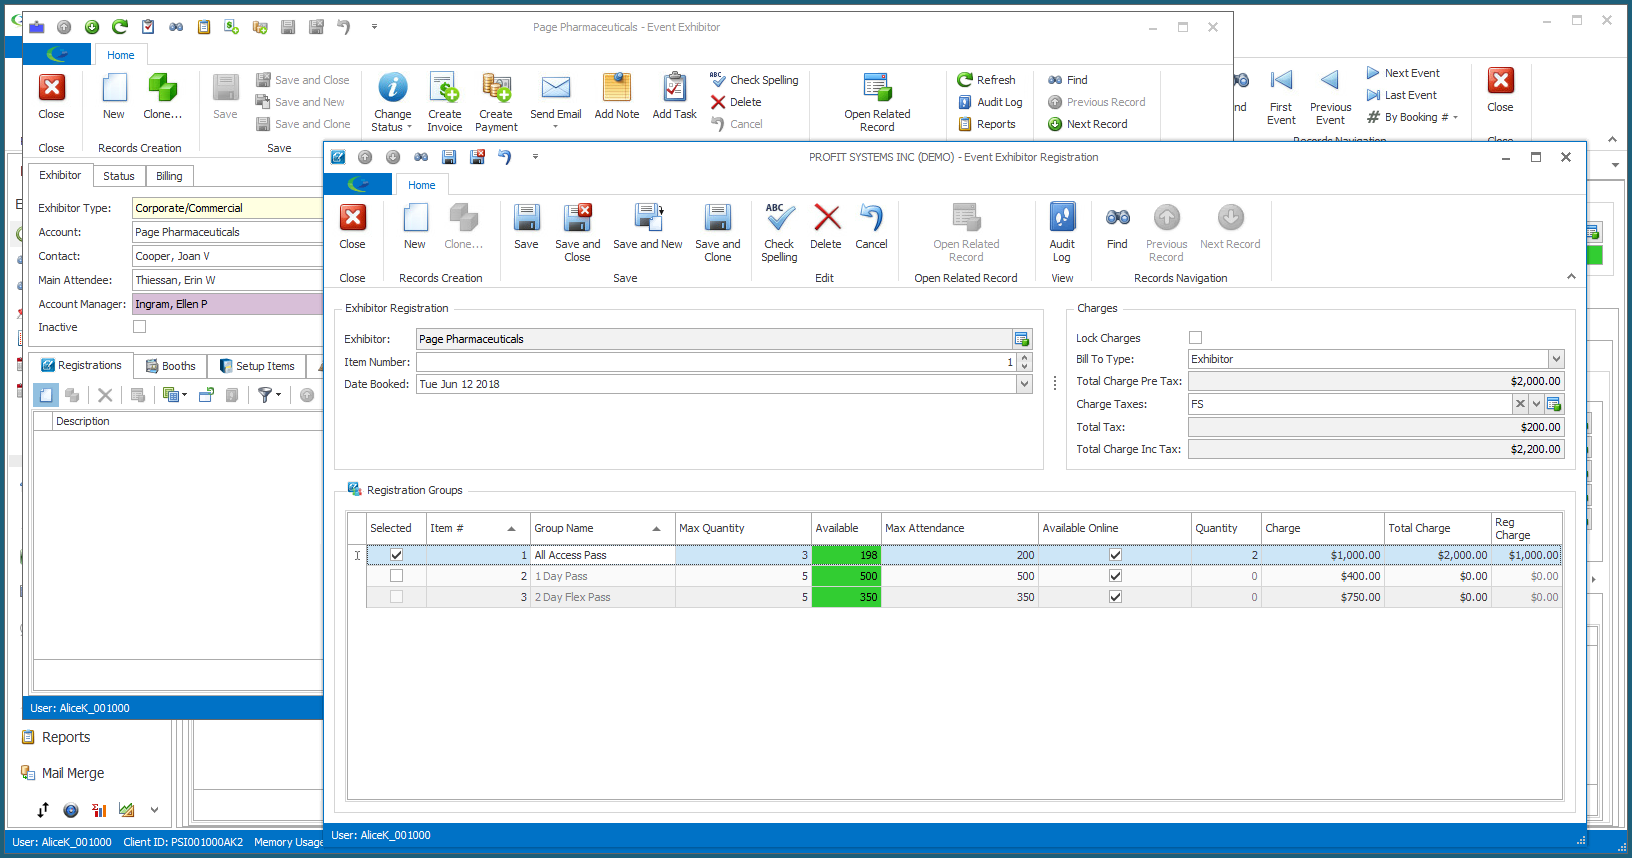
4.Exhibitor: The Exhibitor's name will default in.
5.Item #: The Item Number determines this Event Exhibitor Registration's position relative to other records under the Exhibitor's Registrations tab when sorted by Item #. Change the Item # to change the record's position in the sort order.
6.Date Booked: This defaults from the Date Booked field in the Event Exhibitor edit form.
You can manually select a different date from the drop-down calendar, but remember that this could cause a different Rate Code to apply, if Rate Codes are based on "Days Before" the event. (See, for example, Rates set up under Edit Event Exhibitor Registrations.)
7.Bill To Type: If you don't want to use the default Bill To Type, you can choose a different option.
8.Charge Taxes: Select the applicable Tax Configuration for this Registration, if applicable. The Charge Taxes drop-down is populated by the configurations created under EventPro Setup > Financial > Taxes.
9.Registration Groups: Select the checkbox(es) next to the Registration Group(s) you want to add to this Exhibitor.
a.If applicable, you can change the Quantity, but only up to the Max Quantity set on the Registration Group.
b.If other Registration Groups in this form are Mutually Exclusive to the Group you selected, you will notice that those other Registration Groups will be greyed out and unavailable for selection.
10.Lock Charges: If you want to lock this Registration as set, select the Lock Charges checkbox. If the Lock Charges checkbox is selected, you will not be able to edit anything that would change the charges, i.e. Registration Group selections, Quantities, or Charge Taxes.
11.When you are done making registration selections, click Save and Close.
12.The registration will be added to the exhibitor's Registrations tab.
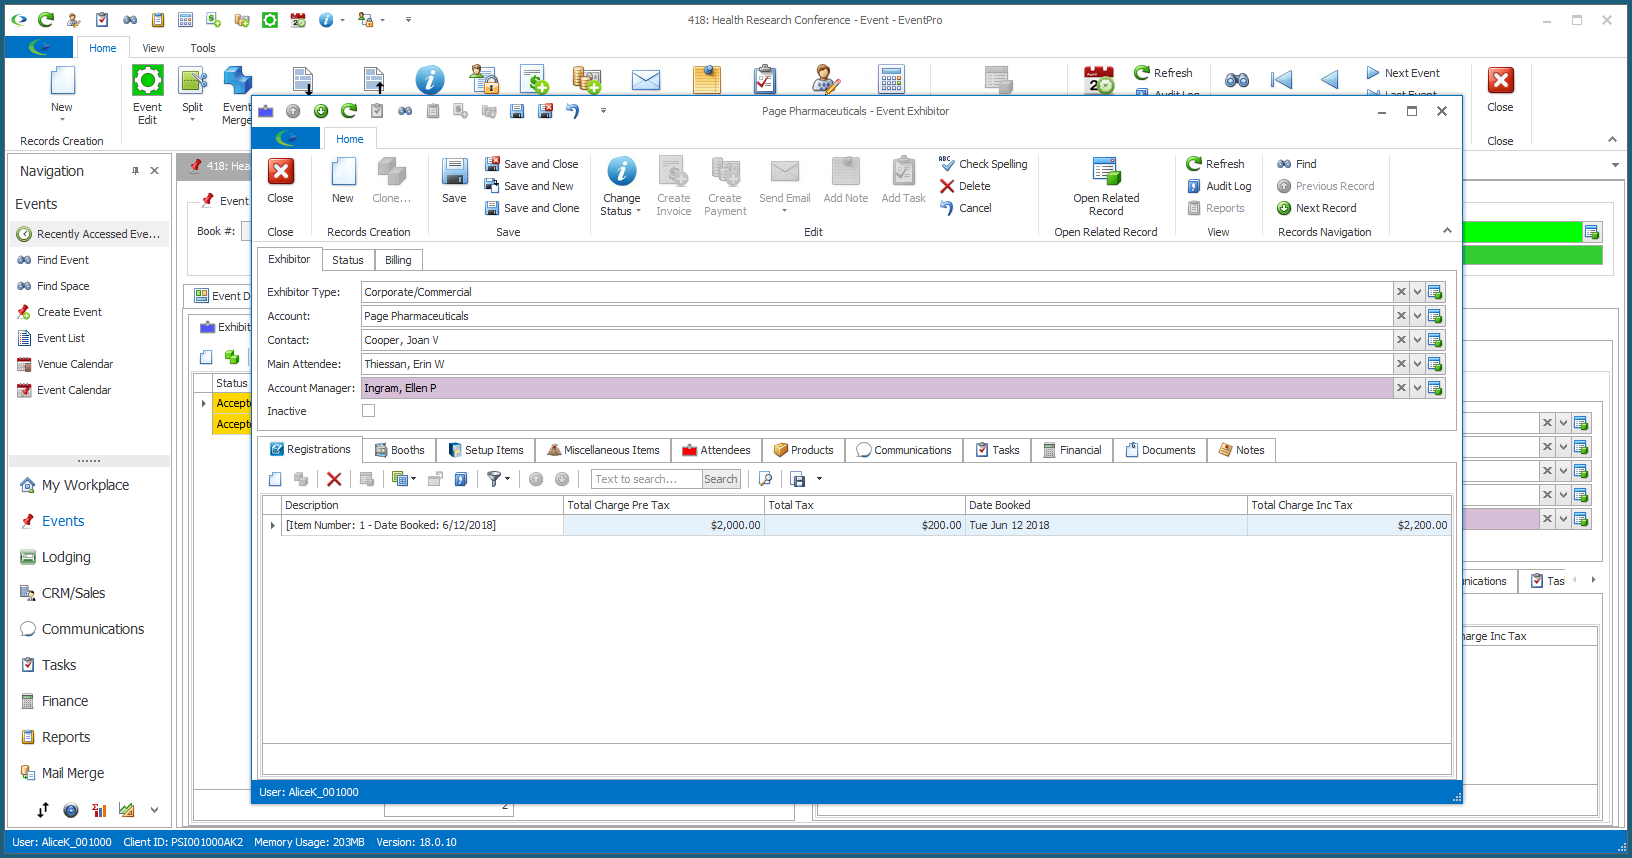
13.If you are in the Event Exhibitor edit form, click Save and Close to return to the Event's Exhibitors tab.