This page definition controls the Account Information page of the "Adding Exhibitor" and "Editing Exhibitor" online registration wizard.
In this topic:
Page Overview
The Exhibitor registrant will encounter the Account Information page when signing into or registering for the Exhibitor Portal.
The hard-coded page header will be "Adding Exhibitor" or "Editing Exhibitor", depending on whether the Exhibitor is creating a new registration or editing an existing registration.
CRM Account & Exhibitor Portal Login
All Exhibitors in EventPro require a CRM Account.
They also require Exhibitor Portal Login credentials if they intend to register online. (Note: These Exhibitor Portal Logins only work for the online Exhibitor Portal; they are not Security User accounts or EPConnect accounts).
New Exhibitor
A new Exhibitor without a CRM Account can create their EventPro CRM Account/Exhibitor Portal login by submitting their details through the Account Information page.
The Login Information form field group will be visible on the page for new Exhibitors, since they need to set their Exhibitor Portal Login credentials.
Returning Exhibitor
A returning Exhibitor's information will be pulled into the Company, Contact, and Exhibitor Information groups on the Account Information page. The Exhibitor can edit their information, if required.
The Login Information form field group will not be visible on the page for returning Exhibitors, since their Exhibitor Portal Login credentials have already been set.
If a returning Exhibitor has forgotten their login password, they will need to reset it through the Exhibitor Forgot Password page.
This screenshot displays a sample Account Information page with the components labeled.
The Login Information form field group (if visible) is hard-coded for the page, and does not need to be added.
The Company, Contact, and Exhibitor Information form field groups are included in the Page Definition's Form Field Groups by default, but can be edited (with caution).
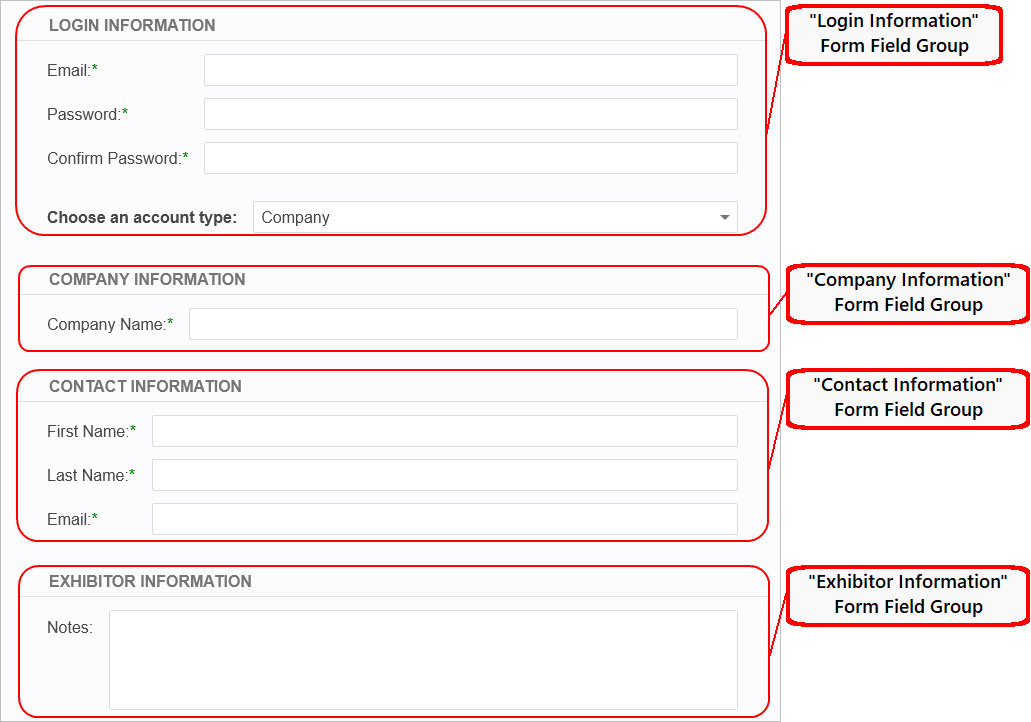
Figure 851: Account Info Page with Labels
Page Definition & Settings
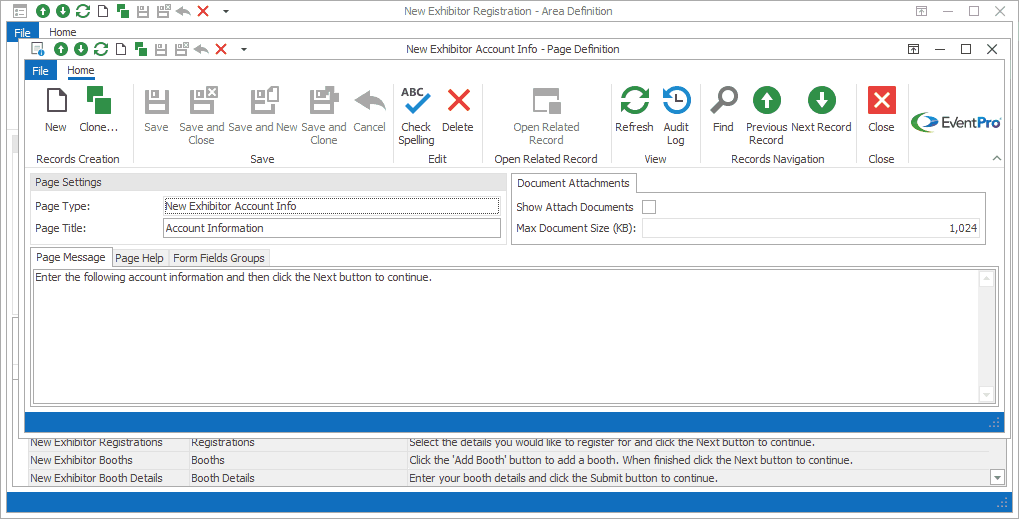
Figure 852: Account Info Page Definition
Page Settings
Page Type
Once selected, the Page Type is fixed, and you will not be able to change it.
The default settings and fields for the Page Type will already be pulled into the edit form.
Page Title
A Page Title will default in, but you can also type in a title of your choice.
On your EPConnect website, the Page Title appears just below the main menu. (The Page Title Image that appears next to the Page Title online would have been defined for the Area Definition containing this Page Definition.)
Document Attachments
To collect documents uploaded by online Exhibitor registrants, you would typically use the New Exhibitor Required Documents Page Definition.
However, the Account Info Document Attachments section simply provides another option for uploading documents, if that is useful for your process.
Show Attach Documents
Select the Show Attach Documents checkbox if you want to allow online registrants to upload documents from the Account Info page.
If you activate this setting, the Documents form field group will appear in the Account Info page of the online New Exhibitor Registration Wizard, where the online user can upload documents.
Max Document Size (KB)
Enter the maximum file size allowed for an upload.
If you activate the Show Attach Documents setting, this hard-coded Documents form field group appears at the bottom of the Exhibitor Account Info page.
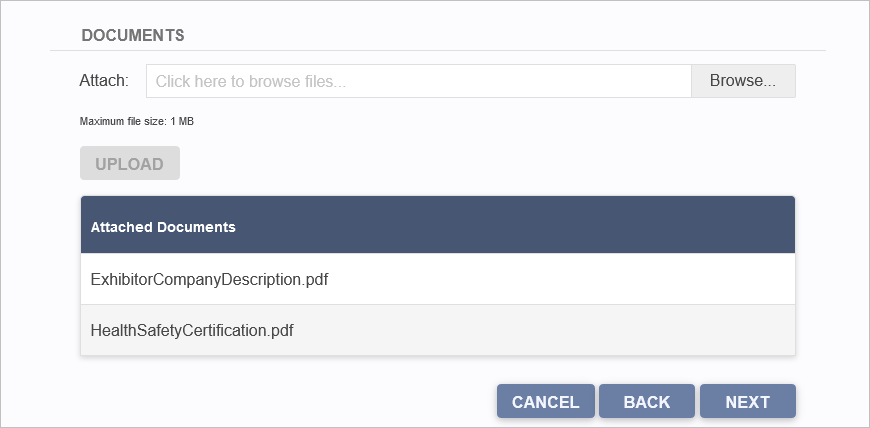
Figure 853: Account Info Page with Documents
Page Message
A default message will appear in this Page Message tab, but you can type in any message you want to use.
On your EPConnect website, the Page Message will appear under the Page Title.
Page Help
If you want to add instructions to a page to assist the online user, enter the text under this Page Help tab.
If you define Page Help text here, the Help icon will appear in the corresponding EPConnect web page. When a viewer clicks the Help icon, it displays the Page Help text in a pop-up.
Form Fields Groups
In this section of the Page Definition, you are defining Form Fields that collect information from online users, and transfer the data back into the corresponding fields in your EventPro program.
For organizational purposes, Form Fields are grouped within Form Field Groups. When viewed online, each Form Field Group typically has a bold heading and thin surrounding border.
If a Page Definition is intended to create an online form, it will already have a default set of Form Field Groups and Form Fields.
You can typically customize the online form by adding, editing, and deleting form fields or groups. However, you should avoid deleting or significantly editing "Required" form fields, as they were specifically selected to transfer critical information between EPConnect and EventPro.
Superficial changes, such as editing Captions, Caption Positions, Item Numbers, or Tool Tips, shouldn't typically cause problems, but significant changes, like selecting a different Field or deleting the form field altogether, can interfere with EPConnect's functionality.

Figure 854: Labelled Form Field Group
Under the Form Fields Groups tab of the Page Definition, double-click the Form Field Group you want to view.
The corresponding Form Field Group edit form opens.
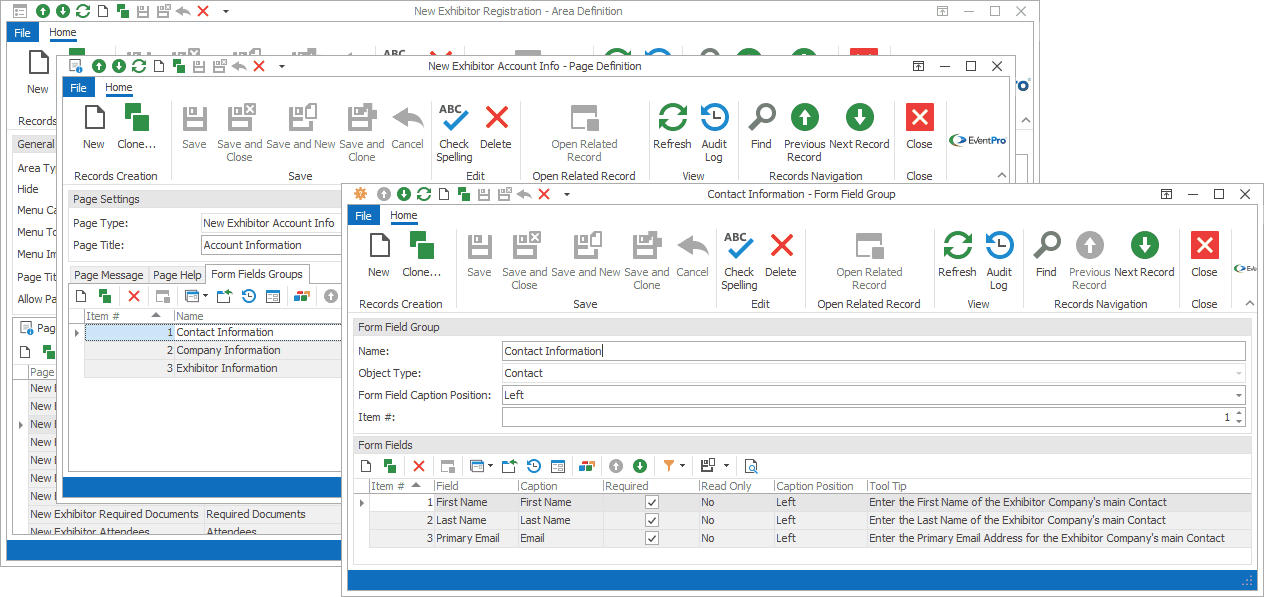
Figure 855: Editing Form Field Group
In the Form Fields selection grid at the bottom of the Form Field Group edit form, double-click the Form Field you want to view.
The corresponding Form Field edit form opens.
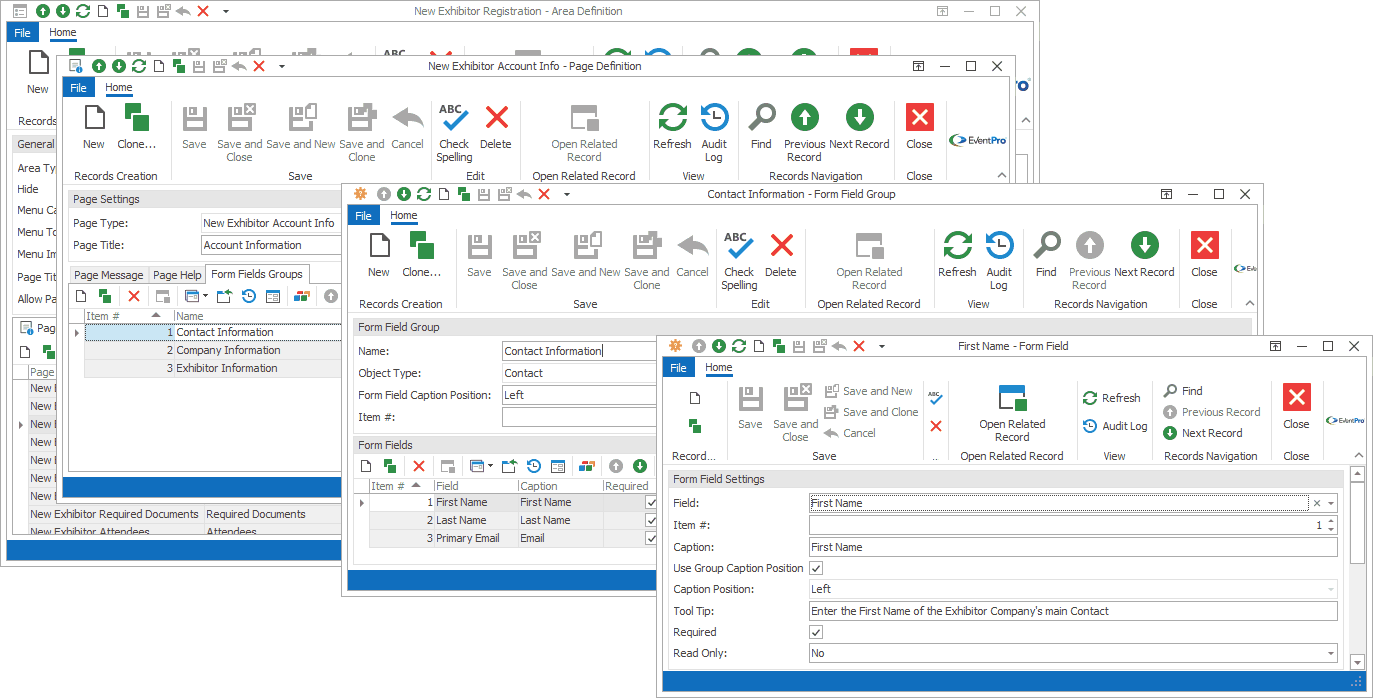
Figure 856: Editing Form Field
When you are done with the Form Field edit form, save and close to return to the Form Field Group edit form.
You will need to save and close the Form Field Group edit form, also.
Ensure that you Save this page definition, as well as the area definition containing it.
Next topic: New Exhibitor Registrations