This Page Definition controls the Attendee Details page of the "Adding Exhibitor" and "Editing Exhibitor" online registration wizard.
In this topic:
Page Overview
As noted earlier, adding Attendees involves two pages: this Attendee Details page, and the Attendees page (New Exhibitor Attendees).
•Start in Attendees page: The Exhibitor registrant clicks the "Add Attendee" button, which takes them to the Attendee Details page.
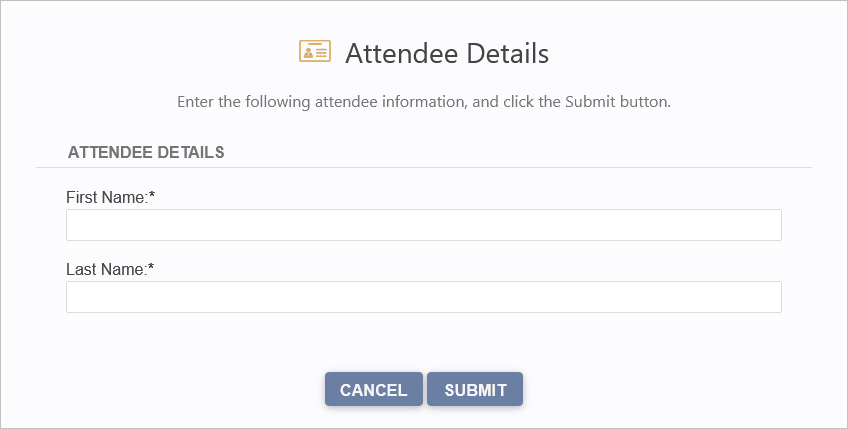
•Go to Attendee Details page: The Exhibitor enters the Attendee's name, and clicks Submit. They are returned to the Attendees page.
•Return to Attendees page: The newly added Attendee appears in the Attendees grid.
•The Exhibitor can add more Attendees by repeating the process.
The Attendee Details form fields are included in the Page Definition's Form Field Groups by default, but can be edited (with caution).

Figure 883: Sample Exhibitor Attendee Details Page
Page Definition & Settings

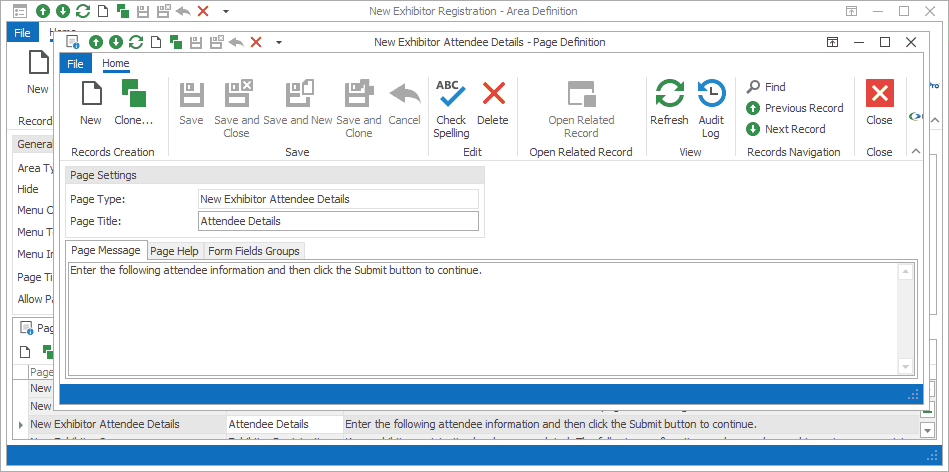
Figure 884: Exhibitor Attendee Details Page Definition
Page Settings
Page Type
Once selected, the Page Type is fixed, and you will not be able to change it.
The default settings and fields for the Page Type will already be pulled into the edit form.
Page Title
A Page Title will default in, but you can also type in a title of your choice.
On your EPConnect website, the Page Title appears just below the main menu. (The Page Title Image that appears next to the Page Title online would have been defined for the Area Definition containing this Page Definition.)
Page Message
A default message will appear in this Page Message tab, but you can type in any message you want to use.
On your EPConnect website, the Page Message will appear under the Page Title.
Page Help
If you want to add instructions to a page to assist the online user, enter the text under this Page Help tab.
If you define Page Help text here, the Help icon will appear in the corresponding EPConnect web page. When a viewer clicks the Help icon, it displays the Page Help text in a pop-up.
Form Field Groups
In this section of the Page Definition, you are defining Form Fields that collect information from online users, and transfer the data back into the corresponding fields in your EventPro program.
For organizational purposes, Form Fields are grouped within Form Field Groups. When viewed online, each Form Field Group typically has a bold heading and thin surrounding border.
If a Page Definition is intended to create an online form, it will already have a default set of Form Field Groups and Form Fields.
You can typically customize the online form by adding, editing, and deleting form fields or groups. However, you should avoid deleting or significantly editing "Required" form fields, as they were specifically selected to transfer critical information between EPConnect and EventPro.
Superficial changes, such as editing Captions, Caption Positions, Item Numbers, or Tool Tips, shouldn't typically cause problems, but significant changes, like selecting a different Field or deleting the form field altogether, can interfere with EPConnect's functionality.
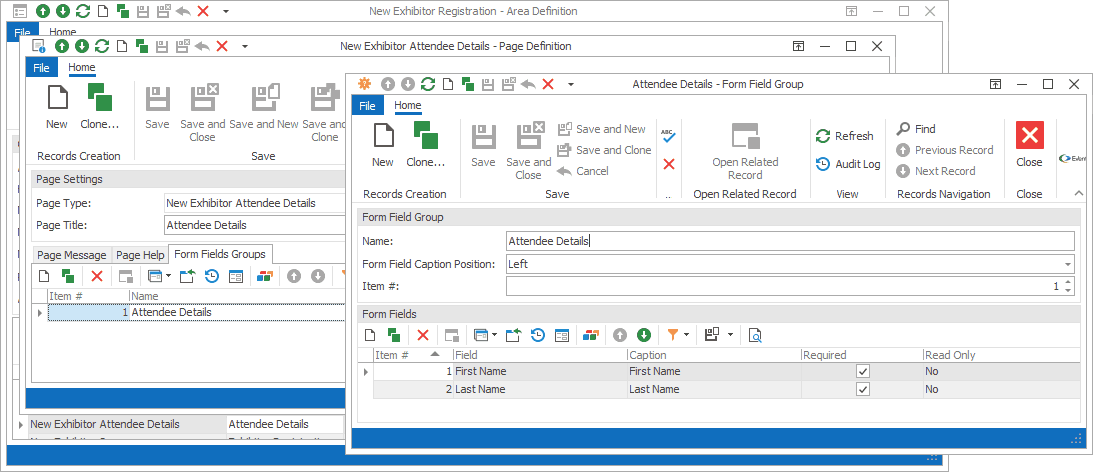
Under the Form Fields Groups tab of the Page Definition, double-click the Form Field Group you want to view.
The corresponding Form Field Group edit form opens.

Figure 885: Editing Form Field Group
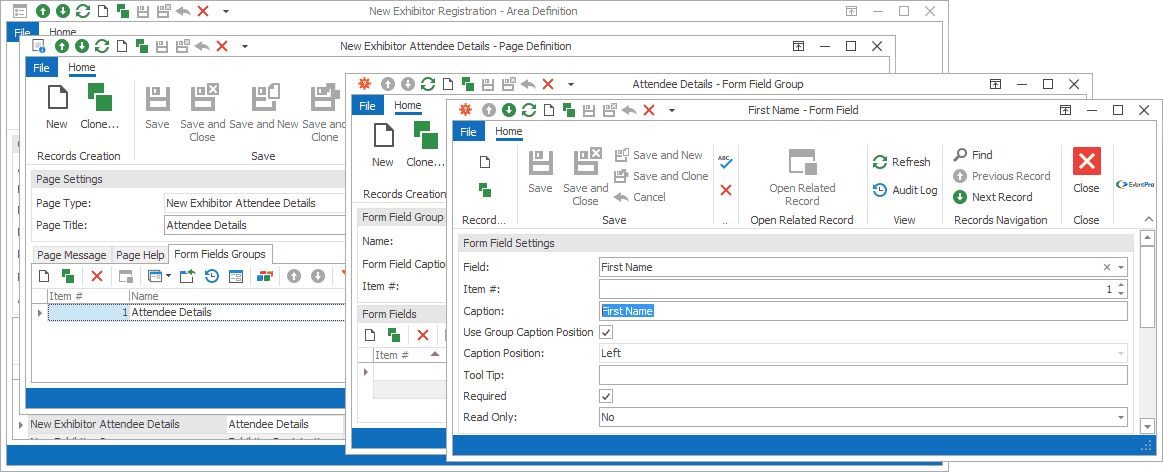
In the Form Fields selection grid at the bottom of the Form Field Group edit form, double-click the Form Field you want to view.
The corresponding Form Field edit form opens.

Figure 886: Editing Form Field
When you are done with the Form Field edit form, save and close to return to the Form Field Group edit form.
You will need to save and close the Form Field Group edit form, also.
Ensure that you Save this page definition, as well as the area definition containing it.
Next topic: New Exhibitor Summary