1.Under EventPro Setup > Financial > Financial Subgroups, these Financial Subgroups allow you to break out smaller, specific groups of items from a general type of resource charge, which later allows you to track the use of resources in those sub-groups and the revenue generated from them. Some examples of how Financial Subgroups could be used are found below.

2.To define a Financial Subgroup, start a new record or edit an existing record under the Financial Subgroup tab.
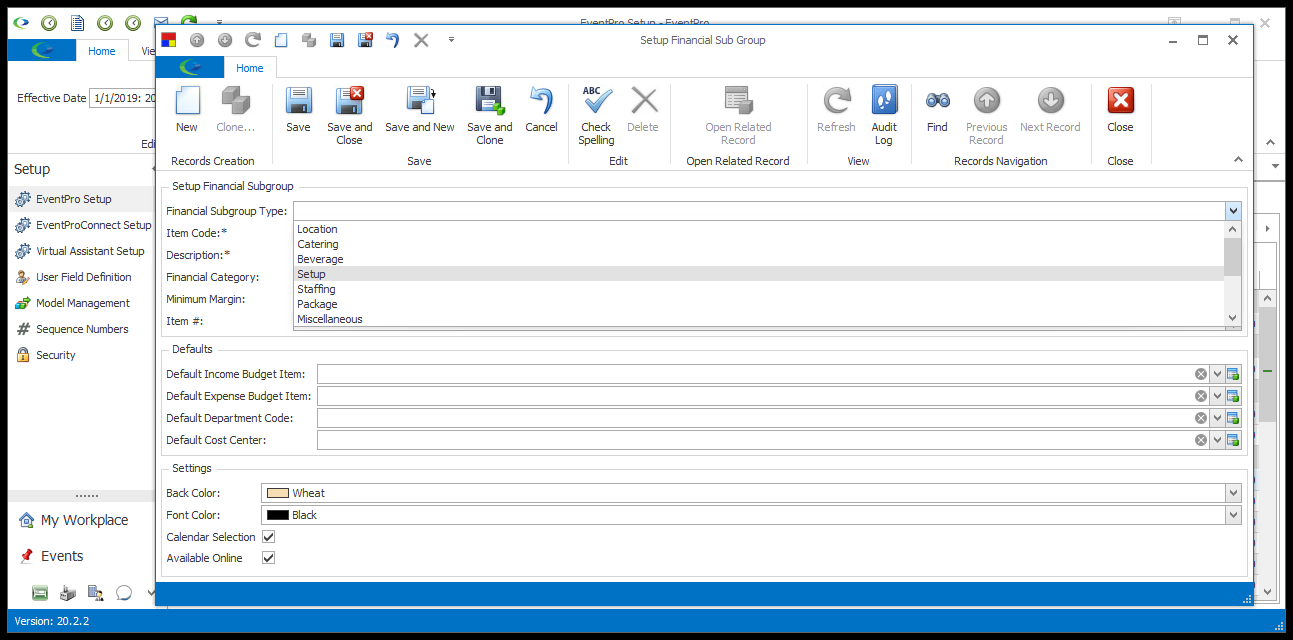
3.The Setup Financial Sub Group edit form opens.
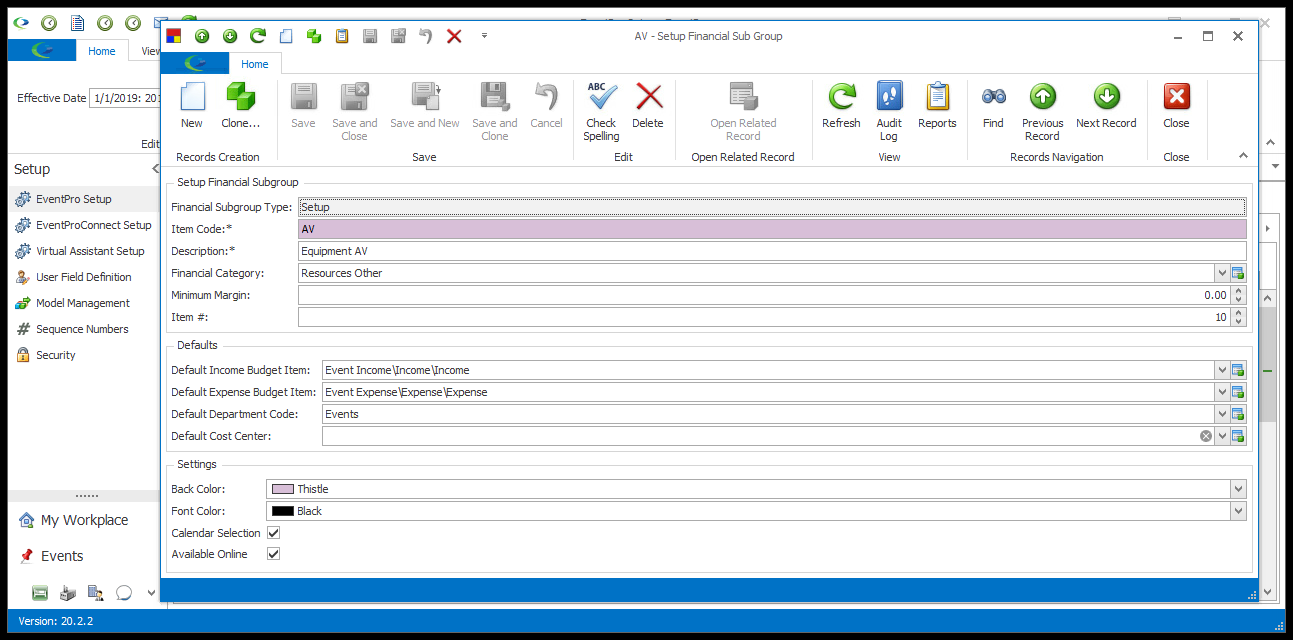
4.Setup Financial Subgroup:
a.Financial Subgroup Type: Select a financial subgroup type from the drop-down list.
b.These types - Location, Catering, Beverage, Setup, Staffing, Package, Miscellaneous, Accommodation, Travel, Attendee Registration, Exhibitor Registration, Exhibitor Booth, and Presenter - are hard-coded in EventPro.
c.Item Code: Enter the item code for the financial subgroup you are creating.
i.If you are creating Financial Subgroups for resources, remember that your resource items will be organized under these different subgroups to help you with tracking resource usage and revenue.
ii.You can create financial subgroups by type of item, or according to the department responsible for certain items - whatever works best for your organization.
d.Description: If you wish, you can enter a longer description of the financial subgroup.
e.Financial Category: If you like, you can select a default Financial Category from the drop-down list.
f.Minimum Margin: This is a percentage figure you can set to prevent staff from discounting below it.
g.Item #: Item numbers allow you to determine a sort order for the items in the list. A number will default in, but you can manually change it.
5.Defaults: If you want, you can select defaults for the following fields.
a.Default Income Budget Item: Select an option from the setup records created under Financial > Budget Configuration > Add Setup Budget Items.
b.Default Expense Budget Item: Select an option from the setup records created under Financial > Budget Configuration > Add Setup Budget Items.
c.Default Department Code: Select an option from the setup records created under Financial > Department Codes.
d.Default Cost Center: Select an option from the setup records created under Financial > Cost Centers.
6.Settings:
a.Back color: Select the background color for this financial subgroup record, which will appear in color-coded areas such as the event financial summary.
b.Font Color: Select the font color for this financial subgroup record, which will appear in color-coded areas such as the event financial summary
c.Calendar Selection: Select this checkbox if you want items in this financial subgroup to be available for selection on the calendar. Note that you can later determine calendar selection on an individual item basis.
d.Available Online: If you want items of this financial subgroup to be visible and available for selection online with EPConnect, select this checkbox. Note that you can later determine online availability on an individual item basis.
7.When you're done creating or editing the record, click a Save option.
8.To see the different ways that Financial Subgroups are used in EventPro, go to:
a.In Tracking Resources & Facilities