•After you finish the Event Creation Wizard, a Report dialog will probably appear. This is the default post-booking Report set in your Events System Settings (Report to Print after New Booking).
A common choice is the Event Confirmation report, as pictured in this example, but you have the option in Setup to select whichever report is most commonly sent after booking events at your organization.
•However, if you did not select any default post-booking Report in Events System Settings, this dialog won't appear, and you will skip this step.
•If you don't want to run the report at this time, just click Close. You will be directed to the Event Screen for the event you just booked.
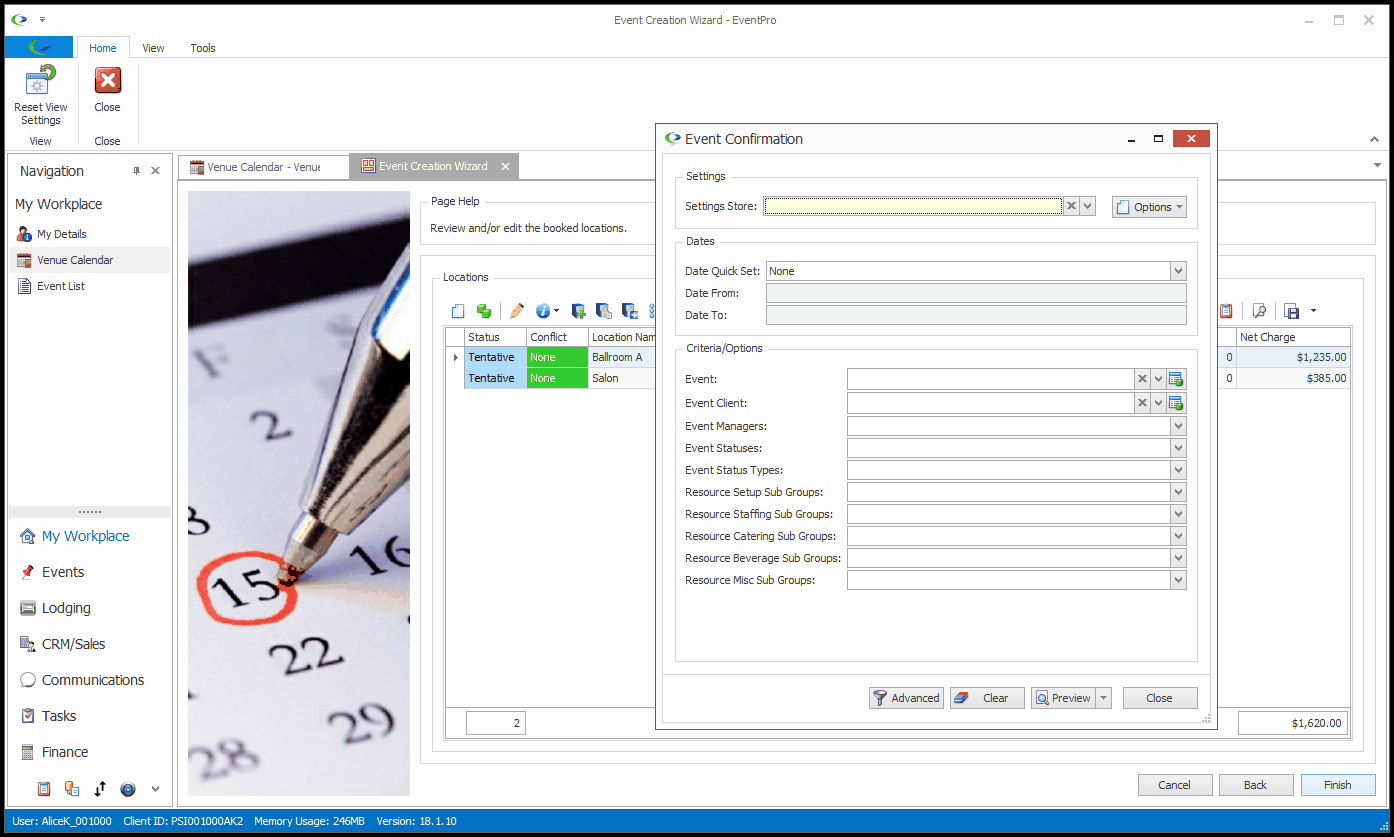
1.In the Event Confirmation report dialog, there won't be any filters set, meaning that the report will include all information for the Event you just booked.
If, however, you want to filter the report, you can select the conditions in this dialog or use a pre-defined filter. To learn more about report filtering, see Reports > Run Reports and Create Report Filters.
2.The Report's print destination button will be set to a default (Preview, Print Dialog, Print to Default, or Send Email), although you can use the drop-down arrow to manually select the print destination.
a.If you choose to Preview the report, there are several actions you can take in the Preview window. When you are done previewing the report, you can send an email with the attached report from the Preview window. Learn more at Reports > Run Reports > Preview.
b.If you choose to Print the report, whether using the dialog or printing straight to default, you can review Reports > Run Reports > Print (Dialog & Default).
c.In our example, we intend to email the Event Confirmation report to the Event Client, so we will select Send Email.
3.After clicking Send Email, the Email edit form will appear.
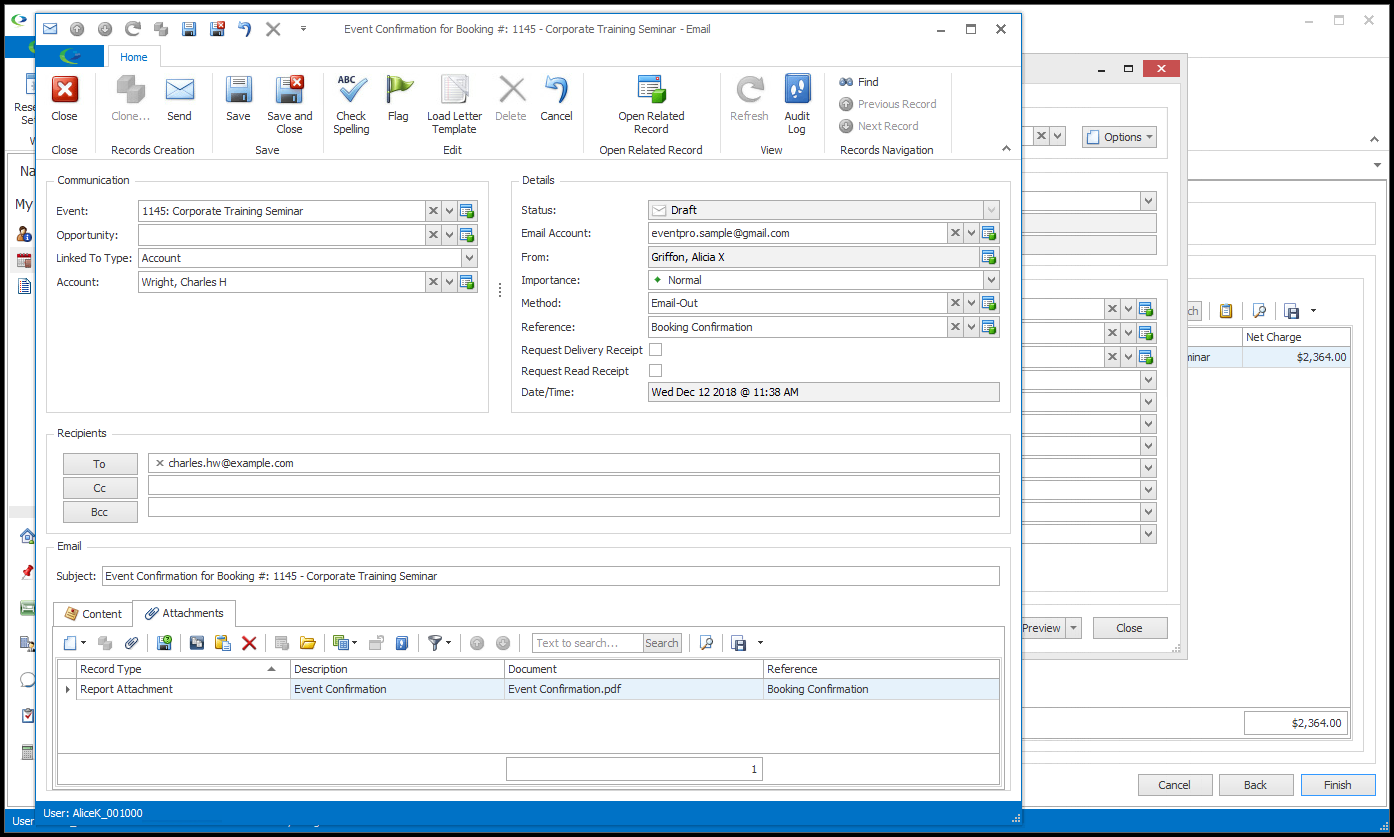
4.The linked Event, the recipient's email address, and other information will default into the email edit form. The relevant Report will already be attached under the Attachments tab in the default format specified in EventPro Setup > Communications > Communications System Settings.
If you want to make any changes to the email, such as changing the Sender's email account, selecting a different Reference, adding more attachments, etc., review Communication & Email Management > Prepare & Send an Email.
5.There may already be a default Subject for the email, but you can type in a different one if you like.
6.You can type your message into the Content tab's memo field, or use the Word Processor for more sophisticated formatting.
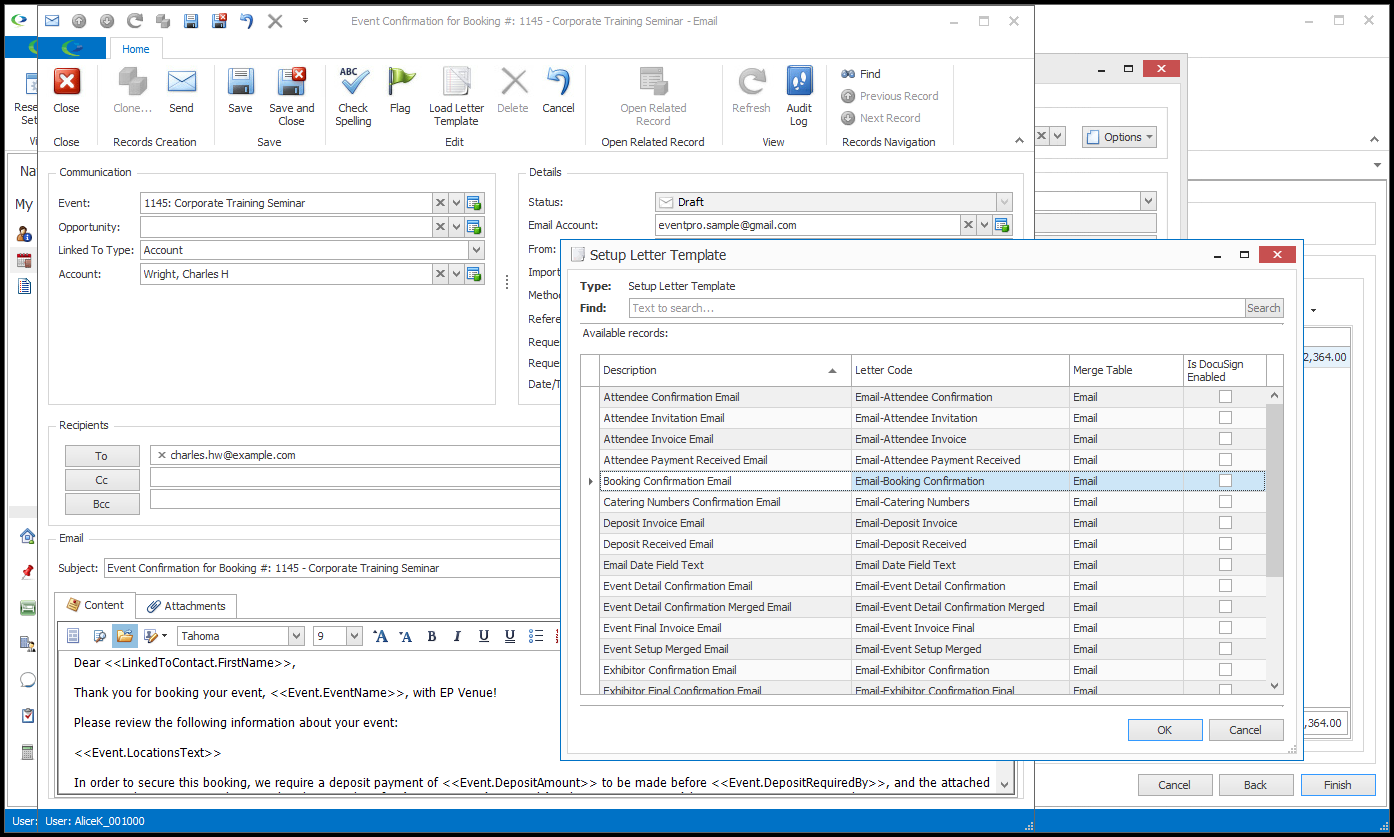
You can also load a letter template into the body of the email. For example, you may have already created a Booking Confirmation Letter Template that includes all of the information and merge fields you need for a confirmation email. To review how to load a letter template, see Communication & Email Management > Prepare & Send an Email > Content.
7.When you have entered all the information you need for this email, click Send.

8.After you click Send, the email will be sent and saved under the Event, Event Client and Event Client Contact communications.
If you return to the report Preview window, close the Preview window.