You can export several different types of records from EventPro.
Although the records are different, the process of exporting is similar. These instructions will explain the general process of exporting EventPro records, and note any special steps required for certain record types.
In this topic:
oExport To (Format)
oEffective Date & Resource Item Type
Select Export Type
In the Navigation Panel or Navigation Menu, select Import/Export, and then select Export.
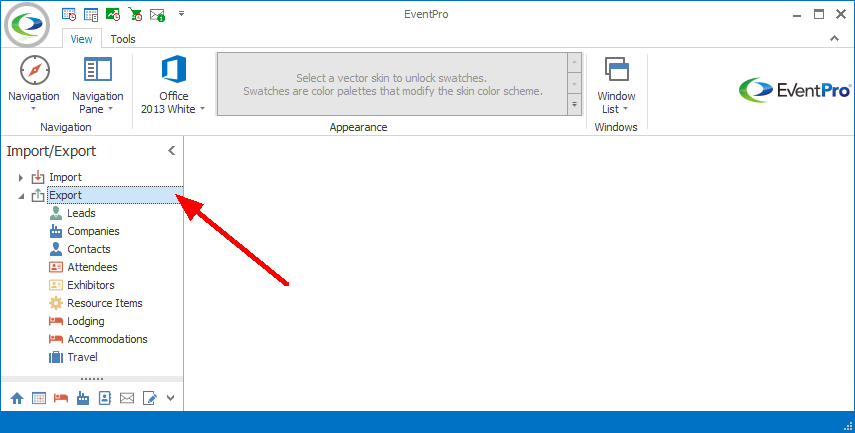
Figure 77: Selecting Export from Navigation Panel
Under Export, click on the type of record you want to export:
•Leads
•Companies
•Contacts
•Attendees
•Exhibitors
•Resource Items
•Lodging
•Accommodations
•Travel
Note that you may not see all of these record types, depending on the EventPro optional modules you have.
Export Wizard
The Export Wizard for the selected record type begins.
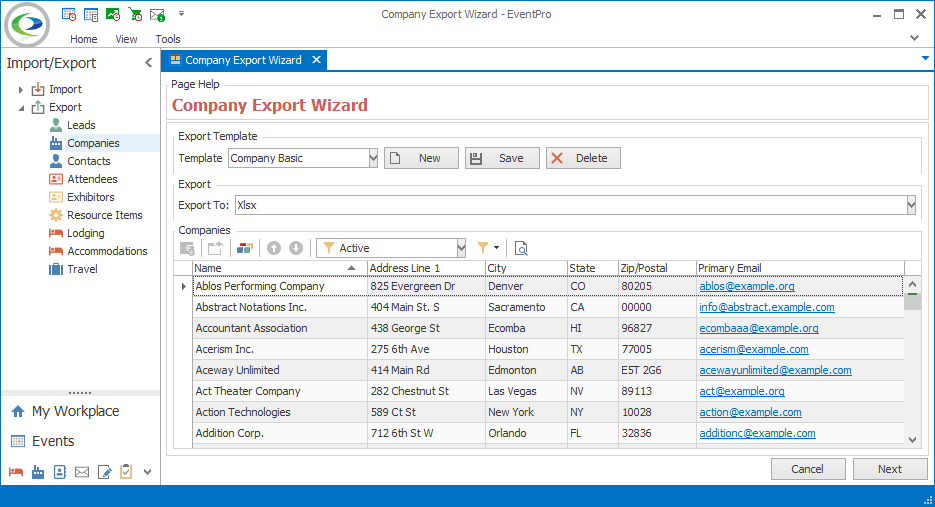
Figure 78: Export Wizard
Export Template
The columns in the bottom selection grid determine what data the wizard exports for the selected records.
The Export Templates allow you to save sets of data columns so you do not need to choose columns every time you export.
Select Export Template
If you already have saved Export Templates, choose one from the Template drop-down list. The corresponding data columns will be displayed below.
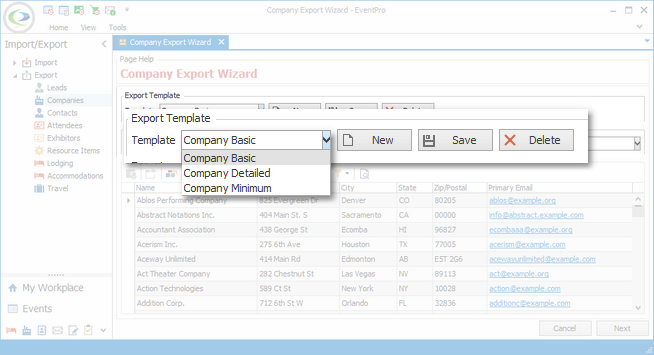
Figure 79: Selecting Export Template
Create Export Template
To create a new Export Template, click the New button next to the Template field.
In the New Template dialog, enter the Template Name, and click OK.
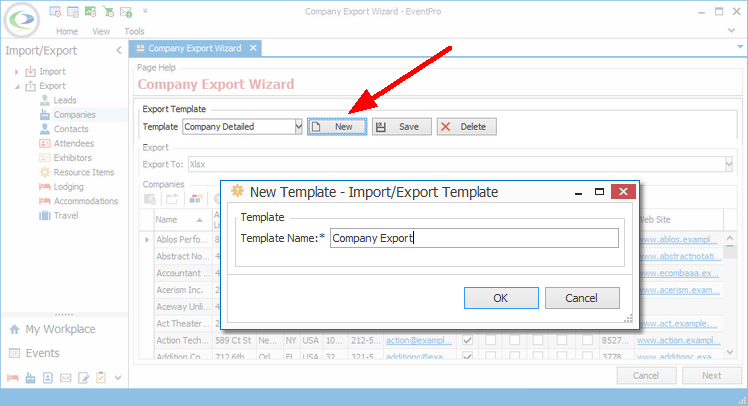
Figure 80: Creating New Export Template
The new template is now selected in the Template field. While it is still selected, make adjustments to the columns, adding or hiding columns as you require. Review the topic Choose & Hide Columns.
When the columns are adjusted to your preference, click the Save button next to the Template field. That column configuration is now saved to that template.
Edit Export Template
To edit an existing Export Template, select it from the Template drop-down list.
Add and/or hide the columns in the selection grid below.
When the columns are adjusted to your preference, click the Save button next to the Template field.
Delete Export Template
To delete an existing Export Template, select it in the Template field, and click Delete. The template will be deleted.
Event
For certain records (Attendees, Exhibitors, Lodging, Accommodations, and Travel), you will need to select an Event.
Click the drop-down arrow next to the Event field to open the Event Find form.
Search for and select the relevant Event from the drop-down grid.
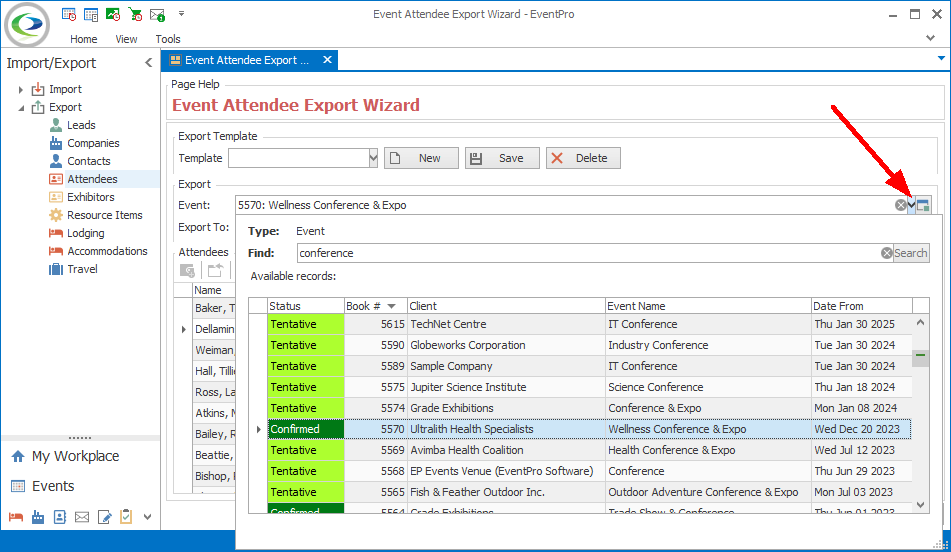
Figure 81: Selecting Event
The records belonging to that Event will appear in the export wizard's selection grid.
Export To
From the Export To drop-down list, select the file format you want to export the selected records to:
•XLS
•XLSX
•HTML
•MHT
•Text
•RTF
•CSV
•Image
•DOCX
Effective Date & Resource Item Type
These two fields are only used for the Resource Item export.
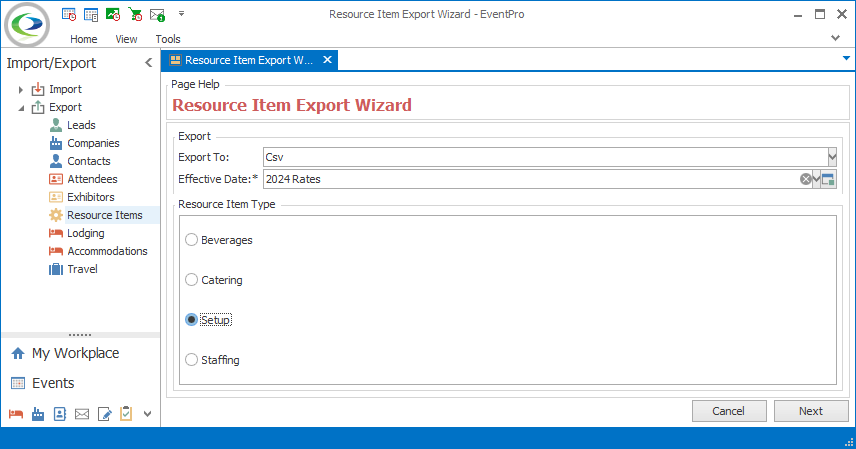
Figure 82: Selecting Effective Date & Resource Item Type
•Select the Effective Date for the resources you intend to export. To review the significance of Effective Dates, see the topic Effective Dates under EventPro Setup.
•Select the Resource Item Type you want to export:
oBeverages
oCatering
oSetup
oStaffing
After selecting the Effective Date and Resource Item Type, as well as the Export To format, click Next.
You will now arrive at the selection grid of records, like the export wizard for other record types.
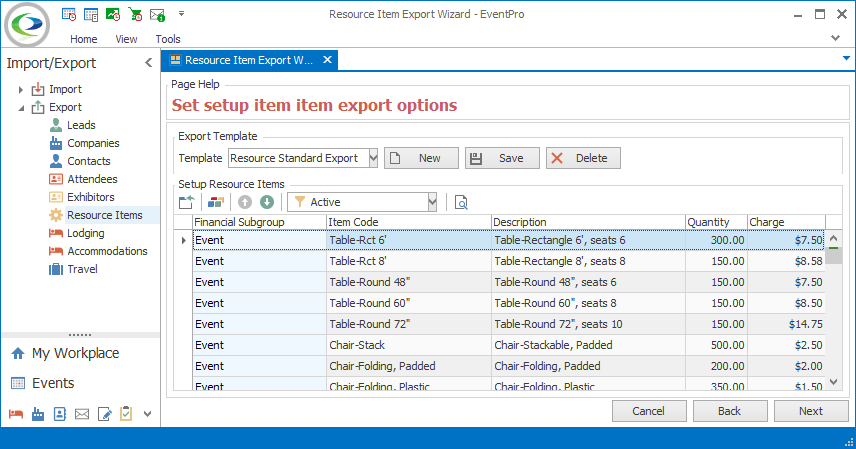
Figure 83: Resource Item Export Selection Grid
Select Records
The records appear in a selection grid at the bottom of the window. As noted earlier, the wizard will export selected records, with the data determined by the visible columns.
You may have already determined which data columns will be exported by selecting an Export Template above.
If not, you can manually change which data columns are visible here.
Once the data columns are set, you need to select the records to export.
First, you may want to filter the selection grid to display only certain records:
•You can use the Column Header Filter to filter the selection grid according to the checked Values. Review the topic Column Header Filter.
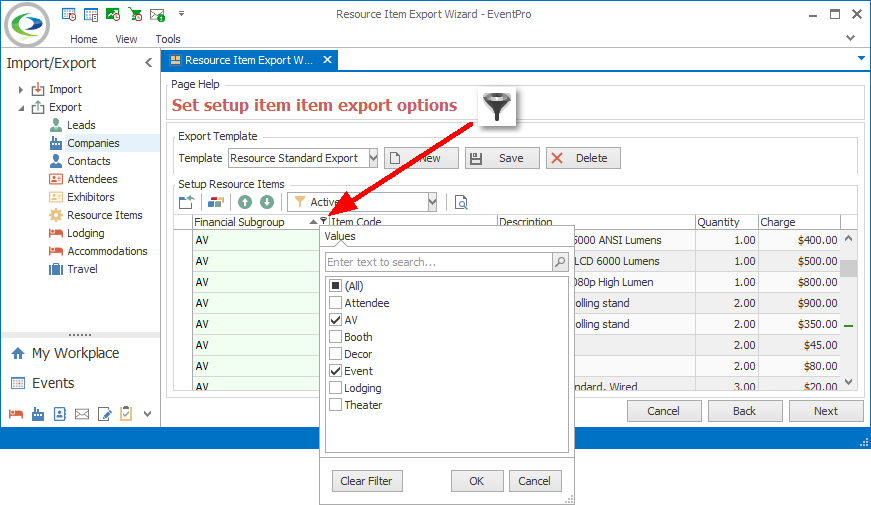
Figure 84: Filtering Column
•You can also use the drop-down Grid Filter, which is populated by standard EventPro filters (e.g. Active/Inactive), plus any custom filters you create. Review the topics Grid Filter and Create Grid Filter.
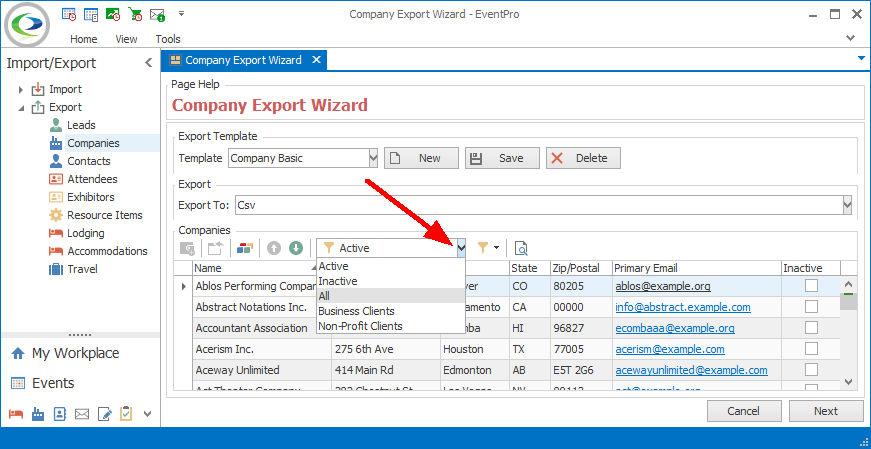
Figure 85: Filtering with Grid Drop-Down
Once you have the grid filtered, if applicable, select the records you want to include in the export:
•To select all records in the grid, press Ctrl + A.
•To multi-select, hold down the Ctrl key and click on the relevant records.
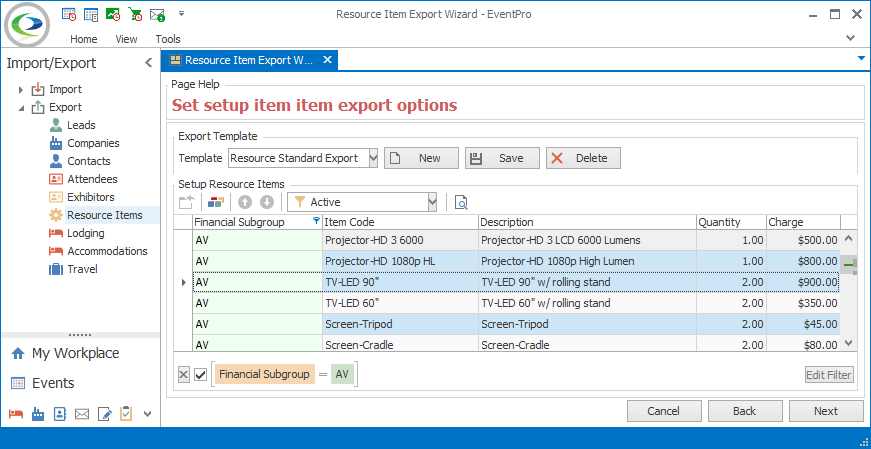
Figure 86: Multi-Selecting Records
Click Next
Once you have the relevant records selected, click Next.
Save Export File
The Save As window appears.
Choose the folder where you want to save the export file, and click Save.
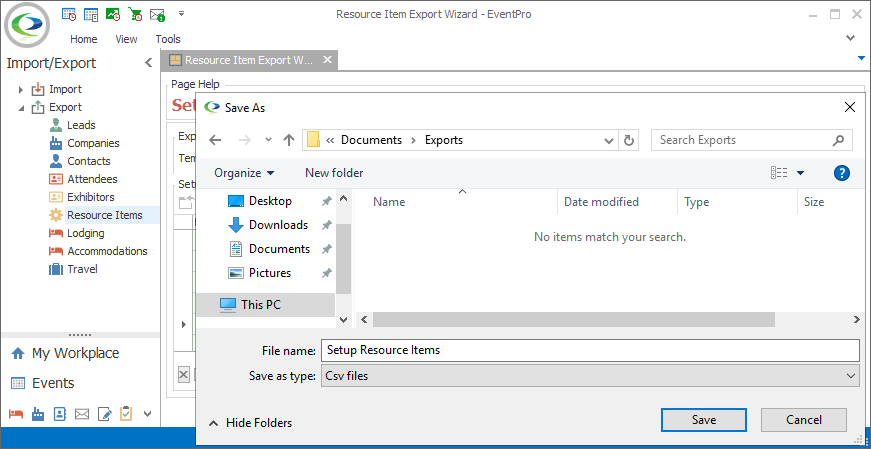
Figure 87: Saving Export File
View Export Summary
This page will display the message: Successfully exported all items.
Click Finish.
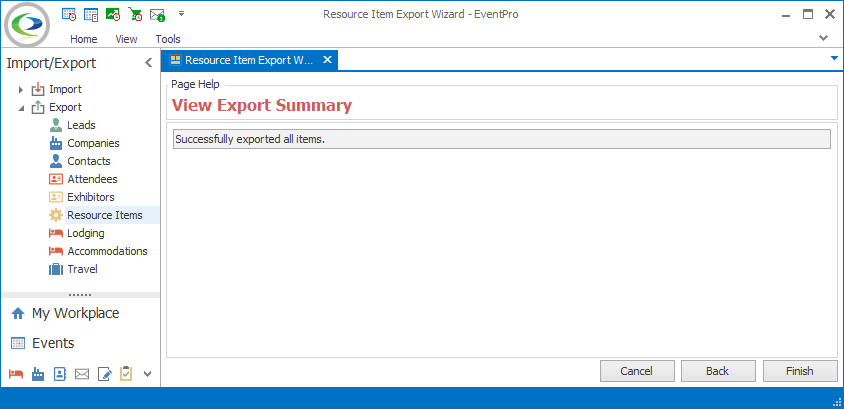
Figure 88: View Export Summary