•The booked locations/dates that appear in the selection grid are those you selected on the Venue Calendar before launching the "New Event" wizard, or - if applicable - the selected preferred dates/location from the connected Opportunity.
•In the last page of the Event Creation Wizard, you can review the Booked Location(s) of the event and check for any booking conflicts before you complete the event booking.
•If you are creating an event without booked locations, you will not see this wizard page.
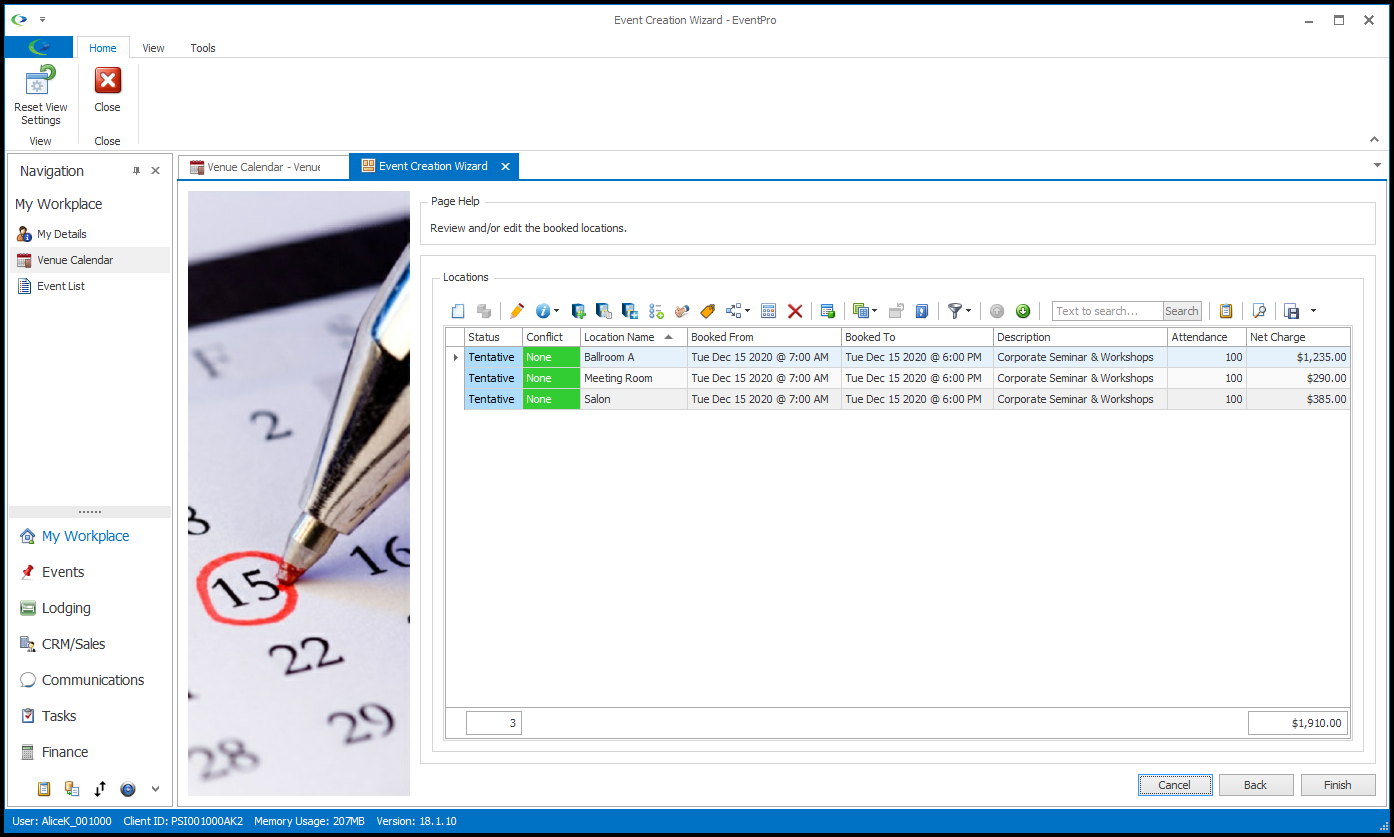
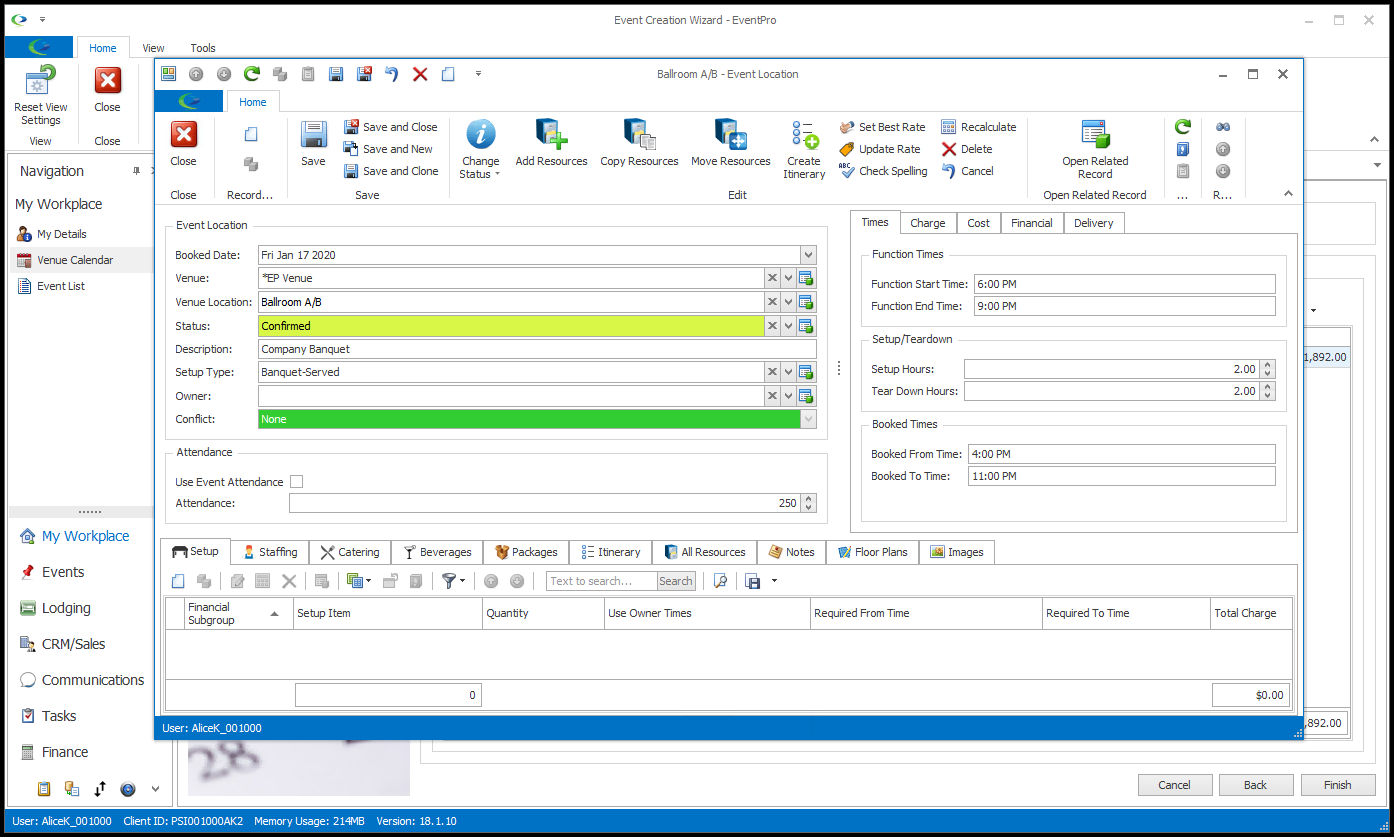
1.If you want, you can edit the booked locations individually to change their Attendance, Booked From/Booked To Times, Setup Types, Description, and so on. You can also add resources to the booked locations, including Setup, Staffing, Catering, Beverages, and Packages.
However, you are not required to enter any of that event detail at the moment. You can edit the booked locations as much or as little as you require right now, and finish the Event Creation Wizard. You will be able to add and edit details later, as described under Event Management.
If you wish to edit the booked locations here, the commands are very similar to those described under Event Management. See the topics Edit One Event Location and Organize Event Resources.
2.The last page of the Event Creation Wizard will also notify you of any booking conflicts that may affect your event.
You can identify any conflicts under the Conflict column of this page.
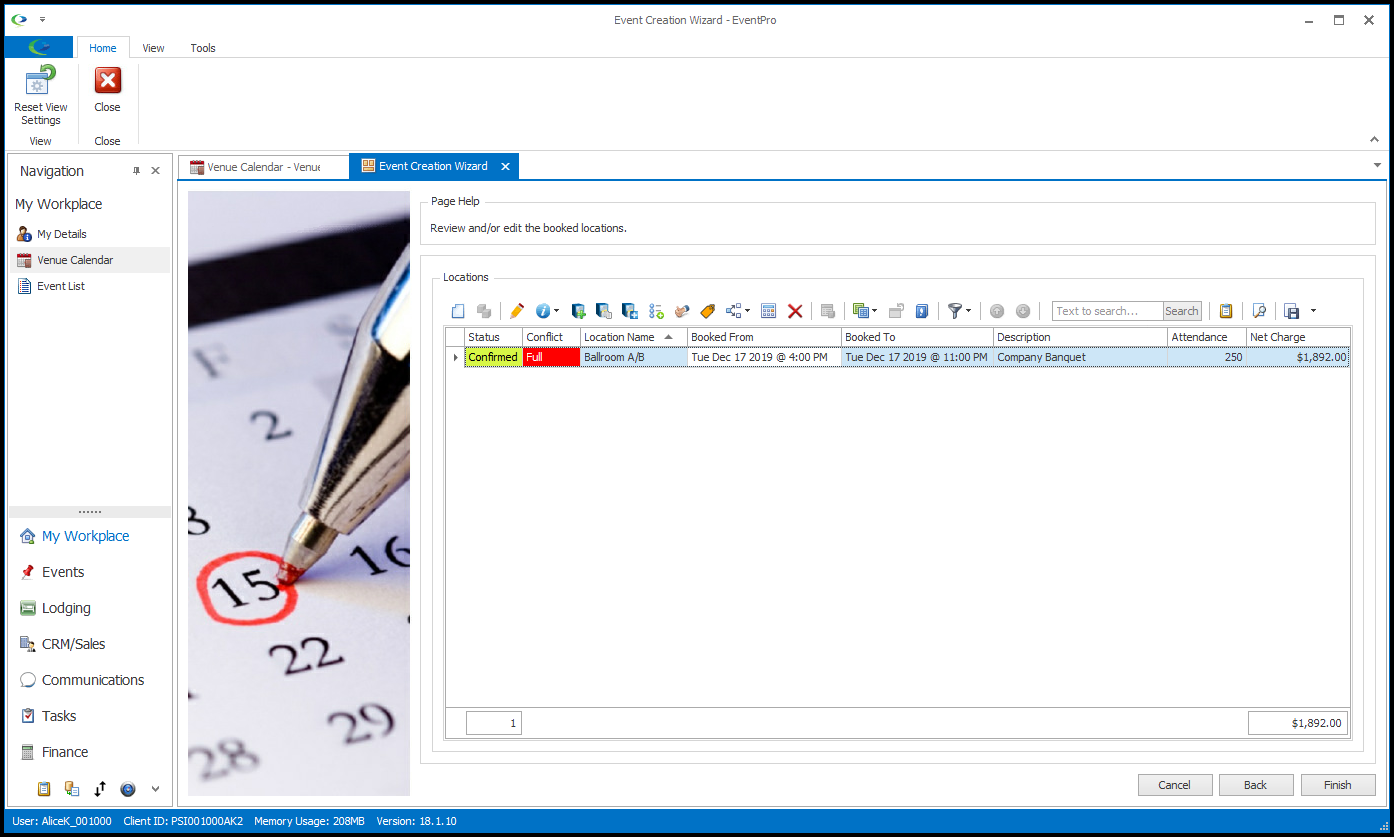
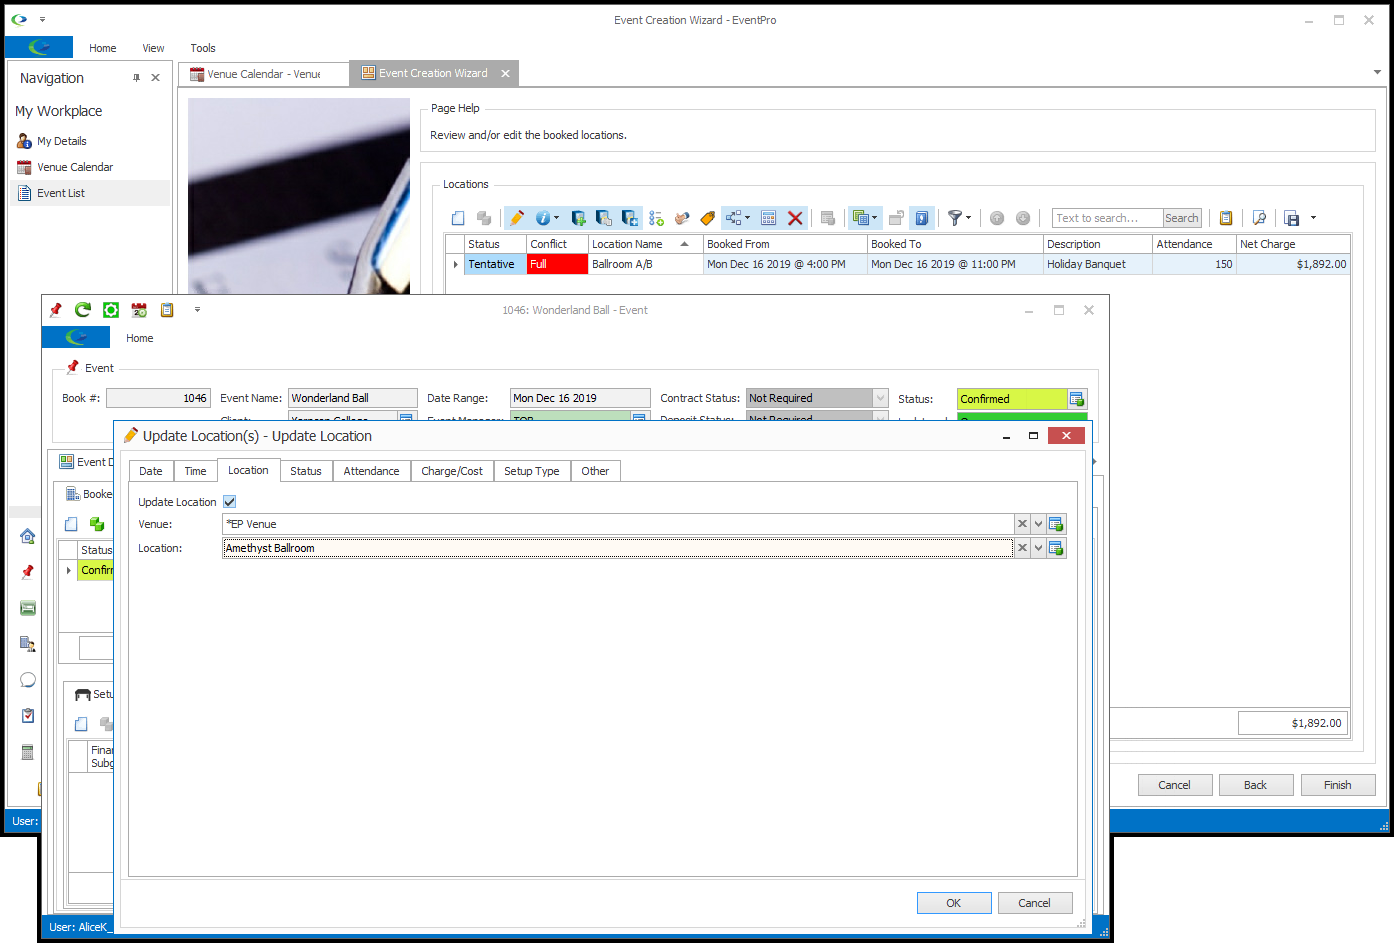
If a conflict warning appears for one of the Booked Locations, you can double-click the Booked Location to open its edit form, and view conflict details under the Conflicts tab.
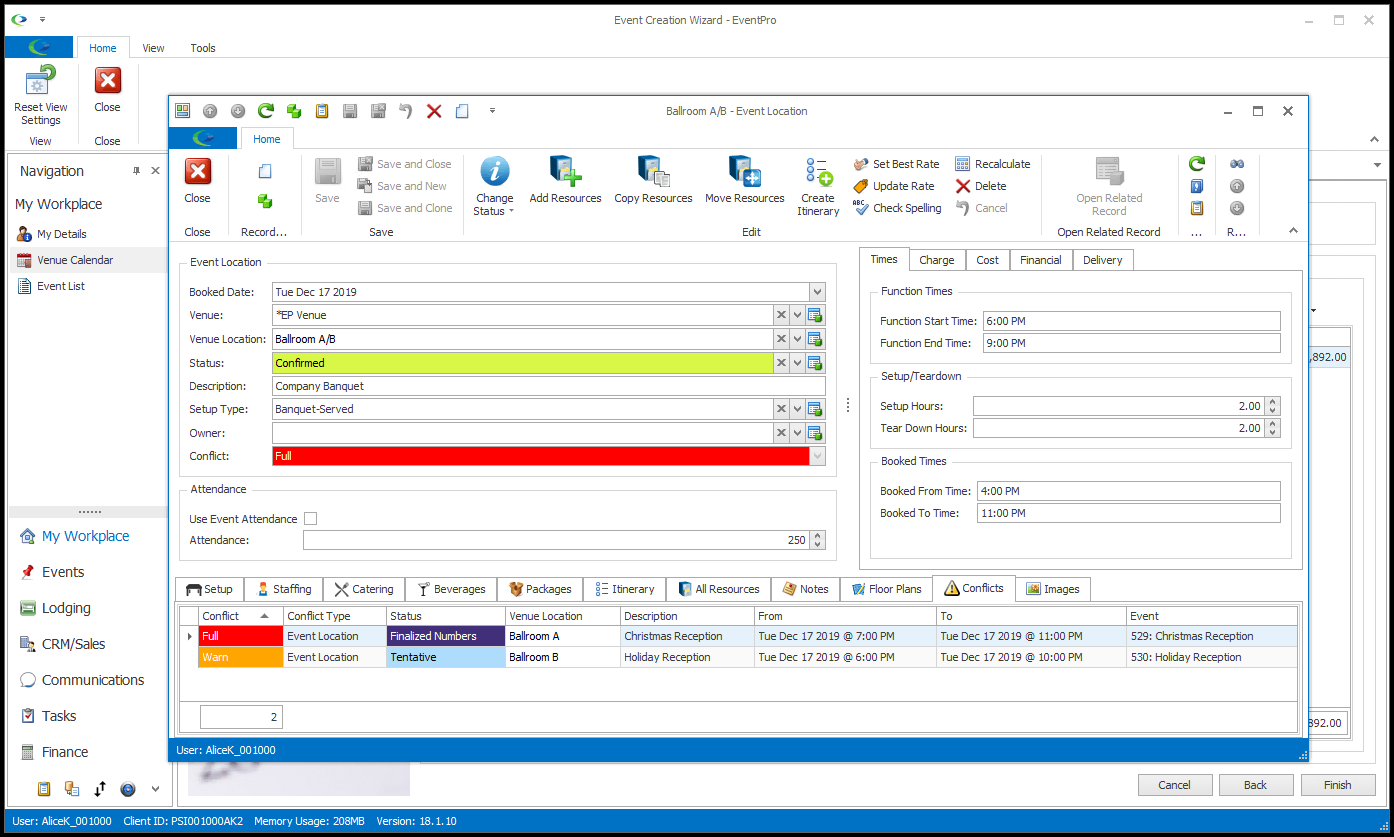
You have four basic options when dealing with a booking conflict: Ignore the Conflict, Edit the Current Booked Location, Edit the Other Booked Location, or Cancel the Booking. Note, however, that your ability to proceed with a certain course of action will depend on your User Security Permissions, as well as other factors.
a.Ignore the Conflict: You may be able to simply ignore the conflict warning and create a double-booking, if you think it is appropriate and/or necessary. Your ability to ignore a conflict will depend on the Status Conflict Level of the competing Booked Locations (review EventPro Setup > Events > Event Statuses), as well as your User Security Permissions.
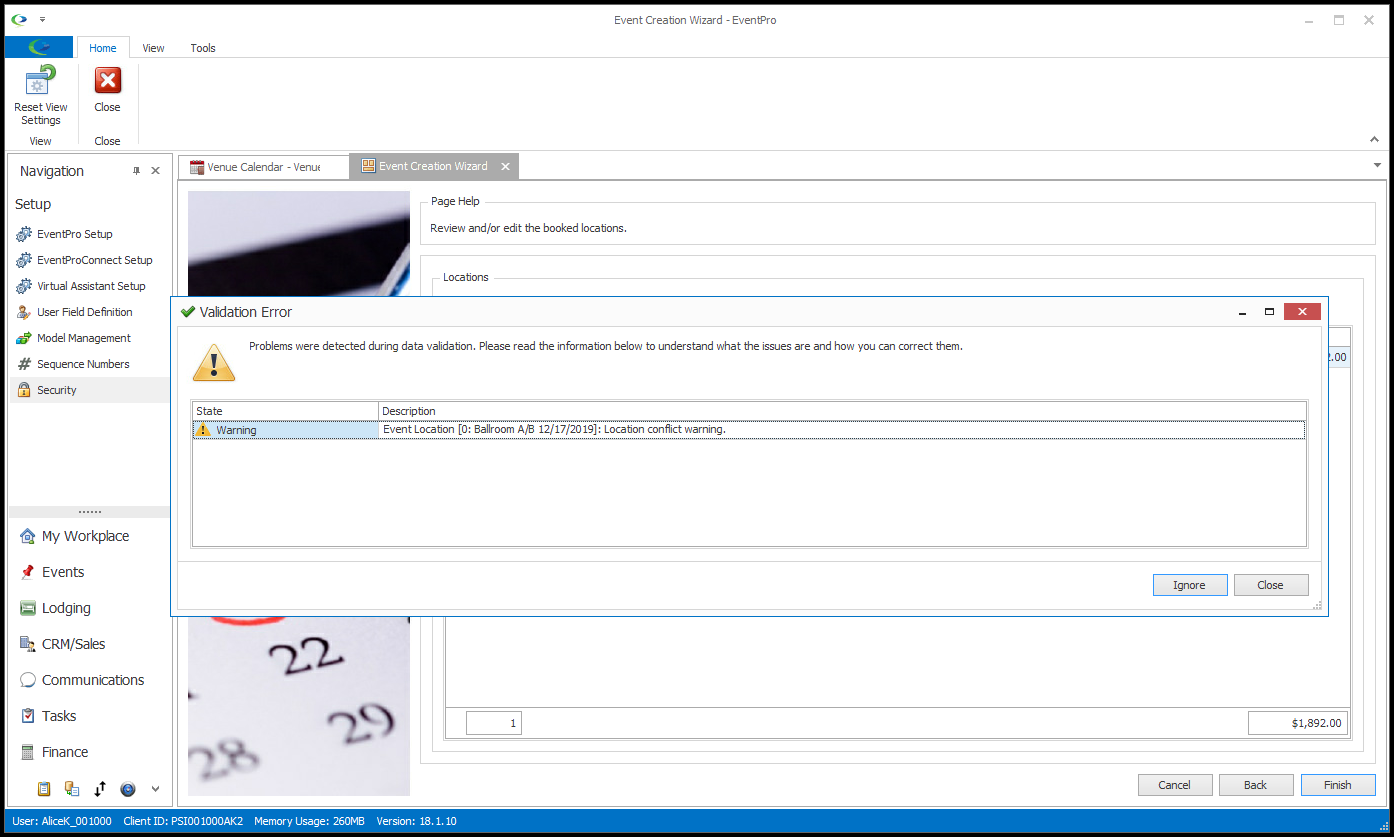
i.To ignore the conflict and proceed with the booking, click Finish.
ii.You will receive a warning that there is a Location Conflict. Click Ignore to proceed with the booking.
iii.If permitted, the booking will be completed. However, you will continue to see Conflict warnings for the Booked Location in the Event screen.
b.Edit the Current Booked Location: You can edit the date, times, and/or location of the Booked Location you are currently working on so that it doesn't conflict with the other, existing Booked Location. you can edit the
i.In the Event Creation Wizard, double-click the Booked Location record to open the Event Location edit form. (To review other ways of editing Booked Locations, see Event Management > Edit Event Locations.)
ii.Once you have resolved the conflict by rescheduling the current Booked Location, the Conflicts tab will disappear, and the Conflict status will default to None.
iii.You can Save and Close the edit form to return to the Event Creation Wizard and complete the booking.
c.Edit the Other Booked Location: Alternatively, you can change the other, existing Booked Location so that it doesn't conflict with the Booked Location you are currently creating (assuming you have the Security Permissions to edit the other event).
i.You can temporarily leave the Event Creation Wizard, and open the other event in another tab.
ii.Change the date, time and/or location of the other Booked Location, as required.
iii.When you are done, return to the Event Creation Wizard. You may need to re-open and re-save the Booked Location to refresh the screen, and see that the conflict has been resolved.
d.Cancel the Booking: If you want to cancel the event booking altogether, click Cancel in the Event Creation Wizard. Note, however, that this will erase all the data you entered during the course of the Event Creation Wizard.
3.When you are done reviewing the booked locations, click Finish.