You can add multiple attachments of several different types to your email.
In these instructions, we will describe the Report Attachment option, which allows you to attach an EventPro Report.
Under the Email's Attachments tab, click the New button, and select Report Attachment.
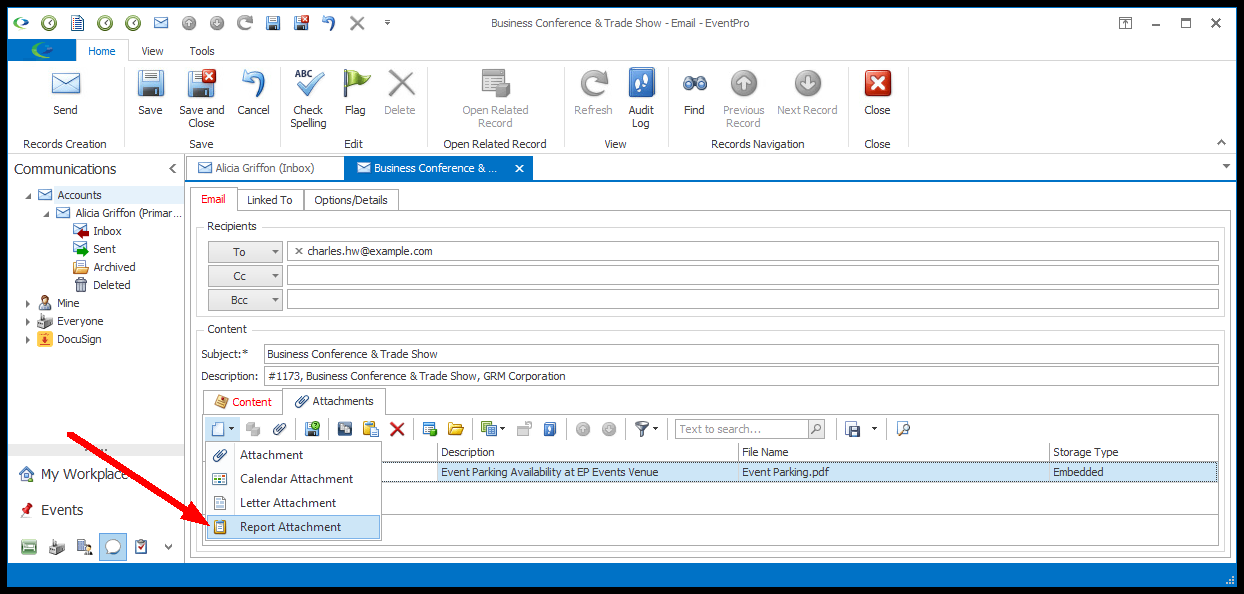
Figure 230: Selecting Attachment Type
The Report Attachment window appears.
Report
Use the Report drop-down to find and select the report you want to attach to the email.
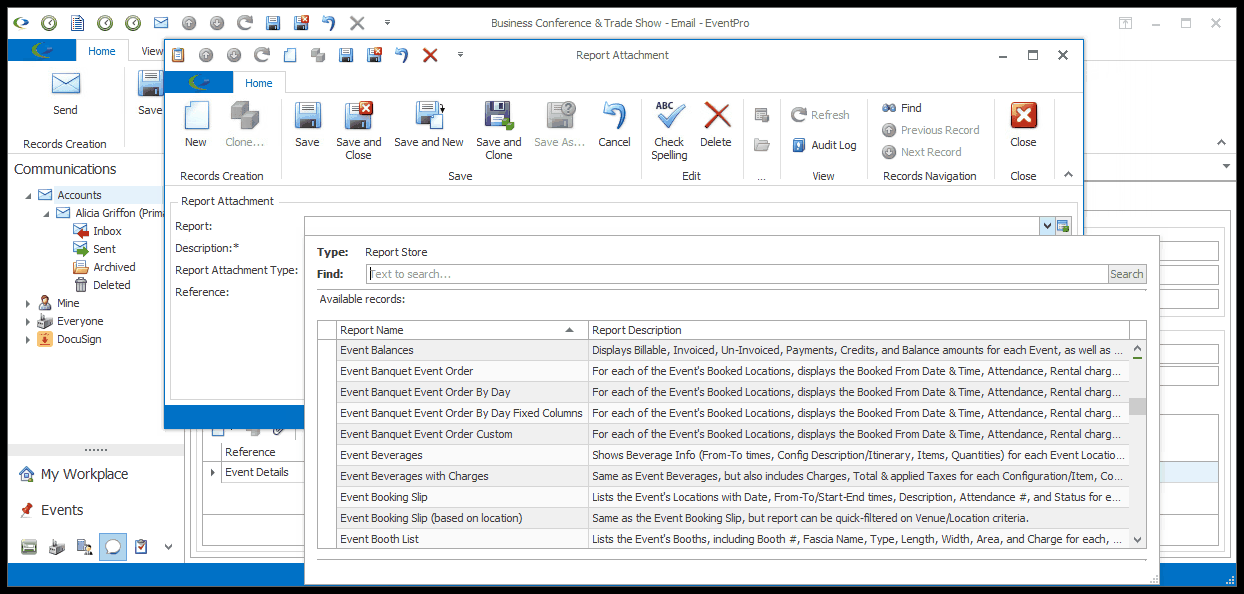
Figure 231: Selecting Report
Description
The Description will default to match the Report name, but you can edit the Description if you like.
Report Attachment Type
This will initially default to the Default Report Attachment Type set in Communication System Settings.
However, if you want to attach the report in a different format, select a different option from the drop-down: PDF, MHT, XLS, XLSX, RTF, CSV, TXT, DOCX, HTML, JPG.
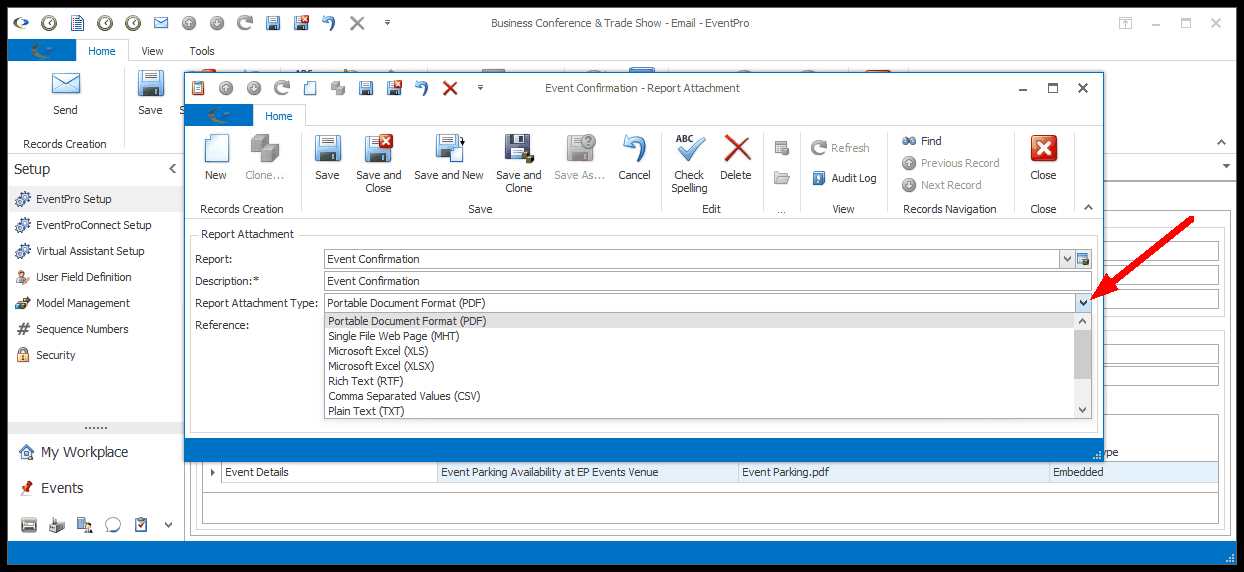
Figure 232: Selecting Report Attachment Type
Reference
If the report had a default Communication Reference assigned, the Reference field will default to it.
However, you can select a different Reference from the drop-down, which is populated by the options created under EventPro Setup / Communications / Communication References.
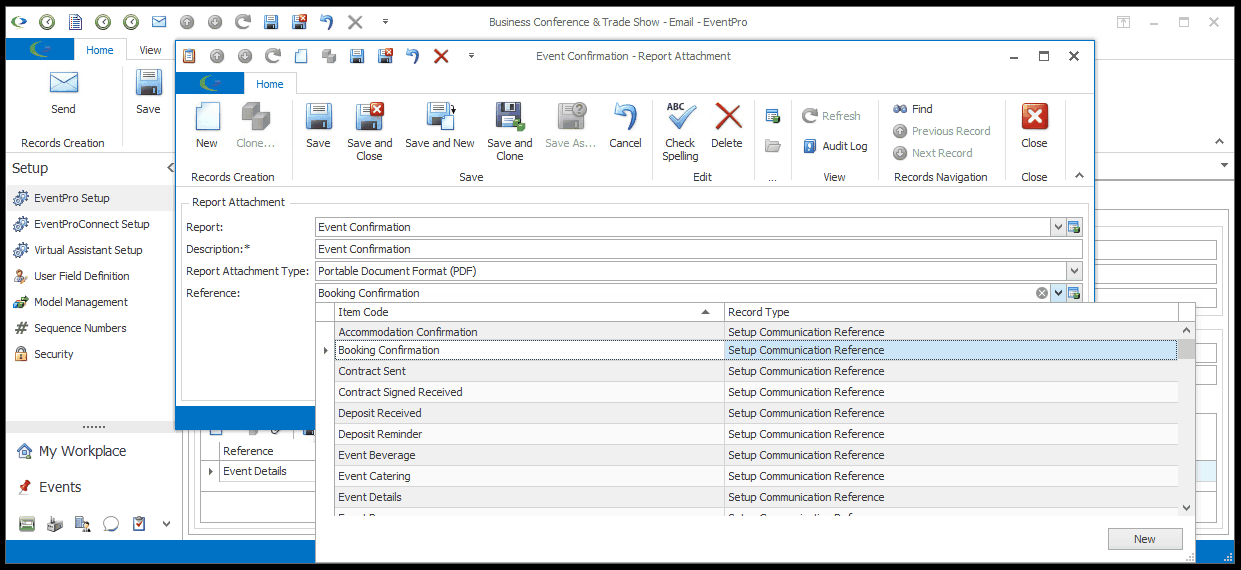
Figure 233: Selecting Attachment Communication Reference
When you are done with the Report Attachment window, click Save and Close.
Next, the Report Filter Settings window appears.
Report Filter Settings
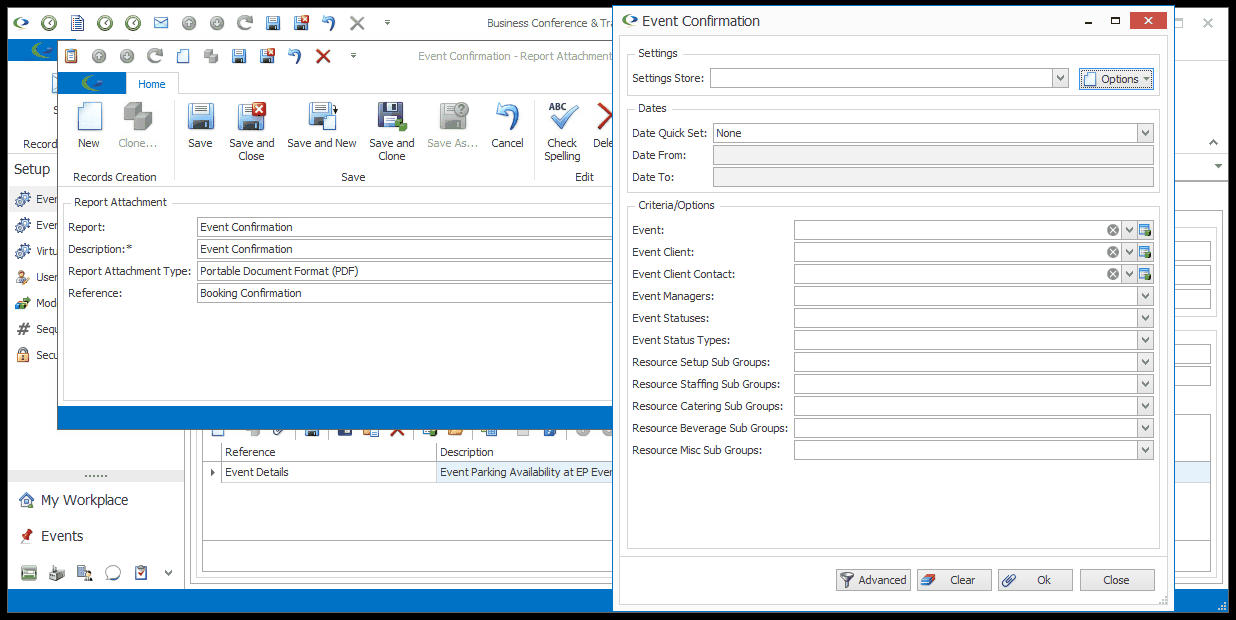
Figure 234: Setting Report Filter
If you want, you can select a predefined Filter from the Settings Store and/or select criteria on the fly in the Filter Settings window.
The available criteria will vary widely, depending on the Report you selected. Many reports will have additional criteria available under the Advanced button in the Filter Settings window.
Filtering & Email Linked To
It is important to note that if the email is linked to a record, the report will already be filtered for that record, even if you don’t set a filter on the report.
For example, let's say you are attaching the Event Confirmation report to an email:
•If an email is Linked To an Event, and you attached the Event Confirmation report, the report will only include that one Event, even if you don't set a filter on the report.
•In comparison, if the email was not linked to an Event, and you attached the Event Confirmation report, the report would attempt to include all events in your database, unless you set a filter on the report.
Another example would be attaching the Attendee Confirmation report to an email:
•If the email is Linked To an Attendee, and you attach the Attendee Confirmation report, the report will only include that one Attendee, even if you don’t set a filter.
•If the email is Linked To an Event, and you attach the Attendee Confirmation report, the report will include all of the Attendees in that Event, unless you set a filter to limit them.
•If the email is not linked to any event or attendee, and you attach the Attendee Confirmation report, the report will attempt to include all Attendees for all Events in your database unless you set a filter.
To review more information about filtering reports, see the topic Reports / Create Report Filters.
When you have the filter set to your preferences, click OK.
You will return to the Email window, where the report will now be attached under the Attachments tab.
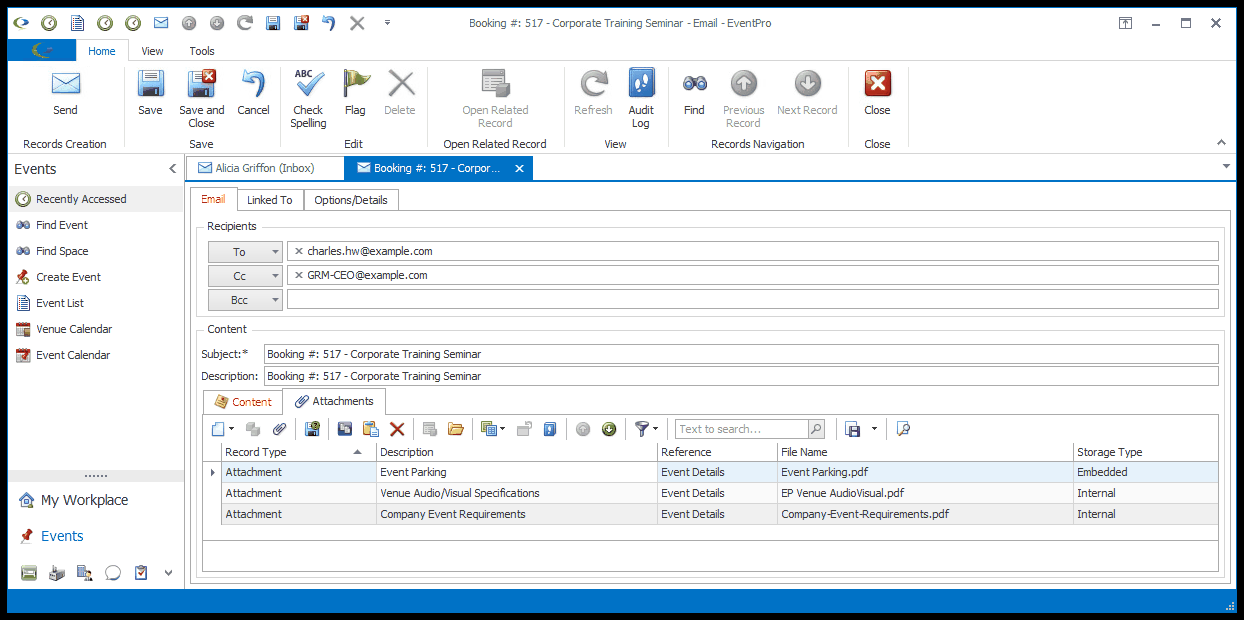
Figure 235: Email with Attachments
Next: Letter Attachments