There are four sub-tabs under Setup / General / System Settings:
4.Logo
If you make changes under any of the General System Settings tabs, ensure that you click Save.
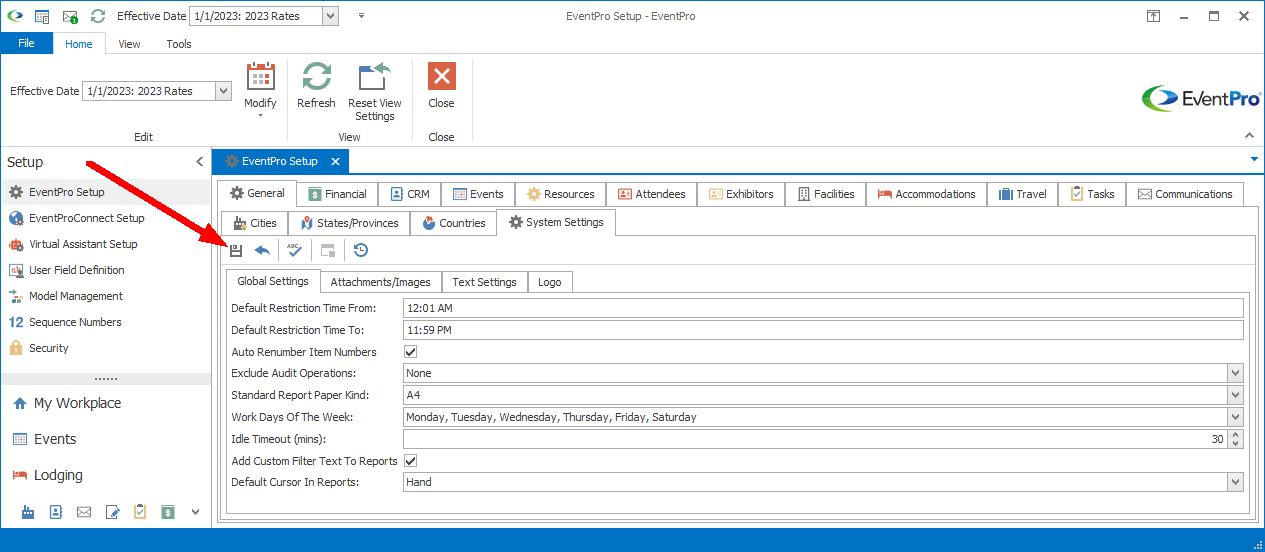
Figure 425: Saving General System Settings
Global Settings
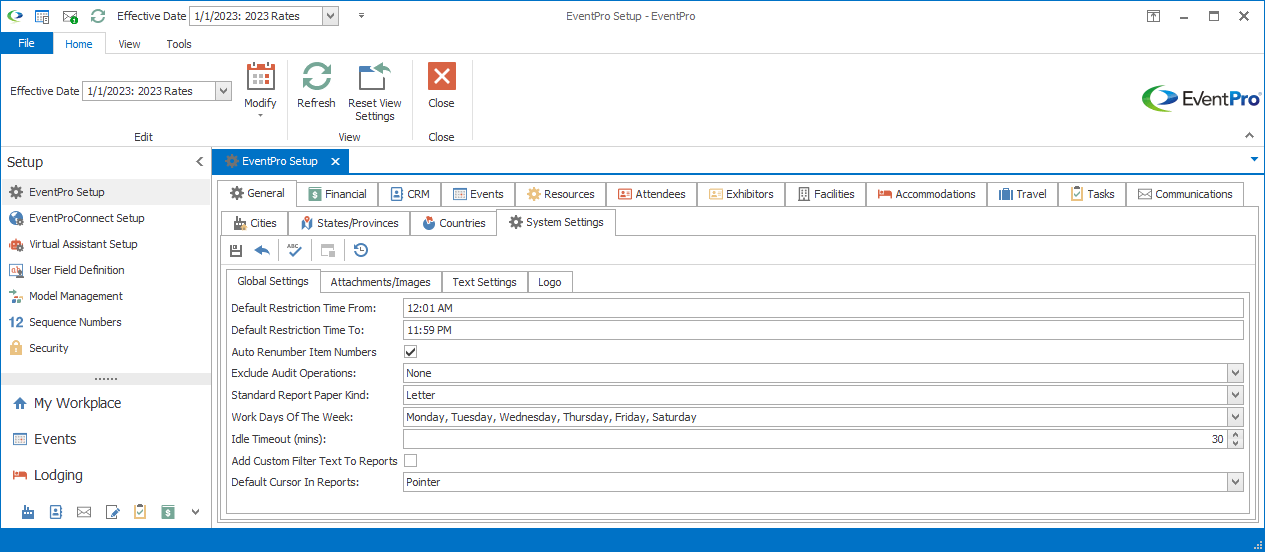
Figure 426: General System Settings
Default Restriction Times
In the Default Restriction Time From and Default Restriction Time To fields, enter the default times at which restrictions will begin and end.
When you later create Restrictions (Locations, Global and Accommodations), these times will default in, although you will be able to change them for the specific restriction you are adding.
Auto Renumber Item Numbers
This setting affects records to which you can assign an Item #, e.g. Setup Resources, Event Resources, Statuses, Types, Registrations, etc.
Select the Auto Renumber Item Numbers checkbox if you want Item Numbers automatically renumbered when records are inserted into or deleted from a list.
Unselect this checkbox if you want Item Numbers to stay as set when the records were first added to the grid, even if it means having repeated Item Numbers or gaps in the sequence.
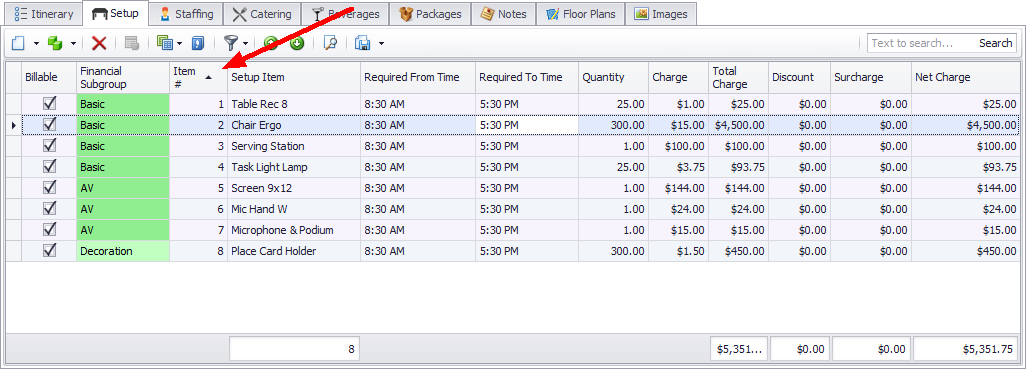
Figure 427: Auto Renumbered Items
Exclude Audit Operations
This setting allows you to turn off specific audit operations, which helps speed up the process of saving records and booking events.
From the drop-down list, select the checkbox(es) next to the audit operation(s) you want to exclude, and click OK.
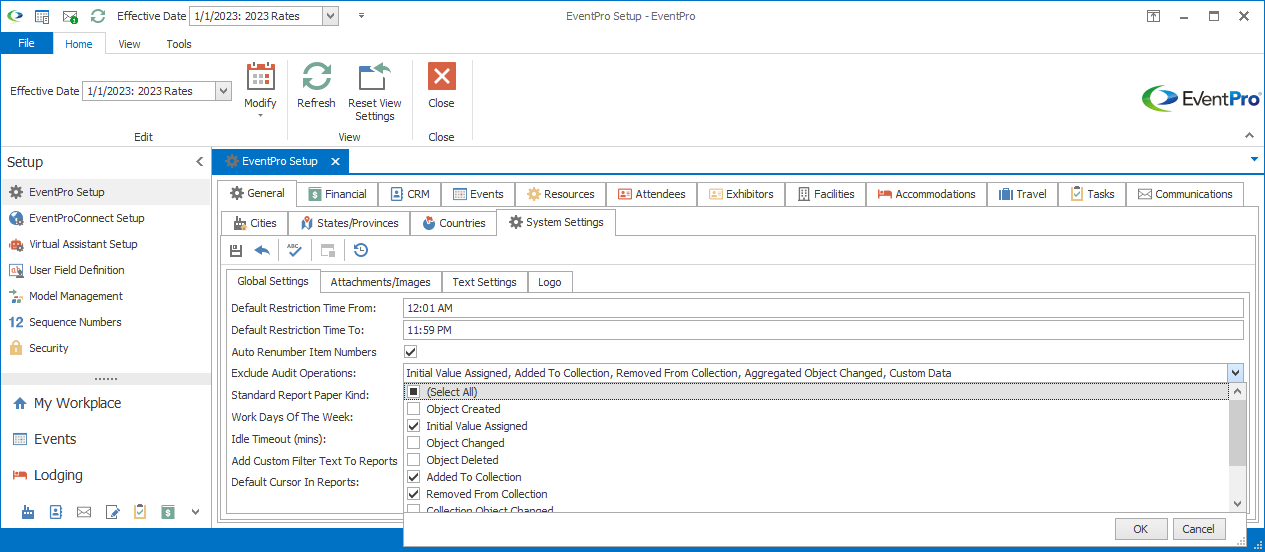
Figure 428: Exclude Audit Operations
If not already set by default, you can try excluding these operations to improve the time EventPro takes to save records and finish booking processes:
•Initial Value Assigned
•Added to Collection
•Removed from Collection
•Collection Object Changed
•Aggregated Object Changed
•Custom Data
Important: Before excluding an audit operation, ensure that the selection is not something your organization requires. For example, if you want to use a certain audit operation for a Change Notification Assistant, it needs to be actively recording information, so you should not exclude that particular operation. For example, see the topic Settings under Change Notification Assistant, which explains how audit operations can be used to trigger notifications.
Standard Report Paper Kind
From the Standard Report Paper Kind drop-down, choose the default paper dimensions that will be used when printing reports.
Work Days of the Week
This setting allows you to select the designated "Work" days of the week.
This setting is important if your Tasks are scheduled using the Adjust to Work Day option.
It can also affect how repetitive bookings are scheduled, depending on the Move Non-Working Days option you select for a booking.
In the drop-down list, select the checkboxes next to the days of the week that you want marked as "Work Days", and click OK.
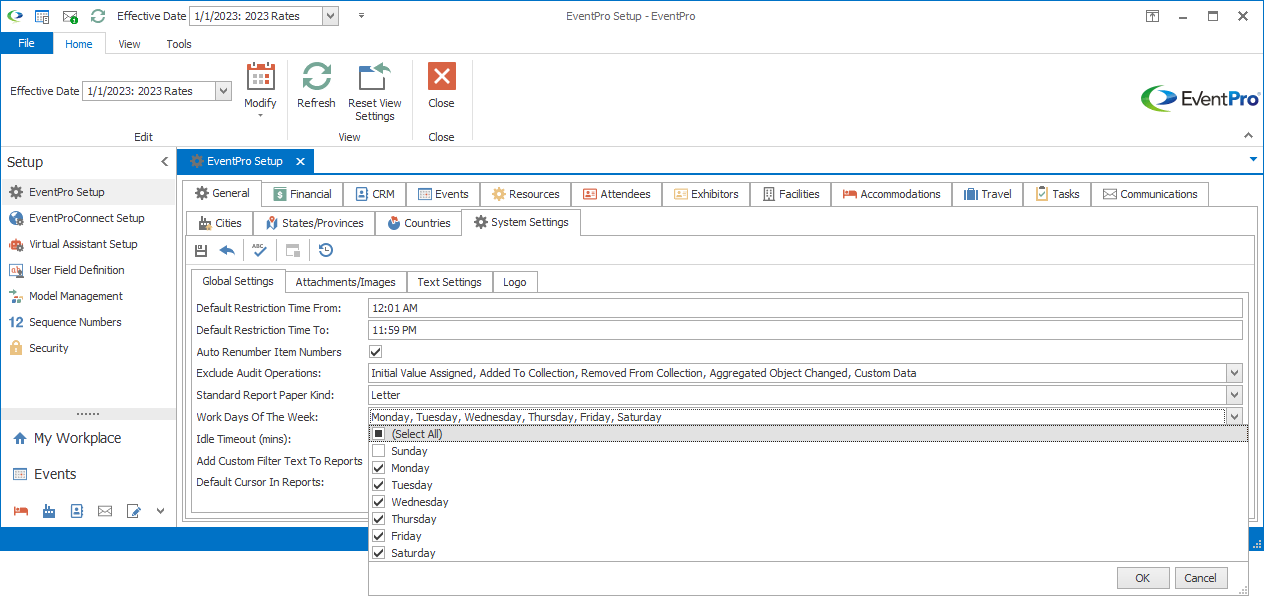
Figure 429: Work Days of the Week
Idle Timeout (mins)
Enter the number of minutes without activity after which the EventPro application will automatically terminate.
This is a security measure intended to help prevent individuals from gaining unauthorized access to the application should it be left in a logged-in state.
Add Custom Filter Text to Reports
If you apply a custom filter to a report, and you want the custom filter text to appear along with other filter selections under a printed report's header, you need to select this Add Custom Filter Text to Reports checkbox.
To review the process of running a report, see the topic Run Reports.
Default Cursor in Reports
From the drop-down list, select the cursor you want appearing as the default when viewing a report:
•Pointer
•Hand
•Magnifier
Attachments/Images
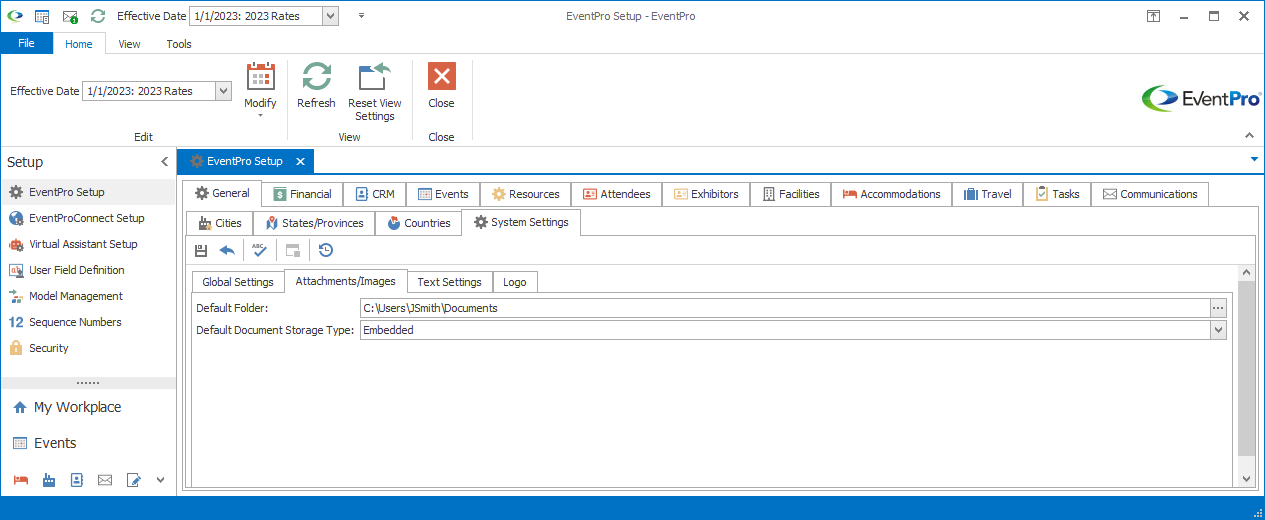
Figure 430: Attachments/Images Settings
Default Folder
Select the default folder in which you want to save attachments and images.
It is important to set up this default folder if you intend to link images and attachments. Later, when you create letters or other documents into which you want to insert images or other files, you can link to an image from this folder, rather than embedding the image in the document. Using linked instead of embedded images can save considerable space in your database.
Ensure that you use a folder that is visible and accessible for all users who need to use it.
Default Document Storage Type
Select the Document Storage Type that you want to use by default when adding documents to EventPro.
Review the topic Attached Documents under Common Procedures.
Text Settings
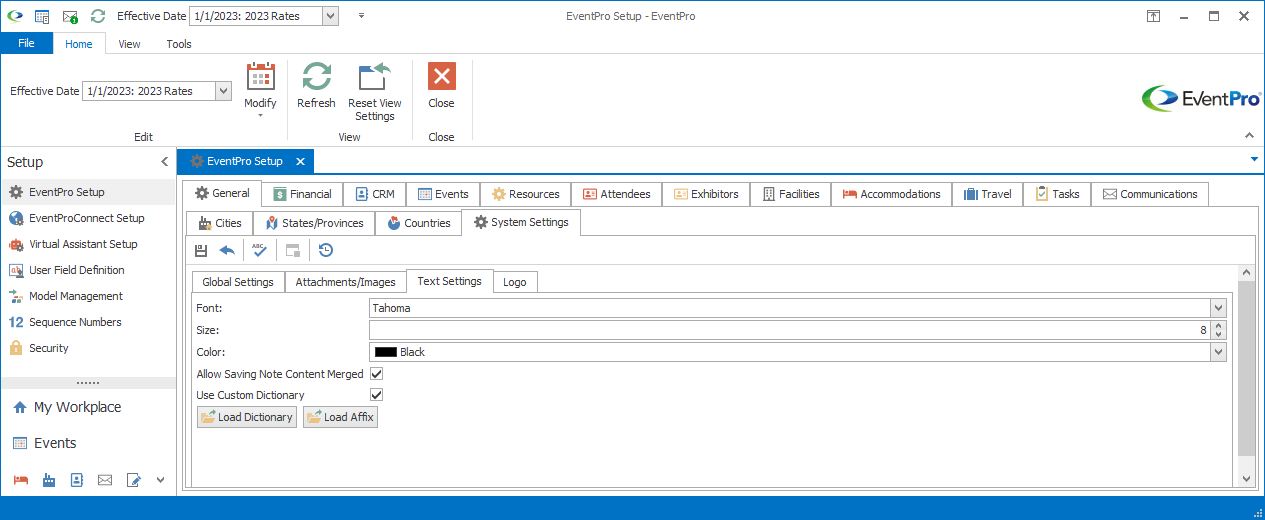
Figure 431: Text Settings
Font
From the drop-down, select the font EventPro will use by default in the text editors.
Size
Type in the point size you want for the default font.
Color
Select the default color for the font.
Allow Saving Note Content Merged
This settings applies to Notes that contain Merge Fields.
Normally, if you save a Note with Merge Fields, the Merge Fields will remain active, and will pull in the most current data if the record changes.
However, if you select this checkbox, the Notes will be saved with static merged content, i.e. the data that was pulled into the Merge Fields as of the save time. Even if the data from the target record changes, the merge fields will not pull in the new information.
Use Custom Dictionary
If you want to load a Custom OpenOffice Dictionary into EventPro, select the Use Custom Dictionary checkbox.
When you select the Use Custom Dictionary checkbox, the Load Dictionary and Load Affix buttons become active.
To load a Dictionary, follow these steps:
1.Click the Load Dictionary button.
2.In the Open dialog, select the Dictionary file (*.dic) you want to load, and click Open.
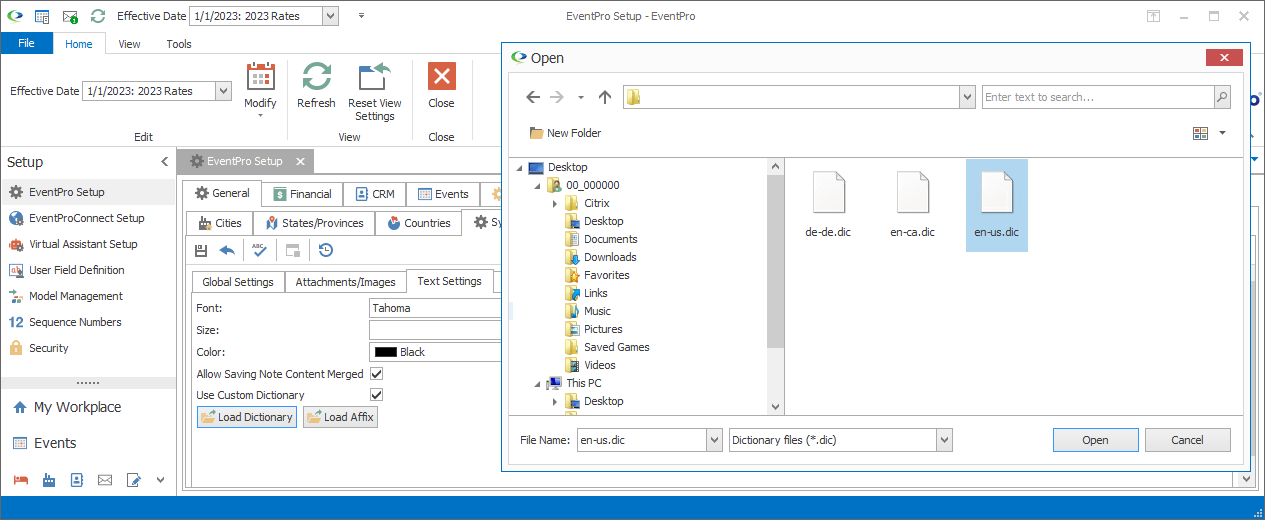
Figure 432: Loading Dictionary
To load an Affix (a file defining prefixes and suffixes), follow these steps:
1.Click the Load Affix button.
2.In the Open dialog, select the Affix file (*.aff) you want to load, and click Open.
Logo System Settings
Under the Logo tab, you can load your company logo into EventPro, where it will be available for your reports.
Important Note: If you attempt to load an image larger than 50K, you will receive a warning from EventPro. This warning is in place to help avoid issues with speed and memory. Most speed and memory issues experienced in EventPro are caused by using logos and images that are too large.
In standard reports, the logo is centered inside a box that is 250 pixels wide and 70 high. Logo images larger than that are proportionately re-sized to fit into that space.
For example, Figure 433 demonstrates how a logo sized 250 x 60 pixels would appear in a standard report header, while Figure 434 demonstrates how a logo sized 500 x 500 pixels would appear.

Figure 433: Report Logo 250 x 60

Figure 434: Report Logo 500 x 500
To load a system logo, follow these steps:
1.Right-click anywhere under the Logo tab and select Load from the speed menu.
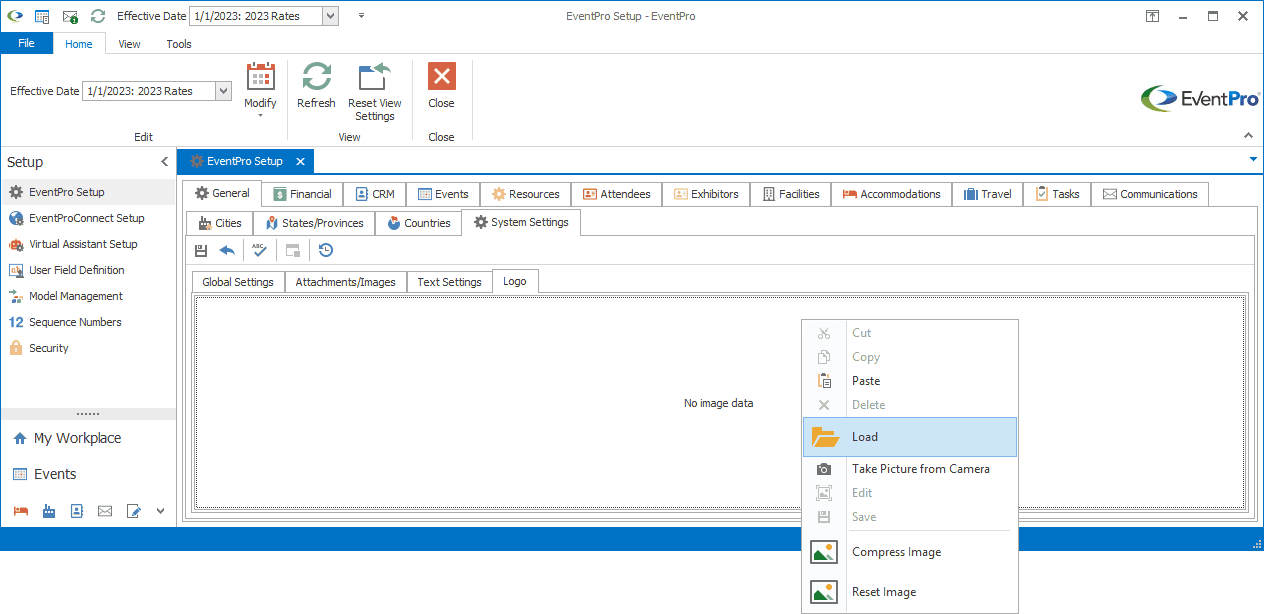
Figure 435: Loading Logo
2.In the Open dialog, select your logo image and click Open.
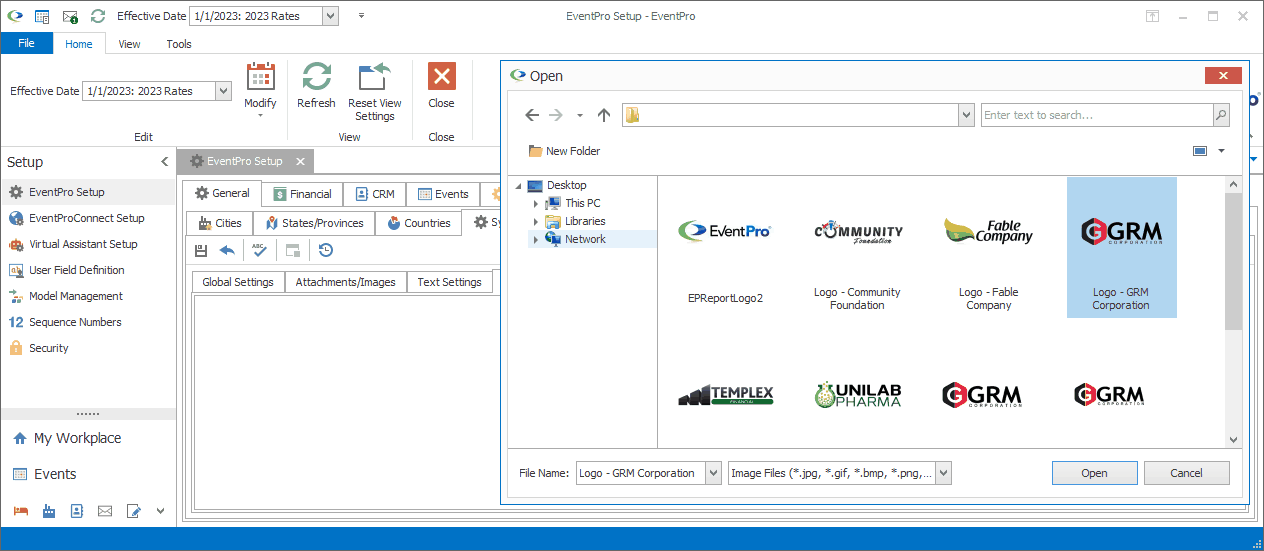
Figure 436: Selecting Logo in Open Dialog
3.The image will appear in the Logo tab.
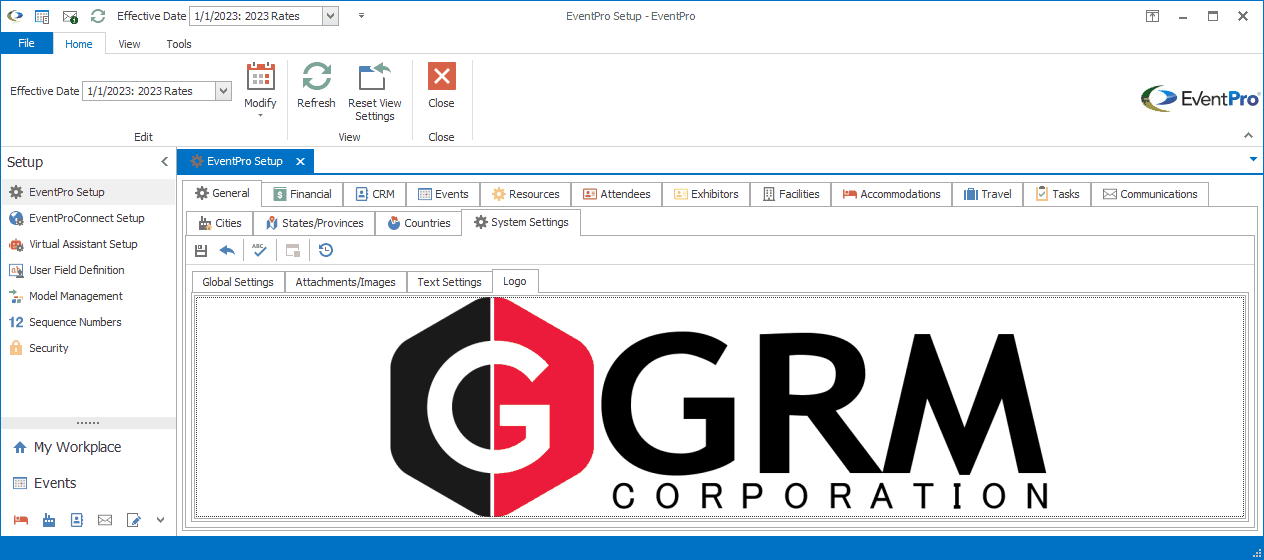
Figure 437: Logo in General System Settings