Table to Monitor
From the Table to Monitor drop-down, select the database Table that contains type of Object you want the Assistant to monitor.
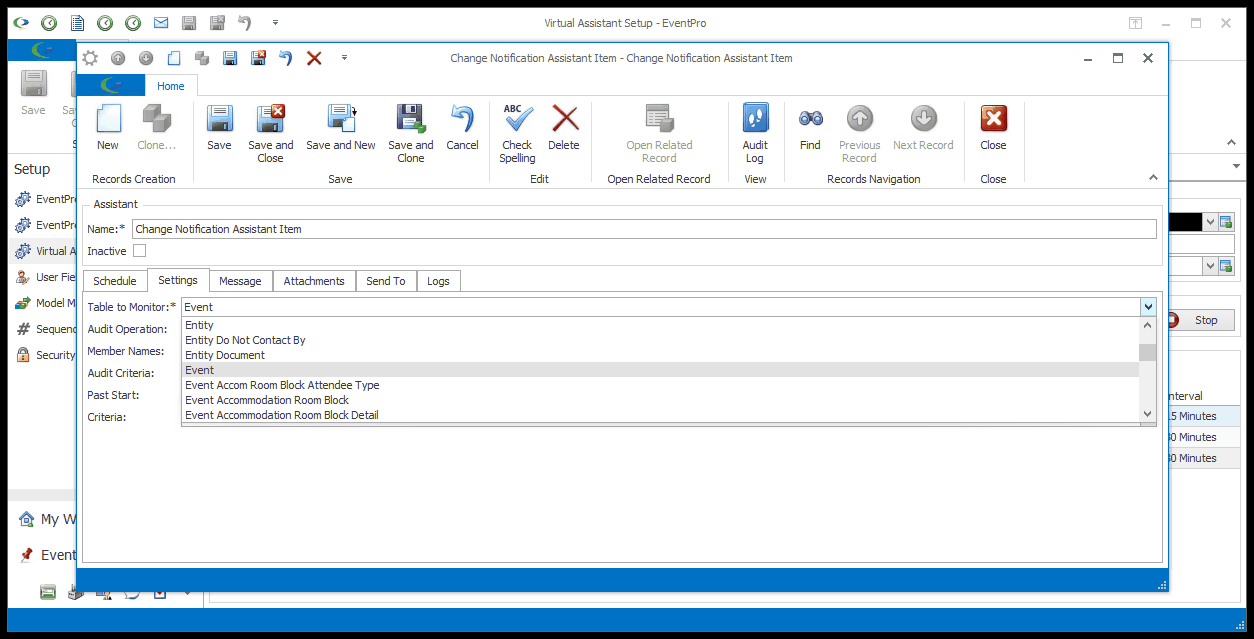
Figure 960: Table to Monitor
Audit Operation
From this drop-down, choose the Audit Operation, i.e. the type of change that must occur in order to trigger the notification.
Your options are: Added to Collection, Aggregated Object Changed, Collection Object Changed, Custom Data, Initial Value Assigned, Logged Off, Logged On, Login Failed, Object Changed, Object Created, Object Deleted, Removed From Collection, or Other.
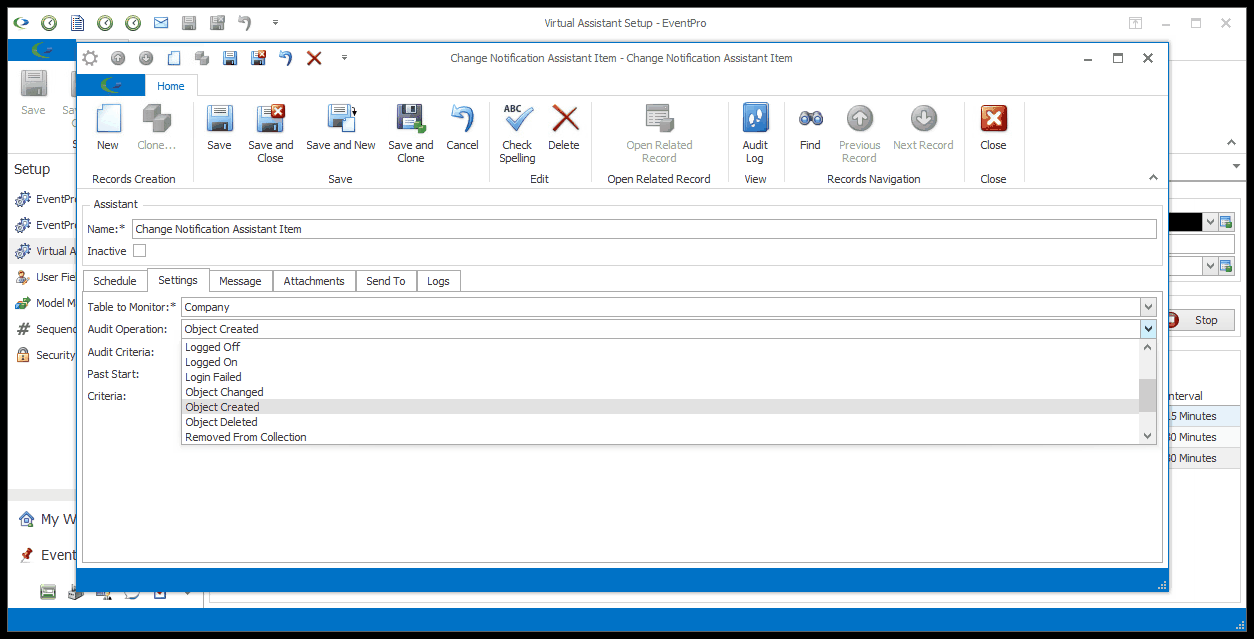
Figure 961: Selecting Audit Operation
Excluded Audit Operations
IMPORTANT: Ensure that the Audit Operation you select has not been turned off in System Settings.
As you will recall, you can choose to Exclude Audit Operations in General System Settings in order to speed up the process of saving records.
However, if you want to use a certain Audit Operation for a Change Notification Assistant, it needs to be active.
Review Audit Log
You will notice that the Audit Operations in the drop-down are the same as those that appear in the Operation column in the Audit Log, as illustrated in the screenshot below.
If you are unsure about the Table, Operation, or Member Name to select in the Assistant, you can try checking the Audit Log for the type of entry you want to track.
For more information about the Audit Log, see Security Setup > Audit Log.
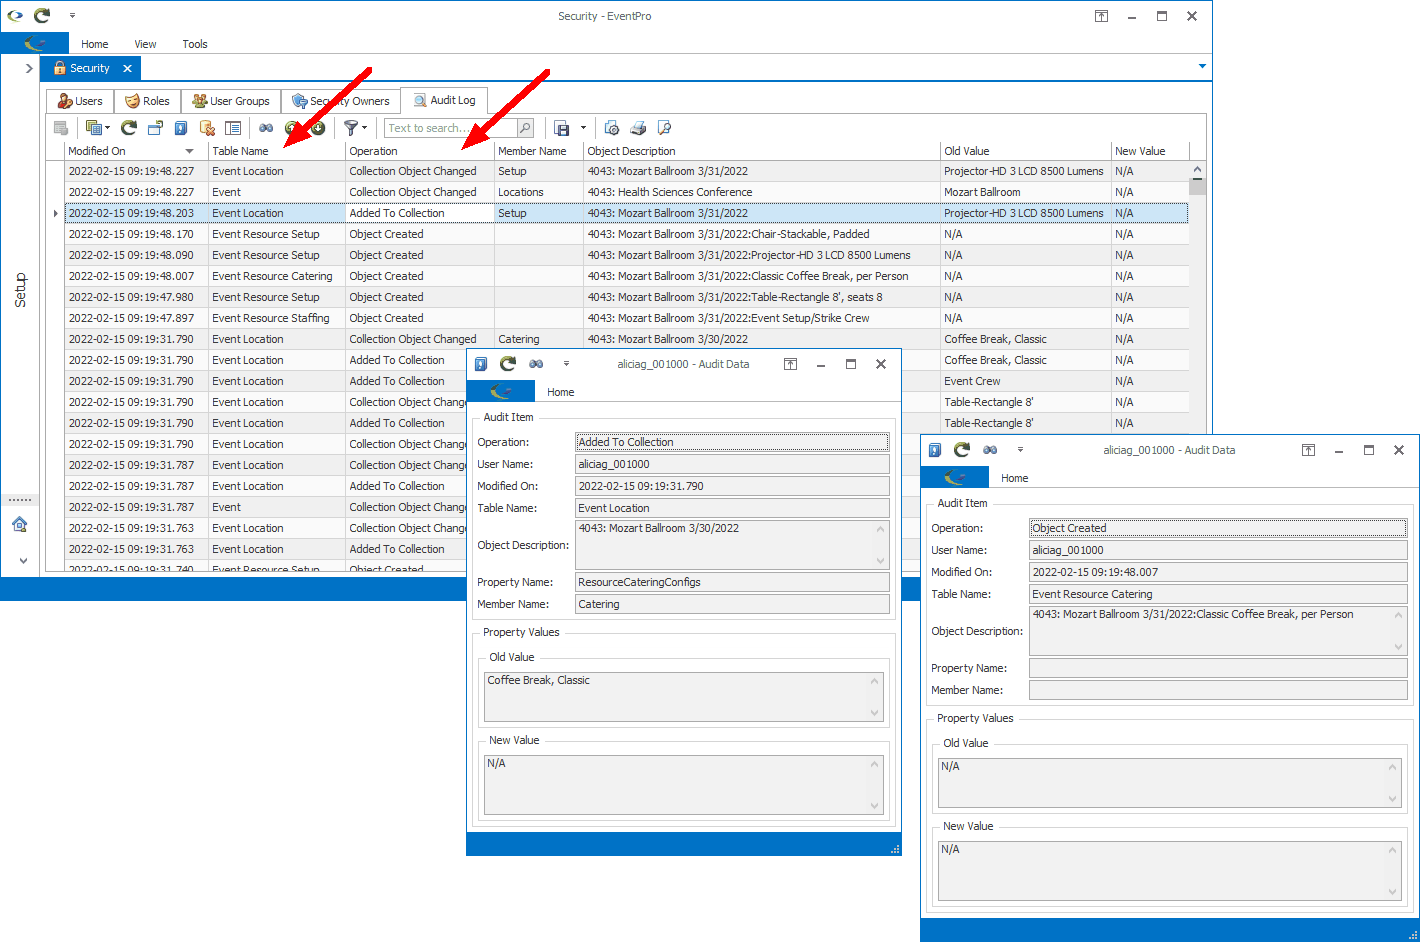
Figure 962: Reviewing Audit Log Entries
Audit Operation Example: Added to Collection
One Audit Operation that may be useful for a Change Notification Assistant is "Added to Collection".
This would be used in a situation where you want a Change Notification sent when any type of resource is added to an Event Location, including setup, staffing, catering, beverage or packages, instead of creating a separate notification for each type of resource.
Set the Table to Monitor to "Event Location" and the Audit Operation to "Added to Collection". Now, each time an item is added to an Event Location - whether it is a catering configuration, setup item, etc. - the notification will be triggered.
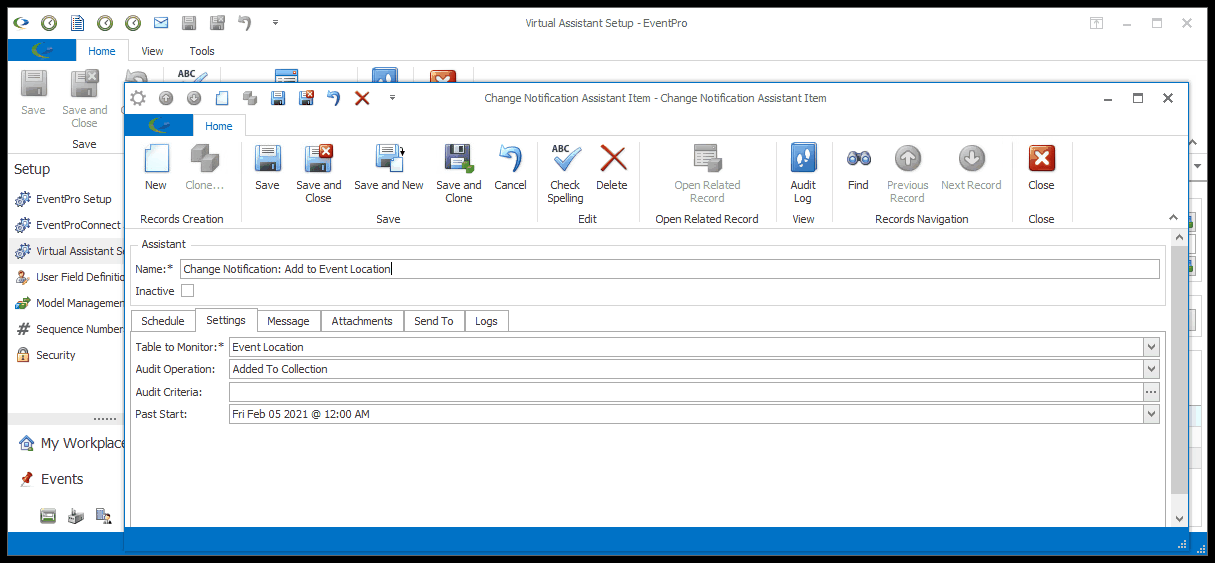
Figure 963: Added to Collection
In comparison, if you did want to set up a different Change Notification for each resource type, you could monitor the "Event Resource x" tables - Event Resource Setup, Event Resource Catering, etc. - and the "Object Created" audit operation.
Member Names
This field only appears if you select "Object Changed" as the Audit Operation.
It allows you to indicate what kind of change within the Object you want to monitor.
The Member Names drop-down displays the fields within the object. Select the checkbox next to the field about which you want to be notified.
For example, if you want to be notified when Statuses of Event Attendees are changed, you would select "Event Attendee" for the Table to Monitor, "Object Changed" for the Audit Operation, and "Status" under Member Names.
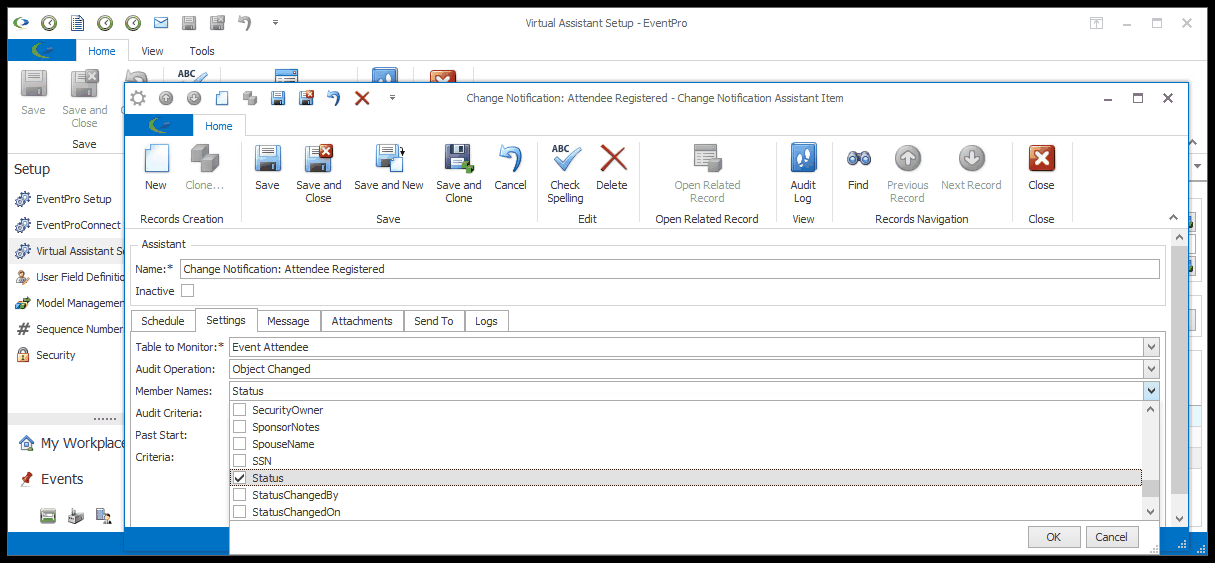
Figure 964: Selecting Member Name
Audit Criteria
As noted above, the Change Notification Assistant scans Audit Log data looking for specified entries, checking:
•First, the Audit Criteria set on the Audit Log entry.
•Then, the Criteria set on the Object to which the entry is pointing (if applicable).
This is where you set any Audit Criteria that the entry must meet in order to trigger the notification. (The Object Criteria field is described farther below in this topic.)
1.Click the ellipsis to the right of the Audit Criteria field.
2.The Advanced Filtering window appears.
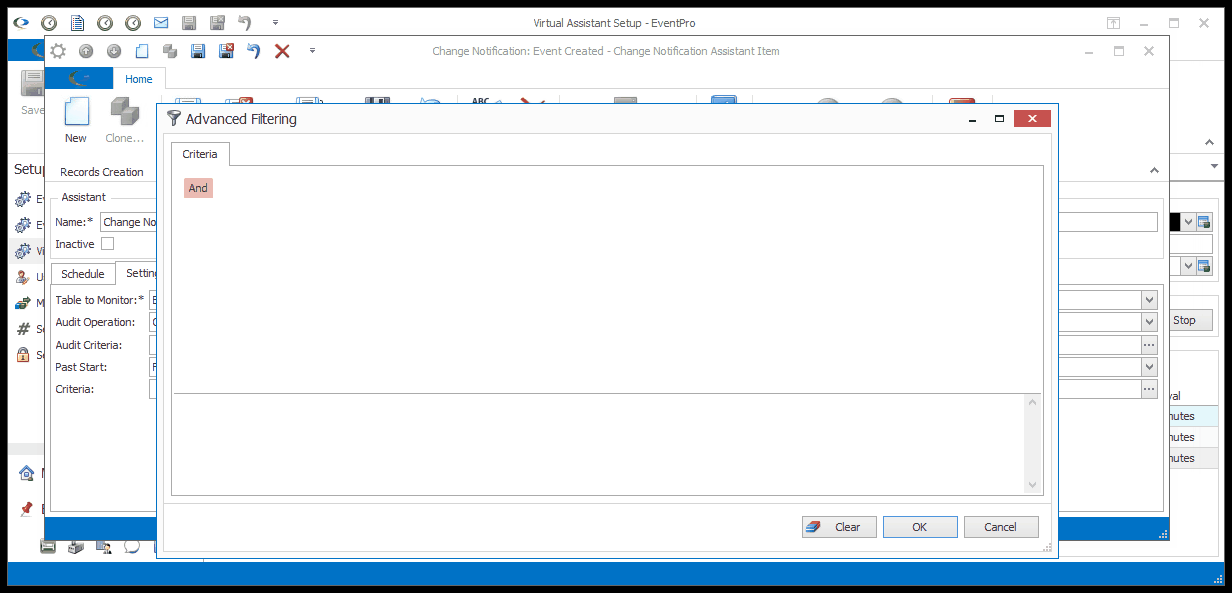
Figure 965: Audit Criteria
3.Enter the filter conditions you want to use, referring back to the instructions under Common Procedures | Construct Filters, if required.
4.When you are done with the Advanced Filtering window, click OK.
Past Start Date
The Past Start Date will default to the current date, meaning the Change Notification Assistant will send email notifications for specified Audit Log entries that occur on the current date and forward.
If you define a Past Start Date, the Assistant will send notifications for triggering entries that occurred during that past date range, as well as continuing forward.
If, for example, you use a Past Start Date that is a week earlier, the Assistant will send email notifications for all of the specified Audit Log entries that occurred in the past week. If many of those entries occurred in the past week, the initial run of the Assistant may need to send out a large batch of email notifications to catch up to the current date.
CAUTION: If you leave the Past Start Date blank, the Assistant will send notifications for defined Audit Log entries starting from the beginning of the database.
Criteria
This field only appears for certain Audit Operations:
•Object Created
•Object Changed
•Initial Value Assigned
It allows you to set a filter to narrow down a more specific set of circumstances that trigger the notification.
As noted earlier, the Change Notification Assistant will check the Audit Criteria set on the Audit Log entry (defined above), and then the Criteria set on the Object to which the entry is pointing.
You are now defining the Object Criteria.
1.Click the ellipsis (...) next to the Criteria field.
2.The Advanced Filtering window opens.
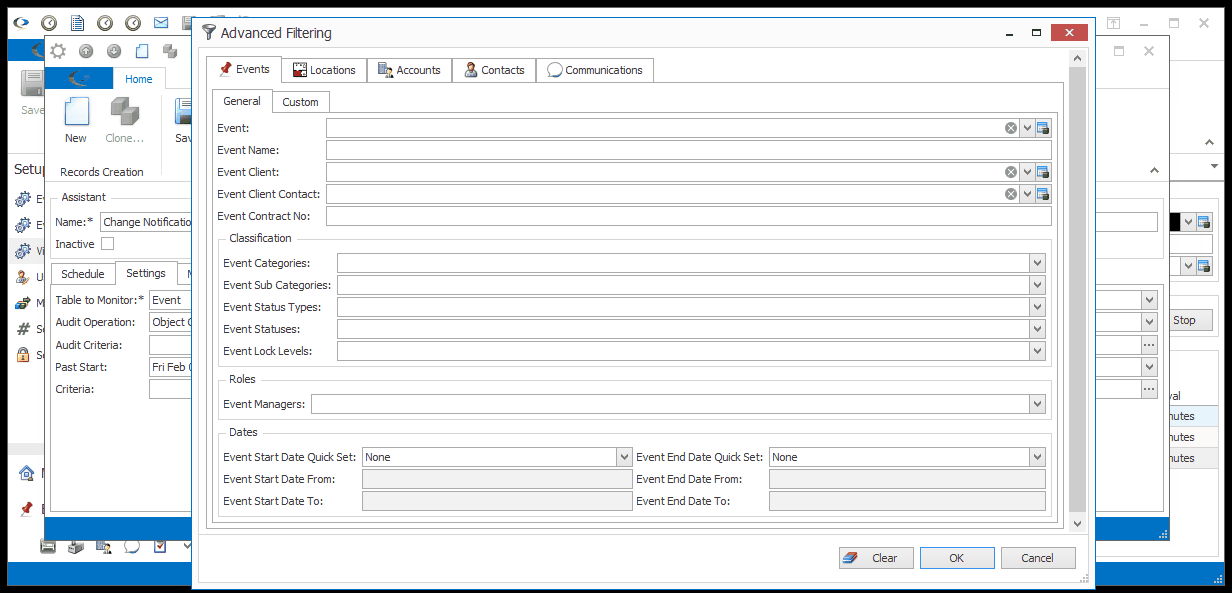
Figure 966: Setting Object Criteria
3.There are several tabs and numerous fields that you can use to specify the criteria for the Change Notification Assistant.
4.For example, let's say you have a Change Notification Assistant that alerts you when a new Company is created (Table to Monitor = Company, Audit Operation = Object Created).
5.Now you want to narrow the scope of the Assistant so that it notifies you only when a "Supplier" Company is created. In the Assistant's Criteria, you would specify that the Relationship Type of the created Company must be "Supplier" to activate the notification.
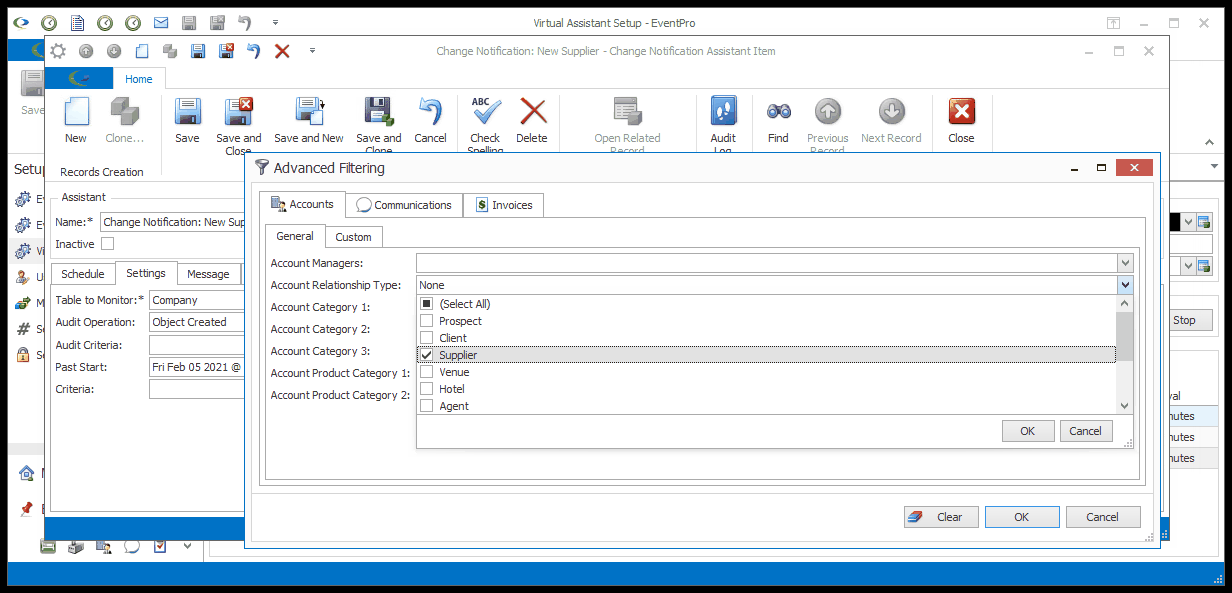
Figure 967: Setting Filter Criteria
6.If you are not happy with your selections, and want to start over, click Clear.
7.When you have the filters set to your specifications, click OK. You will return to the Change Notification Assistant Item edit form.