•Merge Fields are placeholders in the document that will pull in specific information from your database for the related record or object. For example, in a form letter, instead of typing in a generic greeting like "Dear Sir/Madam", you can insert a merge field - "Dear <Title><LastName>" - which will personalize the letter greeting for each recipient.
•A Merge Report field is a placeholder that will pull in a report and convert it to .rtf format.
•There are also specialized merge fields that pull in the current Date/Time and your email Signature.
•If you created Letter Templates in Setup, you may have already used merge fields, merge reports, system date/time fields, and signature fields in those documents. The process of using merge fields in the Word Processor for a document that is not a letter template is very similar.
•If you wish to insert merge fields and reports into the document you are currently creating, please continue with the following steps:
1.Determine Merge Table:
a.When you open the Word Processor, the Merge Fields for the applicable Merge Table will appear in the Merge Panel.
b.The Merge Panel is along the right side of the Word Processor by default, although you can Float, Dock and Auto Hide the panel by right-clicking on the panel header and selecting an option.
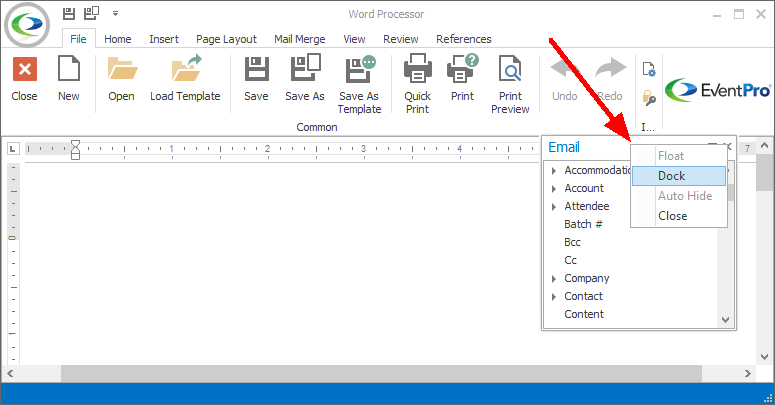
c.The name of the Merge Table is at the top of the Merge Panel in the Word Processor.
d.Which Merge Table you see depends on the area from which you access the Word Processor.
i.For example, if you are in the Communication Email edit form, then you can access the Communication Email merge table.
ii.Event Comments edit -> Event merge table
iii.Task edit form -> Task merge table
iv.Company edit form, under the Notes tab -> Company merge table
e.If you are accessing the Word Processor in Setup Letter Templates, you will be able to choose the Merge Table in the Setup Letter Template edit form. Review Document Management > Letter Templates > Selecting Correct Merge Table.
2.Insert Merge Fields:
a.Once you have determined which Merge Table you are using, you can proceed to insert merge fields Insert Merge Fields into the document.
b.Review the instructions under Document Management > Letter Templates > Content & Merge Fields to learn how to select and insert merge fields.
3.Apply Format Switches:
a.After you insert merge fields, you can further define how merged data should be displayed by adding Format Switches (\* or \# or \@) to Merge Fields in your templates.
b.Review the instructions under Document Management > Letter Templates > Other Merge Elements > Apply Merge Field Format Switch to learn how to use format switches.
4.Insert Merge Reports:
a.Before inserting Merge Reports, you need to prepare the reports specifically for this purpose. Some of the features in standard reports, such as footers, headers, and shading, will not work well in the body of the email.
b.To learn how to adjust reports and insert merge reports into a document, review Document Management > Letter Templates > Other Merge Elements > Insert Merge Report.
5.Insert Date/Time Fields:
a.Like other merge fields, the Date/Time system fields are placeholders in the document that will pull in the current date/time when you use the document.
b.To learn how to insert date/time fields into a document, review Document Management > Letter Templates > Other Merge Elements > Insert Date/Time Fields.
6.Insert Signature:
a.To learn how to insert an email signature into a document, review Document Management > Letter Templates > Other Merge Elements > Insert Signature.
7.When you are done creating your document in the Word Processor, always remember to click Save  .
.