•A Room Block contains a set of rooms/dates at a hotel that have been reserved under one Confirmation #, but the Rooms have not yet been assigned to specific Attendees or Accounts.
oWhen you add individual Accommodation Bookings to the Event, you can select rooms/dates from an existing Room Block, or create an entirely new booking that's not part of a Room Block.
•In these instructions, we will look at how to create a Room Block.
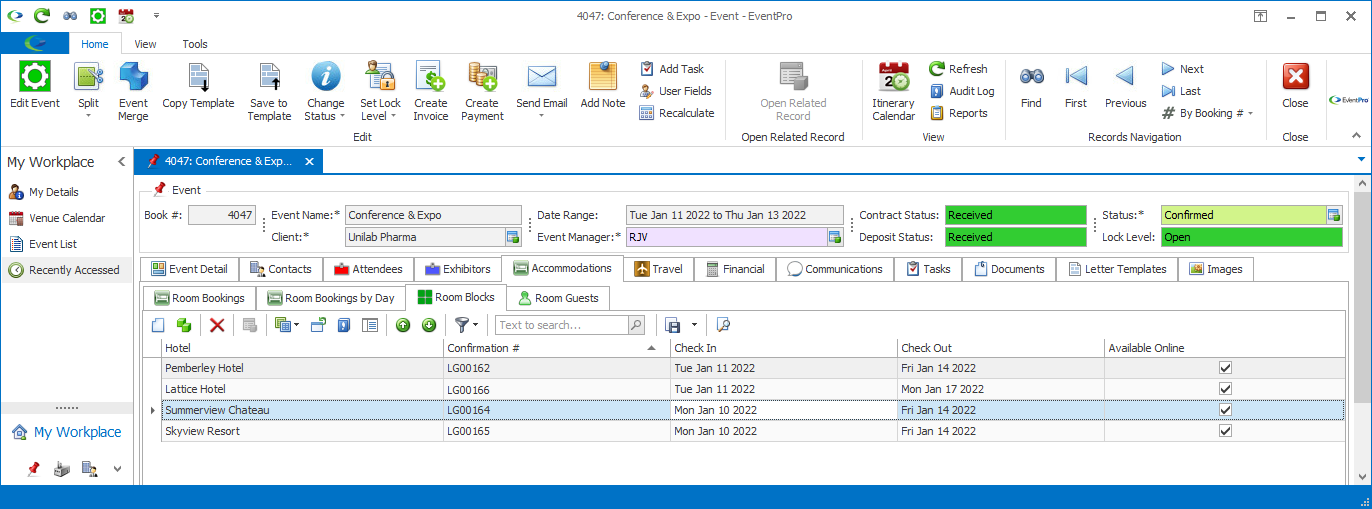
1.Under the Event's Accommodations > Room Blocks tab, click the New button.
2.The Event Accommodation Room Block edit form appears.
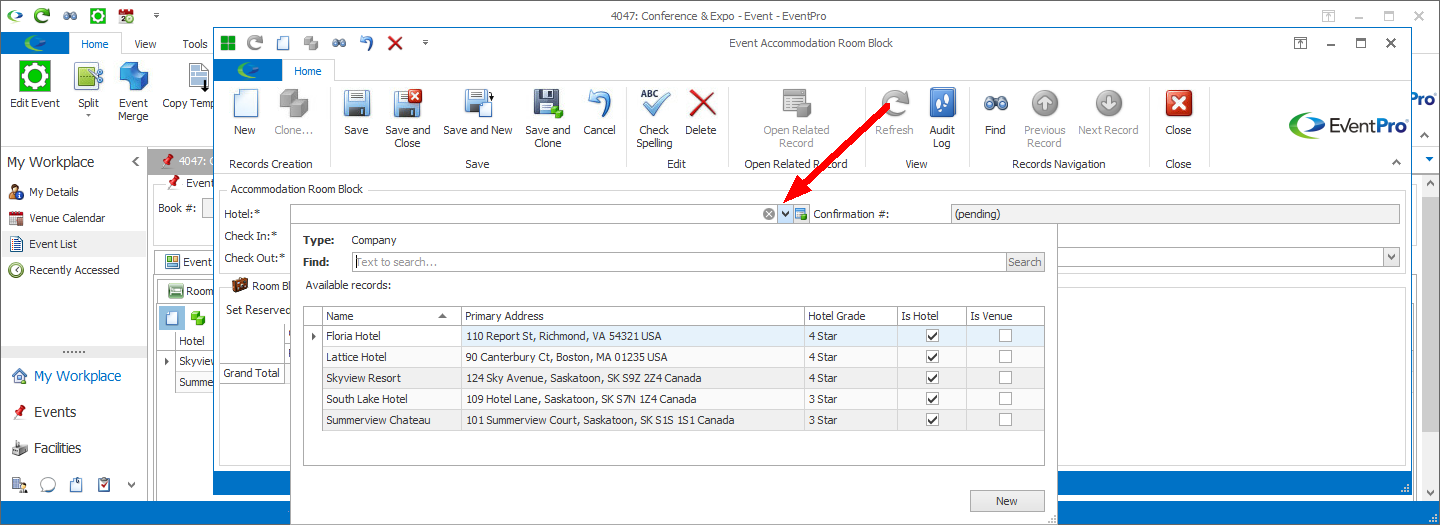
3.Hotel:
a.The Hotel will initial default to the Default Hotel from your Security User Options, or if you don't have one set, the Default Hotel from Accommodations System Settings.
b.However, you can select a different Hotel from the drop-down. Note that the available records will only display Companies that have Relationship Type set to Hotel. (Review CRM > Add New Company > Relationship Types.)
4.Check In/Check Out: The Check In and Check Out Dates for this Room Block will initially default to the Start and End Dates of the Event, but you can use the drop-down calendars to select different dates, if required.
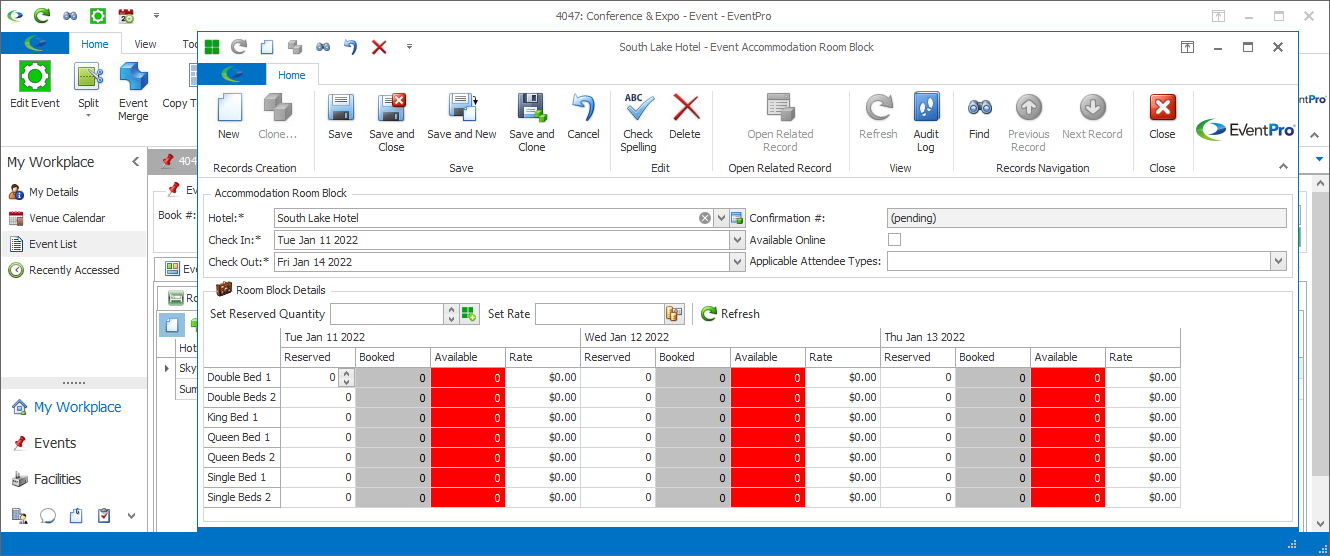
5.Confirmation #: This Confirmation # field may or may not be editable, depending on Sequence Numbers Setup > Accommodations.
a.If the Auto Assign Confirmation #'s setting is turned on, the Confirmation Number field will be read-only and display (pending). When the Room Block reservation is completed, the Confirmation Number will be automatically assigned, using the settings in Sequence Numbers Setup > Accommodations.
b.If the Auto Assign Confirmation Numbers setting is turned off, you can manually enter a Confirmation # of your choice.
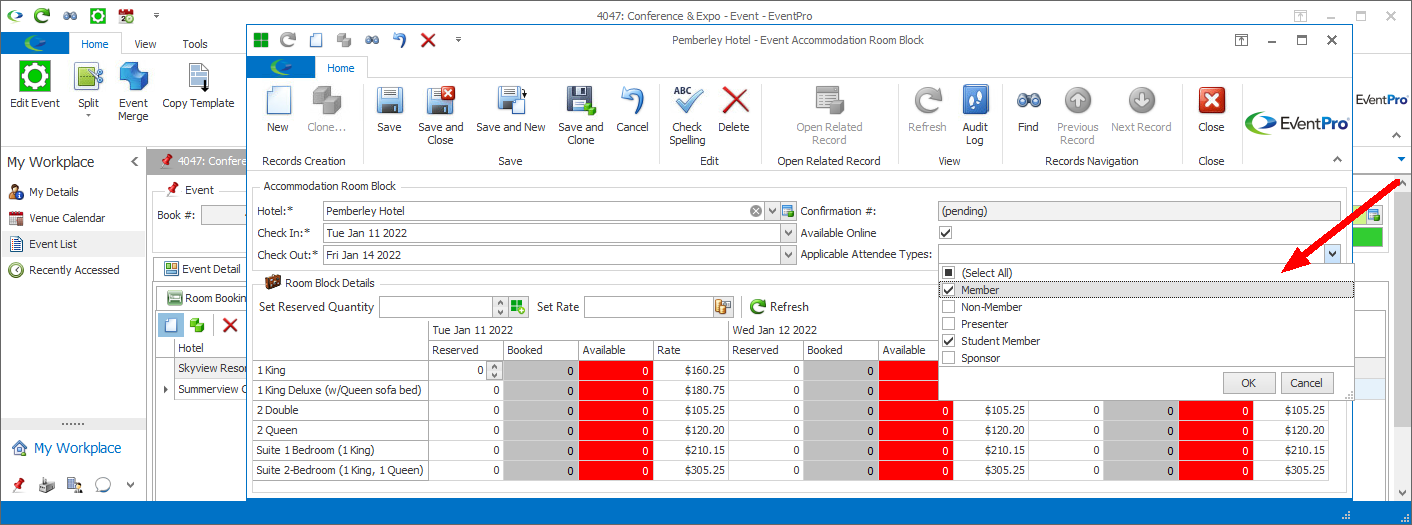
6.Available Online: Select this checkbox if you want this Room Block to be available online in EPConnect so that Attendees registering online will be able to select reservations from the Room Block.
a.NOTE: This selection drop-down only appears if the Show Applicable Attendee Types in Room Blocks setting has been turned on in Accommodations System Settings.
b.If you want this Room Block selection to be available to only certain Attendee Types, select the checkboxes next to those applicable Attendee Types in the drop-down, and click OK.
c.This drop-down is populated by the Event Attendee Types set in the Edit Event Window > Attendee Setup > Attendee Types.
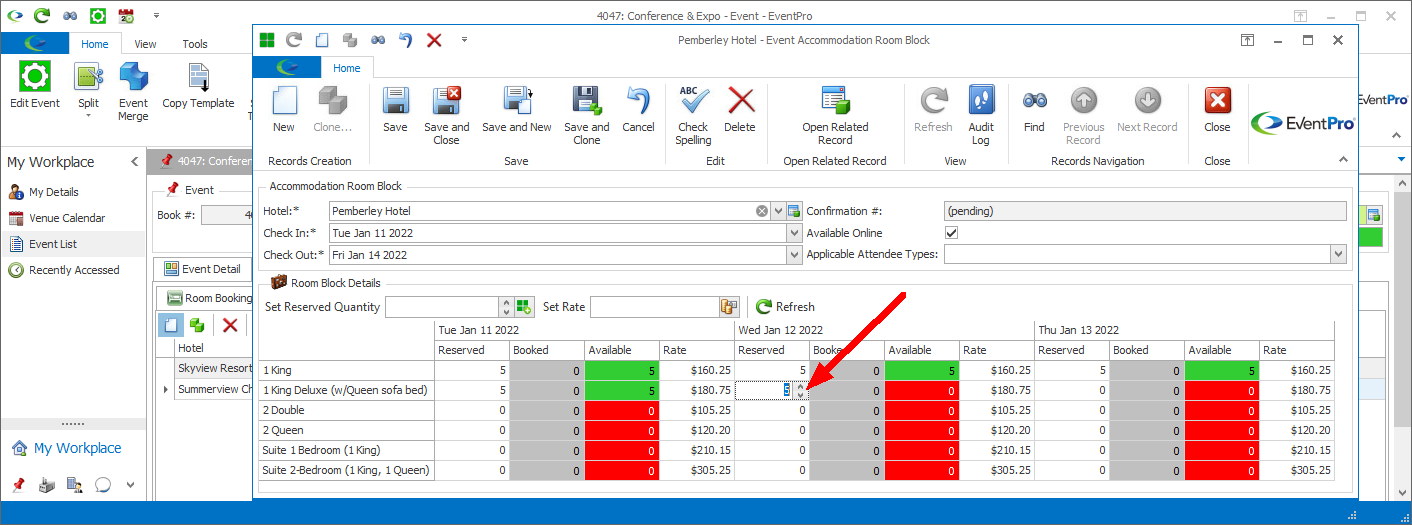
a.The Room Block Details grid displays the Hotel's available Room Types in the rows. The Hotel's Rooms Types and their Rates would have been defined in EventPro Setup > Facilities, under the Hotel's Room Types tab.
b.For each Room Type on each Date, you can select the number of rooms of that type Reserved for the Room Block. When you first create the Room Block, there will be no reserved rooms, so the Reserved, Booked, and Available Columns will display 0 (zero).
c.You can reserve the rooms individually, or set a reserved quantity for an entire row at once.
d.Reserve Room Types Individually: In the Reserved cell for each Room Type, set the number of rooms you want to reserve for that date.
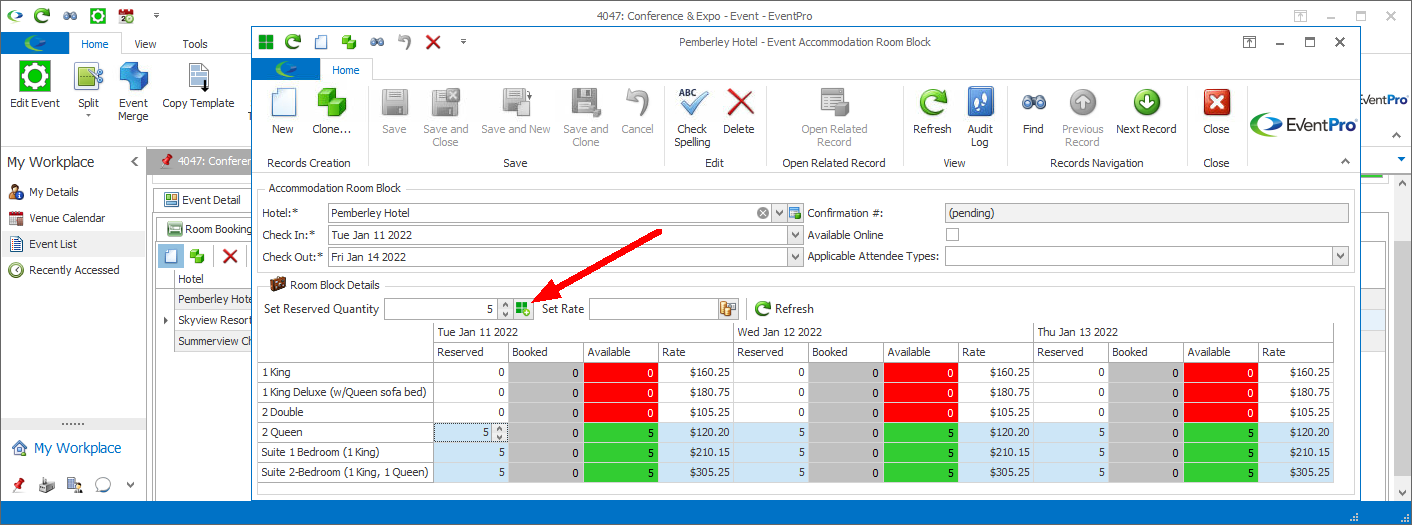
e.Set Reserved Quantity: You can set a reserved quantity for an entire row or multiple selected rows at once.
Select the applicable row by clicking on the first cell containing the Room Type name. To multi-select, hold down the Ctrl key and click on the first cell of each row you want to include.
Enter the number in the Set Reserved Quantity field.
Click the Set Reserved Quantity  button. The Reserved quantities for the selected row(s) will be set to the number you entered.
f.Rates: As noted above, the Hotel Room Types may already have default Rates from EventPro Setup > Facilities, set under the Hotel's Room Types tab.
g.Set Rates Individually: If you want to set new rates for some or all Room Types specifically for this Room Block reservation, you can type the rates in the individual Rate cells for the applicable Date/Room Type.
h.Set Rate: You can also change the Rate for an entire row at once with the Set Rate button. Type the number into the Set Rate field. Select the row by clicking on the first cell containing the Room Type name. Click the Set Rate  button.

9.When you are done with the Event Accommodation Room Block window, click Save and Close.
10.The Room Block will be added to the selection grid under the Event's Accommodations > Room Blocks tab.
11.If you need to edit the Room Block, e.g. reserve more rooms, change Check In/Check Out dates, etc., return to the Accommodations > Room Blocks selection grid and double-click the Room Block record to open the Event Accommodation Room Block window.