•Some notes about adding Invoice Detail Items:
oFor a Manual Invoice, Deposit Manual Invoice, and Credit Manual Invoice, you need to add an Invoice Detail Item to the Invoice, as the Invoice Details tab will otherwise be blank.
oFor the "Single" and "Detailed" invoices, line items will be automatically created and placed in the Invoice Details tab. However, you have the option to add, edit, and delete detail items as you require.
oYou cannot add Detail Items to a Final Invoice, because a Final Invoice's line items are all linked back to event items (except for a Payment Type Surcharge Detail Item, if applicable).
1.Start a New item record under the Invoice Detail tab.
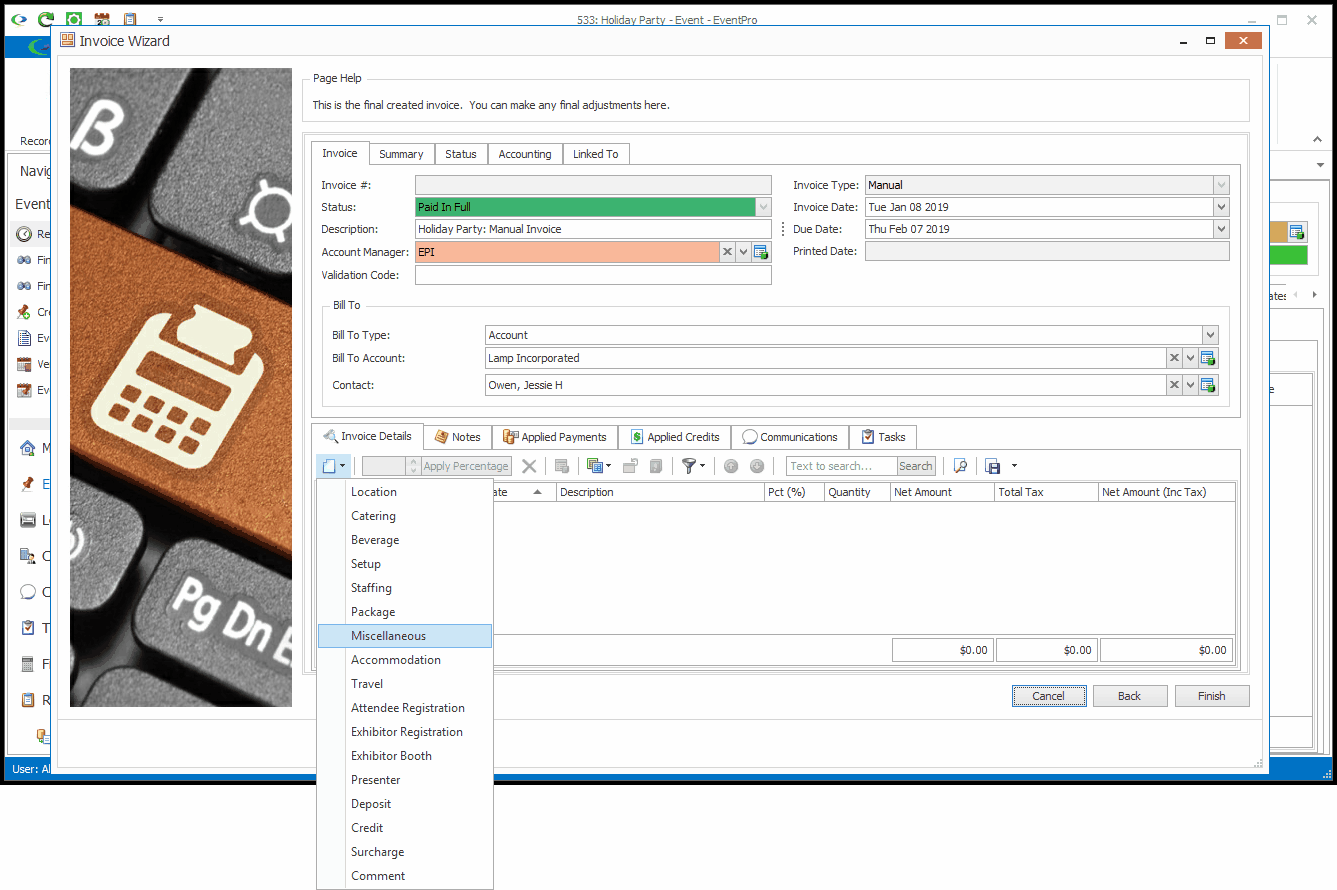
Select the appropriate Invoice Detail Type from the New drop-down list.
a.If you are creating a Manual Invoice, Manual Single Invoice, or Manual Detailed Invoice, you can select from many different Types of Invoice Detail: Location, Catering, Setup, Package, Miscellaneous, Deposit, Credit, Surcharge, Comment, etc.
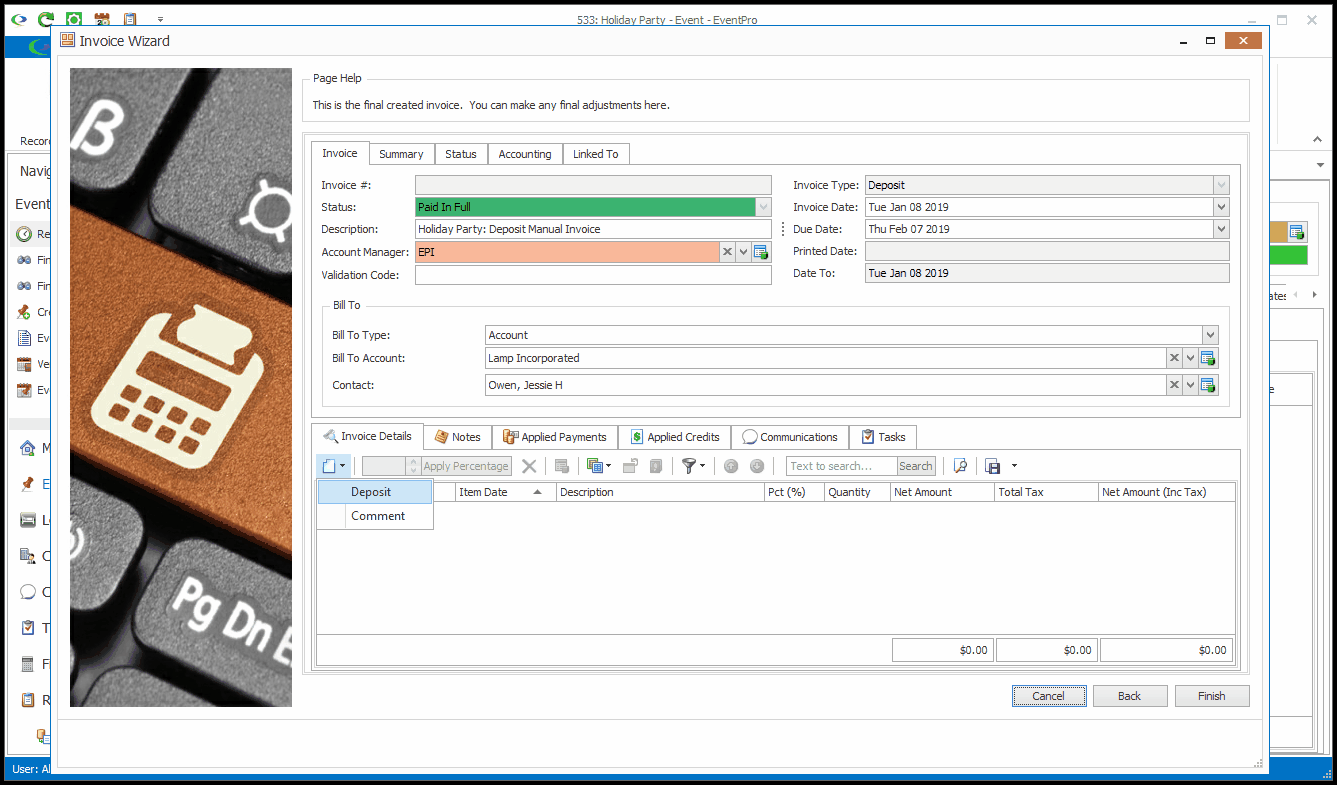
b.If you are creating a Deposit Invoice (Deposit Manual, Deposit Single, or Deposit Detail), you can only select Deposit (or Comment) for the Invoice Detail Type.
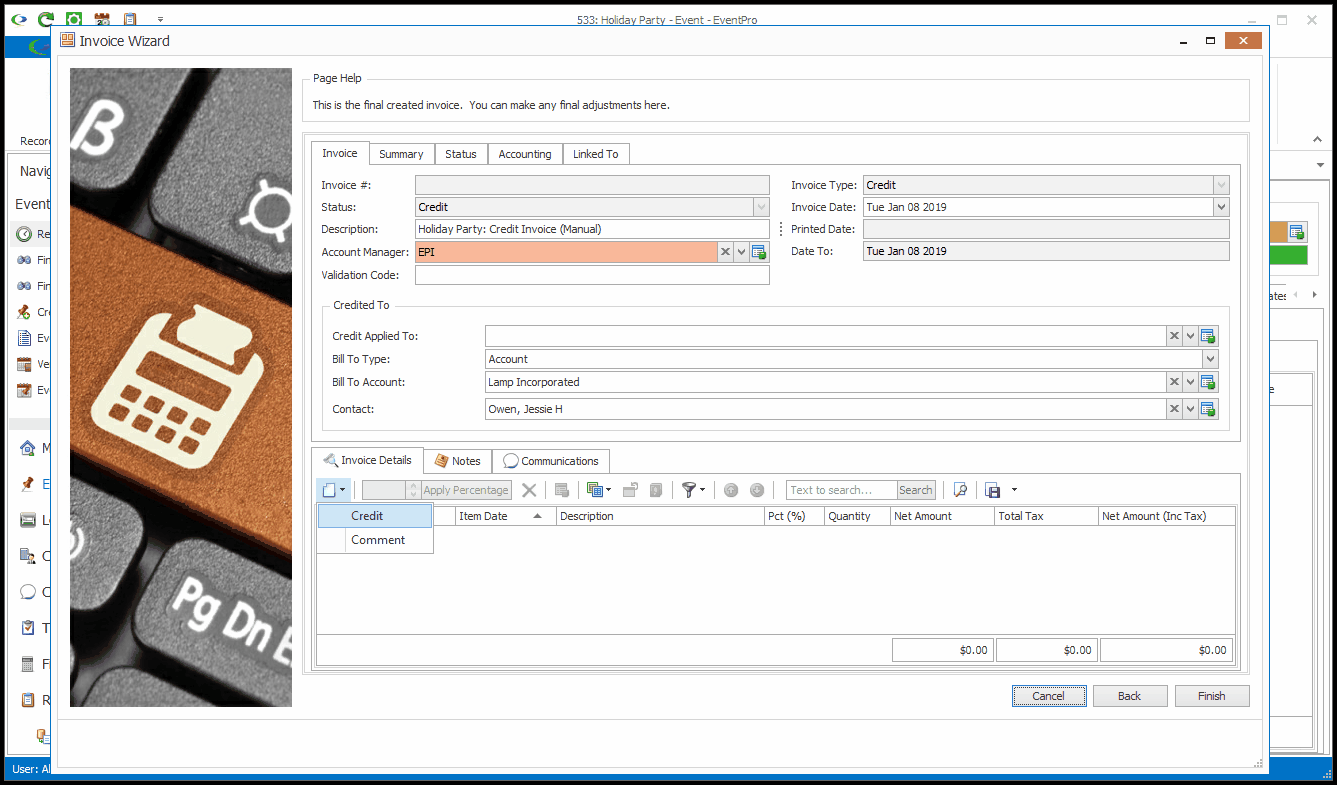
c.If you are creating a Credit Invoice (Credit Manual, Credit Single, or Credit Detail), you can only select Credit (or Comment) for the Invoice Detail Type.
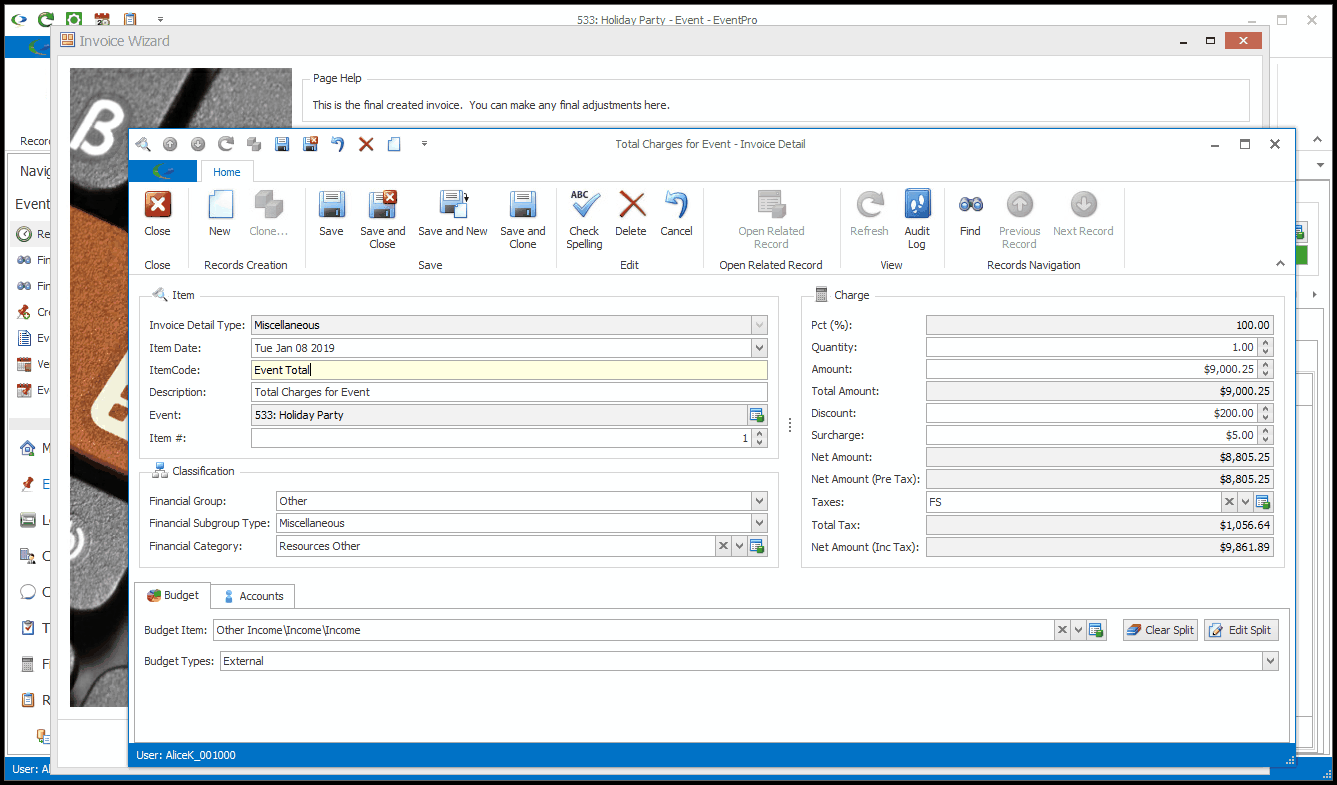
2.The Invoice Detail edit form opens.
This edit form will be essentially the same for any Invoice Detail Type. As examples, we will look at Miscellaneous, Deposit, and Credit Invoice Detail Items.
The important difference for a Credit Detail Item is that the Amount will be negative, in parentheses, since you are creating a credit.
a.Miscellaneous Invoice Detail Item:
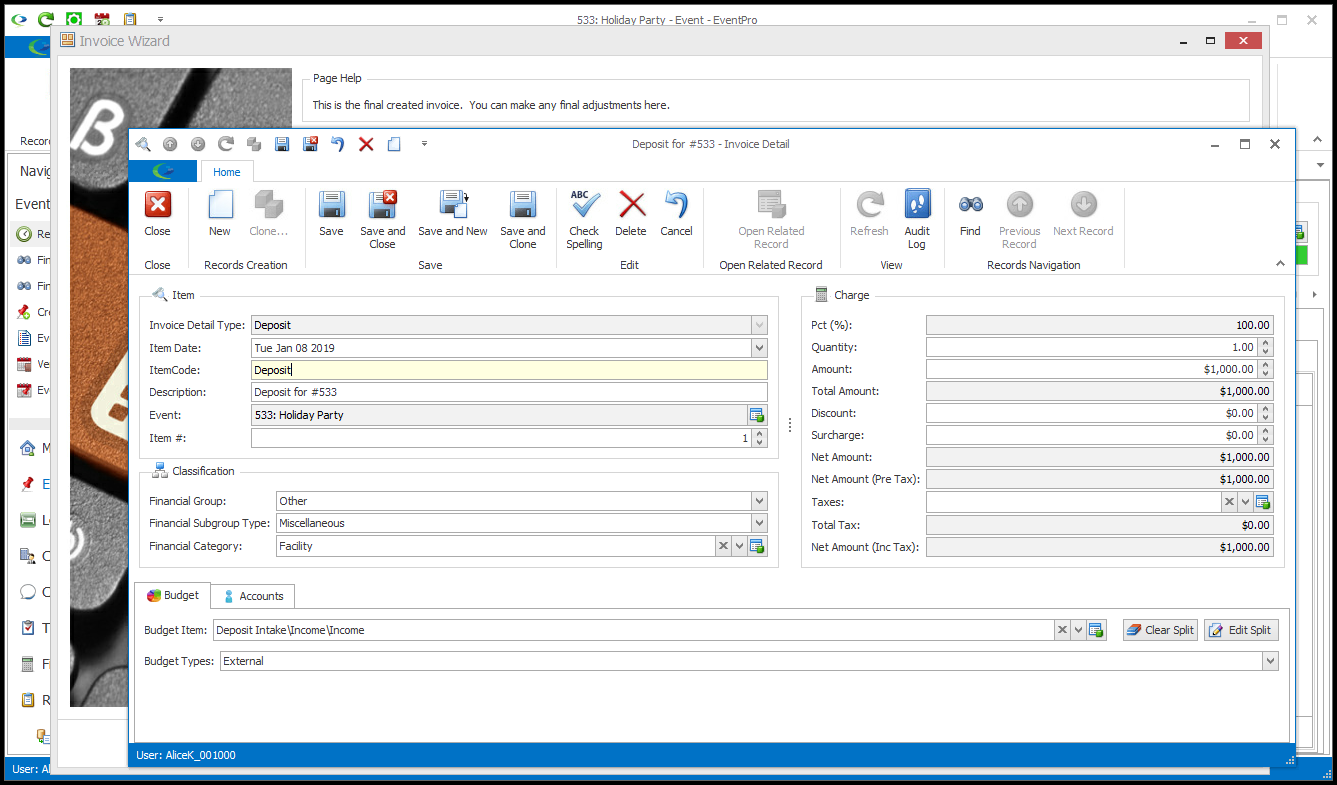
b.Deposit Invoice Detail Item:
c.Credit Invoice Detail Item:

3.Item:
a.Invoice Detail Type: This will be fixed as the Invoice Detail Type you selected when starting the record.
b.Item Date: This will default to the current date, but you can select a different date from the drop-down calendar.
c.Item Code: Enter an Item Code for this detail item.
d.Description: Enter the Description of this detail item.
e.Event: This will be fixed as the event within which you started this invoice.
f.Item #: If there will be multiple line items in the invoice, you can use the Item # to determine this item's place in the sort order.
4.Classification: If relevant, you can assign some financial classifications to this detail item.
a.Financial Group: Select the applicable Financial Group from the drop-down list.
b.Financial Subgroup Type: Financial Subgroup Types are hard-coded in EventPro. Select the applicable one from the drop-down list.
c.Financial Category: Select the applicable Financial Category from the drop-down list, which is populated by the records defined under EventPro Setup > Financial > Financial Categories.
5.Charge:
a.Enter the Quantity and Amount charged for the item you are adding to the invoice.
NOTE: If this is a Credit Detail Item, the Total Amount will appear in parentheses, indicating that it is negative, since it is a credited amount. You do not need to enter a negative sign. Just type the number in, and EventPro will automatically adjust it to indicate that the amount is a credit.
b.If applicable, you can specify a Discount and/or Surcharge.
c.If applicable, choose the Taxes that applies to the item. The Taxes drop-down list is populated by Tax Configurations defined under EventPro Setup > Financial > Taxes.
6.Budget:
a.Budget Item: If applicable, select a Budget Item from the drop-down, which is populated by the records defined under EventPro Setup > Financial > Budget Configuration.
i.If you want to split the Detail Item's Total Amount among multiple Budget Items, click the Edit Split button.
The Invoice Detail Income Budget Item window opens.
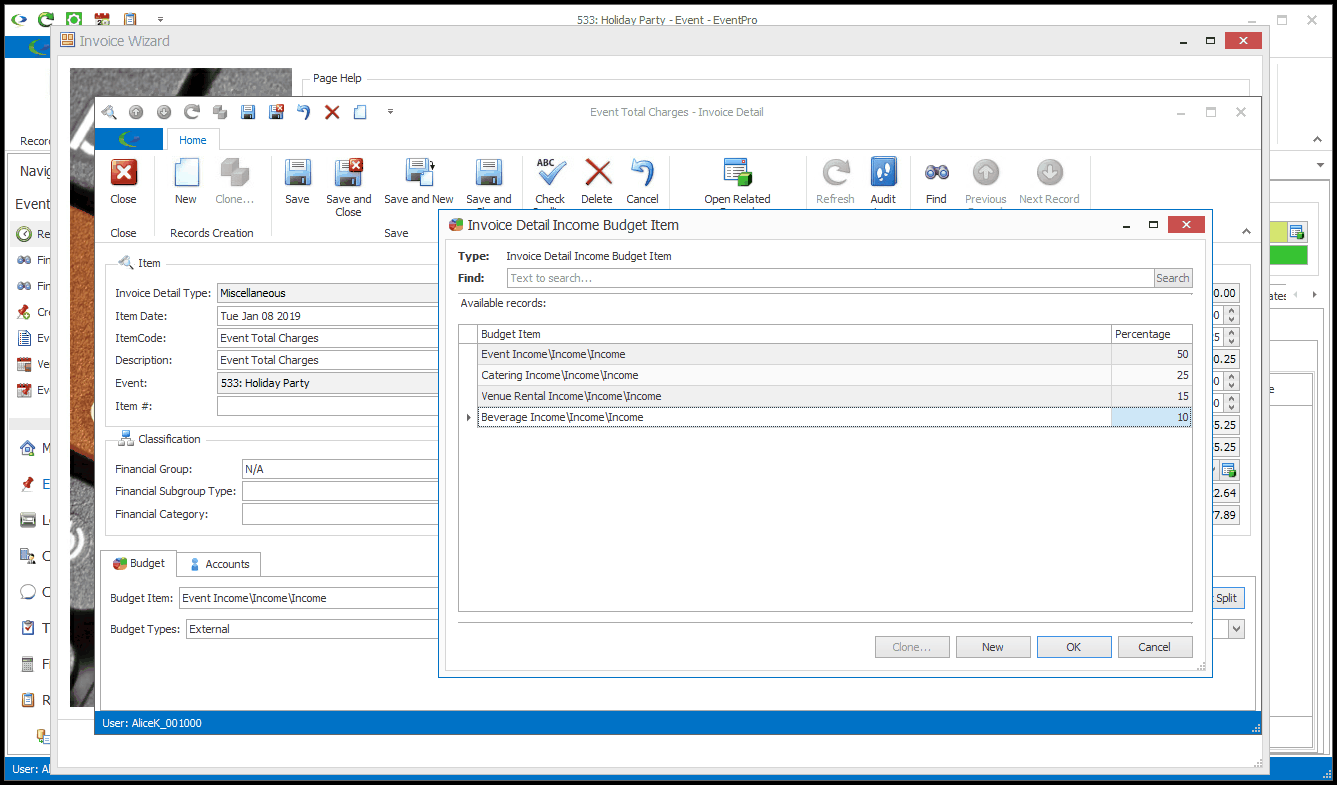
ii.To add another Budget Item to the split, click New. In the edit form, select the appropriate Budget Item, and enter the Percentage. Click Save and Close.
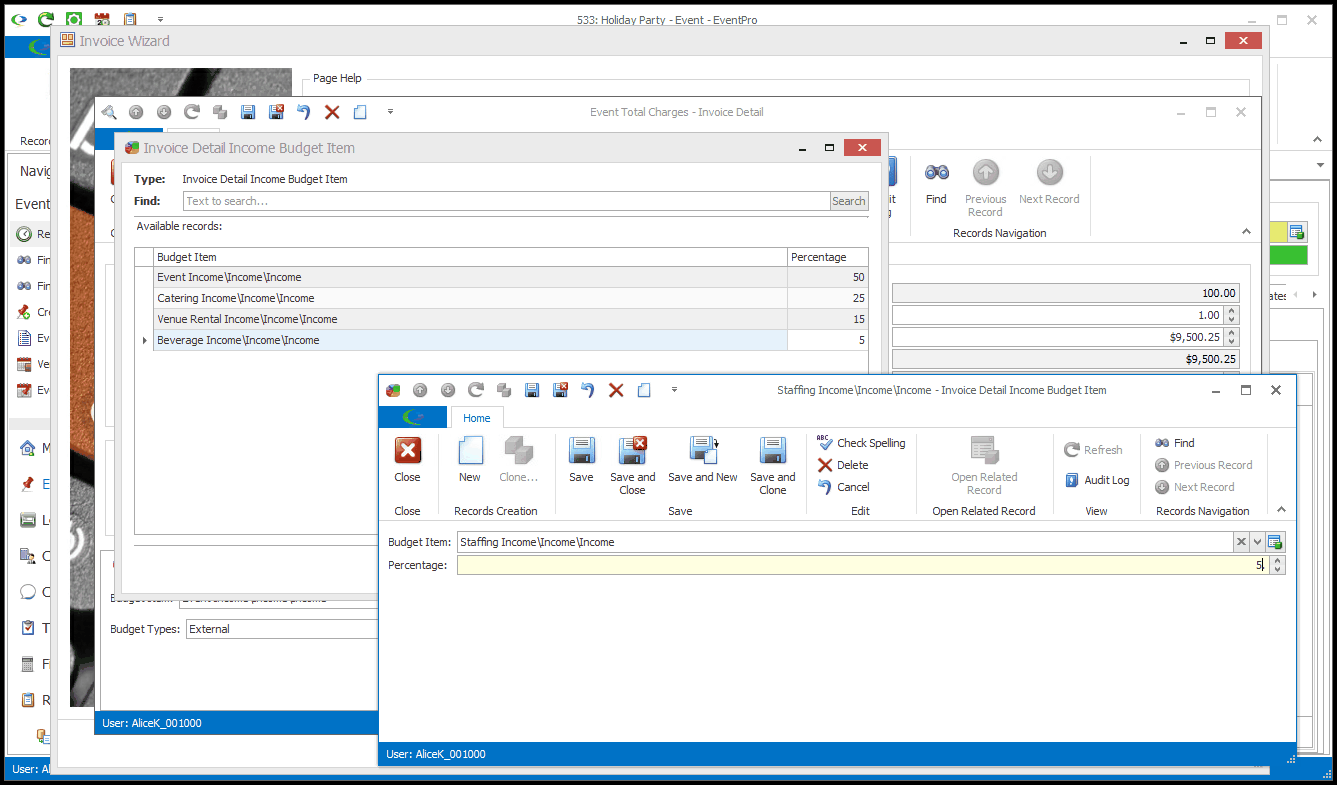
iii.To adjust the existing Budget Split Items, double-click on a record to open its Budget Item edit form, enter the new Percentage and/or select a different Budget Item, and click Save and Close.
iv.When you are done with the Invoice Detail Income Budget Item window, click OK.
v.If you want to erase the Budget Split and start over, you can click the Clear Split button.
b.Budget Types: If applicable, select a Budget Type from the drop-down, which is populated by the records defined under EventPro Setup > Financial > Budget Types.
7.Accounts:
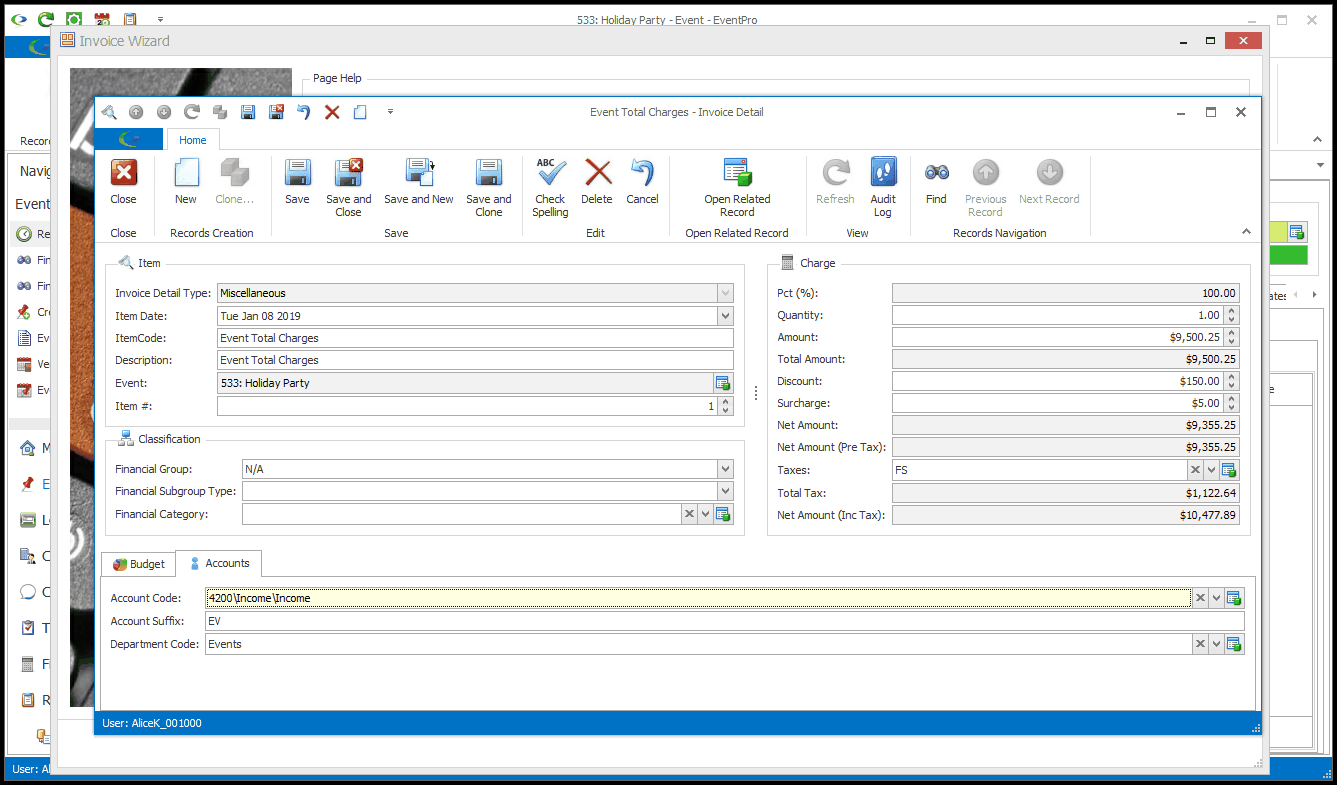
a.Account Code: You can choose an Account Code from the drop-down, which is populated by the records defined under EventPro Setup > Financial > Account Groups and Codes.
b.Account Suffix: You can enter an Account Suffix in this field.
c.Department Code: You can choose a Department Code from the drop-down, which is populated by the records defined under EventPro Setup > Financial > Department Codes.
8.When you are done entering information for this Invoice Detail Item, click Save and Close.
9.You can continue adding more Detail Items to the invoice, as required.