1.You can create an entirely new Task on the spot by manually entering the information you want. You also have the option to select a Standard Task from EventPro Setup, which you can then edit to suit the current situation, if necessary. Standard Tasks were set up under EventPro Setup > Tasks > Tasks.
2.Standard Task: If you want to use a Standard Task, select one from the drop-down list. The default information entered for that Standard Task in Setup will be pulled into the Task you are currently creating, and you can now edit or add information for the Task as required.
a.REMEMBER: Back in Setup, Standard Tasks were set to be Applicable To certain objects - Events, Opportunities, Accom Bookings, etc. There was also an option to make a Standard Task applicable to "All".
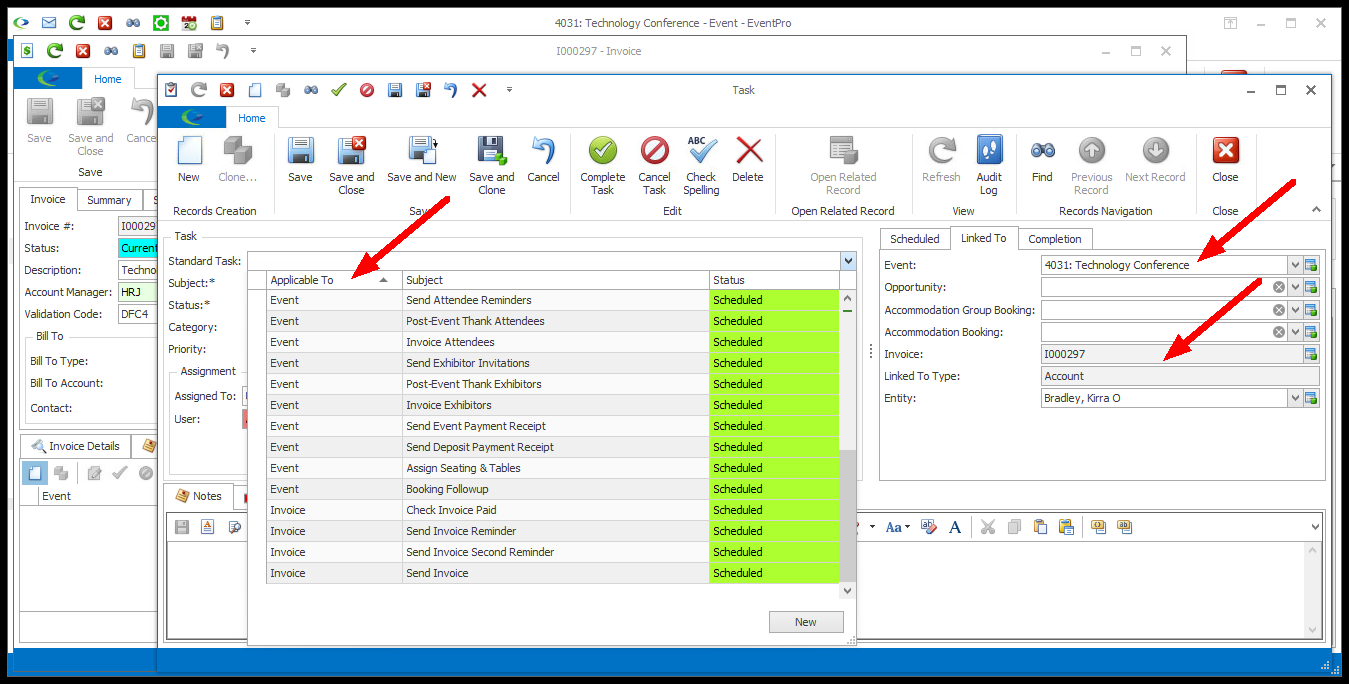
b.Now, when creating this Task, you will only be able to choose from Standard Tasks marked as Applicable To the type of object(s) that this Task is Linked To, as well as any "Applicable To: All" Standard Tasks.
c.For example, this Task is linked to an Event, so you can choose from Standard Tasks applicable to All and Event.

d.This Task is linked to an Invoice and Event, so you can choose from Standard Tasks applicable to All, Event, and Invoice.
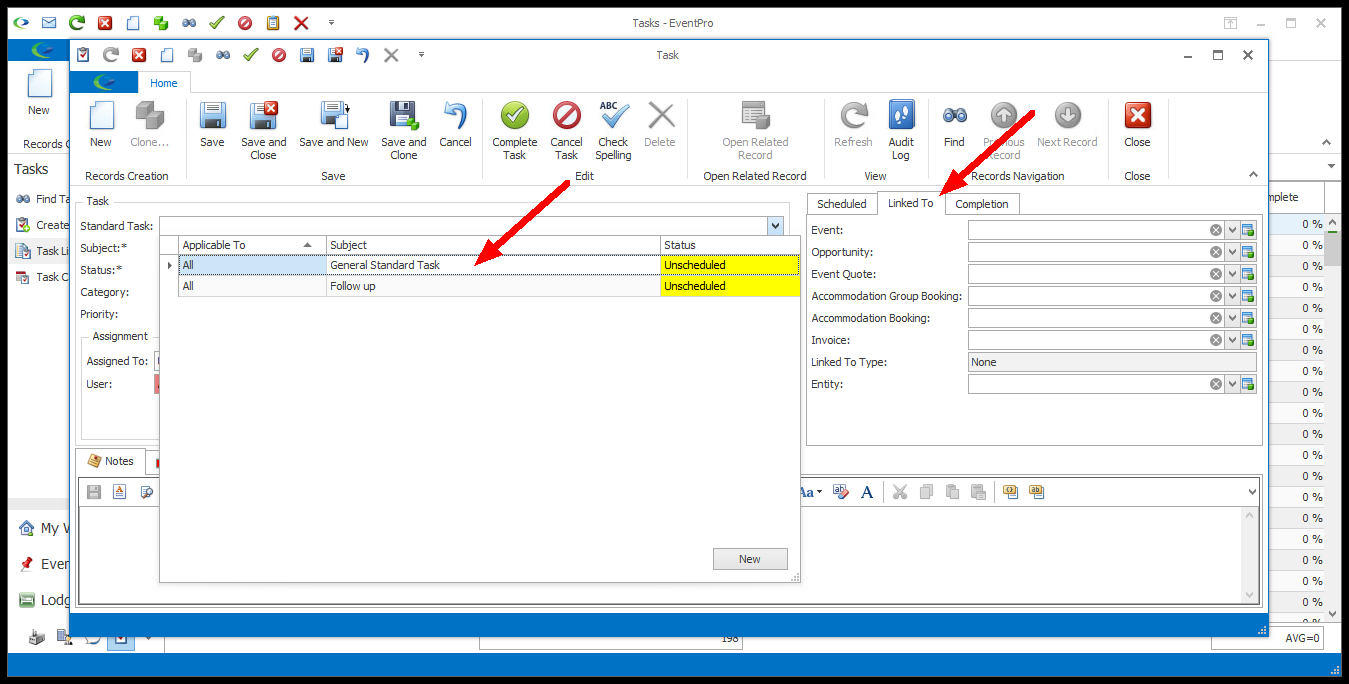
e.If this Task has not been linked to any of the "Applicable To" objects, you will only be able to choose from "Applicable To: All" Standard Tasks.
3.As noted earlier, if you want to create a new Task from scratch, leave the Standard Task field blank. You can simply fill in the information for your new Task below.
4.Subject: Enter the Subject for this Task.
5.Status: This defaults to the Default Task Status defined under EventPro Setup > Tasks > Task Statuses, but you can also select a different Status, if required.
6.Category: Select a Task Category from the drop-down list. Task Categories were defined under EventPro Setup > Tasks > Task Categories.
a.If your Task Categories are nested under Parent Categories, ensure that you click the expand/collapse toggle arrows to view all of the available Categories.
b.Note that the Task Category you select will set the Task's Time Conflicts field to Warn or Ignore, depending on which default was selected for the Task Category in Setup (EventPro Setup > Tasks > Task Categories).
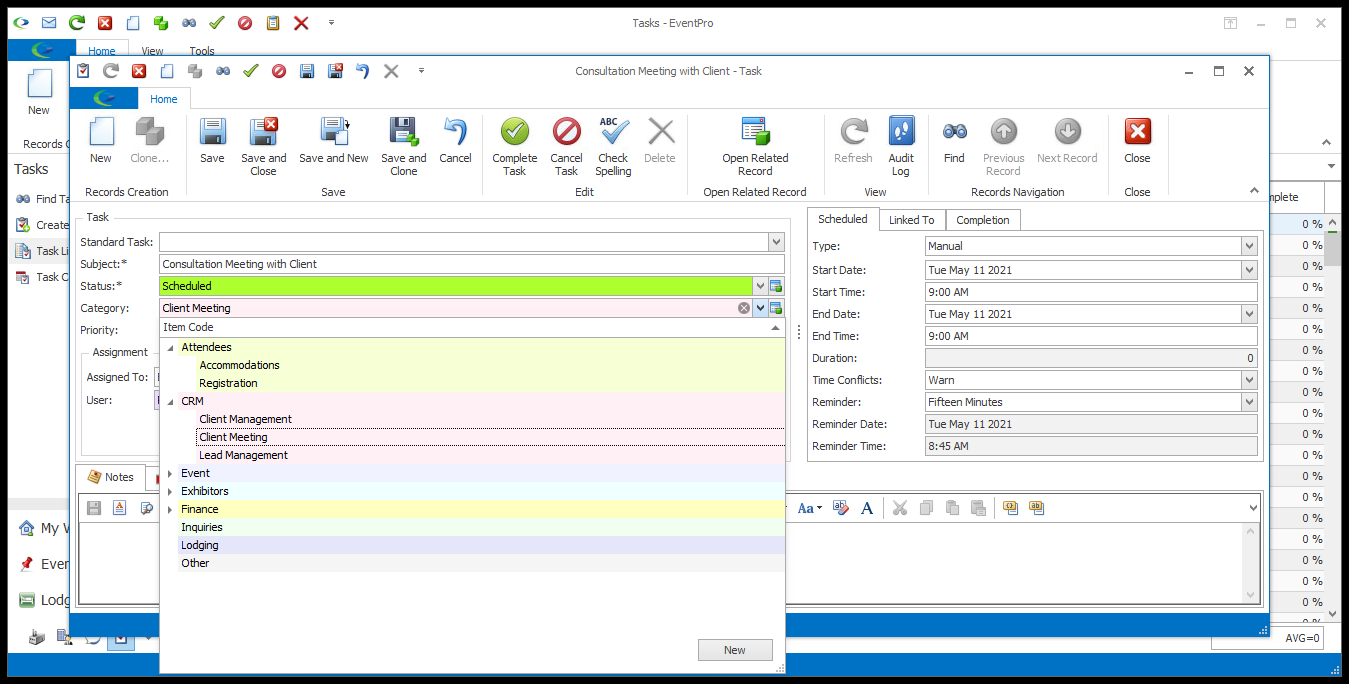
7.Priority: Select the Task's Priority from the drop-down list: Low, Normal or High.
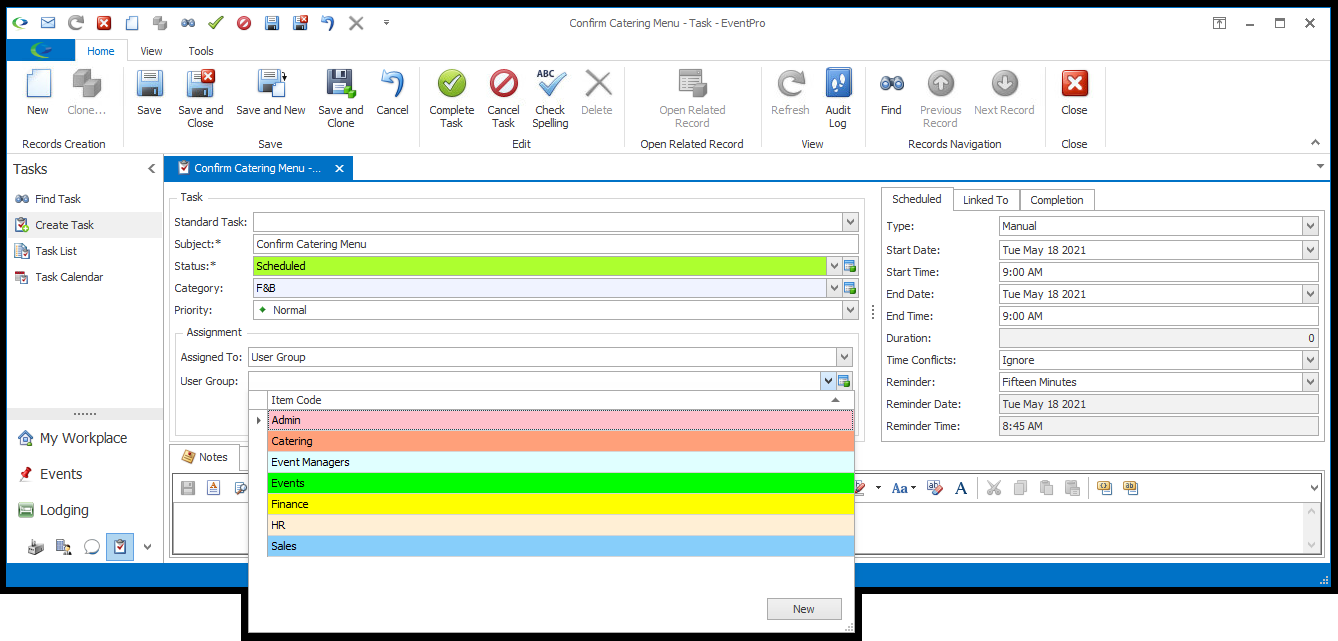
8.Assigned To: Choose the type of entity to which this Task will be assigned.
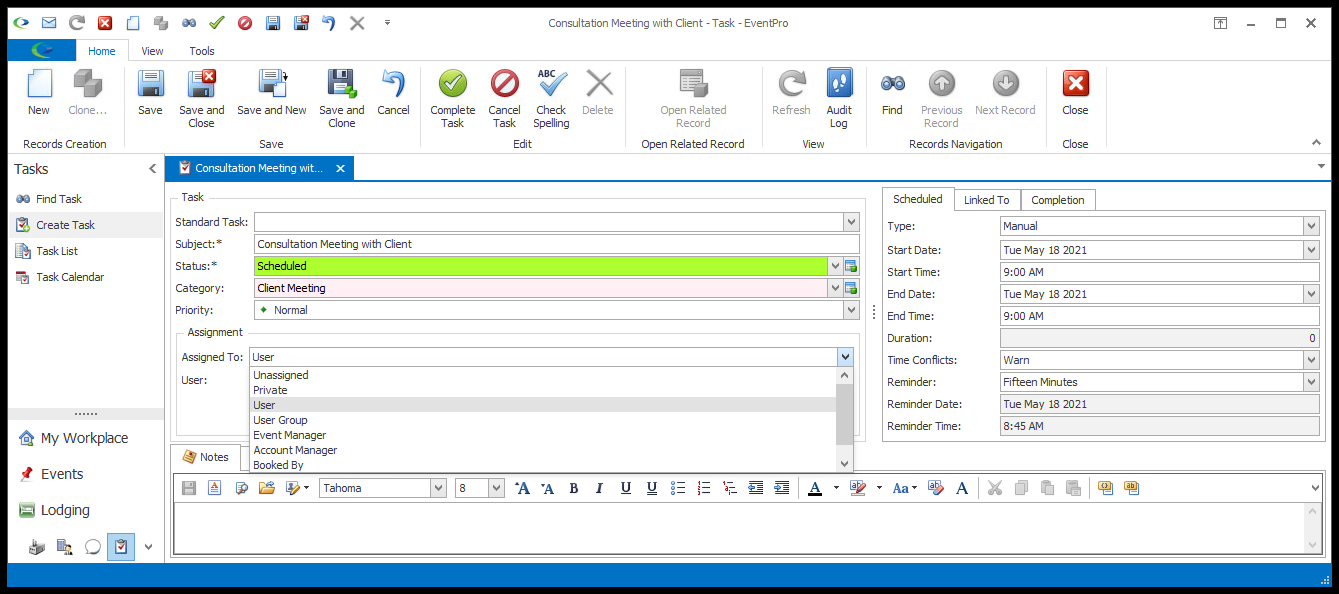
The Assigned To entity you select will determine which fields appear below.
a.Unassigned: The User field below will simply be blank.
b.Private: The Task will be privately assigned to the current User creating the Task.
c.User: You can select the specific User from the drop-down.
d.User Group: You can select the specific User Group from the drop-down. User Groups would have been created under Security Setup > User Groups.
e.Event Manager: The Task is assigned to the User defined as the Event Manager of the linked Event. (Requires a linked Event.)
f.Account Manager: The Task is assigned to the User defined as the Account Manager of the linked Event or Opportunity. (Requires a linked Event or Opportunity.)
g.Booked By: The Task is assigned to the User who booked the linked Event. (Requires a linked Event.)
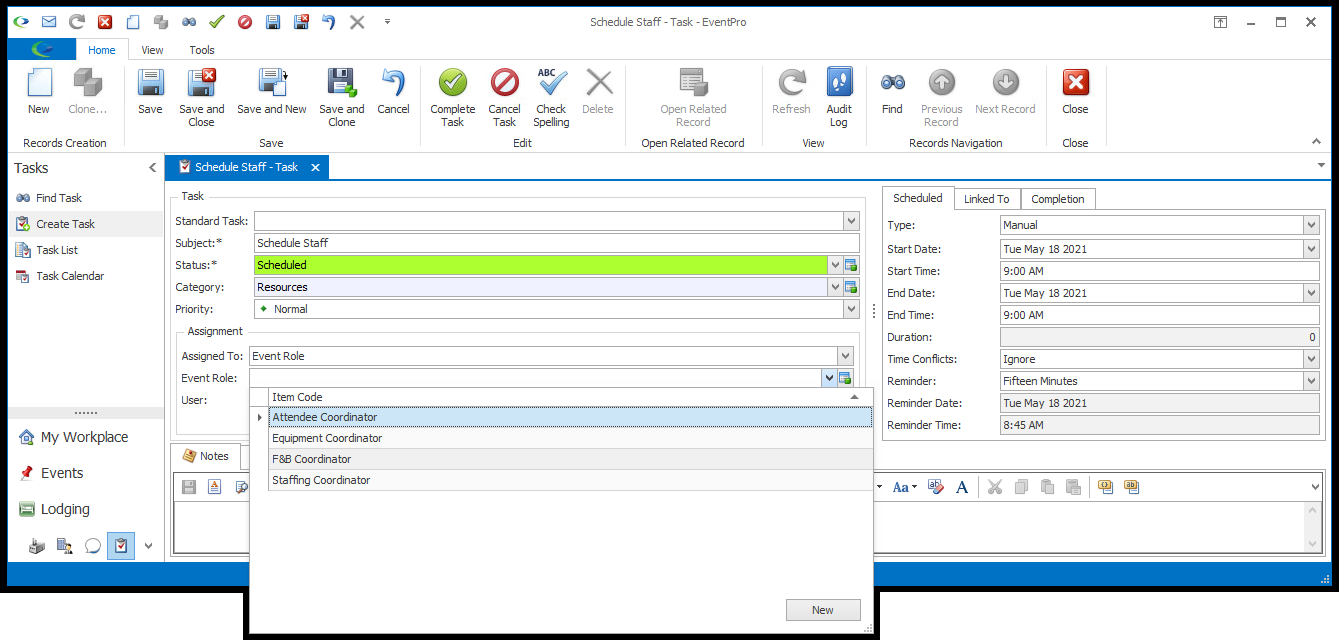
h.Event Role: Choose an Event Role from the drop-down list. The Task is assigned to the User who fills that selected Event Role for the linked Event. (Requires a linked Event.)