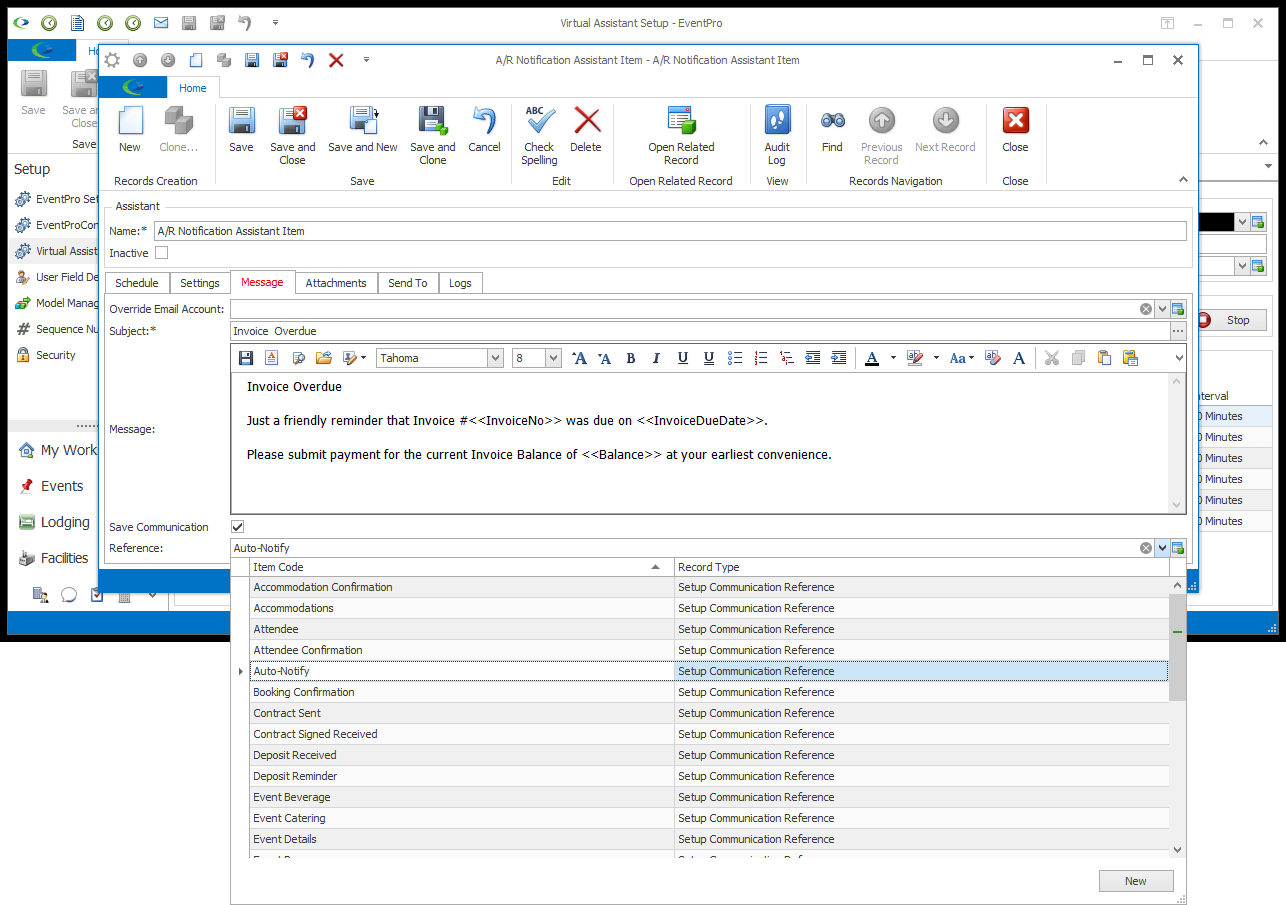
•The notification-type Assistants will have a Message tab, where you can enter the content of the email notifications for that particular Assistant.
•The Message tab will be the same or very similar for most notification-type Assistants. Any variations (such as those in the Change Notification Assistant Message settings) will be noted in the Individual Assistant Setup instructions below.
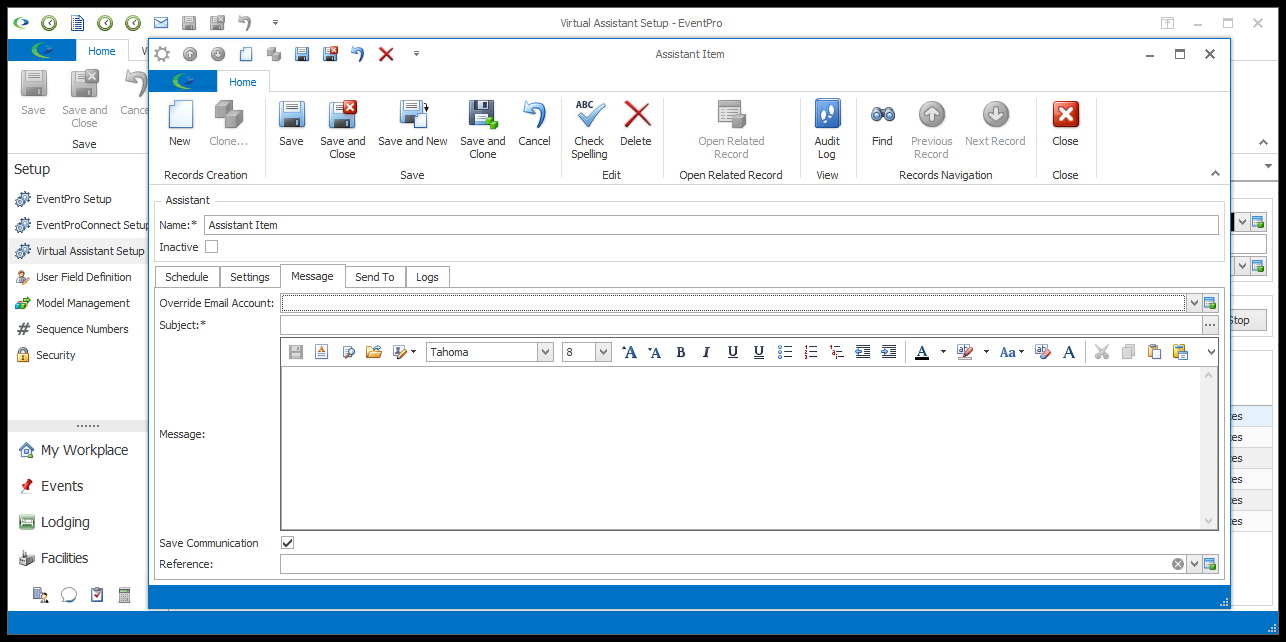
•The settings described below include: Override Email Account, Subject, Message, Word Processor, Save Communication, and Reference.
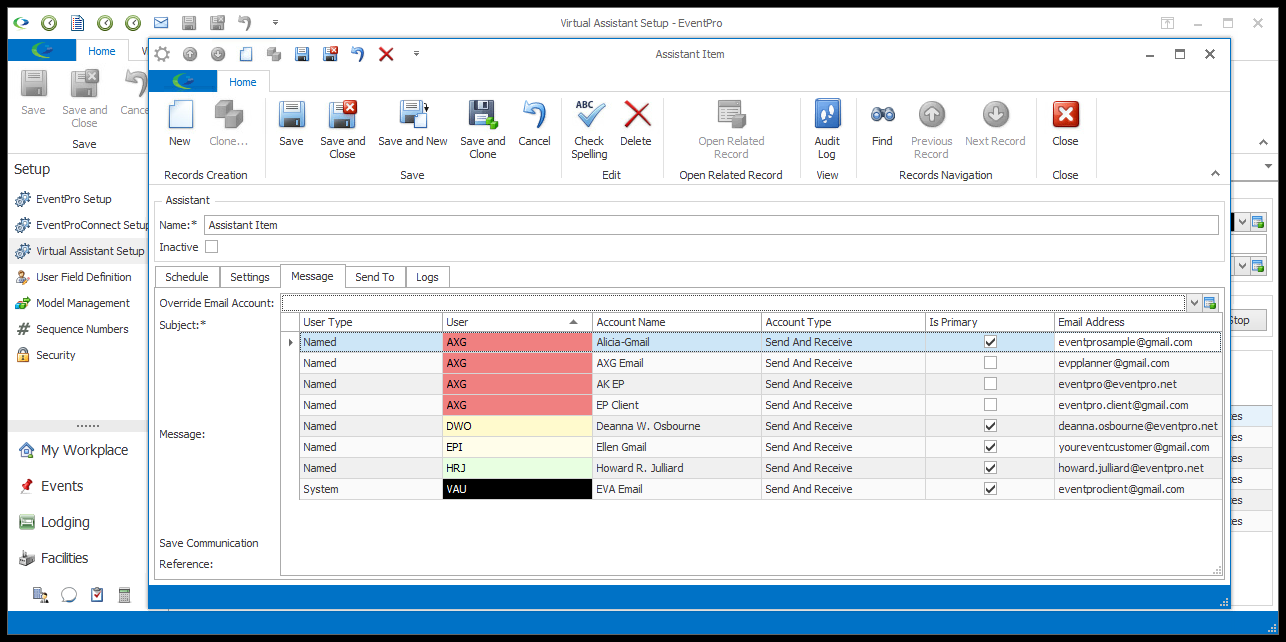
a.By default, the Assistant email notifications would be sent from the Virtual Assistant User's Primary email account.
b.This Override Email Account option allows you to select a different email account from which this Assistant's notifications will be sent.
c.Any user email account defined as "Send/Receive" or "Send Only" that uses SMTP or Exchange can be selected as an override account.
2.Subject: Enter the Subject of the email.
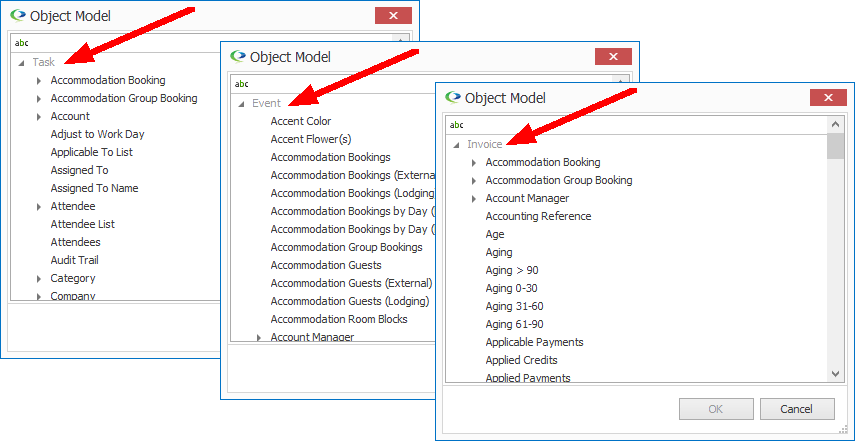
a.You can use Merge Fields in the email's Subject to automatically pull in data about the related record.
b.The available Merge Fields you see here will depend on the Merge Table of the Virtual Assistant, or in other words, the type of record this Virtual Assistant is related to.
i.For example, if you are working in a Task Assistant Item, you will see Task fields because the Assistant is using the Task Merge Table. If you are working in an Event Assistant Item, you will be accessing the Event Merge Table fields. The A/R Notification Assistant Item uses the Invoice Merge Table.
c.Click the ellipsis to the right of the Subject field.
d.The Merge Field dialog appears.
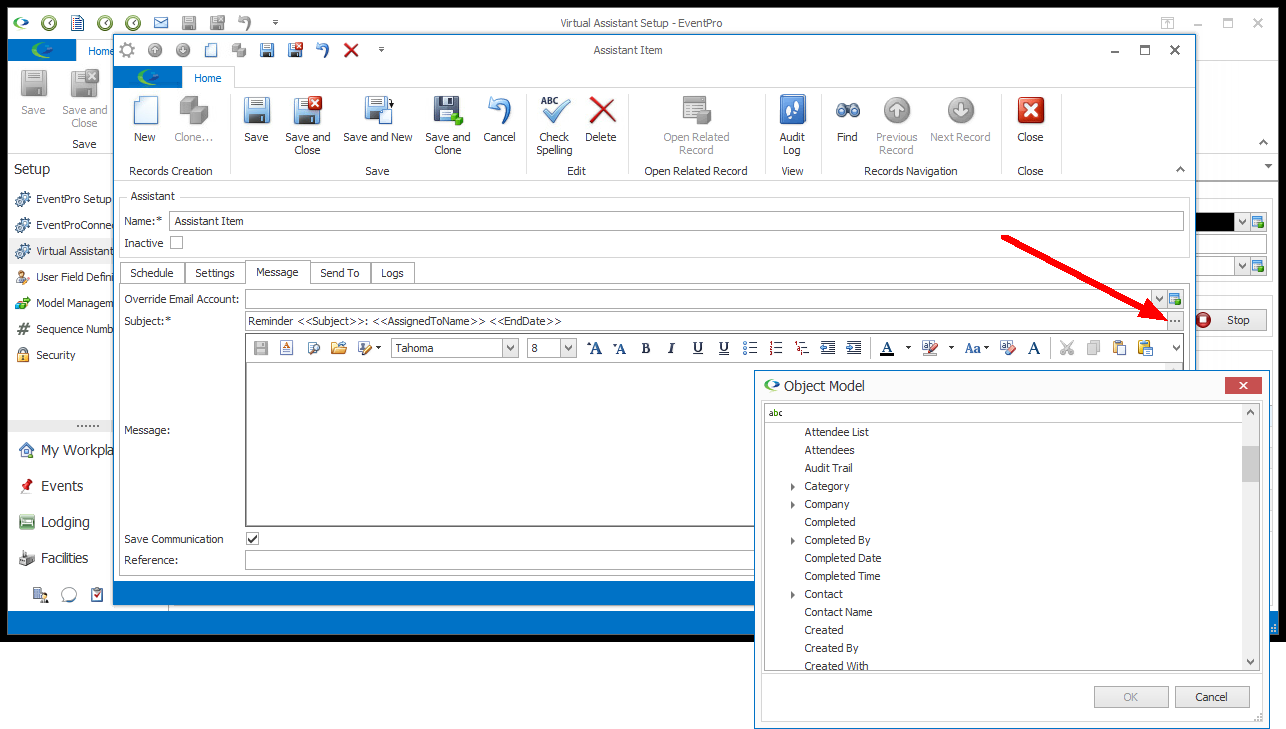
e.Scroll through the list to find the merge field you want to add to the message Subject. You may need to click the arrows to toggle open the nested fields.
f.Double-click to select the merge field and click OK. The merge field will be inserted into the message Subject where your cursor is currently resting.
3.Message: You will add the email body content in this area.
a.You can type the email content directly into the Message space.
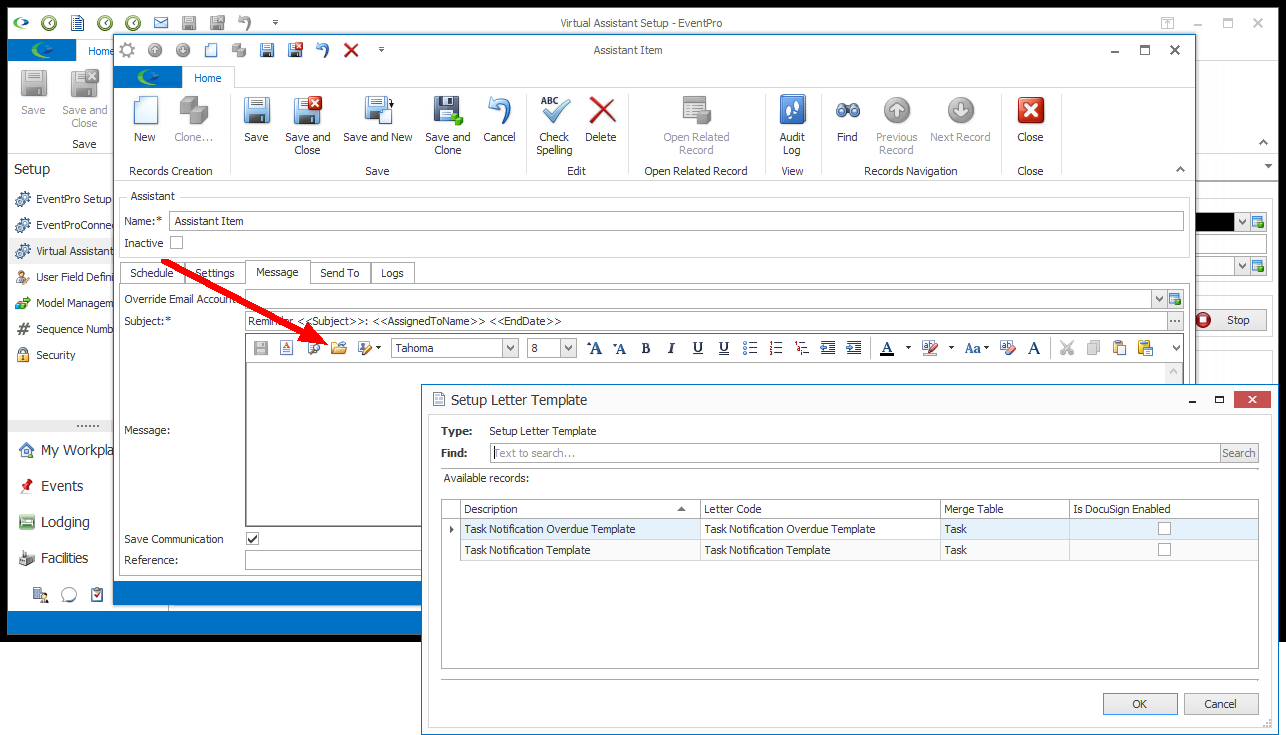
b.However, if there is already a Letter Template for the related Merge Table in EventPro Setup, you can load that template directly into the Assistant Message tab.
c.Once again, the Letter Templates you see available will depend on the Merge Table of the Virtual Assistant. Only Letter Templates for the Merge Table of the Virtual Assistant will appear.
i.For example, if you are working in a Task Assistant Item, you will only see Setup Letter Templates using the Task Merge Table. If you are working in an Event Assistant Item, you will be accessing Setup Letter Templates from the Event Merge Table. The A/R Notification Assistant Item accesses Setup Letter Templates using the Invoice Merge Table.
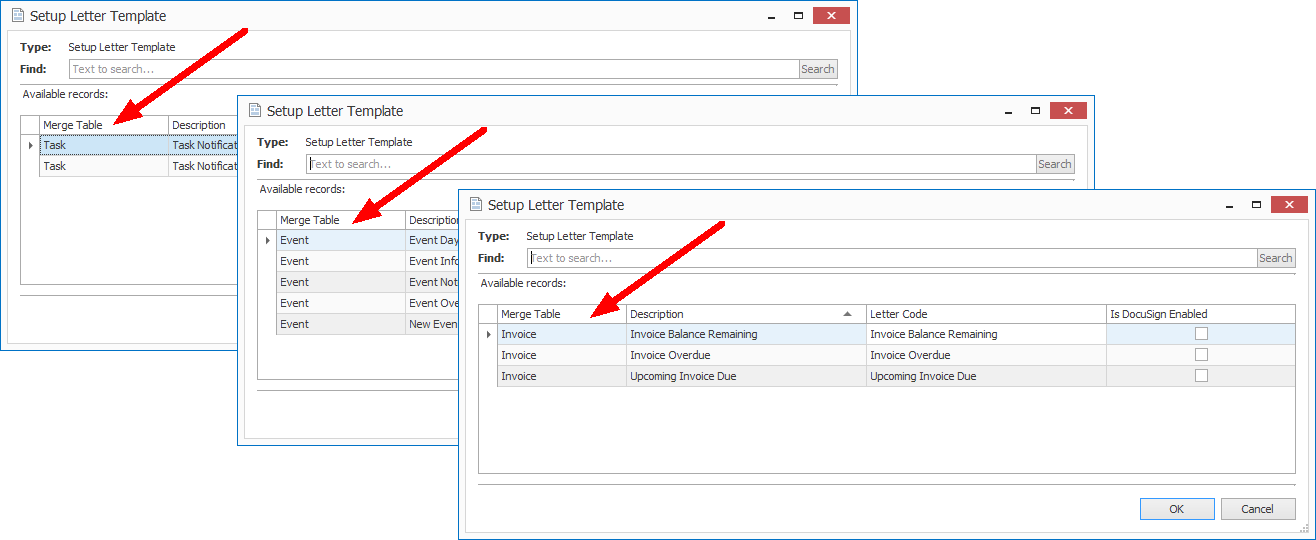
ii.If no templates appear in the Setup Letter Template dialog, it means that there are no Setup Letter Templates using that particular Merge Table.
iii.You can review more about letter templates under Document Management > Letter Templates. For specific examples of selecting Letter Templates with the correct Merge Table for Virtual Assistant Messages, review Document Management > Letter Templates > Selecting Correct Merge Table.
d.Click the Load Template button above the Message area.
e.In the Setup Letter Template dialog, select the template you want to use and click OK. The letter template content will appear in the Message area.
4.Word Processor: If you want to add to or edit the content in the Word Processor, click the Word Processor button.
a.A separate Word Processor window will open.
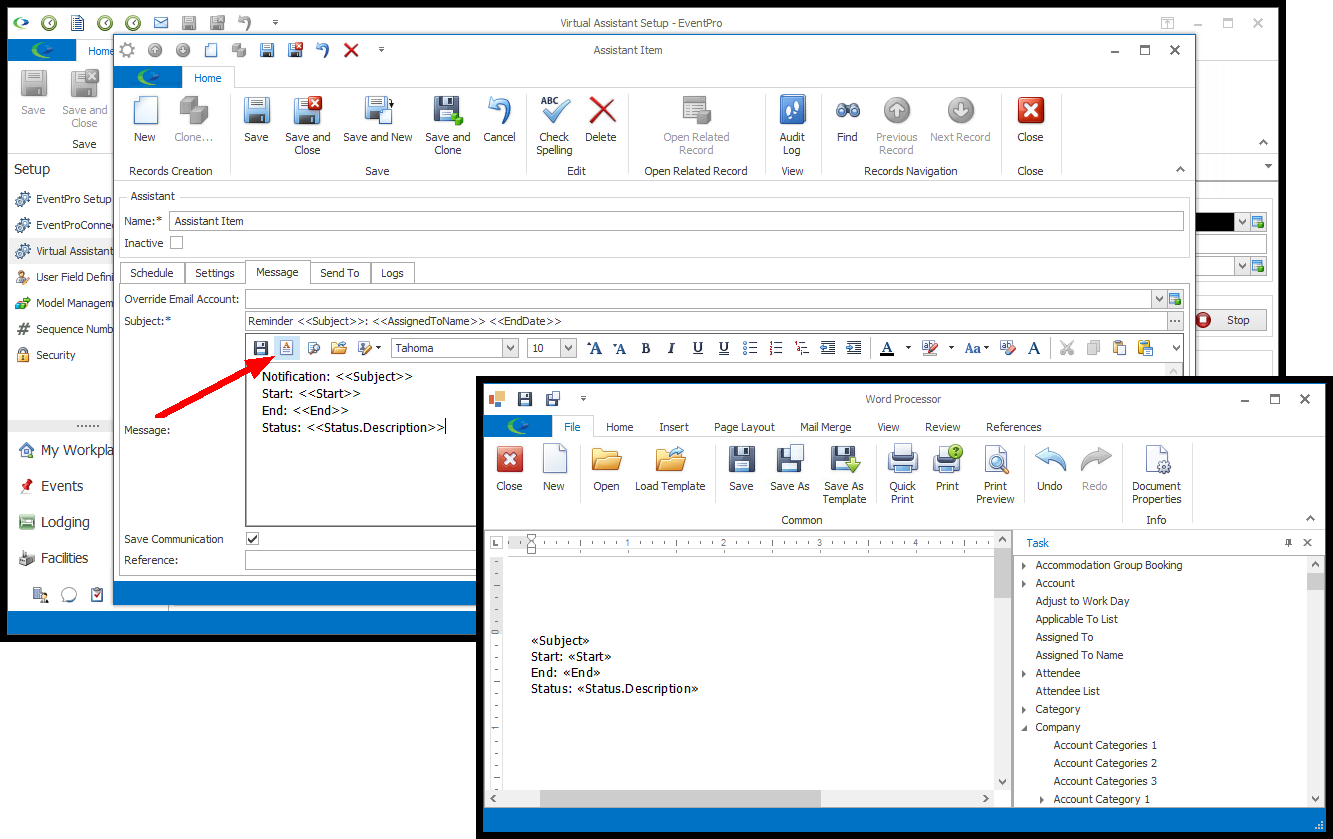
b.In the Word Processor, you can insert Merge Fields that automatically pull data into the email.
c.As noted above for the Subject and the Letter Templates for the Assistant, the available Merge Fields will depend on the Merge Table of the Virtual Assistant.
i.So, for example, if you are creating a Task Assistant Item, you will only see merge fields from the Task Merge Table. If you are working in an Event Assistant Item, you will see merge fields from the Event Merge Table. For the A/R Notification Assistant Item you will see fields from the Invoice Merge Table.
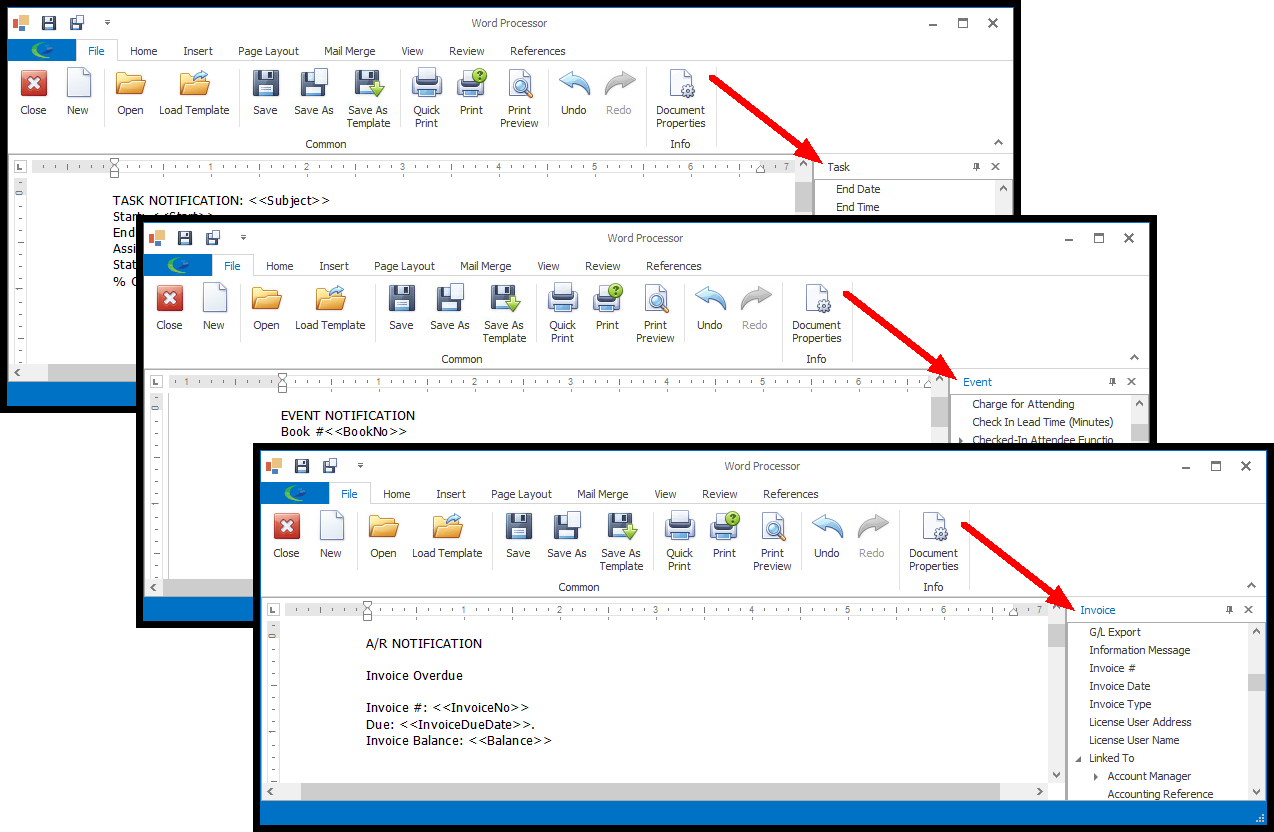
ii.The Merge Fields appear in the panel along the right side of the Word Processor.
iii.To find a specific field, scroll through the list, and use the arrows to toggle open the nested fields.
iv.When you find the merge field you want to use, double-click it.
v.The merge field will be inserted into the document where your cursor is currently resting.
vi.You can review more about adding and formatting Merge Fields in the Word Processor under Document Management > Letter Templates.
d.When you are done in the Word Processor, click Save. You will return to the Assistant edit form.
5.Save Communication: Select this checkbox if you want to save Communication records for the email notifications generated by this Assistant. The saved Communications for this Assistant will use the Reference you select below, and the Method you selected back in VirtualAssistant Setup.
6.Reference: If you select the Save Communication checkbox above, you can select a Communication Reference from this drop-down, which is populated by the records created under EventPro Setup > Communications > Communication References.