Under the Attachments tab, click the New button to reveal a drop-down of different attachment options.
Select Assistant Item Report Attachment.
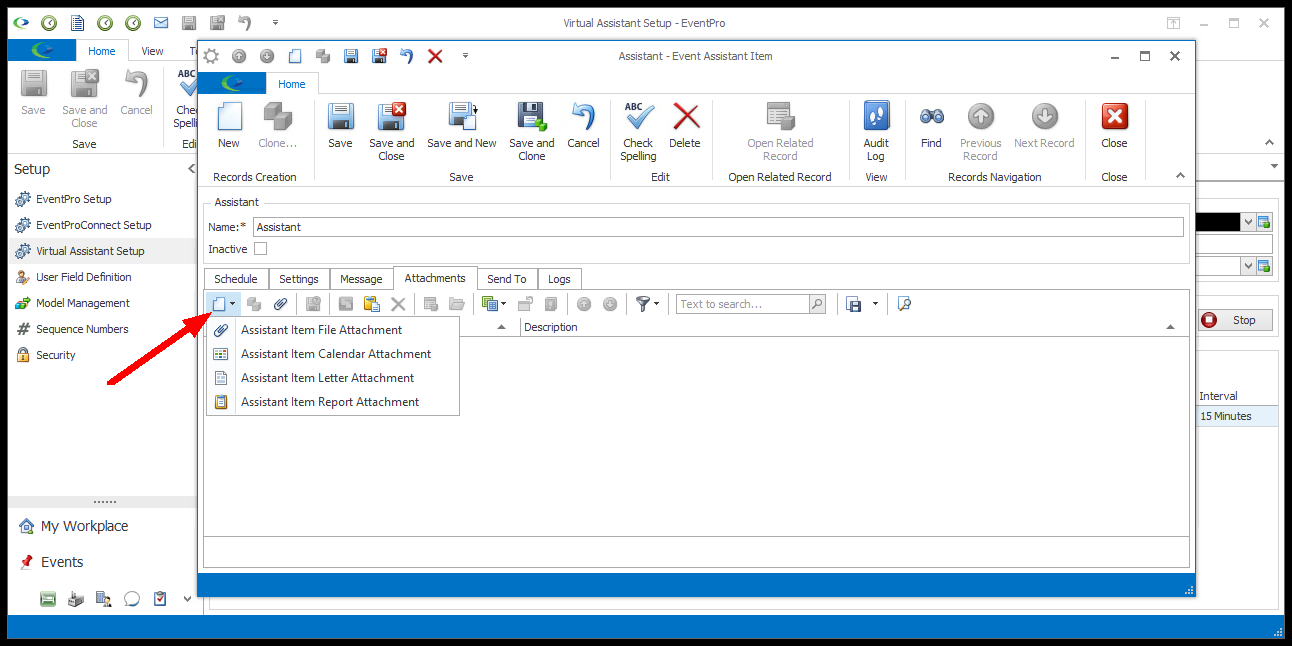
Figure 974: Selecting Attachment
The Assistant Item Report Attachment window appears.
Report
Use the Report drop-down to find and select the report you want to attach.
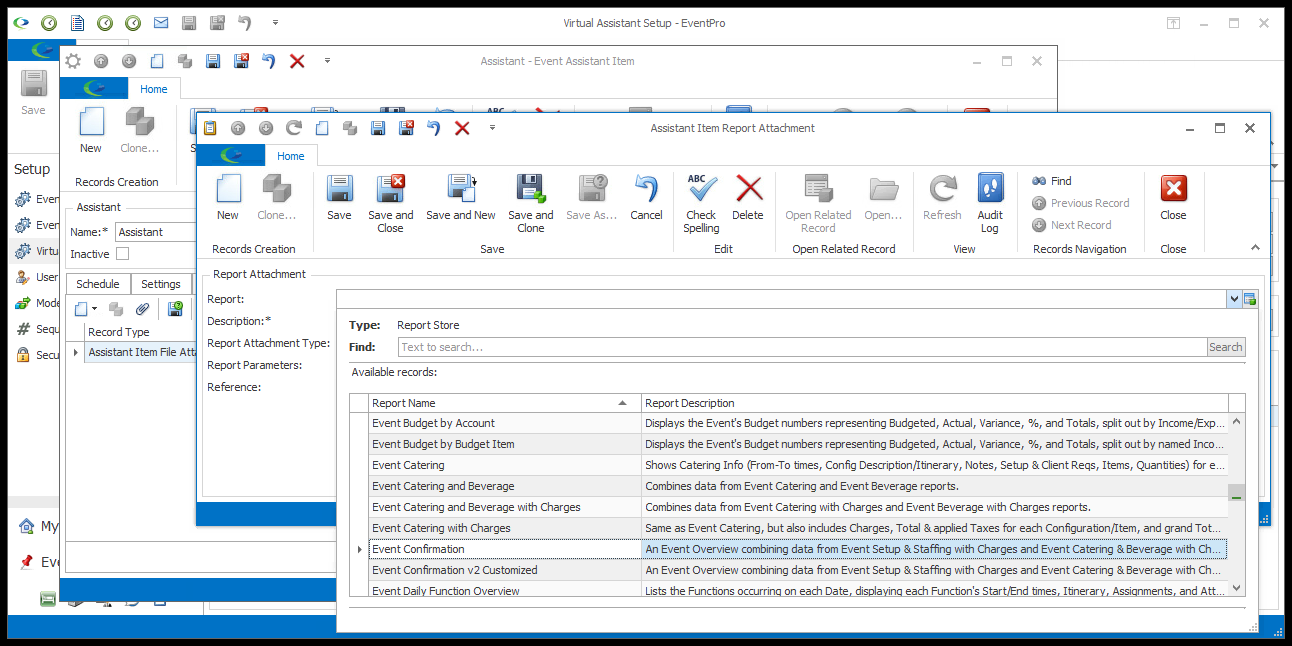
Figure 975: Selecting Report to Attach
Description
The Description will default to match the Report name, but you can edit the Description if you like.
Report Attachment Type
This will initially default to the Default Report Attachment Type set in Communication System Settings.
However, if you want to attach the report in a different format, select a different option from the drop-down: PDF, MHT, XLS, XLSX, RTF, CSV, TXT, DOCX, HTML, JPG.
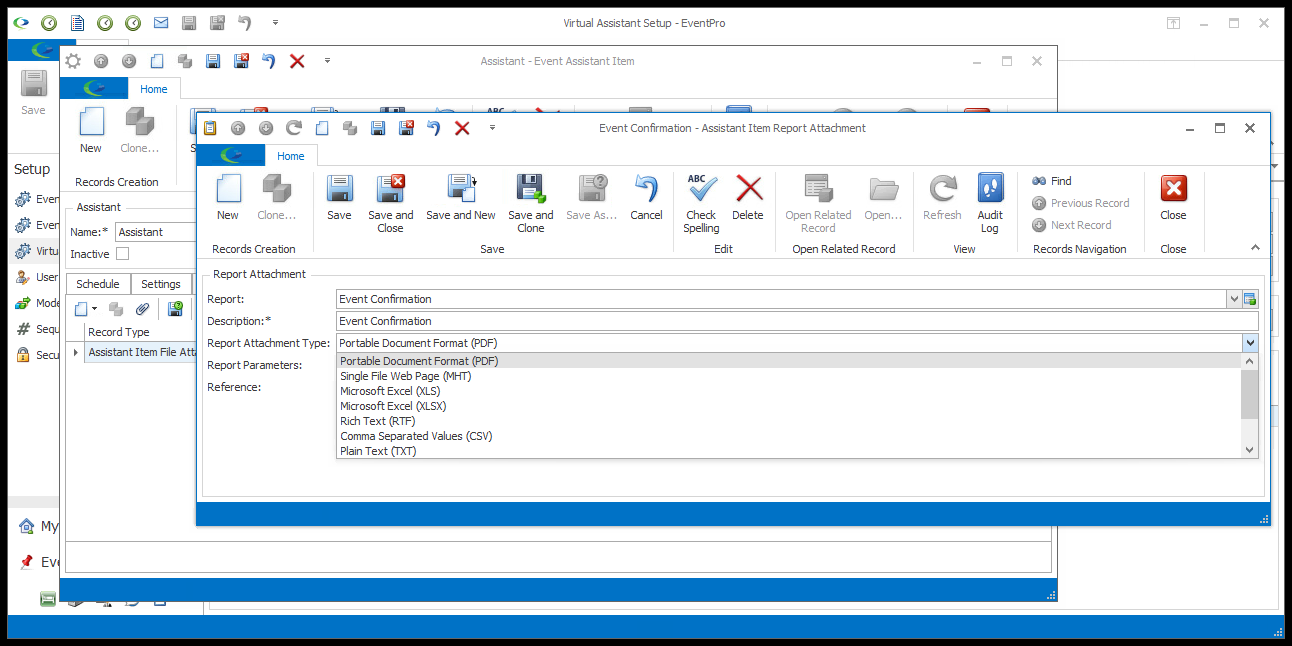
Figure 976: Selecting Report Attachment Type
Report Parameters
To set filtering criteria on the attached report, click the ellipsis to the right of the Report Parameters field.
1.The Report Parameters window appears.
2.Make your parameter selections.
3.If you want to clear all selections and start over, click Clear.
4.When you are satisfied with the parameters you have set, click OK.
The filtering options will vary, depending on the selected report.
These report parameters are similar to those you use when running a report normally. Review Reports > Run Reports.
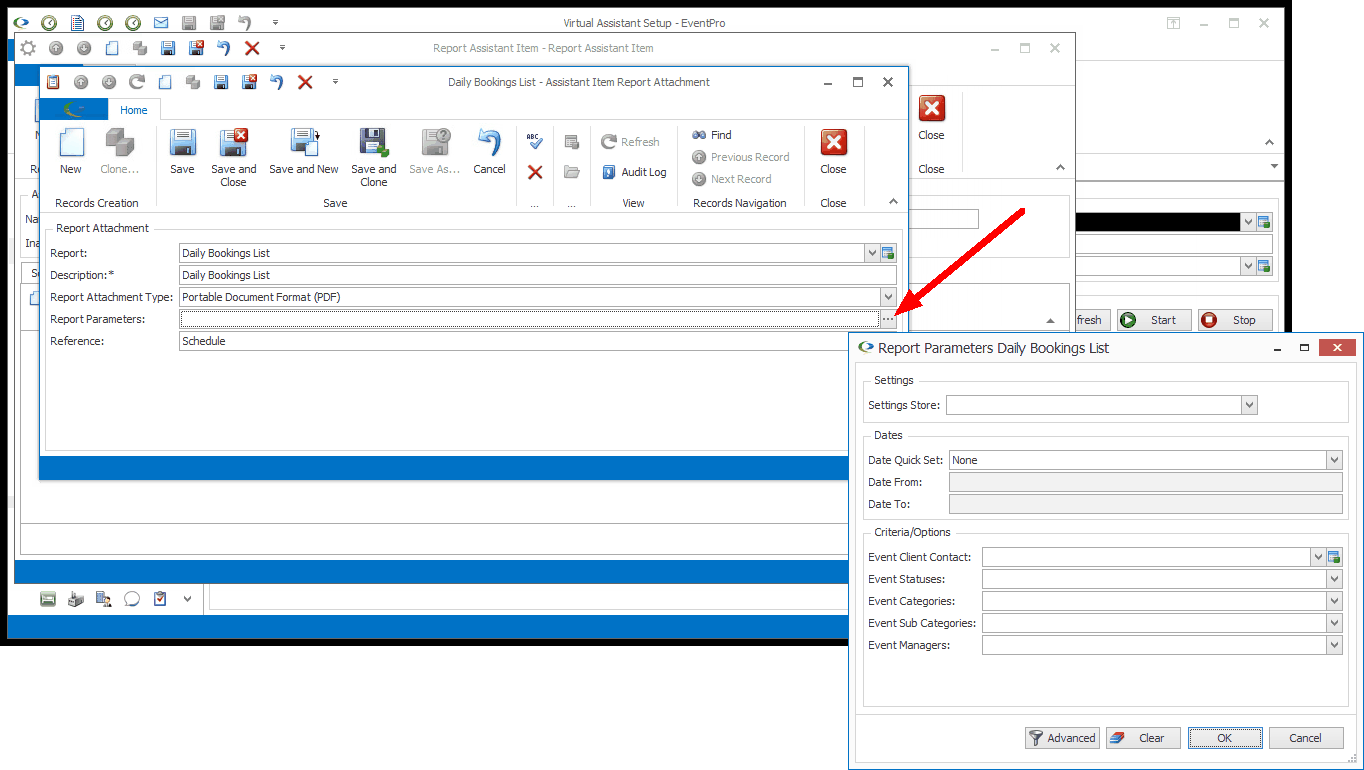
Figure 977: Setting Report Parameters
Reference
If the report had a default Communication Reference assigned, the Reference field will default to it.
However, you can select a different Reference from the drop-down, which is populated by the options created under EventPro Setup > Communications > Communication References.
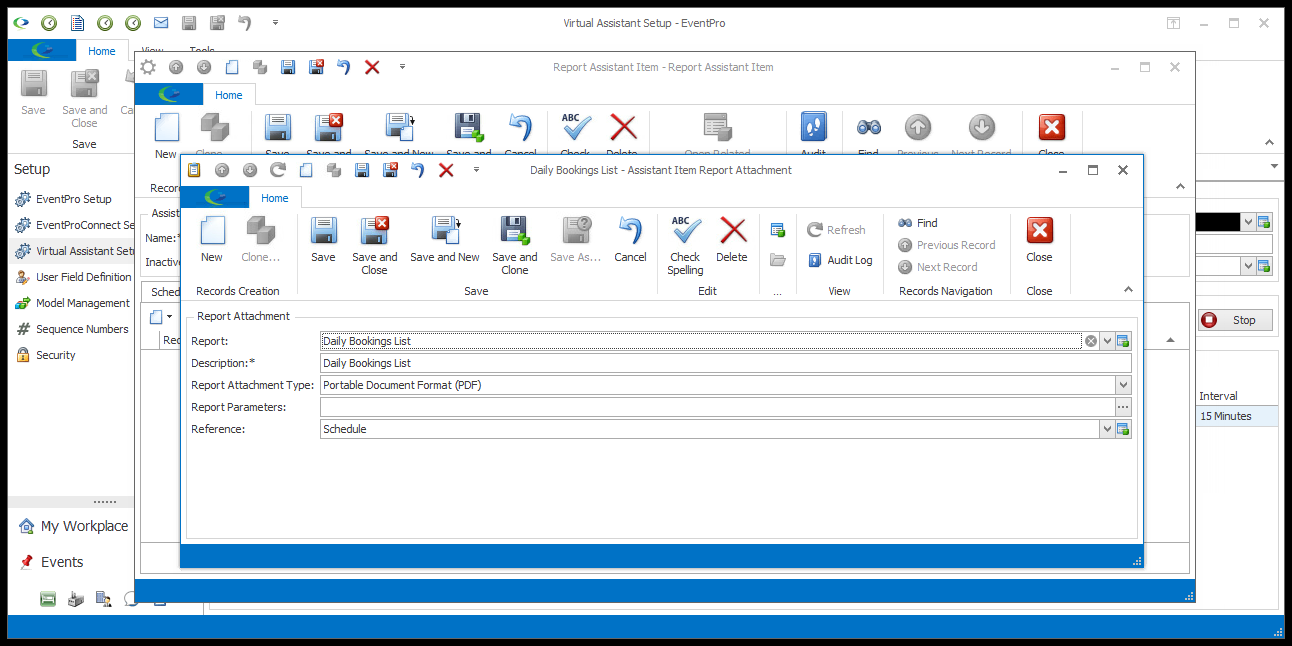
Figure 978: Report Attachment Reference
Save & Close
When you are done with the Assistant Item Report Attachment window, click Save and Close.
You will return to the Assistant Item edit form.