•The Task Assistant sends automated email notifications to the assigned User(s) when Task is Created, Reassigned, Started, Completed, reaches its Reminder date, or is Overdue by a set interval.
oOverdue Tasks can be followed up with automated repeat notifications at set intervals until the Task is marked as Completed.
•This current section is mainly intended to explain the settings that are unique to the Task Assistant, but will refer back to the general instructions from Assistant Creation Overview when relevant.
1.Begin: Create a Virtual Assistant, ensuring that you select the Task Assistant Item.
a.If you are creating multiple Task Assistants for different purposes, you may want to distinguish them by giving each a different name reflecting their purpose, e.g. "Task Reminder Task Assistant", "Task Start Assistant", "Task Completed Assistant", etc.
2.Schedule: Set the Assistant's schedule under the Assistant Schedule Tab.
3.Settings: Adjust the settings under the Settings Tab. Remember that these settings are specific to the Task Assistant.
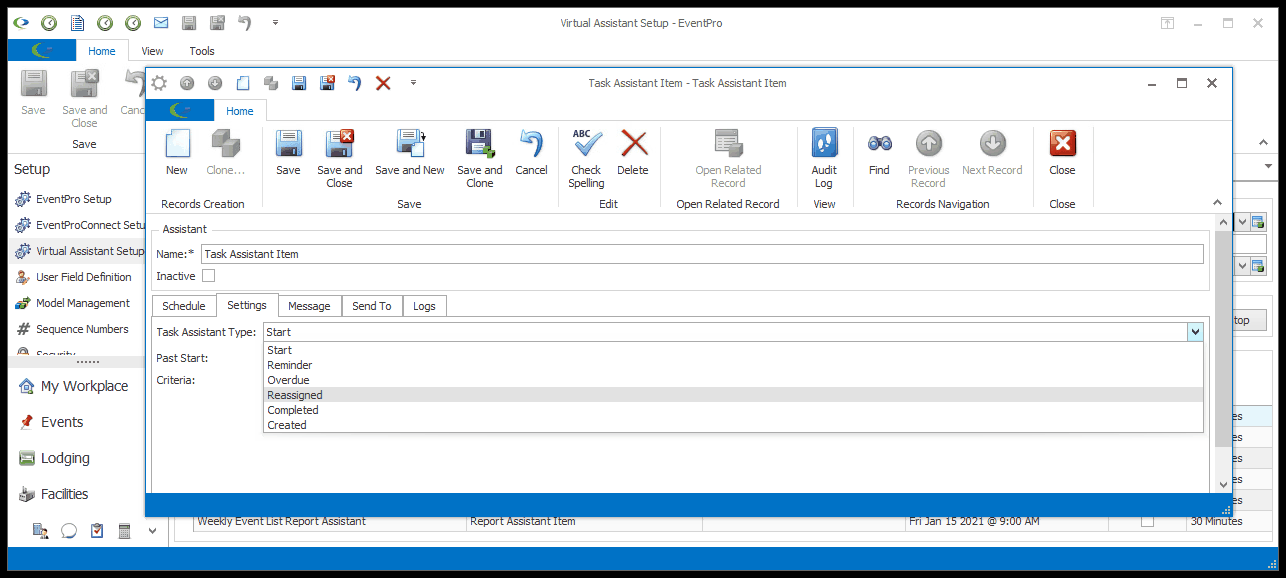
a.Task Assistant Type: Choose one of the six options for this Task Assistant Type:
i.Start: Sends email when the Task's Start Date/Time has been reached.
ii.Reminder: Sends email when the Task's Reminder Date/Time has been reached. The date/time of the Reminder is calculated in advance from the Start Date/Time, using the selected option from the Task record (15 Minutes, 3 Hours, 1 Week, etc.), or if it is a Custom Reminder, the Reminder Date and Reminder Time would be defined in the Task.
iii.Overdue: Sends email when the Task is Overdue, i.e. the End Date/Time has been reached, but the Task has not been set to Completed.
iv.Reassigned: Sends email when the Task's Assigned To information changes.
v.Completed: Sends email when the Task has been set to Completed.
vi.Created: Sends email when the Task is created.
The fields under the Settings tab of the Task Assistant edit form will be the same for Start, Reminder, Reassigned, Completed, and Created.
There will be additional fields for Overdue Task Assistants, which will be explained in more detail below.
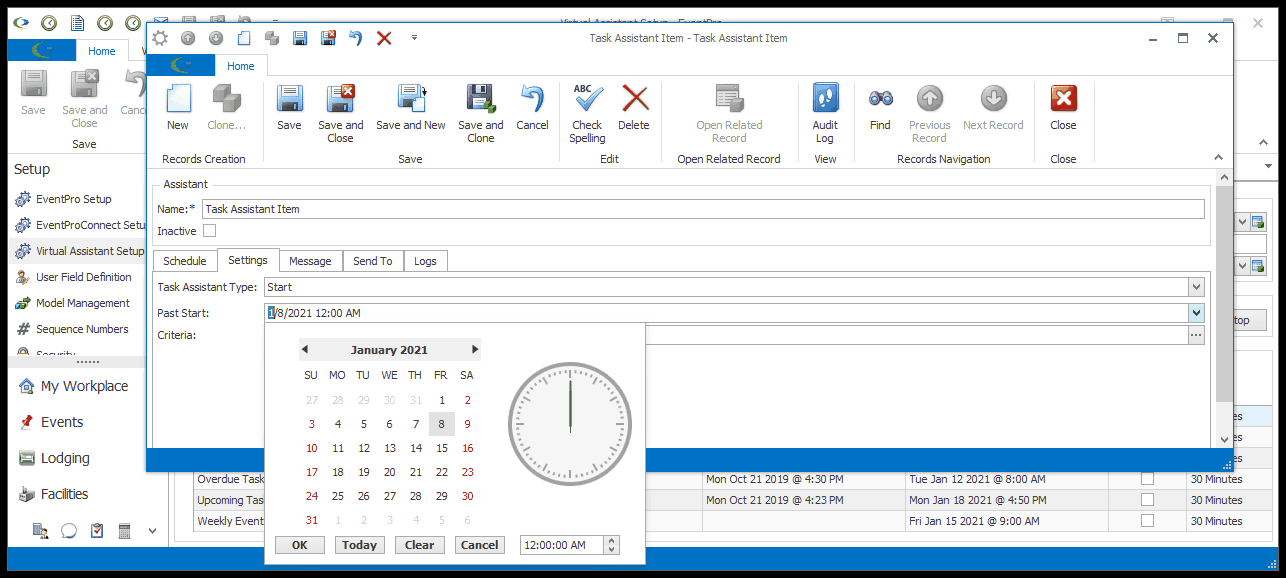
b.Past Start Date: The Past Start Date will default to the current date, meaning that the Task Assistant will send email notifications for triggering actions that occur on the current date and forward.
i.If you choose a Past Start Date, the Task Assistant will send notifications for triggering actions that occurred during that past date range, as well as continuing forward.
ii.If, for example, you use a Past Start Date that is a week earlier, the Assistant will send email notifications for all of the Tasks that Started in the last week, or that reached their Reminder dates in the last week, or whatever type of Task occurrence is specified in the Assistant.
iii.If you have many Tasks reaching the notification conditions per day, the Assistant may need to send out a large batch of backlogged email notifications during its initial run.
iv.CAUTION: If you leave the Past Start Date blank, the Task Assistant will send notifications for defined Task occurrences starting from the beginning of the database.
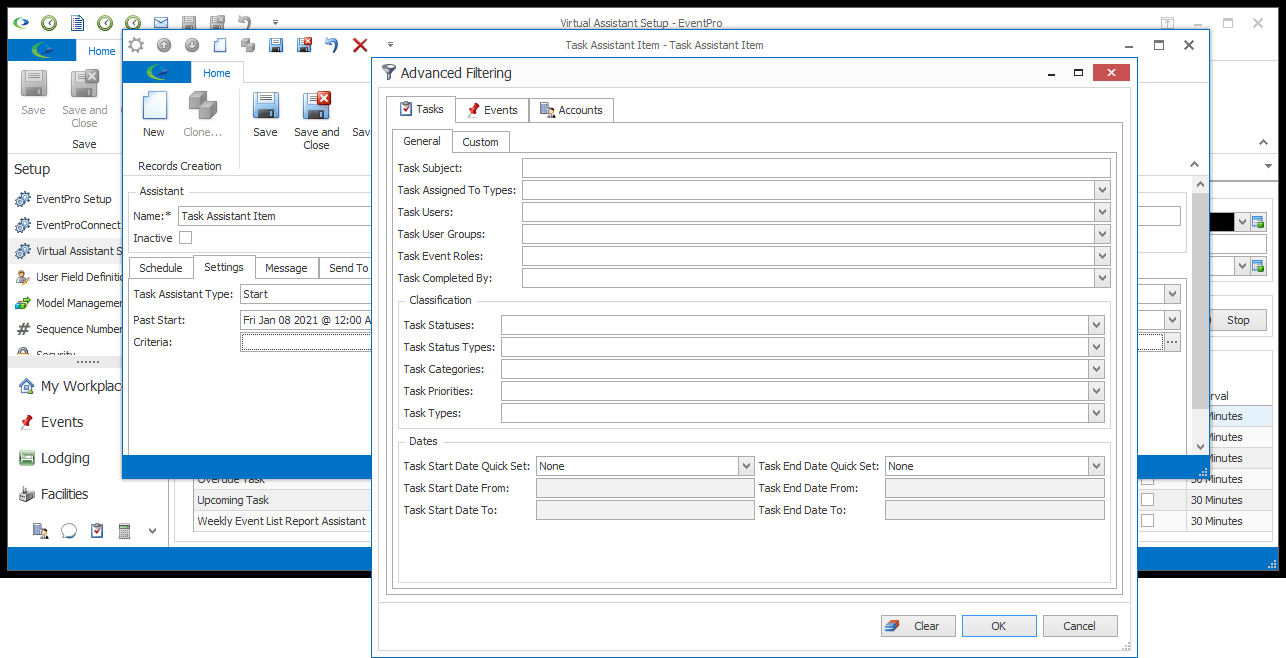
c.Criteria: If you want set further criteria on the Tasks so that notifications are sent only in specific circumstances, click the ellipsis to the right of the Criteria field to open the Advanced Filtering window.
i.There are several tabs and numerous fields that you can use to specify the criteria for situations in which the Task-related email notifications are sent.
ii.If you are not happy with your selections, and want to start over, click Clear.
iii.When you have the filters set to your specifications, click OK.
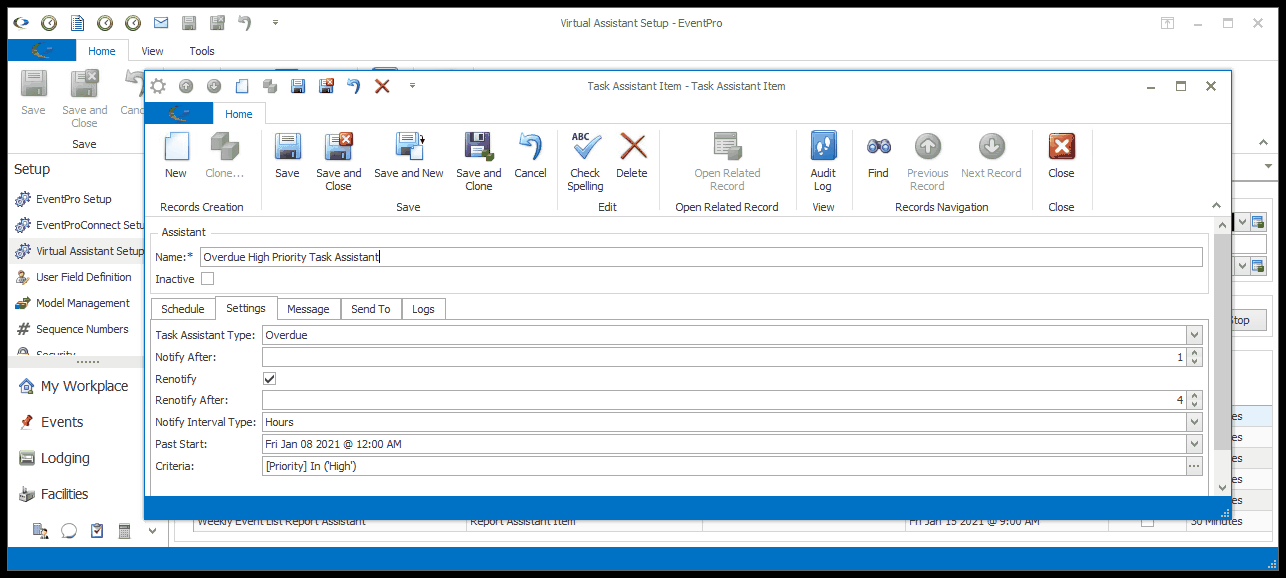
Fields specific to Overdue Assistants: As noted above, the Overdue Task Assistant has some additional fields that are specific to this Assistant type.
d.Notify After: Enter the number representing the interval after the Task's End Date/Time at which the Task becomes "Overdue" for the purpose of sending the overdue notification. The type of interval (e.g. minutes, hours, days) is selected below in the Notify Interval Type field.
e.Renotify: Select this checkbox if you want the Overdue Notifications to be repeated at intervals until the Task is marked "Complete".
f.Renotify After: Enter the number representing the intervals between repeated Overdue Notifications. The type of interval (e.g. minutes, hours, days) is selected below.
g.Notify Interval Type: Choose the Notify Interval Type (Minutes, Hours or Days) that the Notify After and Renotify After numbers represent.
4.Message: Define the email notification message under the Assistant Message Tab.
5.Send To: Make your recipient selections under the Send To tab.
a.The common Send To recipient options are described under Assistant Send To Tab.
b.Assigned To: By default, the Assigned To checkbox will be selected, meaning that the notification will be sent to the User/User Group indicated in the Task's Assigned To fields. You can, however, unselect the checkbox, if you intend to direct the notification elsewhere.
6.Logs: You can later review the Assistant Logs Tab to see if the Assistant has been running successfully.
7.Finish: When you are done with the Assistant edit form, Save and Close the Assistant.