Event Location Floor Plans can help ensure efficient and accurate event set up.
Earlier in EventPro Setup, you would have created Venue Location Floor Plans. Review the topic Add Location / Floor Plans in EventPro Setup. You can now use those Venue Location Floor Plans as the basis for Event Location Floor Plans.
When adding an Event Location Floor Plan, you select the Venue Location Floor Plan that will act as the template, and then - if required - customize the layout as required for the specific event. For example, you may need to add or remove floor plan objects such as tables, chairs, A/V equipment, decorations, etc. Note that any changes you make to the Event Location Floor Plan will only be saved for this Booked Location in this Event; you are not editing the Venue Location Floor Plan back in EventPro Setup.
You may note that an Event Location Floor Plan has already been automatically added to the tab. Back in Setup, when creating a Venue Location and defining its Setup Types, you were able to assign a default Floor Plan for each Venue Location Setup Type. Review the topic Add Location / Setup Types under Venue Information in Facilities Setup. If there was a default Floor Plan assigned to the Setup Type currently used by this Event Location, it would have been automatically added to this Event Location's Floor Plans tab.
There may be other items added automatically, as well, depending on how you set up your Floor Plan Objects. There is an option to link Floor Plan Objects to Setup Resources Items; review the topic Floor Plan Object Library. If a Venue Location Floor Plan contains any of those linked Floor Plan Objects, and you use that Venue Location Floor Plan for this Event Location (whether it was added automatically by the Setup Type, or you manually selected it), the linked Objects will pull the corresponding Setup Items (including quantities and charges) into the Event Location's Setup tab. You will also have the option to add and remove linked Objects in the Event Location Floor Plan, which will add and remove the corresponding Setup Items. You can view an example under the topic Add Setup Resources via Floor Plan.
Adding an Event Location Floor Plan
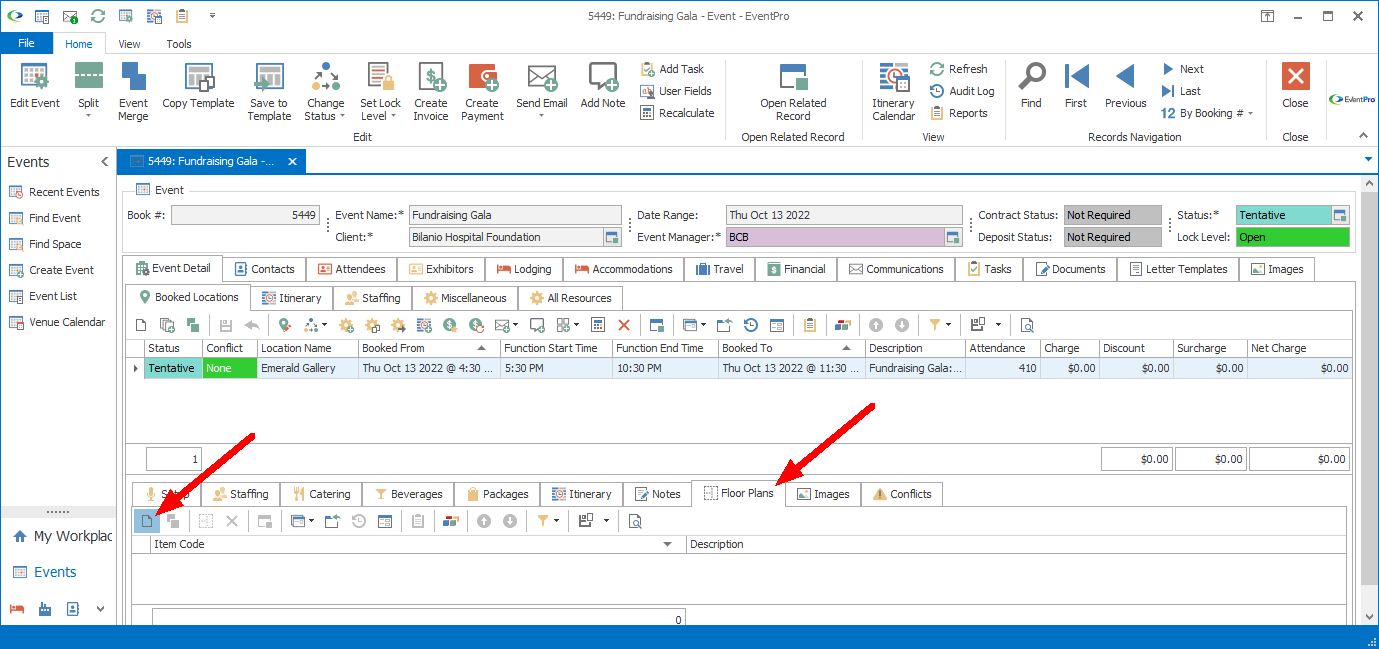
1.In the Event Location edit form opens, go to the Floor Plans tab and click the New button to start a new floor plan record.

Figure 187: Starting a new Event Location Floorplan
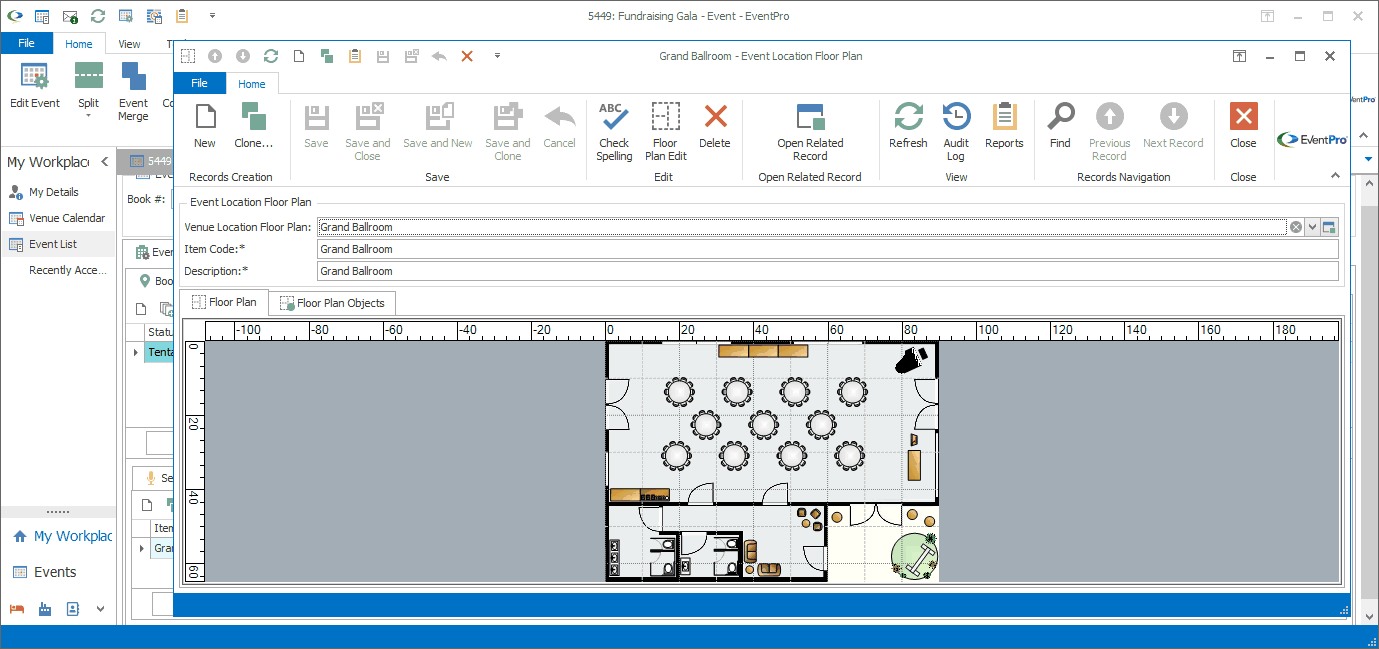
2.The Event Location Floor Plan edit form opens.
3.From the Venue Location Floor Plan drop-down, select the Setup Floor Plan you wish to use. Remember, these are the floor plans created for the venue location earlier in EventPro Setup.

Figure 188: Selecting Venue Location Floorplan from Setup
4.When you select a floor plan, the Item Code, Description, and Floor Plan preview will be pulled in from EventPro Setup.

Figure 189: Event Location Floor Plan
5.If you are satisfied with the Floor Plan as is, click Save and Close to return to the Event Location edit form, where the floor plan you just added will appear under the Floor Plans tab.
6.However, if you want to edit the Floor Plan for this specific event booked location, continue to the next heading.
Editing an Event Location Floor Plan
You can edit the Item Code and Description of the Floor Plan for the purpose of this Event Booked Location, if you like.
You can also customize the layout for this Event Location, e.g. adding, moving, and editing objects in the Floor Plan Designer. There may already be Floor Plan Objects in the design, depending on how you set up the original Venue Location Floor Plan.
Remember that if any of the Floor Plan Objects are linked to Setup Resources, adding and removing linked Objects in the Event Location Floor Plan will add and remove the corresponding Setup Items under the Event Location's Setup tab. To review how floor plan objects can be linked to setup items, see the topic Floor Plan Object Library under EventPro Setup.
IMPORTANT: Any edits you make to the floor plan in this Event Location, including the Item Code, Description, and layout, will be saved only for this specific Event Location. The Venue Location Floor Plan back in EventPro Setup will not be altered. If you want to edit the original Setup Venue Location Floor Plan, you need to return to EventPro Setup, edit the Venue Location, and alter the Floor Plans there.
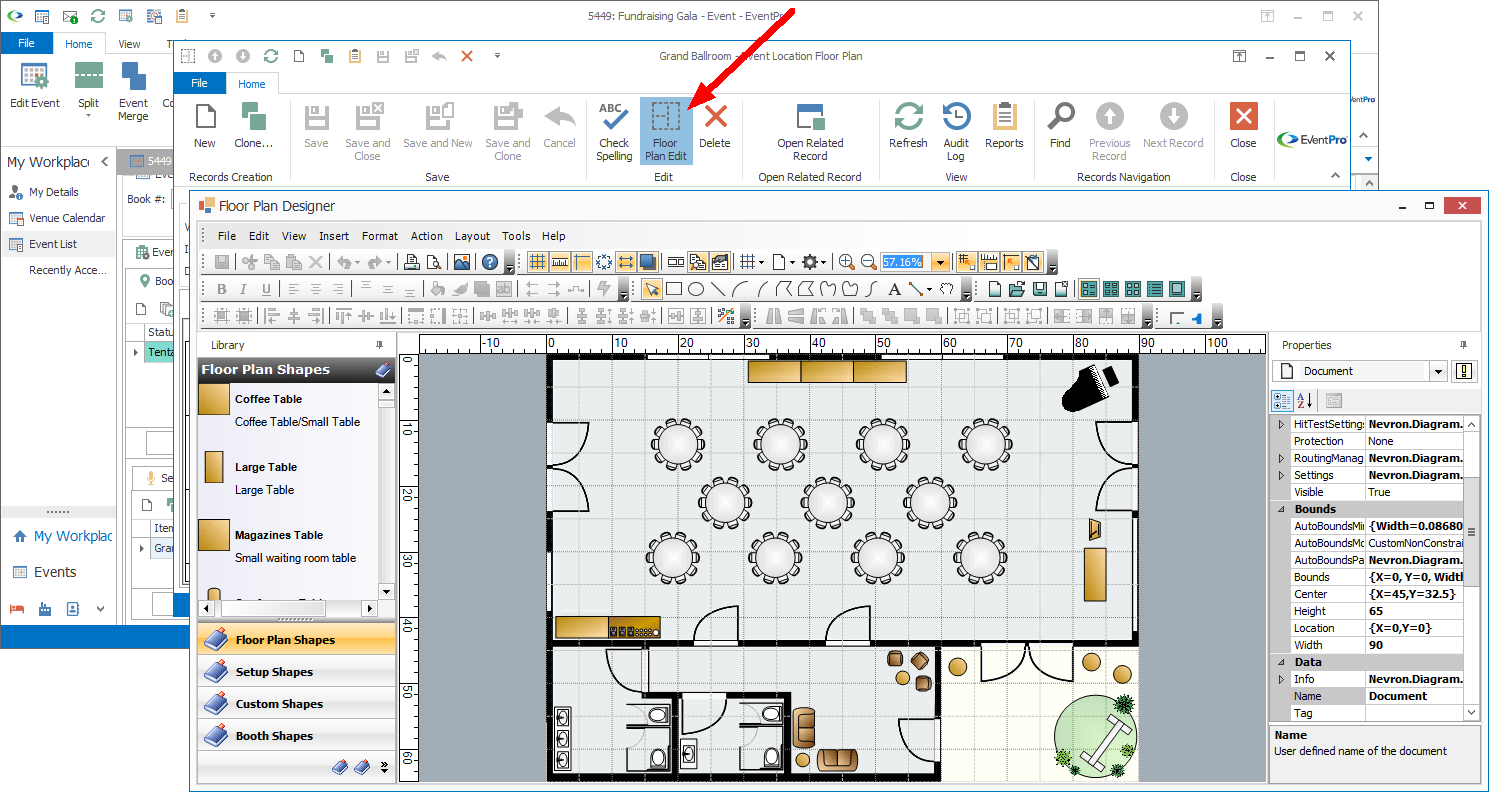
1.Click the Floor Plan Edit button at the top of the Event Location Floor Plan edit form.
2.The Floor Plan Designer opens.

Figure 190: Opening Floor Plan Designer
3.Make changes to the Floor Plan as required for the current event location. To review how to perform different actions in the Floor Plan Designer - such as adding objects, editing objects, drawing new objects, changing dimensions, and so on - consult the instructions in the topic Floor Plan Designer under EventPro Setup.
4.When you are done adjusting the floor plan in the Floor Plan Designer, make sure that you Save your changes. Remember that changes you make to the floor plan in this Event Location will be saved only for this specific Event Location.
5.Once the floor plan is saved, you can close the Floor Plan Designer by clicking the "x" in the upper right corner of the window.
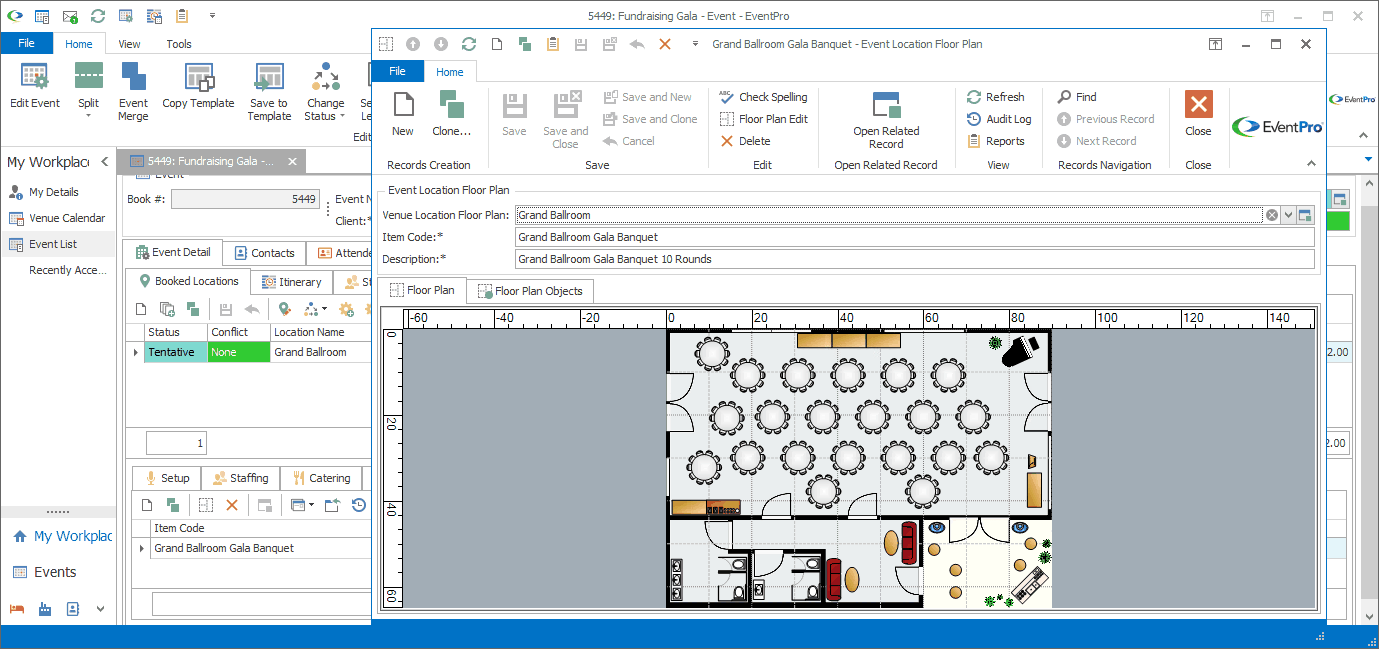
6.You will return to the Event Location Floor Plan edit form. If you are satisfied with the changes, click Save and Close.

Figure 191: Edited Event Location Floor Plan
7.You will then return to the Event Location edit form. The floor plan you added will appear under the Floor Plans tab.
Next topic: Event Location Images