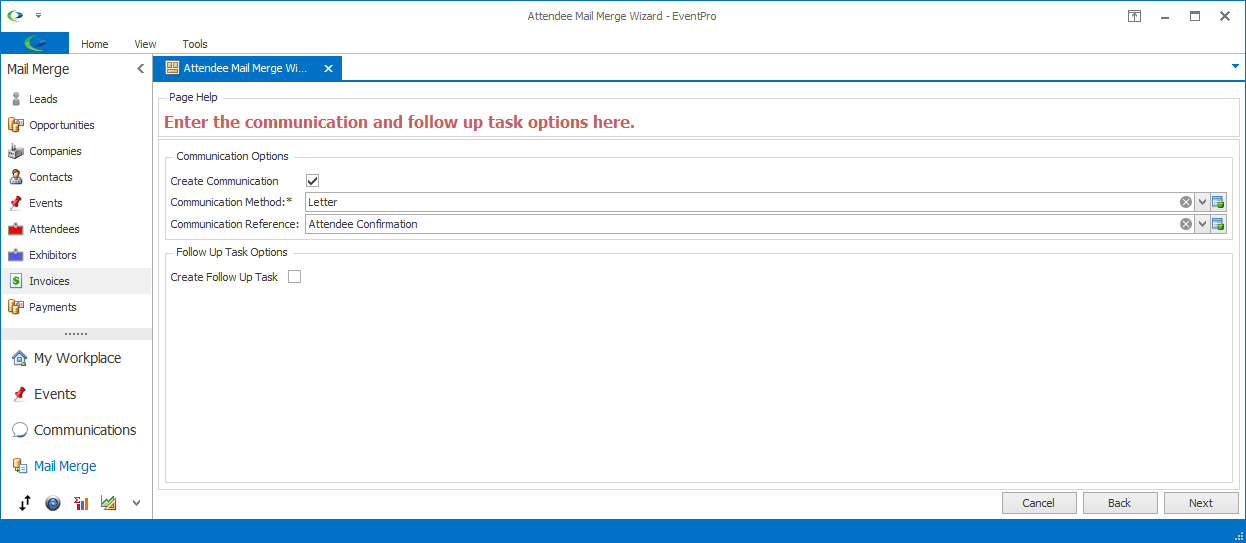
On this page of the wizard, you can determine what kind of Communication record you want to store for the mail merge, and whether you want to add a follow-up Task.

Figure 306: Selecting Communication & Task Options
Communication Options
Create Communication
This checkbox will only appear if you selected Printer or Document as the mail merge Destination.
•For Printer and Document mail merges, creating a Communication in the recipients' records is optional.
•If you select this checkbox, EventPro will add a Communication Note record to each recipient, using the Communication Method and Reference (optional) you select below, and the Subject & Content you add on the next page of the wizard.
•Note that if you choose to not create a Communication for the Printer or Document mail merge, you will skip the Subject & Content page of the wizard, and go directly to the Summary.
For Email or Alternate Email mail merges, the Communication Email record is automatically created, so you will not see this Create Communication checkbox.
Communication Method
You need to select a Communication Method from the drop-down list, which is populated by records created under EventPro Setup / Communications / Communication Methods.
Communication Reference
You can select a Communication Reference from the drop-down list, which is populated by records created under EventPro Setup / Communications / Communication References.
Follow Up Task Options
Create Follow Up Task
Select this checkbox if you want to create a follow-up Task for this mail merge.
If you select the checkbox, additional fields will appear below.
One Task per Recipient
Select this checkbox if you want to add one Task per recipient, which means you will create multiple identical Tasks, each one attached to an individual recipient's record.
If you unselect the checkbox, only one Task will be created.
Task
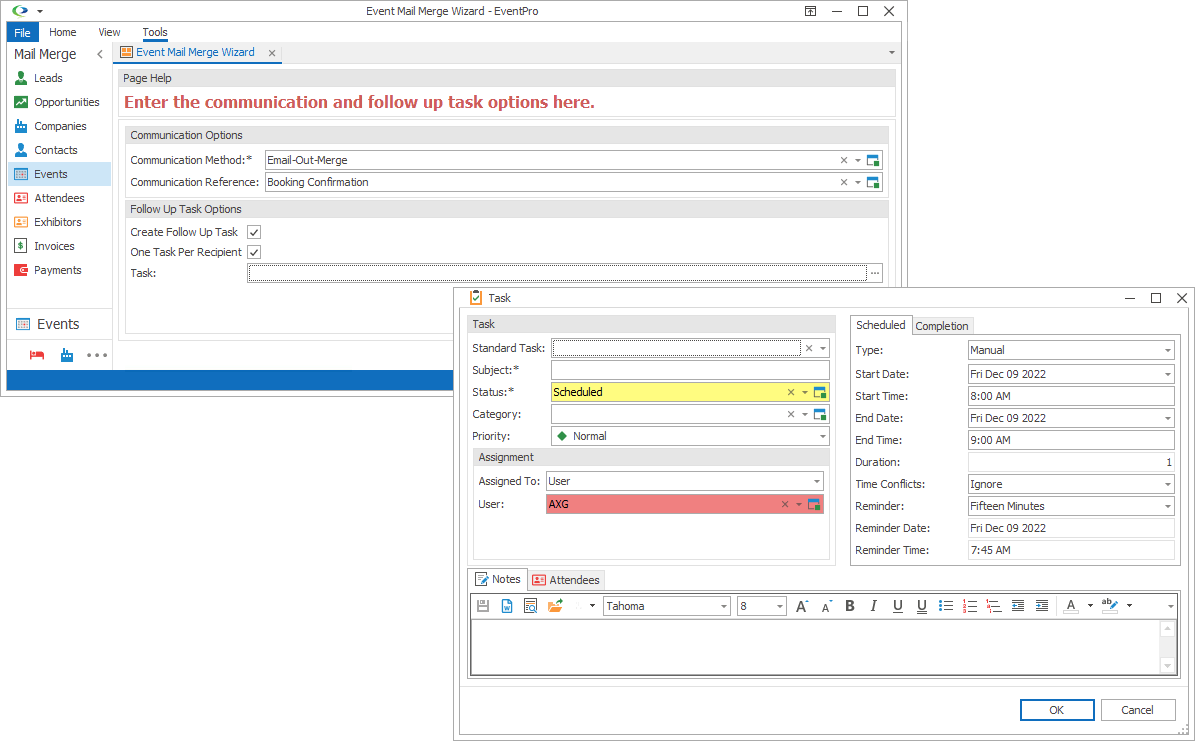
Click the ellipsis next to the Task field to open the Task edit form.

Figure 307: Creating Follow-Up Task
You can create a new Task on the fly, or select an existing Standard Task from Setup.
If you select a Standard Task from Setup, remember that you can only choose from Standard Tasks marked as "Applicable To" the linked object type, i.e. in this case, the type of Mail Merge.
•For any of the mail merges, you can access Tasks that are set as applicable to "All".
•For Event, Attendee, and Exhibitor Mail Merges, you can access Tasks that are set as applicable to "Event" and "All".
•For Opportunity Mail Merges, you can access Tasks set as applicable to "Opportunity" and "All".
•For Invoice Mail Merges, you can access Tasks set as applicable to "Invoice" and "All".
Review Task Management > Create a Task for more information about creating a Task.
You will note that in the Mail Merge Wizard, the Task edit form does not have the usual Linked To tab. This is because the Task(s) will be automatically linked according to the recipients of the mail merge.
When you are done with the Task edit form, click OK.
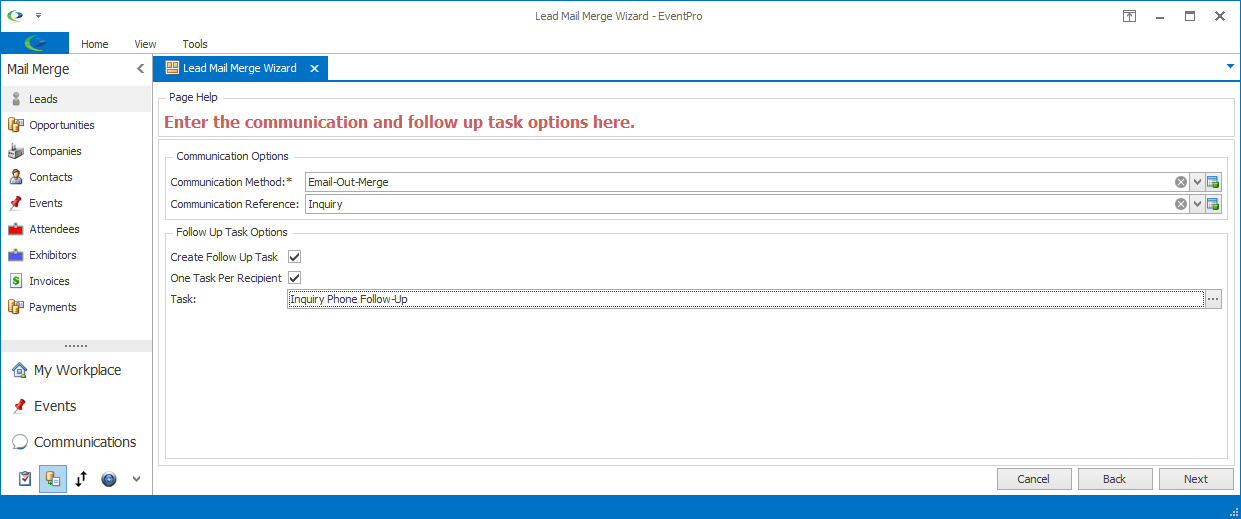
The task's subject will appear in the Task field.

Figure 308: Follow-Up Task Selected
Next
When you have entered the information you require for this mail merge's Communication and follow-up Task, click the Next button to advance to the Subject & Content page of the wizard.
If this mail merge is directed to a Printer or Document destination, and you chose to not create a Communication, you will advance directly to the Summary page.