In order to send and receive emails within EventPro, you need to set up an email account.
You can set up multiple email accounts for a User, and set one as the User's primary email.
Adding an Email Account
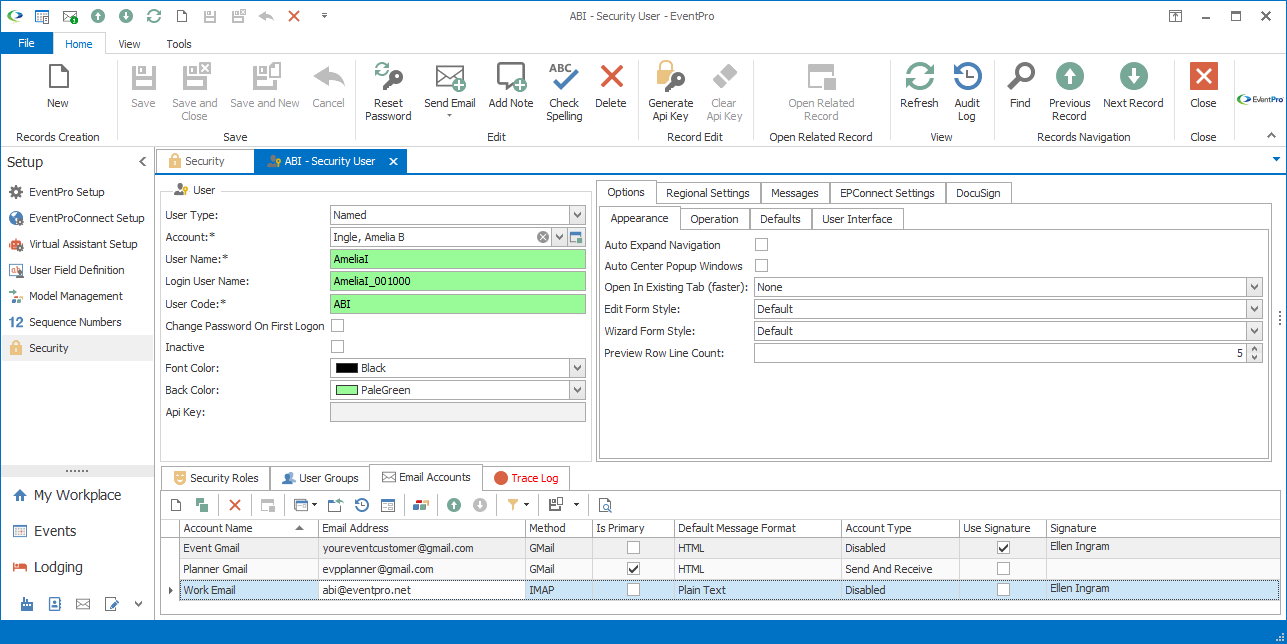
To add an email account to a User's record, click the click the New button under the Email Accounts tab.

Figure 1070: User Email Accounts
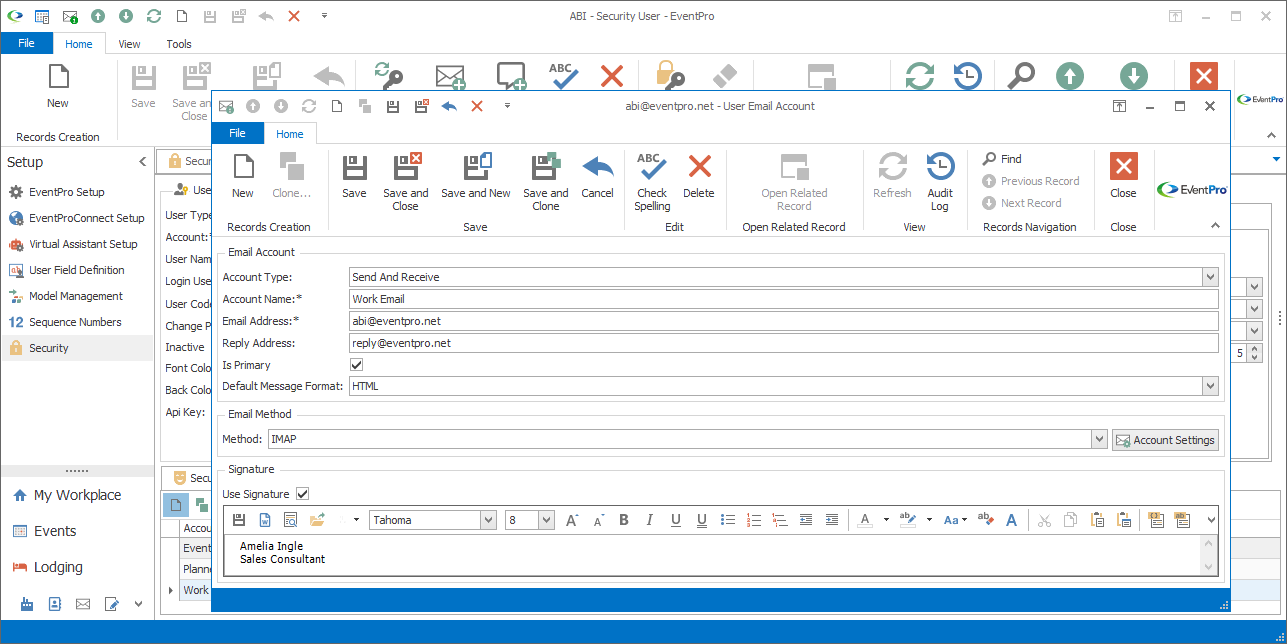
The User Email Account edit form appears.
Fill in the email account information, following the instructions below.
When you are done setting up the email account, click Save and Close to return to the Security User record.
User Email Account Edit Form

Figure 1071: Adding User Email Account
The fields in the User Email Account edit form are grouped under three areas:
•Email Account
•Email Method
•Signature
Email Account
Account Type - From the drop-down, select the type of email account, i.e. whether it will be used for sending, receiving, or both:
•Send and Receive
•Receive Only
•Send Only
•Disabled: If the email account is no longer valid, but you want to keep it on record for the User, select the Disabled option.
Account Name: Enter a name to describe this email account.
Email Address: Enter the Email Address for the User's email account.
Reply Address: If the User's Reply Address is different, enter that email address here.
Is Primary: If this will be the User's primary email account, select the Is Primary checkbox. You can assign multiple email addresses to a User, but one of them needs to be designated the Primary email account for the User.
Default Message Format - Select the default formatting for the User's emails:
•Plain Text
•HTML
Email Method
Email Method - Choose the email Method from this drop-down:
•None
•Outlook (This is available for local install only, not for Cloud.)
•POP3
•IMAP
•Exchange Web Service
•MS Graph
•Gmail
Account Settings: Click the Account Settings button to open the edit form in which you can set up the email account for use in EventPro.
The fields in this form will differ, depending on the email Method you chose above. We can provide some general guidance in setting up account information, but it is recommended that you consult your email service documentation to determine the appropriate connection settings.
Follow the link for your selected Email Method to find further instructions:
•Exchange Web Service Settings
After entering the email account information for the selected method, click Test Account Settings to see if it has been set up correctly.
You should get an Information dialog telling you the email account test was successful. Click OK.
If the test fails, the dialog will tell you what error has occurred, and you will need to correct the settings before proceeding.
Signature
Use Signature: If you want the User's signature to be automatically added to emails, select the Use Signature checkbox.
If the User is going to manually add signatures to emails, or use letter templates that pull in the signature as a merge field, you can leave the Use Signature checkbox unselected.
Signature: If applicable, enter the User's email signature in the Signature memo area.
Open the Word Processor if you require more sophisticated formatting options. Review the topic Word Processor.